Category: Blog

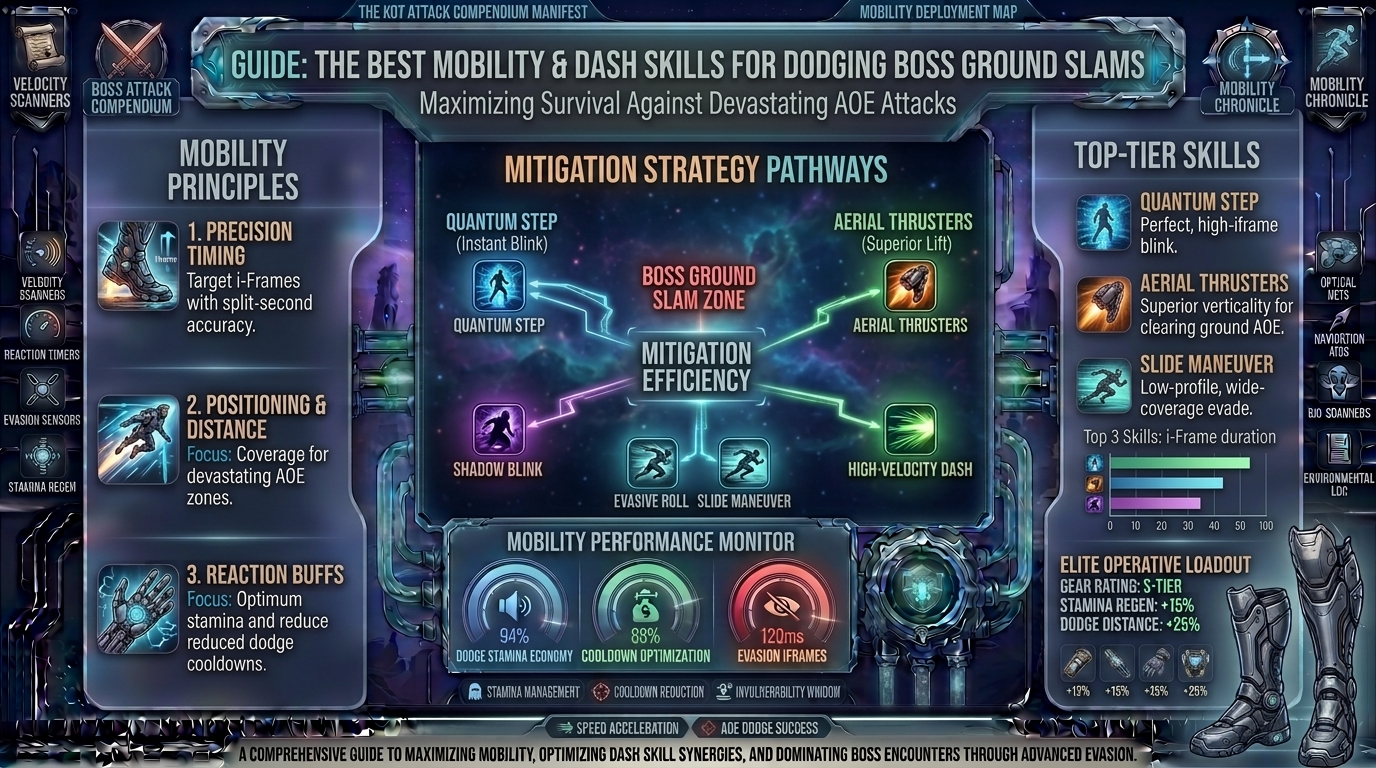
  • What are the best mobility and dash skills for dodging devastating area of effect boss ground slam attacks

    What are the best mobility and dash skills for dodging devastating area of effect boss ground slam attacks

    Picture this: You have spent the last ten minutes chipping away at an endgame boss’s health bar. Victory is within reach. Suddenly, the screen darkens, the boss rears back, and a massive red warning indicator or a subtle animation cue signals an impending Area of Effect (AoE) ground slam. Within a fraction of a second, the shockwave ripples across the entire arena. You fail to clear the radius, your health bar vanishes, and you are staring at a dreaded “You Died” screen.

    For players across action RPGs (ARPGs), massively multiplayer online games (MMOs), and action-adventure titles, surviving these devastating mechanics relies on one crucial element: mastering mobility and dash skills.

    Whether you operate out of tech hubs like New York, San Francisco, Seattle (Washington), Austin (Texas), or Los Angeles (California), gamers worldwide face the same high-latency and reaction-time challenges. Choosing the right mobility tool can mean the difference between glorious loot and endless frustration. This comprehensive guide explores the best movement, dash, and teleport skills across modern gaming, breaking down how to utilize them to completely neutralize devastating boss ground slams.

    Understanding AoE Ground Slams: Why Standard Movement Fails

    Before evaluating specific skills, you must understand why walking or running away from boss ground slams rarely works. Modern boss design incorporates three primary mechanics that defeat standard movement:

    1. Expansive Radius: Ground slams usually scale outward exponentially, covering 60% to 90% of standard combat arenas.
    2. Instantaneous Shockwaves: The lingering hitbox often expands faster than a character’s base run speed.
    3. Tracking & Predictive Aiming: Many elite bosses lock their slam coordinates onto your location mid-animation, punishing linear movement.

    To counter this, you need skills with invulnerability frames (i-frames), instantaneous vector changes, or long-range vertical displacement.

    Top-Tier Mobility & Dash Skills for Evading Ground Slams

    Different gaming ecosystems offer unique mechanical frameworks for evasion. Below are the definitive top-tier mobility skills categorized by their tactical utility.

    1. Directional Short-Dashes (The Quick-Escape Standard)

    • Examples: Flame Dash (Path of Exile), standard class Dodge Roll (Dark Souls, Elden Ring, Last Epoch).
    • Mechanics: Instant activation, short cooldown or resource cost (stamina/charges), and often grants brief i-frames.
    • Why it beats ground slams: Short dashes allow you to “iframe” through the leading edge of a shockwave or quickly slip behind the boss’s hitbox where the slam footprint is narrowest.

    2. Targeted Teleports & Blinks

    • Examples: Blink Arrow / Smoke Mine (Path of Exile), Shadow Strike (Grim Dawn).
    • Mechanics: Instantly removes your character from point A and repositions them at point B, ignoring intermediate terrain and hitboxes.
    • Why it beats ground slams: If a boss targets the center of the room with a massive expanding ring, blinking directly through the expanding wave or entirely out of the danger zone bypasses ground-travel time completely.

    3. Momentum-Based Leaps and Charges

    • Examples: Leap Slam (Path of Exile), Vire’s Might (Grim Dawn), Blitz.
    • Mechanics: Propels the character over gaps, hazards, and enemy hitboxes while covering massive ground quickly.
    • Why it beats ground slams: Ground slams travel along the floor. Leaping mechanics elevate your character model off the ground plane, inherently clearing low-profile shockwaves if timed correctly.

    Strategic Breakdown: How to Time Your Dash Against Boss Telegraphs

    Having the best skill equipped is only half the battle. Executing a clean dodge requires reading boss animations effectively:

    • Identify the Wind-Up: Look for visual cues—such as a boss glowing, lifting a massive weapon overhead, or planting one foot firmly. This is your cue to stop attacking.
    • Bait and Switch: Do not panic-dash the second the animation begins. Many modern boss attacks track your movement until the final millisecond. Dash late in the wind-up cycle to exploit the boss’s locked-in direction.
    • Move Toward the Blind Spot: For most slam attacks, the safest place isn’t backward—it is behind the boss’s model or directly into their lateral flanks.

    Frequently Asked Questions (FAQ)

    1. What is the difference between a dash and a teleport skill for boss fights?

    Dashes move your character rapidly across physical space, meaning you can still intersect with active hitboxes unless the dash grants explicit invulnerability frames. Teleports instantly relocate you, completely bypassing ground hazards and intervening enemy hitboxes.

    2. Do all dash skills feature invulnerability frames (i-frames)?

    No. In many games (like traditional MMORPGs), dashes simply grant a burst of movement speed or displacement. In ARPGs and Souls-likes, specific rolls or tactical dashes provide fractions of a second where attacks phase right through you. Check your specific game mechanics.

    3. How do I counter ground slams that have a full-room coverage indicator?

    If an attack covers the entire arena, check for safe zones (such as raised platforms, pillars, or small gaps near the boss’s feet) or look for a channeled item/mechanic provided specifically for that encounter to mitigate the damage.

    4. Is movement speed stacking better than active dash skills?

    Generally, no. While high baseline movement speed helps with general kiting, it cannot match the sudden acceleration required to escape a zero-to-sixty boss shockwave. You should ideally run a hybrid setup of baseline speed and a low-cooldown active dash.

    5. Why do I still get hit by ground slams even after dashing out of the visual red zone?

    This is typically caused by “netcode desynchronization” in online multiplayer or lingering hitboxes that persist after the animation finishes playing. Always clear the visual indicator by a safe margin rather than cutting it close.

    6. Can I bind my dash skill to a more accessible key for faster reaction times?

    Yes! Many players remap their primary escape or movement skill away from default keyboard bindings to an easily accessible mouse side-button or a dedicated thumb-accessible key to shave precious milliseconds off their reaction time.

    7. Which class archetypes generally have the best built-in mobility options?

    Rogue, assassin, monk, and ranger archetypes traditionally feature the lowest cooldowns and highest number of baseline tactical dashes or multi-charge teleports.

    8. How does frame rate or latency affect my ability to dodge boss slams?

    High latency (ping) delays the server registration of your dash command, causing rubber-banding. Lower latencies and higher frame rates ensure that your i-frames or vector changes register precisely when you press the button.

    9. Should I save my mobility skill exclusively for defense, or use it in my damage rotation?

    Against aggressive endgame bosses featuring frequent one-shot mechanics, you should always reserve at least one charge of your mobility skill strictly for emergency evasion. Relying on it for DPS rotation leaves you vulnerable.

    10. Are there passive traits that reduce dash cooldowns?

    In most modern RPGs, skill trees feature cooldown recovery nodes, resource cost reductions, or gear affixes specifically designed to lower dash cooldowns or grant extra charges. Prioritize these if you find yourself caught short during long boss encounters.

    Conclusion

    Overcoming devastating area-of-effect boss ground slams is a rite of passage for serious gamers. By transitioning away from standard running and investing in high-tier directional dashes, instantaneous teleports, or vertical leaps, you transform your gameplay from reactive panic into calculated mastery. Study your enemy’s wind-up animations, map your mobility skills to intuitive keys, and always keep an escape route open.
  • How to find and harvest rare crystal minerals required for high tier legendary weapon enchantments and upgrades

    How to find and harvest rare crystal minerals required for high tier legendary weapon enchantments and upgrades

    How to Find and Harvest Rare Crystal Minerals Required for High-Tier Legendary Weapon Enchantments and Upgrades

    Welcome back, digital blacksmiths, loot hunters, and completionists, to thegamerbuzz.com! If you have pushed your way into the brutal endgame tiers of your favorite open-world action RPGs or fantasy survival titles, you already know the harsh reality of weapon progression. Standard iron, common copper, and baseline stone won’t cut it anymore.

    When you are staring down world-tier bosses and legendary armor thresholds, your arsenal demands high-tier enchantments. And those enchantments? They rely entirely on one elusive bottleneck: Rare Crystal Minerals.

    Across gaming communities from Austin, Texas and New York to the tech capitals of San Francisco, Los Angeles, and Seattle, players are constantly scouring the map for these glittering deposits. Let’s break down the ultimate master guide on where these minerals hide, how to harvest them efficiently, and what tools you need to secure them.

    Phase 1: Understanding Crystal Classifications and Biomes

    Before tracking down rare crystal nodes, you must understand that not all crystals are born equal. Game developers scatter minerals across specific environmental biomes based on their elemental properties. Knowing where to look saves you hours of wasted map-running.

    1. Volcanic and Magma Biomes (Ignis Shards & Fire-Crystals)

    • What They Look Like: Jagged, glowing orange or crimson crystal clusters protruding from cooled lava flows and obsidian walls.
    • Primary Use: Required for weapon enchantments that add burn damage, critical multiplier scaling, and raw physical scaling upgrades.
    • Harvesting Danger: Extreme environmental heat. You cannot mine these without heat-resistant gear or cool-down potions, or your health bar will melt away faster than the rock.

    2. Subterranean Abyssal Caves (Void Prisms & Umbral Crystals)

    • What They Look like: Deep purple or pitch-black crystalline formations that seem to absorb ambient light.
    • Primary Use: Used for shadow-scaling enchantments, life-stealing perks, and bypassing enemy armor thresholds.
    • Harvesting Danger: Pitch-black darkness and aggressive cave-dwelling mobs that ambush you mid-swing. Always pack permanent light sources.

    3. Alpine Mountain Peaks (Celestial Glint-Crystals)

    • What They Look Like: Brilliant, translucent blue or diamond-white shards embedded in frozen glaciers and high-altitude cliff faces.
    • Primary Use: Essential for holy, lightning, and high-tier mana-scaling magical weapon upgrades.
    • Harvesting Danger: Slippery footing, sheer drop-offs, and flying raptor-type mini-bosses that knock you off the mountain edges.

    Phase 2: Essential Tools Required for Harvesting High-Tier Minerals

    You cannot walk up to a legendary-tier mineral node with a rusty starter pickaxe and expect results. Attempting to mine high-density crystals with low-tier tools will either yield zero resources or shatter the mineral entirely, ruining the node.

    • The Adamantite / Diamond-Tipped Pickaxe: Check your crafting station tiers. You need to upgrade your mining implement to match the hardness rating of the mineral.
    • Vibration-Damping Grips: Advanced tool attachments that prevent rare crystals from fracturing under heavy impact, doubling your yield per node.
    • Amulets of Mineral Resonance: Rare trinkets equipped in your accessory slots that cause nearby rare crystal veins to emit a faint, low-frequency hum or glow through walls when you are within 20 meters.

    Phase 3: Step-by-Step Harvesting Strategy

    To maximize your crystal collection rate and avoid wasting precious gaming hours, follow this systematic gathering routine:

    Step 1: Map Scouting and Node Respawns

    Rare crystal nodes do not respawn instantly. They typically operate on an in-game timer tied to day-night cycles or region resets (usually 2 to 4 real-world hours). Map out 3 or 4 high-density loops rather than farming a single node repeatedly.

    Step 2: Clear the Perimeter First

    Never attempt to mine while mobs are aggroed onto you. The mining animation locks you in place for 3 to 5 vulnerable seconds. Clear out surrounding sentinels, set up a defensive trap or totem, and then approach the crystal cluster.

    Step 3: Utilize Over-Mining Bonuses

    If the game features a skill tree for gathering professions, invest points into nodes that grant Critical Yields or Double-Drop Chances. Harvesting a single high-tier Void Prism during a double-yield proc can save you hours of grind.

    Comparative Matrix: Rare Crystal Types & Locations

    Crystal Mineral NameBiome LocationPrimary Enchantment UseRequired Tool Tier
    Ignis ShardsVolcanic CratersFire damage / Critical boostTier 3 Heat-Resistant Pick
    Umbral PrismsDeep Abyssal CavesLife-Steal / Shadow scalingTier 4 Reinforced Pick
    Glint-CrystalsFrozen Alpine PeaksLightning / Holy scalingTier 4 Ice-Broke Pick
    Aether-StonesFloating Sky IslandsAbsolute Legendary FusionTier 5 Masterwork Catalyst

    Pro-Tips for Speedrunners and Crafters

    • Listen for the Hum: High-tier rare minerals feature unique audio design. Turn down your music volume slightly; rare crystal nodes emit a faint, magical chime or crystalline resonance when you walk past them.
    • Don’t Ignore Daily Vendor Resets: Sometimes, high-tier crafting merchants in major hub cities stock 1 or 2 rare crystal minerals for exorbitant gold prices. If you have excess currency and hate grinding, buy them out!
    • Store Them Safely: Rare minerals are frequently targeted by PvP drop mechanics or death-penalty loss systems in survival RPGs. Bank them immediately after a farming run.

    Frequently Asked Questions (FAQ)

    1. What is the fastest way to find rare crystal minerals?

    Focus your search on high-level biomes (volcanic, deep caves, and alpine peaks) while wearing an accessory that pings or glows when mineral nodes are nearby.

    2. Can my pickaxe break if I mine a high-tier crystal?

    In many games, tools have durability meters. Mining high-tier crystals with low-tier pickaxes accelerates wear and tear, eventually breaking your tool mid-node.

    3. Why did the crystal node shatter into dust when I hit it?

    You are likely using a tool tier that is too low, or you failed a mini-game timing prompt required for delicate rare mineral extraction.

    4. Do rare crystal minerals respawn in the same spot every time?

    Yes, high-tier mineral nodes have fixed spawn coordinates, though the exact quality or variant of the crystal can sometimes randomize upon respawn.

    5. Can I use magic spells to mine crystals from a distance?

    Certain games allow earth or force magic spells to shatter mineral nodes from afar, though you may lose out on bonus yield percentages compared to manual pickaxe harvesting.

    6. What do I do if my inventory is too heavy while farming?

    Crystals are notoriously heavy due to their density. Bring a summoned pack-mule, mount storage bag, or use weight-reduction elixirs before embarking on a long mining expedition.

    7. Are rare crystals tradable with other players?

    In most multiplayer or online-enabled RPGs, rare crafting minerals can be traded or sold on the player-run auction house for massive amounts of gold.

    8. How many rare crystals do I need for a full legendary weapon upgrade?

    Requirements vary, but a top-tier legendary enchantment generally requires anywhere from 5 to 15 rare crystals alongside baseline currency.

    9. What is the best time of day to farm outdoor crystal nodes?

    In-game night cycles often make glowing crystals much easier to spot visually against dark rock faces, though ambient mob density usually increases after dark.

    10. Where can I find more crafting guides and material maps?

    Keep your browser bookmarked right here at thegamerbuzz.com for daily updates, resource maps, and expert endgame guides!

    Conclusion

    Securing rare crystal minerals is the ultimate rite of passage for any serious gamer looking to max out their legendary weapon enchantments. By targeting the correct biomes—whether scaling frozen mountain peaks or braving volcanic depths—equipping top-tier harvesting tools, and following disciplined farming routes, you will never find yourself short on upgrading materials again. Gear up, head out into the wild, and make those weapons shine.

  • What are the best stealth assassination perks for clearing out enemy fortresses in absolute complete silence

    What are the best stealth assassination perks for clearing out enemy fortresses in absolute complete silence

    What Are the Best Stealth Assassination Perks for Clearing Out Enemy Fortresses in Absolute Complete Silence

    Welcome back, shadow-walkers, ghost operatives, and silent executioners, to thegamerbuzz.com! If your favorite playstyle involves slipping through heavily guarded enemy fortresses like a phantom, leaving behind nothing but empty shoes, baffled guards, and untouched alarm bells, you have found your ultimate sanctuary.

    Across gaming epicenters from Austin, Texas and New York to the bustling tech hubs of San Francisco, Los Angeles, and Seattle, stealth enthusiasts constantly search for the holy grail of silent clearing builds. Charging into a sprawling military encampment with a colossal battleaxe is fun, but there is an unmatched psychological thrill to dismantling a 50-man fortress brick by brick without a single alarm ever being raised.

    To achieve absolute complete silence, however, raw reflexes aren’t enough. You need the right combination of perks, passive skill trees, and environmental manipulation techniques. Let’s break down the definitive master guide to the best stealth assassination perks for ghost runs.

    Phase 1: The Core Pillars of a Ghost Stealth Build

    Before investing your hard-earned skill points into individual talents, you need to understand how game engines calculate stealth metrics. Modern open-world titles evaluate your ghost runs using three core pillars:

    1. Audio Profile (Sound Suppression): Guards don’t just see you; they hear you. Heavy footsteps on metal grates, the clinking of chainmail, or sprinting across gravel will instantly break your cover.
    2. Visual Detection Cones: Light levels, shadow blending, and movement speed dictate how quickly an enemy’s awareness meter fills up when you cross their field of view.
    3. Elimination Velocity: How quickly and quietly you can dispatch a target and dispose of their body before a patrolling guard rounds the corner.

    Phase 2: The Best Stealth Assassination Perks Ranked

    If you want to clear fortresses without triggering a single panic state, these are the absolute essential perks you need to unlock first.

    1. The Shadow-Step / Sound-Dampening Perk

    • Category: Movement & Audio Suppression
    • What It Does: Completely eliminates footstep audio generation and reduces running detection thresholds by up to 50%.
    • Why It’s Essential: This is the bedrock of any true ghost build. Without it, you are forced to spend half your time in a slow, tedious crouch walk. Sound dampening lets you sprint right up behind unsuspecting guards while staying entirely silent, dramatically cutting down your fortress-clearing time.

    2. The Chain-Assassination / Momentum Strike

    • Category: Combat Multiplier / Multi-Kill
    • What It Does: Allows you to seamlessly transition from one stealth takedown immediately into a second or third nearby target using throwable knives or lightning-fast lunges.
    • Why It’s Essential: Enemy fortresses are often packed with guard duos standing shoulder-to-shoulder. If you can only take out one, the other will sound the alarm. Chain-assassination perks let you wipe out tightly knit pairs before they even process what happened.

    3. The Instant Body-Dissolution / Vanishing Act

    • Category: Scene Clean-Up / Evidence Erasure
    • What It Does: Automatically turns a downed enemy’s body into ash or sinks it into shadows the exact millisecond a stealth execution finishes.
    • Why It’s Essential: The biggest enemy of a silent fortress run isn’t the guards—it’s gravity and stray bodies. Leaving a corpse in an open courtyard is a guaranteed alarm trigger. This perk removes the need to manually drag bodies into bushes, letting you maintain a fluid forward momentum.

    4. The Distraction Throw / Audio Decoy Mastery

    • Category: Crowd Manipulation
    • What It Does: Empowers your thrown stones, coins, or arrows to create targeted acoustic lures that draw a single guard away from their patrol route.
    • Why It’s Essential: When a high-ranking commander is locked in a secure watchtower surrounded by three other soldiers, you cannot brute-force your way in. Distraction mastery lets you isolate targets one by one, turning a heavily fortified zone into an orderly elimination line.

    Comparative Matrix: Stealth Perk Synergies

    Perk NamePrimary BenefitBest Situational UseRisk Factor if Omitted
    Sound DampeningZero footstep noiseMoving quickly between coversGuards hear you approaching from behind
    Chain AssassinationMulti-target silent killsClearing gatehouses & guard towersPartner guard spots single survivor
    Body DissolutionInstant corpse removalOpen courtyards with no bushesPatrols spot bodies and trigger alarms
    Acoustic DistractionTargeted enemy luringIsolating stubborn sentinelsForcibly engaging in direct combat

    Phase 3: Advanced Fortress-Clearing Tactics for Ghost Operatives

    Unlocking the best perks is only half the battle. To clear an entire military base in absolute silence, you need a disciplined tactical routine:

    • Reconnaissance First (The Bird’s Eye View): Never jump blindly into a fortress. Use a drone, scouting spyglass, or high vantage point to tag every single guard, sniper, and alarm mechanism on your minimap.
    • Target the Watchtowers and Snipers First: Snipers have the widest field of view and can spot you from across the entire map. Eliminate them first to secure your airspace.
    • Sabotage the Alarm Systems: Locate the central alarm horn, bell, or electrical switchboard before you start your run. Sabotaging it ensures that even if a guard catches a fleeting glimpse of you, they cannot call for reinforcements.

    Frequently Asked Questions (FAQ)

    1. What is the absolute most important perk for a stealth build?

    Sound dampening and footstep elimination are universally considered the most critical perks because they fundamentally change how fast you can maneuver through a map.

    2. How do I stop guards from spotting bodies I leave behind?

    Prioritize unlocking body-dissolution perks, or commit to a strict routine of manually dragging every single downed enemy into tall grass or dark indoor rooms.

    3. Why do guards instantly detect me even when I am crouching?

    You are likely moving too fast, wearing heavy armor pieces that generate noise penalties, or walking directly through well-lit torchlight without using shadows.

    4. Can I clear an entire fortress without using any weapons?

    Yes! Many games support pure ghost playthroughs where you rely strictly on stealth takedowns, environmental traps, and non-lethal distraction tools.

    5. What is the best way to deal with heavy armored guards who resist standard takedowns?

    Look for specialized perks like “Heavy Execution” or utilize environmental hazards (like dropping hanging cargo crates or luring them near architectural ledges).

    6. Do stealth perks stack if I equip multiple rings or items?

    In most games, passive stealth modifiers stack additively up to a hidden cap, allowing you to become virtually invisible and completely silent to enemy AI.

    7. What should I do if an alarm accidentally gets triggered?

    If an alarm rings, your ghost run isn’t necessarily ruined, but you will need to break line of sight immediately, hide in a designated locker or shadow zone, and wait out the search timer.

    8. Are ranged stealth weapons better than melee assassinations?

    Both serve different purposes. Ranged silencers or throwing knives are great for distant snipers, while melee assassinations are essential for tight indoor corridor clearing.

    9. Does armor weight affect my stealth capabilities?

    Yes! Heavy metal plate armor significantly increases noise generation and movement detection speeds. Always swap to lightweight leather or cloth gear for stealth runs.

    10. Where can I find more stealth build guides and fortress walkthroughs?

    Keep your browser bookmarked right here at thegamerbuzz.com for daily updates, game guides, and expert tactical strategies!

    Conclusion

    Clearing an entire enemy fortress in absolute, pristine silence is one of the most rewarding challenges in gaming. By stacking essential perks like Sound-Dampening, Chain-Assassination, and Instant Body Dissolution, and pairing them with disciplined reconnaissance, you transform from a vulnerable target into an unstoppable urban phantom. Slip into the shadows and claim your victory.

  • How to complete the diplomatic negotiation dialogue choices to prevent a catastrophic war between fantasy factions

    How to complete the diplomatic negotiation dialogue choices to prevent a catastrophic war between fantasy factions

    How to Complete the Diplomatic Negotiation Dialogue Choices to Prevent a Catastrophic War Between Fantasy Factions

    Welcome back to thegamerbuzz.com! If you are deep into narrative-driven RPGs, grand strategy games, or immersive fantasy epics, you know that the sharpest weapon in your arsenal isn’t a legendary dragon-slaying sword or a maxed-out spell book—it is your tongue.

    Few moments in gaming match the sweaty-palmed tension of sitting at a high-stakes round table. On one side sits an inflexible, proud elven monarch threatening a holy crusade; on the other sits a ruthless, cornered dwarf warlord sharpening his axes. Between them stands a total, continent-shattering war that will wipe out entire cities, destroy your hard-earned faction reputations, and lock you out of half the game’s map.

    Across gaming communities from Austin and San Francisco to New York, Los Angeles, and Seattle, players constantly hunt for the precise dialogue paths needed to talk enemies down from the ledge. In this master guide, we will break down the psychology of fantasy diplomacy, the exact dialogue choices you need to make, and how to successfully prevent a catastrophic war.

    Phase 1: The Anatomy of a High-Stakes Negotiation

    Before selecting a single dialogue option, you need to understand how game engines evaluate political conversations. Developers don’t just throw random choices at you; negotiation encounters are carefully coded systems built on three core pillars:

    1. The Faction Pride Meter: Every leader has an ego and a baseline grievance. If you insult their heritage, dismiss their past losses, or act overly aggressive, their pride meter spikes, instantly locking out peaceful paths.
    2. Hidden Stat Checks (Charisma, Insight, & Persuasion): Many golden dialogue trees are greyed out or fail automatically unless your character has invested heavily in soft stats, historical lore knowledge, or high-tier empathy perks.
    3. The Leverage Ledger: True diplomacy isn’t about begging; it’s about leverage. Coming into a summit with incriminating evidence, a rescued royal hostage, or a neutralized mutual threat gives you the political currency required to demand peace.

    Phase 2: Step-by-Step Strategic Roadmap for Peace

    To prevent a catastrophic war, you must manage the negotiation across three distinct phases. Follow this tactical sequence to keep all parties at the table.

    Step 1: Pre-Summit Information Gathering (The Leverage Phase)

    Never walk into a peace summit empty-handed. Before triggering the final dialogue prompt:

    • Uncover the Inciting Incident Conspiracy: In most narrative games, the war is triggered by a false-flag operation (stolen relics, assassinated ambassadors, or border skirmishes orchestrated by a secret third party). Spend time doing side investigations to find proof of a framing plot.
    • Secure Neutral Allies: Speak to minor faction leaders beforehand. Winning their backing gives you additional political weight during the summit argument.

    Step 2: The Opening Gambit (De-escalation First)

    When the summit begins, both factions will immediately posture, hurling accusations and insults.

    • The Rule of Neutrality: Never take a side immediately. Siding with Elves against Dwarves (or vice versa) in the opening statement causes the opposing faction to instantly close ranks and reject your authority.
    • Acknowledge Pain, Reject Blame: Choose dialogue options that validate their historical suffering without validating their current call for bloodshed. (Example: “I honor the blood spilled at the Whispering Pass, but marching into human lands will only stain that blood further.”)

    Step 3: Presenting the Counter-Evidence (The Turning Point)

    Midway through the negotiation, the tension reaches its boiling point, and a leader will threaten to walk out. This is where your pre-summit investigation pays off.

    • Select the option that references your discovered evidence: “Look at the forge-marks on this blade; it was manufactured in the Shadow-Wastes, not by your supposed enemies.”
    • This shifts the blame away from the two negotiating factions and unites them against a common manipulator, dropping their hostility meters significantly.

    Step 4: The Final Compromise (The Concession Matrix)

    No faction walks away from a successful peace talk completely happy—both must make concessions. When prompted to propose a treaty structure:

    • Choose balanced resource-sharing or demilitarized buffer zones.
    • Avoid options that completely humiliate one side, as a cornered faction leader will choose war over public disgrace.

    Comparative Matrix: Dialogue Archetypes & Their Outcomes

    Dialogue ApproachPrimary ToneRisk LevelTypical Result
    Aggressive / IntimidationForceful, demanding obedienceExtremeFaction leaders unite against you; war triggers instantly.
    Sycophant / FlatteryOverly agreeable to one sideHighAlienates the opposing faction; peace talks collapse.
    Empathetic & Fact-BasedValidating grief while exposing truthsLowSuccessfully lowers hostility meters and opens the path to a permanent treaty.
    Bribes / Material LeverageUsing gold or rare items to buy complianceModerateWorks short-term, but can backfire if your treasury runs low later.

    Pro-Tips for Master Negotiators

    • Save Before Every Major Dialogue Node: RPG dialogue trees can have unpredictable branching paths. Always keep a manual save right before entering the throne room or summit tent.
    • Check Your Companion Reactions: If you have companions present, pay attention to their body language. Choosing dialogue options that align with your party members’ core moral values often unlocks hidden stat boosts or future loyalty perks.
    • Invest in Passive Speech Perks: Even if you prefer playing a heavy warrior or stealth rogue, spending a few early skill points on persuasion or insight trees completely changes how dialogue options unfold in political quests.

    Frequently Asked Questions (FAQ)

    1. What happens if peace talks fail and the war begins?

    Failing the negotiation usually locks you out of major regional quest lines, cuts off trade access to key merchant hubs, and forces you to fight through difficult military sieges.

    2. Can I use intimidation choices to force a peaceful outcome?

    Occasionally, high-level intimidation works if your character build is terrifyingly powerful, but most proud faction leaders view threats as a declaration of war, making it a high-risk gamble.

    3. Do I need a high Charisma stat to prevent the war?

    While high Charisma makes passing checks much easier, many games allow you to bypass stat checks entirely if you bring concrete evidence and complete specific pre-summit side quests.

    4. Is it possible to betray the peace treaty later for extra rewards?

    Yes, many RPGs feature post-treaty betrayal paths where you can side with one faction to backstab the other, though this usually earns you negative karma or alignment penalties.

    5. Why do faction leaders keep walking out of the negotiation?

    You likely triggered a hidden pride penalty by insulting their ancestry or taking a hard-lined stance too early in the conversation. Try adopting a more neutral, empathetic tone.

    6. Can I replay the negotiation if I fail the first time?

    If you didn’t create a manual save, you may have to reload an autosave from before you entered the summit room, or live with the consequences of an outbreak of war.

    7. Do companion characters influence diplomatic outcomes?

    Yes! Bringing specific companions can unlock unique dialogue choices or allow your allies to step in and de-escalate tension when you run out of speech options.

    8. What are the best rewards for successfully achieving peace?

    Peace typically grants you the “Diplomatic Immunity” perk, access to legendary faction-exclusive gear sets, and heavy discounts from regional vendors.

    9. How do I find out who the true mastermind behind the war is?

    Talk to tavern keepers, bribe palace guards, and search hidden archives for torn letters or encrypted ledgers before attending the official summit.

    10. Where can I find more RPG walkthroughs and quest guides?

    Keep your browser bookmarked right here at thegamerbuzz.com for daily updates, choice optimization guides, and deep-dive gaming content!

    Conclusion

    Mastering the art of digital diplomacy is one of the most rewarding challenges in modern gaming. By swapping out your battleaxe for a sharp mind, gathering airtight evidence before entering the room, and carefully balancing faction pride with empathetic de-escalation, you can pull a fractured world back from the brink of total annihilation. Peace isn’t just an option—for a true master tactician, it’s the ultimate victory.

  • What are the best summoner build strategies for letting your minion creatures do all the dangerous combat work

    What are the best summoner build strategies for letting your minion creatures do all the dangerous combat work

    What Are the Best Summoner Build Strategies for Letting Your Minion Creatures Do All the Dangerous Combat Work

    Welcome back, master tacticians, armchair generals, and lazy conquerors, to thegamerbuzz.com! If your preferred combat philosophy involves sitting comfortably in the back row while a raging army of undead thralls, elemental golems, mechanical turrets, or celestial spirits rips your enemies to shreds, you have found your spiritual home.

    Across gaming hubs from Austin, Texas and New York to the tech capitals of San Francisco, Los Angeles, and Seattle, players love the ultimate summoner fantasy. There is a deeply satisfying, chaotic joy in watching a terrifying boss monster hyper-fixate on your disposable minions while you casually sip an in-game potion and watch health bars melt.

    However, playing an effective summoner is far more than just casting a spell and standing still. True mastery requires understanding minion scaling, aggro management, crowd control support, and specialized gear setups. Let’s dive deep into the definitive master guide for building the ultimate minion army.

    Phase 1: The Core Philosophy of Summoner Builds

    Before stacking gear and minion types, you need to understand why summoner builds work and how to survive when you aren’t the one swinging the sword. In most action RPGs and tactical fantasy titles, minions operate under specific rules:

    1. Aggro Generation (Threat Tables): Enemies target whatever entity hit them last or has the highest immediate threat profile. Your job is to let your minions initiate contact so they absorb the initial burst of boss damage.
    2. Double-Scaling Mechanics: Minions do not scale off your raw weapon damage; they scale off your Summoner Stat Pools (such as Intelligence, Faith, Arcane, or dedicated Minion Power percentages) and specific passive modifiers.
    3. The Buffer Role: You are no longer a frontline brawler; you are a tactical commander. Your secondary spells should focus on healing your minions, casting debuffs on enemies, or providing barrier shields.

    Phase 2: The Best Summoner Build Archetypes Ranked

    Depending on the game you are playing, minion builds typically branch into three distinct playstyles. Here is how to optimize each archetype.

    1. The Necromancer / Undead Horde Build

    • The Playstyle: Overwhelming numerical superiority. Swarming bosses with dozens of low-tier skeletons, zombies, or ghouls.
    • Key Stats to Stack: Max Mana Pool, Minion Attack Speed, and Undead Health Scaling.
    • Tactical Advantage: Bosses with single-target melee attacks get completely overwhelmed and body-blocked by your endless waves of disposable troops. Even if a boss unleashes an Area of Effect (AoE) attack, you simply re-summon your army instantly.
    • Pro-Tip: Always carry corpse-generation skills or items to replenish your fallen ranks mid-combat without burning through all your mana.

    2. The Elemental / Golem Warden Build

    • The Playstyle: Quality over quantity. Summoning one or two massive, unyielding juggernauts (like fire drakes, stone golems, or ice spirits).
    • Key Stats to Stack: Minion Armor, Elemental Resonance, and Threat Generation (Aggro Pull).
    • Tactical Advantage: Massive individual health pools and staggering poise damage. A heavy rock golem can stand toe-to-toe with hyper-aggressive melee bosses, locking them in trade-heavy stagger loops while you cast long-range spells from safety.
    • Pro-Tip: Invest in minion-healing or lifesteal auras so your single powerful summon stays healthy through punishing boss phases.

    3. The Tech-Engineer / Turret Summoner Build

    • The Playstyle: Stationary fortification. Laying down automated crossfire turrets, floating magic drones, or explosive traps.
    • Key Stats to Stack: Cooldown Reduction, Placement Range, and Critical Strike Multipliers.
    • Tactical Advantage: Exceptional burst damage in structured arenas. Once you set up your kill zone, enemies melt before they can even close the distance.
    • Pro-Tip: Never fight outside your designated zone. Pull enemies back into your crossfire network rather than running forward to meet them.

    Comparative Matrix: Summoner Archetypes at a Glance

    Archetype NameMinion CountDurabilityBest Defensive StrategyMain Weakness
    Necromancer HordeHigh (5 – 15+)Low-MediumEndless instant re-summoningVulnerable to large-scale boss AoEs
    Golem WardenLow (1 – 2)Extremely HighDirect healing & tank-tauntsSlow repositioning speeds
    Tech / TurretsModerate (3 – 6)Fixed / StationaryPositioning & choke-pointsZero mobility once placed

    Phase 3: Essential Tips and Tricks for Staying Alive

    When playing a summoner, the golden rule is simple: Dead summoners make zero minions. Because your personal defensive stats are often neglected in favor of minion-boosting gear, you are a prime target for flanking enemies.

    • Master the Art of Backpedaling: Never stop moving. Use your movement keys or analog sticks to walk backward in wide circles while your minions attack the center cluster.
    • Utilize Distraction Decoys: Keep a decoy spell, shadow clone, or totem in your utility slot. If a boss breaks away from your minions and charges straight at you, drop a decoy immediately to redirect their threat table.
    • Check Your Stat Allocations: Double-check item descriptions. Many players mistakenly equip gear that boosts their own melee damage instead of items that explicitly state “Increases Minion Damage and Health.”

    Frequently Asked Questions (FAQ)

    1. What is the best summoner build for absolute beginners?

    The Golem / Single-Target Tank Summoner is usually best for beginners because managing one powerful, durable minion is much easier than tracking an army of fragile skeletons.

    2. Do minions scale with my character’s weapon level?

    In most games, standard weapons do not scale your minions unless the weapon has a specific passive perk like “Minion Damage +15%.” Always look for dedicated summoning catalysts or staves.

    3. What should I do when a boss targets me instead of my minions?

    Run defensively, use a crowd-control freeze or stun spell to break their charge, and let your minions attack the boss’s back to instantly pull their aggro away from you.

    4. Can minions trigger critical hits?

    Yes! Many games allow your minions to inherit a percentage of your critical strike chance and critical multiplier stats, making end-game gear scaling devastatingly powerful.

    5. Is it better to have many weak minions or one strong minion?

    It depends on the encounter style. Hordes excel at crowd control and body-blocking mob swarms, while single powerful minions excel at surviving heavy boss single-target attacks.

    6. How do I replenish my mana or summon resources quickly during long boss fights?

    Pack mana regeneration rings, consumable elixirs, or equip skills that convert enemy damage or minion deaths into recovered resource pools.

    7. Do summoner builds work well in cooperative multiplayer?

    Yes, but be mindful of your screen clutter! Having multiple summoners in a co-op lobby can flood the screen with minions, making it difficult for teammates to see boss telegraphs.

    8. Why do my minions keep dying so fast against late-game bosses?

    Late-game boss AoE attacks deal massive fractional damage to pets. You need to invest in gear pieces that grant “Minion Damage Negation” or actively micro-manage your summons by pulling them out of danger zones.

    9. Are there special talismans or rings dedicated to summoners?

    Almost every major RPG features specialized rings that increase maximum summon count, minion movement speed, or minion lifespan. Hunt these down as top-priority items!

    10. Where can I find more build guides and minion optimization strategies?

    Keep your browser bookmarked right here at thegamerbuzz.com for daily updates, end-game build calculators, and expert tips!

    Conclusion

    Playing a summoner build lets you experience the ultimate gaming power fantasy: commanding a legion of chaotic creatures while you orchestrate victory from safety. By choosing the right archetype—whether it’s an overwhelming undead horde, an unyielding golem warden, or an automated turret engineer—and balancing your defensive positioning, you will turn the toughest bosses into easy targets.

  • How to find hidden cave entrances behind waterfalls and dense jungle foliage in tropical exploration zones

    How to find hidden cave entrances behind waterfalls and dense jungle foliage in tropical exploration zones

    How to Find Hidden Cave Entrances Behind Waterfalls and Dense Jungle Foliage in Tropical Exploration Zones

    Welcome back, digital explorers, treasure hunters, and map completionists, to thegamerbuzz.com! If you have been traversing lush, sun-drenched tropical regions in your favorite open-world exploration games, you have undoubtedly noticed a timeless gaming trope: the hidden grotto tucked away behind a roaring curtain of white water or buried under thick, emerald jungle foliage.

    From gaming communities in Austin, Texas and New York to tech hubs in San Francisco, Los Angeles, and Seattle, players are constantly hunting for these secretive shortcuts. These hidden cave systems usually gatekeep legendary gear, ancient artifacts, and massive piles of currency. However, finding them requires more than just wandering around blindly; it takes a sharp eye, an understanding of environmental design, and a few tactical tricks.

    Pack your machetes, secure your climbing gear, and let’s dive into the ultimate master guide on how to find every hidden cave entrance behind waterfalls and dense jungle foliage.

    Phase 1: Understanding Environmental Design Cues in Tropical Zones

    Developers love hiding secrets in plain sight, and tropical biomes are uniquely suited for camouflage. Before you start hacking at vines or diving into rivers, you need to learn how to read the environment like a seasoned cartographer.

    1. Recognizing Waterfall Anomalies

    Not every waterfall hides a secret. If water flows smoothly against a sheer, flat cliff face with no protruding rocks or ledges at the base, it is usually just scenery. However, look for these key indicators:

    • The Suspended Ledge: A narrow, dry stone path running horizontally behind the sheet of water.
    • Unusual Ripple Patterns: If the current parts slightly or creates an unnatural eddy before plunging over the edge, it often indicates an underwater tunnel or a hollow cavity behind the fall.
    • Audio Cues: Listen closely to the ambient sound design. A hollow, echoing roar often replaces the standard splashing sound when a cavern amplifies the acoustic reverb.

    2. Identifying Jungle Foliage Distortions

    Dense jungle canopies can hide entire fortresses, let alone a small cave mouth. To spot hidden flora-covered entrances:

    • Color Discrepancy: Look for slightly lighter or desaturated patches of green vines. These are often interactive textures or physics-enabled assets rather than static background models.
    • Fauna Behavior: Notice if birds or insects cluster around a specific bush or wall. Game designers frequently use wildlife particle effects to subconsciously draw the player’s eye toward secret interaction zones.
    • Wind Currents: In modern games with advanced physics engines, foliage covering a drafty cave entrance will sway slightly outward or inward against the prevailing wind direction.

    Phase 2: Essential Tools and Gear for Jungle Exploration

    You cannot successfully plunder tropical caves without the right loadout. Make sure your inventory is prepped with these essential tools before embarking on an expedition:

    • The Machete / Sickle Weapon Mod: Essential for cleanly slicing through thick wall-vines without wasting time or drawing unwanted mob aggro with loud explosive tools.
    • Torch or Phosphor Lantern: Tropical caves are notoriously pitch-black. Relying solely on temporary handheld torches can leave you vulnerable to ambush predators lurking in the dark.
    • Grappling Hook / Ascender: Many waterfall caves are suspended halfway up a sheer cliff face, requiring vertical traversal tools to swing across the cascade safely.
    • Water-Breathing Elixirs: Some hidden cave entrances require diving through an underwater siphon beneath a waterfall to reach the dry interior chambers.

    Phase 3: Step-by-Step Search Strategies for Difficult Zones

    When you hit a dense jungle sector or a sprawling river system, use this systematic sweep pattern to ensure you never miss a hidden grotto.

    Step 1: The Perimeter Wall Sweep

    Hug the cliff walls or valley edges rather than running down the center of paths. Most jungle cave entrances are seamlessly built into the natural rock faces flanking the biome boundaries.

    Step 2: The Aerial Vantage Point

    If the game features a drone, mountable flying beast, or tall canopy tree, climb as high as possible. Looking down from above lets you spot unnatural linear gaps in the jungle green canopy or hidden ledges behind waterfalls that are completely invisible from ground level.

    Step 3: Torch Testing and Interaction Prompts

    If you suspect a wall of leaves is hiding a cave mouth but see no obvious opening, walk directly into the brush while swinging your melee weapon or holding a lit torch. Many foliage-covered doors will burn away or yield a contextual prompt the moment your hitbox intersects with the hidden entrance.

    Comparative Matrix: Waterfall vs. Jungle Cave Signifiers

    Feature TypePrimary Visual CueBest Tool for DiscoveryCommon Reward Type
    Waterfall GrottoLedge behind water / Dry stone pathGrappling Hook / Swim GearAncient Relics / Rare Armor
    Jungle Foliage CaveDiscolored vines / Insect swarmsMachete / TorchTribal Weapons / Crafting Gold
    Underwater SiphonBubbling surface / Submerged currentBreathing PotionLegendary Trinkets

    Pro-Tips for Speedrunners and Explorers

    • Turn Down Ambient Music: If you are struggling to hear the subtle audio differences behind waterfalls, temporarily lower the music volume slider in your audio settings to isolate environmental sound effects.
    • Check Behind Every Multi-Tiered Fall: Major waterfalls often have two levels—a lower pool and an upper ledge. Always check both tiers, as developers frequently place minor loot on the bottom and major quest items on the top.
    • Watch Out for Ambush Predators: Tropical caves are prime nesting grounds for venomous snakes, tracking panthers, or cave-dwelling mutants. Always enter with your weapon drawn and shield or dodge-ready!

    Frequently Asked Questions (FAQ)

    1. How can I tell if a waterfall actually has a hidden cave behind it?

    Look for a dry rocky ledge behind the water curtain, or check if your minimap shows an unmapped cavernous pocket extending past the cliff boundary.

    2. Do I need special tools to cut through jungle vine walls?

    Most games allow you to use any sharp weapon (swords, daggers, machetes), but dedicated cutting tools or fire-based items will clear the foliage much faster.

    3. What should I do if my torch goes out inside a dark tropical cave?

    Always carry backup fire-striker materials or equip a permanent lantern upgrade to avoid getting trapped in total darkness with hostile wildlife.

    4. Are waterfall caves dangerous to enter?

    Yes, many feature strong currents that can sweep your character downstream or over a hidden drop if you miscalculate your jump or swim path.

    5. Can enemies attack me while I am hidden behind a waterfall?

    Generally, aggressive mobs lose track of your line of sight once you step fully behind a waterfall curtain, making it an excellent tactical retreat spot.

    6. Do these hidden caves contain fast travel points or checkpoints?

    Larger dungeon-style cave systems often feature hidden campfires or ancient shrines that double as fast-travel waypoints once discovered.

    7. Why can’t I interact with certain jungle vine walls?

    Some foliage doors are progression-locked and can only be opened later in the game once you acquire a specific key, quest item, or explosive tool.

    8. Are there any hidden achievements tied to finding all waterfall secrets?

    Yes! Many open-world adventure games feature exploration trophies or achievements for uncovering every hidden grotto and secret area on the map.

    9. How do I survive poisonous flora inside dense jungle caves?

    Equip anti-poison charms, stock up on antidote consumables, or use ranged attacks to clear dangerous spore plants before stepping into tight spaces.

    10. Where can I find more exploration guides and hidden map secrets?

    Keep your browser bookmarked right here at thegamerbuzz.com for daily guides, map walkthroughs, and community secrets!

    Conclusion

    Uncovering hidden cave entrances tucked away behind roaring waterfalls and dense jungle foliage is one of the most gratifying aspects of tropical exploration games. By mastering environmental visual cues, packing the right traversal gear, and systematically sweeping cliff faces and green canopies, you will never miss another secret loot stash again. Step into the shadows, trust your instincts, and claim your treasures.

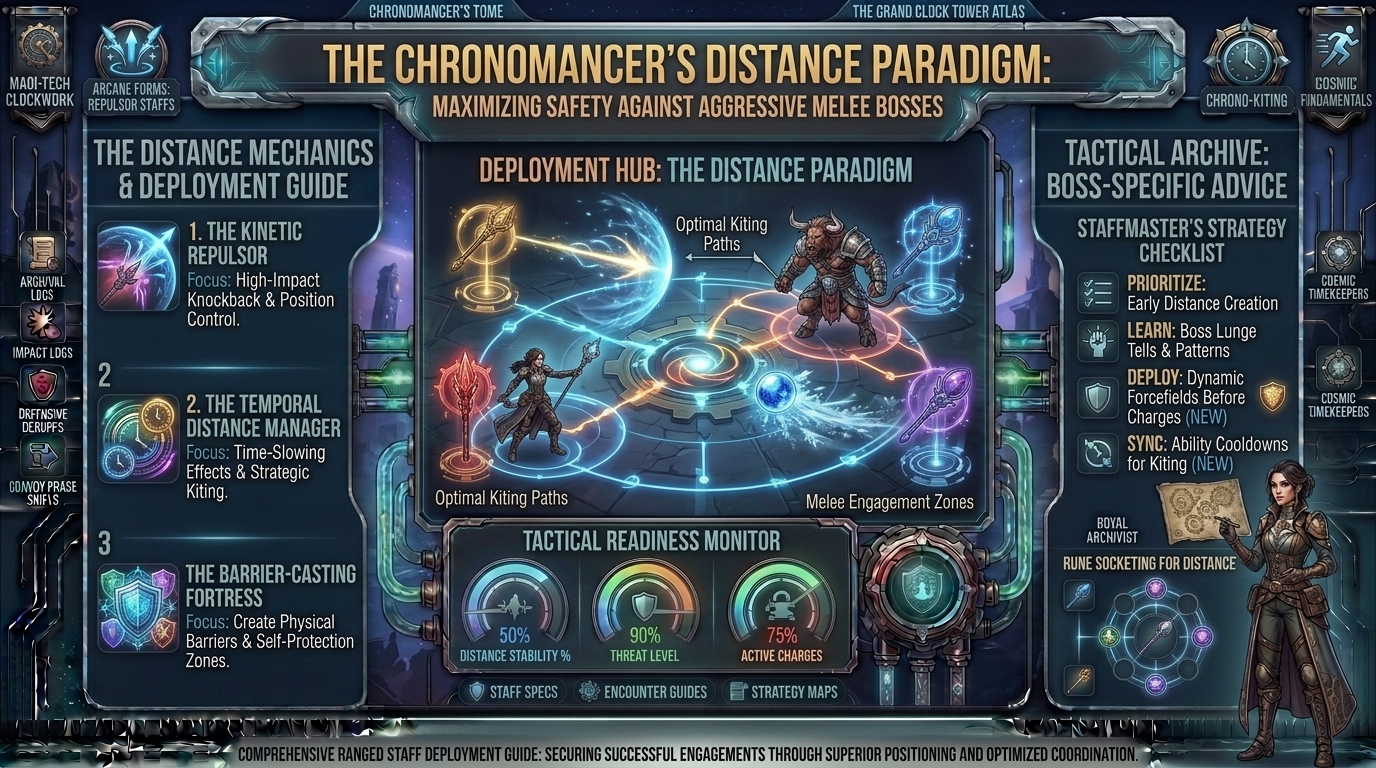
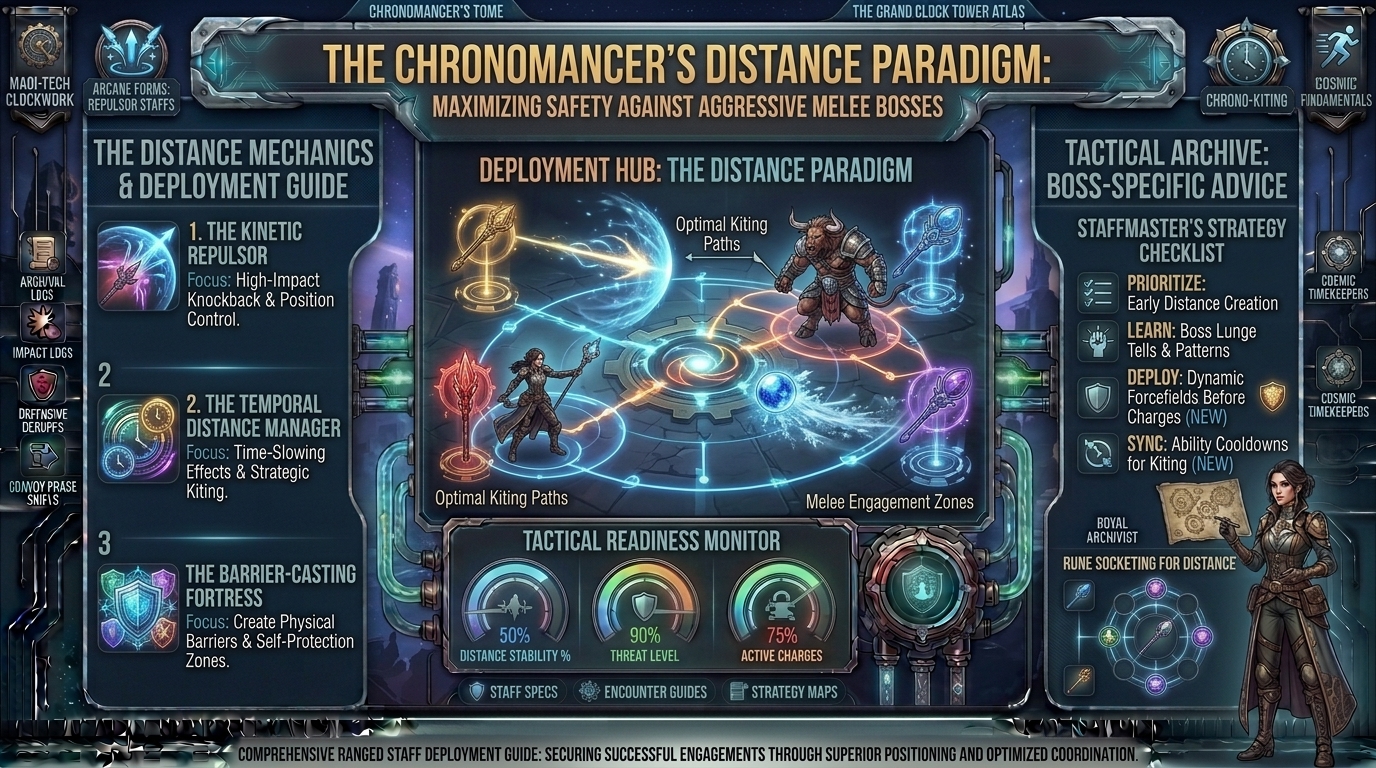
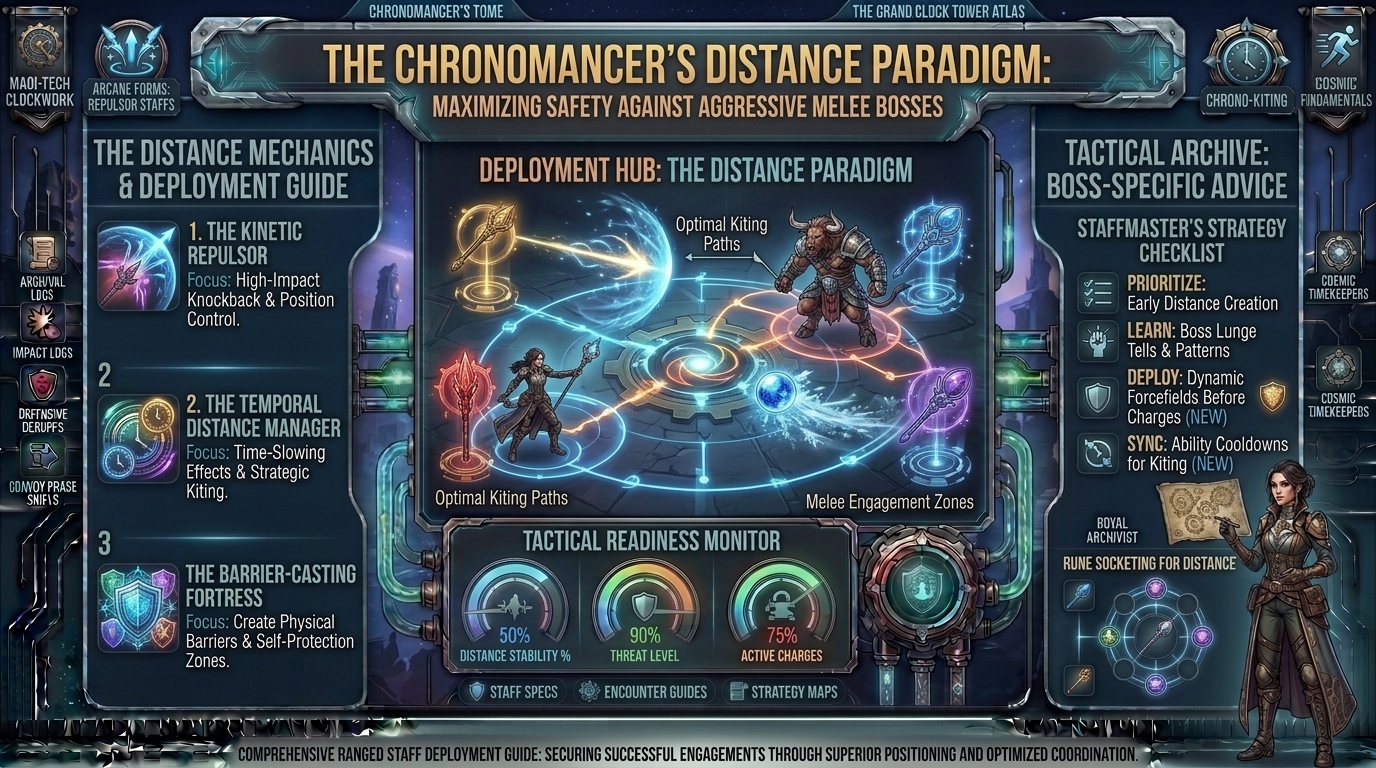
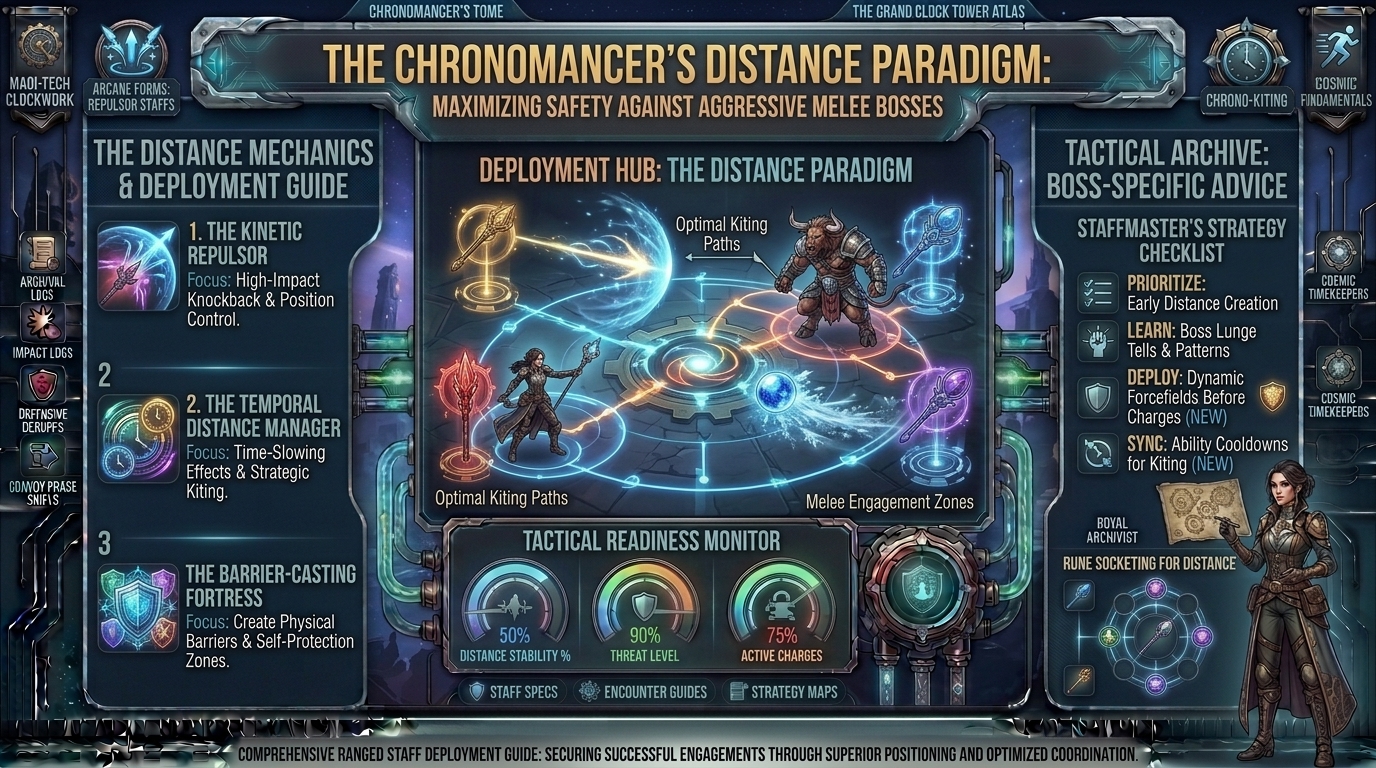
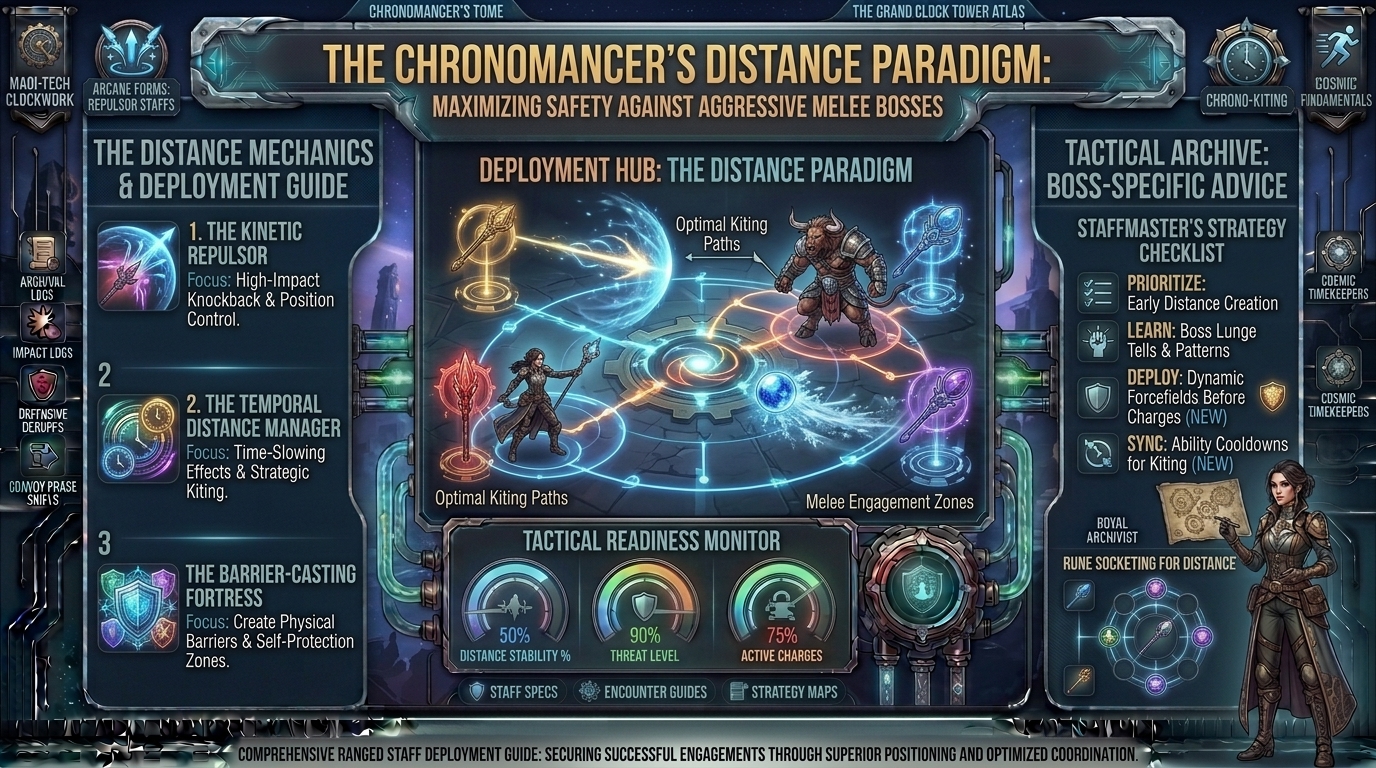
  • What are the best ranged magic staff weapons for keeping safe distance from aggressive melee boss enemies

    What are the best ranged magic staff weapons for keeping safe distance from aggressive melee boss enemies

    What Are the Best Ranged Magic Staff Weapons for Keeping Safe Distance from Aggressive Melee Boss Enemies

    Welcome back to thegamerbuzz.com, your definitive hub for tactical gaming breakdowns, endgame gear optimization, and high-performance builds. If you have ever played an action RPG or fantasy open-world title as a dedicated spellcaster, you already know the universal nightmare: you step into an arena, lock eyes with a towering, multi-phased boss wielding massive melee weapons, and watch in sheer horror as they cross the entire map in a single leaping animation to flatten you into dust.

    For spellcasters, survival depends entirely on spatial control. Keeping a safe distance from aggressive melee enemies is the difference between an effortless flawless victory and a frustrating, endless death loop. To do that, you need more than just good footwork—you need the best ranged magic staff weapons capable of hurling high-velocity projectiles, staggering charging foes, and maximizing spell scaling from afar.

    Across gaming hubs from Austin and San Francisco to New York and Seattle, players are constantly theory-crafting the ultimate wizard setups. Let’s break down the absolute best magic staffs designed to keep aggressive bosses at arm’s length.

    Phase 1: What Defines a Top-Tier Kiting Staff?

    Not all magic catalysts are created equal. When facing hyper-aggressive, gap-closing bosses, a staff needs to offer specific tactical advantages beyond raw damage:

    1. High Sorcery Scaling: Ensures your long-range spells hit hard enough to stagger or break boss momentum before they reach your position.
    2. Passive Spell Enhancement: Many top-tier staves boost specific categories of ranged projectiles (such as night sorceries, gravity spells, or full moons).
    3. Casting Speed and Recovery: Shorter recovery animations mean you can fire a projectile and immediately resume backpedaling or dodging.
    4. FP Efficiency: Long encounters require heavy resource management; burning through your mana pool too quickly leaves you defenseless when the boss closes in.

    Phase 2: The Best Ranged Magic Staves Ranked for Safety and Control

    1. The Carian Regal Scepter (The Ultimate General-Purpose Kiting Tool)

    • Scaling Requirements: High Intelligence (60+).
    • Primary Advantage: Incredible scaling paired with a unique built-in asset—it boosts full moon sorceries.
    • Why It Keeps You Safe: The Carian Regal Scepter provides phenomenal medium-to-long-range damage consistency without imposing any extra FP consumption penalties on your spells. Its steady output allows you to comfortably spam high-velocity tracking spells from across the arena, keeping aggressive bosses locked in reaction loops.

    2. Lusat’s Glintstone Staff (The Maximum Burst Deterrent)

    • Scaling Requirements: Very High Intelligence (41+) and heavy stat investment.
    • Primary Advantage: Absolute peak sorcery scaling for raw burst damage.
    • Why It Keeps You Safe: Sometimes the best defense is a devastating offense. When a boss is sprinting straight toward you, you don’t have time for a prolonged exchange. Lusat’s staff turns heavy projectiles into absolute truck-hits, allowing you to break boss stances or chunks of health bar in 2 or 3 casts, stopping their charge dead in its tracks. (Note: It increases FP costs, so pack extra mana flasks!)

    3. The Meteorite Staff (The Early-to-Mid Game Gravity Anchor)

    • Scaling Requirements: Moderate Intelligence (18).
    • Primary Advantage: S-tier intelligence scaling right out of the box and boosts gravity spells like Rock Sling.
    • Why It Keeps You Safe: Long before you reach endgame milestones, the Meteorite Staff is a kiting savior. Because gravity spells deal heavy physical stagger damage, pairing this staff with Rock Sling allows you to hurl boulders from extreme distances, knocking aggressive melee bosses out of their attack animations and creating massive safety windows.

    4. The Staff of Loss (The Stealth Sniper Setup)

    • Scaling Requirements: Low-to-moderate Intelligence (12).
    • Primary Advantage: Massive passive boost to invisible/night sorceries (up to 30% damage increase).
    • Why It Keeps You Safe: Many aggressive late-game bosses feature “input-reading” AI—meaning they instantly dodge the millisecond you press the cast button. Night sorceries (like Night Comet) bypass this entirely, meaning enemies will not react or evade mid-flight. Holding the Staff of Loss in your off-hand while casting with a primary staff turns you into a silent sniper who can whittle down bosses safely from maximum render distance.

    Comparative Matrix: Staff Performance Breakdown

    Staff NameInt RequirementScaling PotentialKey Passive / Special EffectBest Kiting Tactic
    Carian Regal Scepter60SBoosts Full Moon SpellsSteady, long-range tracking spam
    Lusat’s Glintstone Staff41S+Increases spell damage & FP costHigh-burst stopping power
    Meteorite Staff18A (Fixed)Boosts Gravity SorceriesStagger-locking with boulders
    Staff of Loss12B+Boosts Night SorceriesUndodgeable stealth sniping

    Pro-Tips for Maintaining Distance Against Aggressive Bosses

    • Unlock Your Camera for Retrears: When a boss lunges past you, unlock your camera target momentarily to sprint away cleanly instead of performing awkward slow rolls.
    • Pair Staves with Phalanx Spells: Cast floating defensive swords before the boss closes the distance. If they rush you, the automatic blades will absorb the pressure or trigger a mini-stagger.
    • Manage Your Stamina Buffer: Never drain your entire stamina bar casting spells. You need at least one roll’s worth of stamina in reserve to escape when an aggressive enemy counters your barrage.

    Frequently Asked Questions (FAQ)

    1. What is the best overall staff for keeping bosses at a distance?

    The Carian Regal Scepter is widely considered the best general-purpose option for endgame mages due to its high scaling and lack of penalty mechanics.

    2. Why do bosses dodge my spells the exact second I cast them?

    Many modern boss AI configurations use “input reading.” They react to the animation frame of your cast rather than the projectile itself. Switching to night sorceries bypasses this behavior.

    3. Does dual-wielding staves stack their passive bonuses?

    Yes! If you hold a specialized staff (like the Staff of Loss) in your off-hand while casting with a stronger main staff, you retain the passive damage multiplier of the off-hand tool.

    4. How can I stop fast bosses from closing the gap so quickly?

    Utilize gravity spells like Rock Sling or heavy impact projectiles that deal high stance damage, forcing the boss to stagger or stumble.

    5. Is Lusat’s Staff worth the increased mana consumption?

    If you are running a high-mind build with plenty of mana flasks, the massive burst damage makes short work of aggressive bosses before they can reach you.

    6. Can I upgrade the Meteorite Staff?

    No, the Meteorite Staff cannot be upgraded with smithing stones, but its base intelligence scaling remains extraordinarily powerful through the early and mid-game.

    7. What is the best spell to pair with a long-range kiting build?

    Spells with piercing multi-hit properties (like Shard Spiral) or long-range homing projectiles work best to punish bosses moving toward you.

    8. How do I manage my inventory weight while carrying multiple staves?

    Staves generally weigh very little compared to heavy armor or colossal weapons, making it easy to carry two or three utility staves simultaneously.

    9. Are there any melee options a pure caster should carry just in case?

    Keeping a lightweight sidearm with a quick thrust or panic-rollback skill is always a smart insurance policy when a boss breaks through your zone.

    10. Where can I find more advanced caster builds and boss strategies?

    Keep your browser locked right here to thegamerbuzz.com for daily guides, patch breakdowns, and community tips!

    Conclusion

    Mastering the art of spacing as a spellcaster is what separates casual players from true eldritch lords. By equipping top-tier catalysts like the Carian Regal Scepter or leveraging the staggering power of the Meteorite Staff, you can turn any aggressive melee boss into a distant target. Keep your distance, mind your mana, and let your magic do the talking.

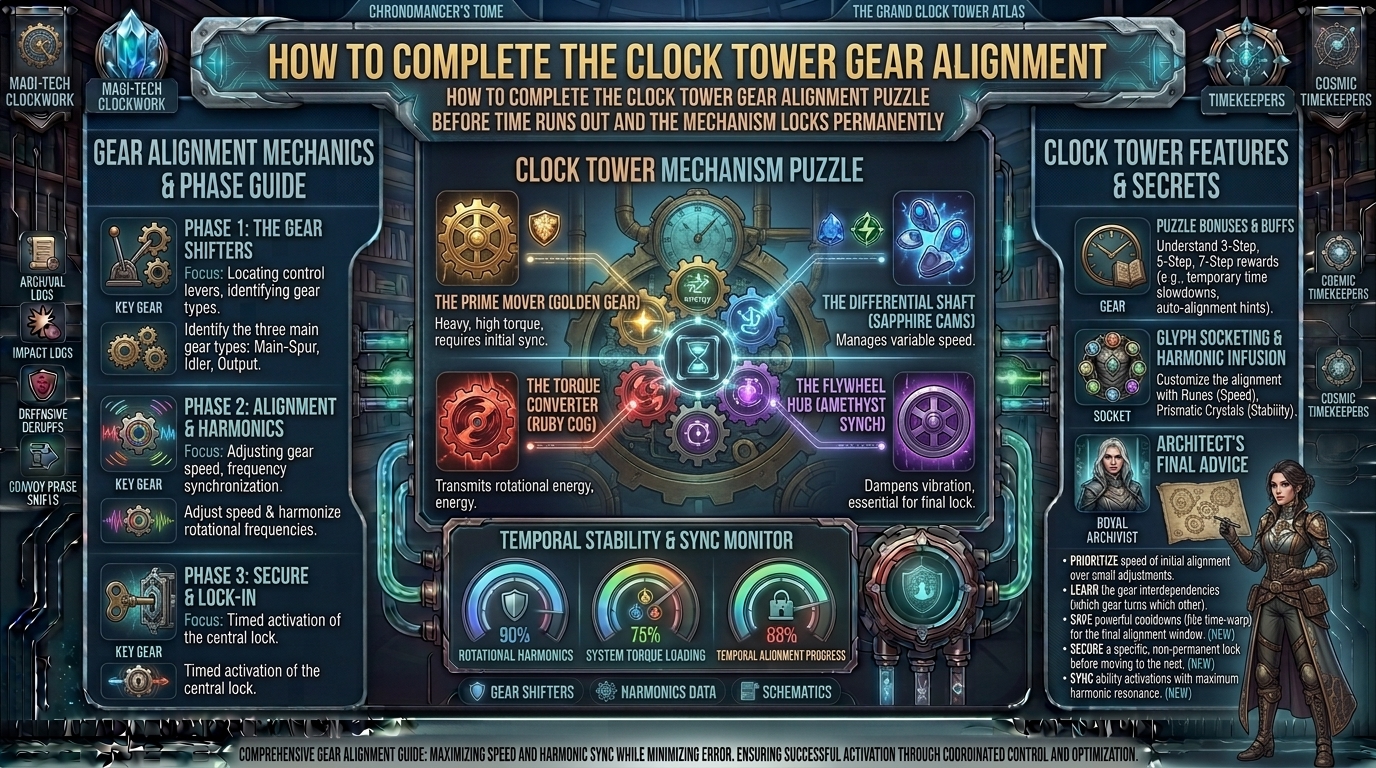
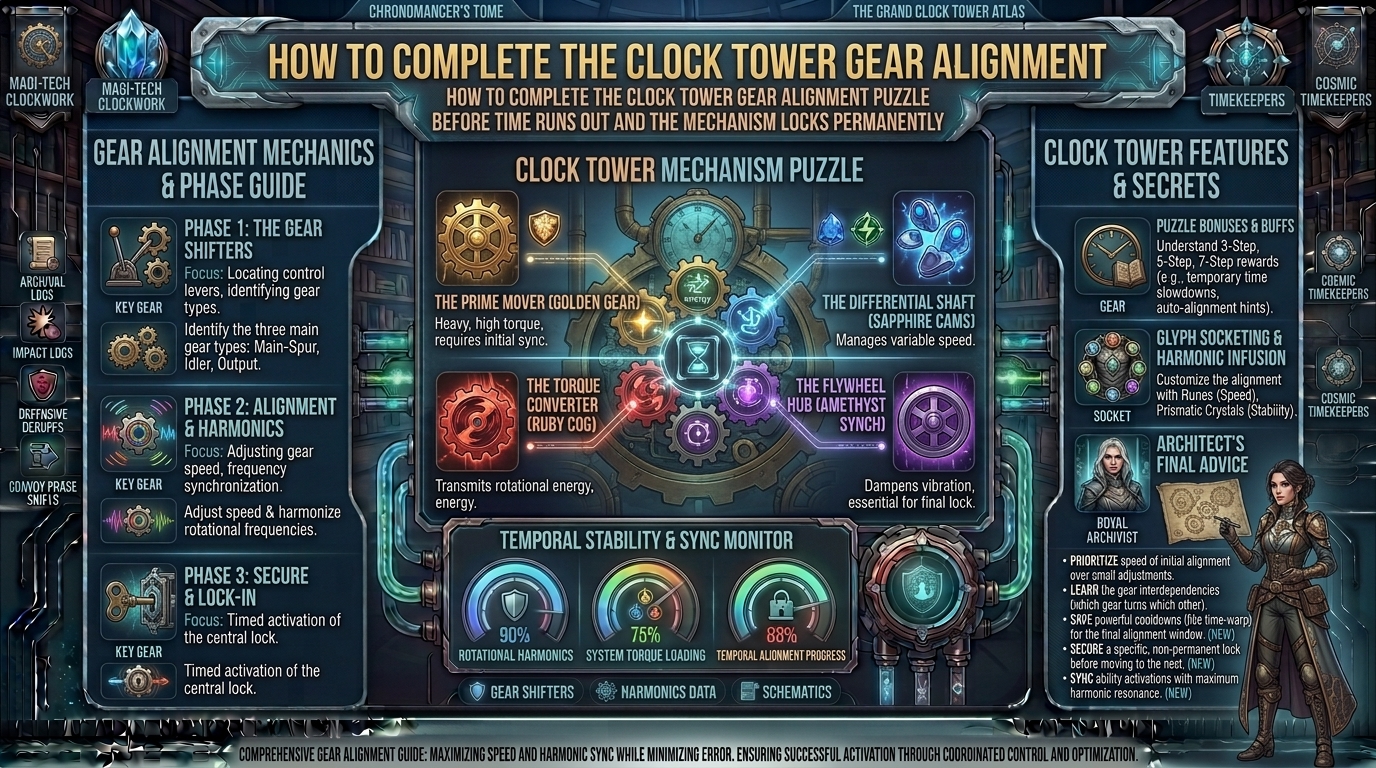
  • How to complete the clock tower gear alignment puzzle before time runs out and the mechanism locks permanently

    How to complete the clock tower gear alignment puzzle before time runs out and the mechanism locks permanently

    How to Complete the Clock Tower Gear Alignment Puzzle Before Time Runs Out and the Mechanism Locks Permanently

    Welcome back, completionists and puzzle enthusiasts, to thegamerbuzz.com! If you have found yourself standing in front of the ticking behemoth that is the Grand Clock Tower, heart pounding as the emergency countdown timer ticks down, you are likely facing one of the most infamous progression roadblocks in modern gaming history.

    From gaming communities in Austin, Texas to tech circles in Seattle, Washington, San Francisco, New York, and Los Angeles, players have lost hours watching that massive pendulum swing a little too close to permanent mechanism lockdown. A single mistake, a mistimed lever pull, or a panicked miscalculation can jam the gears tight, locking you out of the upper chamber’s legendary loot and forcing a grueling reload.

    Grab your wrench, steady your nerves, and let’s break down the definitive, foolproof walkthrough for solving the Clock Tower Gear Alignment Puzzle before time runs out.

    Phase 1: Anatomy of the Clock Tower and the Lockdown Threat

    Before turning a single cog, you need to understand why this puzzle is so punishing. When you interact with the primary central console on Floor 3 of the Clock Tower, two things happen:

    1. The Timer Starts: A subtle, ticking alarm sound begins, giving you a strict 3-minute countdown (180 seconds) to align three primary gear matrices.
    2. The Stakes: If the timer hits zero, the brass gears fuse together under safety clamps, triggering a permanent lock. You will be locked out of the puzzle room for the current in-game day or forced to reload your last manual save file.

    The Three Core Mechanics You Must Manage:

    • The Master Gear (Center): Controls the main rotational speed and direction.
    • The Sun Gear (Left Alcove): Regulates solar/daylight time-state alignment.
    • The Moon Gear (Right Alcove): Regulates lunar/nighttime time-state alignment.

    Phase 2: Step-by-Step Walkthrough to Align the Gears

    Follow this exact sequence to minimize wasted movement, bypass panic, and sync the mechanism with seconds to spare.

    Step 1: Pre-Puzzle Preparation (The Recon Phase)

    Do not pull the console lever immediately! Before triggering the timer, walk around the chamber and note the current positions of the alignment notches.

    • Look at the glowing etching on the back wall. The target alignment symbols (Sun pointing East, Moon pointing West, Central Crown pointing Up) must be memorized or screenshotted.

    Step 2: Trigger and Secure the Master Gear (0:00 – 0:45)

    1. Pull the central console lever to start the sequence. The 3-minute timer begins now.
    2. Sprint immediately to the Master Gear winch directly behind the console.
    3. Turn the winch counter-clockwise twice until the primary alignment arrow snaps into the vertical groove with an audible, heavy metallic click.

    Step 3: Calibrating the Sun Gear (0:46 – 1:30)

    1. Take the metal catwalk to the left alcove overlooking the courtyard.
    2. You will find a sliding track puzzle with three interconnected cogs (Small, Medium, Large).
    3. Push the Medium Cog into the bottom-right socket. This engages the intermediary teeth.
    4. Pull the primary activation lever once. The Sun Gear will spin and lock into the horizontal position, illuminating the left stained-glass window with amber light.

    Step 4: Calibrating the Moon Gear (1:31 – 2:15)

    1. Sprint across to the right alcove (watch out for steam vent hazards if you are playing on higher difficulty modifiers!).
    2. Unlike the Sun Gear, the Moon Gear requires weight equilibrium. Pick up the two Counterweight Bricks sitting on the nearby crate.
    3. Place one brick on the left scale pan and one on the right scale pan to balance the pendulum arm.
    4. Once balanced, interact with the locking pin to secure the Moon Gear into its vertical downward slot. The right window will glow with cool blue moonlight.

    Step 5: Final Synchronization at the Central Console (2:16 – 2:45)

    1. Dash back to the main console on Floor 3 before the final 15-second warning klaxon sounds.
    2. Press the Master Override Button in the center of the console.
    3. Watch the cinematic engine sequence as all three gears lock into harmonious rotation, disengaging the safety clamps and opening the secret floor hatch above!

    Comparative Table: Gear States and Common Errors

    Gear ComponentCorrect Alignment PositionCommon Player MistakeConsequence of Error
    Master GearVertical Up (12 o’clock)Over-spinning past the notchWastes 20-30 seconds reversing
    Sun GearHorizontal Right (3 o’clock)Forgetting the intermediary cogGear slips and free-spins
    Moon GearVertical Down (6 o’clock)Failing to balance scale weightsMechanism jams instantly

    Pro-Tips for Speedrunners and Anxious Puzzlers

    • Clear the Mobs First: Before ever touching the console, clear out any ambient clockwork spiders or bats lingering in the tower stairwells. Getting interrupted by a stray attack mid-interaction will drain 5 critical seconds.
    • Turn on Subtitles / Visual Cues: Enable visual audio cues in your settings. When the timer drops below 30 seconds, visual screen pulses will help you gauge remaining time without needing to constantly look at a tiny UI clock.
    • Practice in Casual Mode: If your current difficulty penalizes failed attempts severely, lower the world tier temporarily just to learn the spatial layout of the catwalks.

    Frequently Asked Questions (FAQ)

    1. What happens if the timer runs out and the mechanism locks permanently?

    If the timer hits zero, the gears fuse shut, and you are locked out of the puzzle. You will either need to wait until the in-game daily reset or reload your most recent manual save file.

    2. Can I pause the game to look at a guide while the timer is running?

    In most offline single-player setups, opening the system menu or pausing will freeze the game state, including the timer. However, in online or co-op sessions, the timer continues to run!

    3. Do the puzzle solutions change randomly on every playthrough?

    The core mechanics remain identical, but the starting position of the gears can randomize slightly depending on your game mode or difficulty setting. Always check the initial alignment before pulling the lever.

    4. What rewards are waiting in the chamber above the clock tower?

    Opening the puzzle grants access to the Chronomancer’s Robes, a legendary time-manipulation trinket, and a massive cache of rare crafting materials.

    5. Why won’t the Moon Gear stay in place when I pull the pin?

    You likely forgot to place the counterweight bricks on the scale pans. Without weight equilibrium, gravity pulls the gear back down out of alignment.

    6. Is there a way to permanently disable the timer?

    No, the 3-minute countdown is a core feature designed to build tension and test your spatial awareness and route efficiency.

    7. Can I bring a friend along in co-op to solve it faster?

    Yes! In co-op mode, one player can handle the Sun Gear while the other manages the Moon Gear, cutting completion time in half if you coordinate via voice chat.

    8. What is the best route to take back down if I want to farm the area?

    Use the internal elevator pulley system unlocked after completing the puzzle. It provides a direct, hazard-free shortcut back to the ground floor.

    9. Are there any hidden achievements tied to this specific puzzle?

    Yes, solving the puzzle with more than 60 seconds remaining on the clock unlocks the prestigious gold achievement titled “Master of Time.”

    10. Where can I find more puzzle walkthroughs and gaming guides?

    Keep your browser bookmarked right here at thegamerbuzz.com for daily guides, secret discoveries, and community tips!

    Conclusion

    Conquering the Clock Tower Gear Alignment Puzzle is a true test of poise under pressure. By memorizing the layout, executing a disciplined sequence from the Master Gear to the Sun and Moon alcoves, and keeping a cool head as the timer winds down, you can bypass the dreaded permanent lockdown and claim your hard-earned rewards.

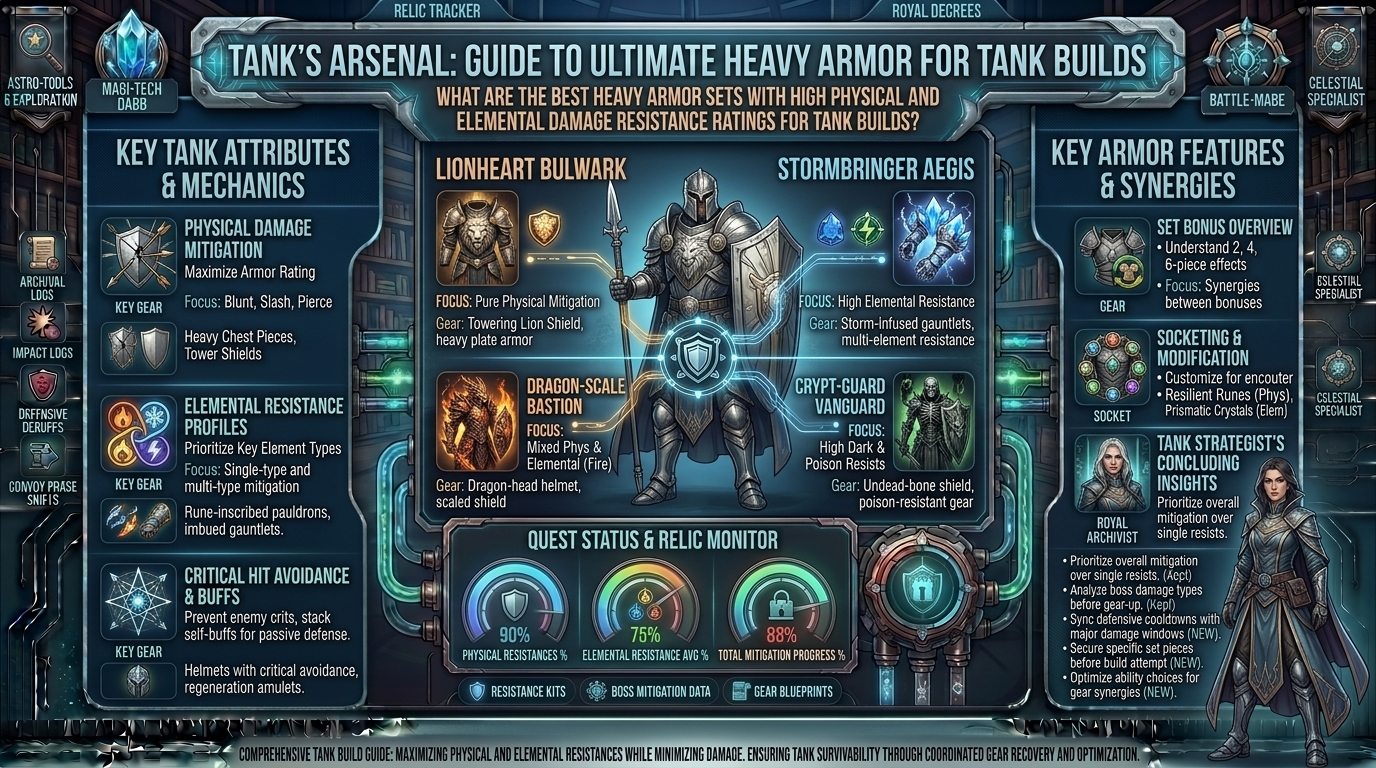
  • What are the best heavy armor sets with high physical and elemental damage resistance ratings for tank builds

    What are the best heavy armor sets with high physical and elemental damage resistance ratings for tank builds

    What Are the Best Heavy Armor Sets with High Physical and Elemental Damage Resistance Ratings for Tank Builds

    Welcome back to thegamerbuzz.com, your ultimate digital sanctuary for tactical guides, deep-dive math mechanics, and endgame optimizations. Whether you are holding down frontlines in sprawling open-world action RPGs, orchestrating dungeon-boss lock-downs, or preparing for high-stakes PvP arenas, playing a dedicated tank requires more than just high health pools. It demands uncompromising mitigation.

    Across gaming communities from Austin, Texas to New York, Los Angeles, and Seattle, hardcore players continuously search for the ultimate gear setups. When bosses throw screen-clearing AoE attacks, physical strikes, and elemental magic your way, your survival hinges on one primary factor: Damage Negation and Resistances.

    In this master guide, we will break down the absolute best heavy armor sets built for pure tanking efficiency, evaluating how they stack up in physical protection, elemental absorption, poise thresholds, and practical weight management.

    What Makes a Heavy Armor Set “Tank-Tier”?

    Before diving into specific gear pieces, we need to establish what separates a mediocre suit of heavy plate from a true endgame tank fortress. A top-tier tank armor set must excel in four primary categories:

    1. Physical Damage Negation: The bedrock of your defense. It absorbs standard slash, strike, and pierce impacts from boss weapons and mob swarms.
    2. Elemental Absorption: Magic, fire, lightning, and holy mitigation. Many high-tier physical armor sets suffer from pitiful elemental resistance, leading to “chip damage” through shields or barriers.
    3. Poise / Stagger Resistance: The hidden metric that stops your character from being interrupted mid-action or staggered when taking heavy blows.
    4. Weight-to-Value Ratio: Ensuring your equipment load doesn’t accidentally force you into a sluggish heavy roll or limit your shield and weapon choices.

    The Ultimate Heavy Armor Sets Ranked for Tank Builds

    1. The Verdigris Set (The Undisputed King of Defense)

    • Best For: Ultimate physical protection and maximum poise.
    • Key Stats: Exceptional physical defense, top-tier robustness, and a staggering base poise rating of 100.
    • Why It’s a Tank Essential: Introduced in major expansion content, the Verdigris Set rivals traditional heavyweight titans while offering surprisingly well-rounded elemental resistances. When paired with heavy greatshields, it minimizes stamina damage and provides absolute stability on the front line.

    2. The Bull-Goat Set (The Master of Stagger Prevention)

    • Best For: Uninterrupted combat flow and heavy physical mitigation.
    • Key Stats: Highest raw physical defense and unmatched poise values in many classic rosters.
    • Why It’s a Tank Essential: If your tanking style relies on counter-attacking, slow heavy weapon swings, or executing guard counters without getting knocked flat on your back, the Bull-Goat set is legendary. While its elemental defenses are average, its physical absorption ensures baseline safety against physical-heavy bosses.

    3. General Radahn’s / Young Lion’s Set (The Balanced Powerhouse)

    • Best For: High efficiency and balanced stat distributions.
    • Key Stats: Great physical defense coupled with phenomenal status-effect resistances (Robustness/Immunity).
    • Why It’s a Tank Essential: For players worried about heavy armor weighing them down too much, this set offers incredible stat-to-weight efficiency. It allows tanks to maintain substantial damage negation without sacrificing all mobility.

    4. The Solitude Set (The Early-Access Fortress)

    • Best For: Mid-to-late game progression convenience.
    • Key Stats: High overall damage negation and massive poise relative to how early it can be acquired.
    • Why It’s a Tank Essential: Many heavy armor sets are locked behind grueling endgame bosses. The Solitude Set breaks this trend by giving players access to near-endgame defensive stats early in progression, making it a reliable companion for the entire journey.

    Comparative Matrix: Heavy Armor Stat Breakdown

    Armor Set NamePhysical DefenseElemental Defense (Avg)Poise RatingWeight Class
    Verdigris SetS+B+100Heavyweight
    Bull-Goat SetS+BS+Heavyweight
    Solitude SetSB+SHeavyweight
    Young Lion’s SetSA-SHeavyweight

    Pro-Tips for Optimizing Your Tank Build

    • Watch Your Equip Load: Never sacrifice a medium roll or general mobility entirely unless you are running a dedicated, 100% block-stability greatshield build. Mobility is your safety net against unblockable grabs and environmental hazards.
    • Layer with Buffs and Talismans: Heavy armor alone won’t protect you from elemental onslaughts. Always stack defensive talismans (such as elemental damage negation rings or shield-boosting artifacts) to cover your armor’s weak points.
    • Mix and Match: If you are just a few points away from a better roll threshold, don’t hesitate to swap out heavy greaves for a slightly lighter alternative while keeping a high-poise chest piece.

    Frequently Asked Questions (FAQ)

    1. Does heavy armor completely negate elemental damage?

    No. While heavy armor provides robust physical mitigation, most heavy metal sets have lower elemental (magic, fire, lightning, holy) absorptions. You must rely on consumables, spells, or talismans to cover elemental weaknesses.

    2. Is heavy load worth using just to wear the heaviest armor?

    Generally, no. Entering a “Heavy Load” fat-roll state makes dodging delayed boss attacks, grab mechanics, and AoE shockwaves nearly impossible. Aim for heavy armor while maintaining a Medium Equip Load.

    3. How does Poise affect a tank build?

    Poise determines how much damage your character can absorb before getting staggered out of an animation. High poise allows you to complete slow weapon attacks or heavy spell casts right through enemy hits.

    4. What is the single highest physical defense armor set?

    The Bull-Goat set and the Verdigris set consistently trade blows for the highest physical damage absorption and defense ratings in modern action RPG titles.

    5. Can I mix pieces from different armor sets?

    Yes! Mixing and matching pieces is often the optimal strategy to hit specific poise breakpoints while keeping your total weight optimized for a medium roll.

    6. Do heavy armor sets degrade or break over time?

    In most modern games, armor durability has been phased out or streamlined, meaning you don’t have to worry about your plate armor shattering mid-combat. Always check your specific game’s mechanics.

    7. How do I offset the slow stamina recovery caused by heavy gear?

    Utilize stamina-recovery rings, green blossoms, or specific class skills that boost stamina regeneration to counter the heavier equipment burden.

    8. Are there lightweight alternatives with good elemental resistance?

    Yes, cloth and medium leather sets (such as specific regional priest or scout sets) often boast superior elemental resistances compared to metal plate, though they completely lack physical poise.

    9. Do heavy helmets matter as much as chest armor?

    Chest pieces provide the highest percentage of defense and stats, but helmets round out your total poise and elemental resistances. Never leave your head slot empty!

    10. Where can I find more optimized tank builds?

    Keep your browser locked right here to thegamerbuzz.com for continuous updates, stat calculators, and deep-dive boss guides!

    Conclusion

    Building an impenetrable tank requires balancing raw physical defense, tactical elemental resistance, and clever weight management. By equipping titans like the Verdigris Set or the Bull-Goat Set, utilizing supportive talismans, and mastering your defensive positioning, you can turn your character into an immovable wall against even the most punishing bosses.

  • How to find and collect all scattered royal crown jewels to open the secret vault door in the castle basement

    How to find and collect all scattered royal crown jewels to open the secret vault door in the castle basement

    Welcome, fellow adventurers and completionists, to the definitive master guide for thegamerbuzz.com. If you have been tearing your hair out trying to figure out why that heavy, rune-carved door in the depths of the castle basement refuses to budge, you are in the exact right place.

    Unlocking the secret vault is one of the most rewarding milestones in the game. Not only does it gatekeep some of the most legendary endgame gear, rare crafting materials, and historical lore fragments, but it also tests your platforming, puzzle-solving, and exploration mettle.

    Across regions from the bustling gaming hubs of New York and San Francisco to the tech-savvy communities in Seattle, Washington, players everywhere are searching for the elusive Royal Crown Jewels. Grab your torches, ready your lockpicks, and let’s dive straight into the ultimate walkthrough.

    Phase 1: Understanding the Castle Basement Vault Mystery

    Before you start sprinting blindly across the map, you need to trigger the quest line properly. Down in the Castle Basement, past the aging wine racks and the damp, echoing corridors, sits the Grand Vault Door. Etched onto its stone surface are five empty sockets shaped like regal ornaments, accompanied by an enigmatic Latin inscription roughly translating to:

    “Only when the scattered glory of the crown is reunited in darkness shall the iron seal yield its ancient heart.”

    To open this door, you must track down five distinct Royal Crown Jewels, each hidden in radically different biomes, guarded by environmental puzzles, mini-bosses, or clever platforming segments.

    Phase 2: Location Guide – Finding All 5 Scattered Royal Crown Jewels

    1. The Ruby of the High Rook (The Castle Ramparts)

    • Location: The highest point of the upper battlements.
    • The Puzzle: While it is technically part of the castle structure, reaching this jewel requires going up rather than down. Head to the West Guard Tower and climb the spiral staircase to the broken rookery.
    • Collection Strategy: You will need to time your jumps across the collapsing wooden scaffolding. Avoid the nesting Griffon guards (throw a raw meat bait if you are struggling with combat). Once you reach the apex, the Ruby of the High Rook rests atop an ornate stone pedestal bathed in sunlight.

    2. The Sapphire of Sunken Depths (The Grotto Caves)

    • Location: Accessible via the hidden waterfall cave behind the outer moat.
    • The Puzzle: This jewel is submerged in an underwater grotto that features a synchronized pillar-pressure plate puzzle.
    • Collection Strategy: Bring water-breathing potions or ensure your stamina stat is sufficiently leveled. Dive into the central chamber and activate the three statues in chronological order based on the sun-moon-star reliefs carved on the cavern walls (Left: Moon, Center: Sun, Right: Star). Doing so drains the secondary basin, letting you pry the Sapphire of Sunken Depths from the jaw of a stone serpent.

    3. The Emerald of the Overgrown Crypt (The Whispering Woods)

    • Location: Deep within the foggy labyrinth of the southern forest graveyard.
    • The Puzzle: The crypt door is sealed by a shadow-weaving puzzle. You must use your portable light source or torch to align the statues’ shadows with the markings on the floor.
    • Collection Strategy: Beware of ambient ghoul spawns that disrupt your positioning. Once the crypt opens, navigate past the swinging pendulum blades. The Emerald of the Overgrown Crypt rests inside a sarcophagus guarded by a restless crypt-keeper mini-boss. Defeat him by exploiting his fire vulnerability.

    4. The Amethyst of the Royal Library (The Forbidden Archive)

    • Location: Hidden behind a rotating bookshelf puzzle inside the castle’s upper library.
    • The Puzzle: This is a pure logic puzzle. You must inspect three historical logs scattered on reading desks throughout the library to find out which fictional monarchs “died of poison,” “died in battle,” or “died of old age.”
    • Collection Strategy: Pull the corresponding busts in the correct historical sequence: The Red King, The Blue Queen, and The Green Prince. The bookshelf will slide open with a grinding mechanical groan, revealing a small treasury room where the Amethyst of the Royal Library glimmers safely inside a glass display case.

    5. The Diamond of the Obsidian Abyss (The Volcanic Mines)

    • Location: The deepest, hottest tier of the abandoned mining shafts connected to the castle’s sub-level.
    • The Puzzle: Extreme heat management and rail-cart navigation.
    • Collection Strategy: Equip your heat-resistant armor set. You will need to hop into a rusty minecart and manually switch track levers at high speeds to avoid lava pools and collapsing ceiling hazards. At the final terminal station, the Diamond of the Obsidian Abyss sits on an altar of cooled magma. Grab it fast before the thermal damage ticker overwhelms your health bar!

    Phase 3: Unlocking the Secret Vault Door

    Now that your inventory holds all five glittering artifacts—the Ruby, Sapphire, Emerald, Amethyst, and Diamond—it is time to return to where your journey started: The Castle Basement.

    1. Approach the heavy iron Vault Door.
    2. Interact with the empty recessed sockets one by one.
    3. Place each jewel into its corresponding color-coded slot (Red top-left, Blue top-right, Green center, Purple bottom-left, White bottom-right).
    4. Watch the cinematic sequence as the ancient mechanisms grind into motion, the magical runes flare up with blue energy, and the heavy stone slab swings open into darkness.

    Pro-Tips for Speedrunners and Completionists

    • Don’t Rush the Combat: In areas like the Whispering Woods and Volcanic Mines, rushing blindly will trigger traps or trap you in corner-swarms. Clear mobs methodically.
    • Audio Cues Matter: When solving the library and grotto puzzles, listen closely for distinct mechanical “clicks.” These confirm you have positioned a lever or statue correctly.
    • Inventory Management: Ensure you have at least 5 free inventory slots before starting your collection run. You cannot pick up a jewel if your satchel is completely full!

    Frequently Asked Questions (FAQ)

    1. Can I collect the Royal Crown Jewels out of order?

    Yes! Once you have unlocked access to the open-world map, you can collect the five jewels in any sequence you prefer. However, following the intended level-scaling path makes survival much easier.

    2. What happens if I die while carrying a Crown Jewel? Do I lose it?

    No, the game treats quest-critical items like the Crown Jewels as permanent key items. You will not drop them upon death, though you may respawn at the nearest checkpoint.

    3. Do I need any special tools or high-tier lockpicks for these jewels?

    Most jewels are locked behind puzzles or environmental traversal rather than traditional lockpicking minigames. However, bringing a few standard lockpicks is always recommended for extra chests found along the way.

    4. What kind of loot is hidden inside the castle basement vault?

    Inside, you will find the legendary Royal Sovereign Armor set, a massive pile of gold currency, and a unique blueprint needed for end-game weapon crafting.

    5. Is the vault door repeatable on multiple playthroughs?

    Yes. If you start a New Game Plus (NG+) run, the vault resets, allowing you to collect the jewels and raid the vault all over again for scaled rewards.

    6. Can I open the vault door with only four of the five jewels?

    Negative. The magical seal requires all five elemental frequencies (represented by the five distinct gems) to neutralize the barrier. Missing even one will keep the door locked tight.

    7. Why isn’t the bookshelf rotating in the Royal Library?

    Make sure you have interacted with all three historical books on the reading tables first. The puzzle mechanism remains locked until your character “discovers” the solution clues.

    8. How do I survive the intense heat in the Volcanic Mines?

    Drink a Cool-Brew Elixir before entering the mine shafts, and equip any gear items featuring baseline thermal or fire resistance to slow down health depletion.

    9. Are there any hidden achievements tied to this vault?

    Yes! Opening the vault unlocks the prestigious silver achievement/trophy titled “Heir to the Crown.”

    10. Where can I find more game guides like this?

    Keep your browser bookmarked right here at thegamerbuzz.com for daily updates, secret hunting walkthroughs, and deep-dive gaming content!

    Conclusion

    Conquering the trials of the castle basement and tracking down the scattered Royal Crown Jewels is one of the most satisfying experiences the game has to offer. By blending sharp exploration across the high ramparts, subterranean grottos, spooky crypts, dusty archives, and fiery mines, you have proven your skill as a master adventurer. Now step inside the vault, claim your legendary spoils, and enjoy the fruits of your labor.