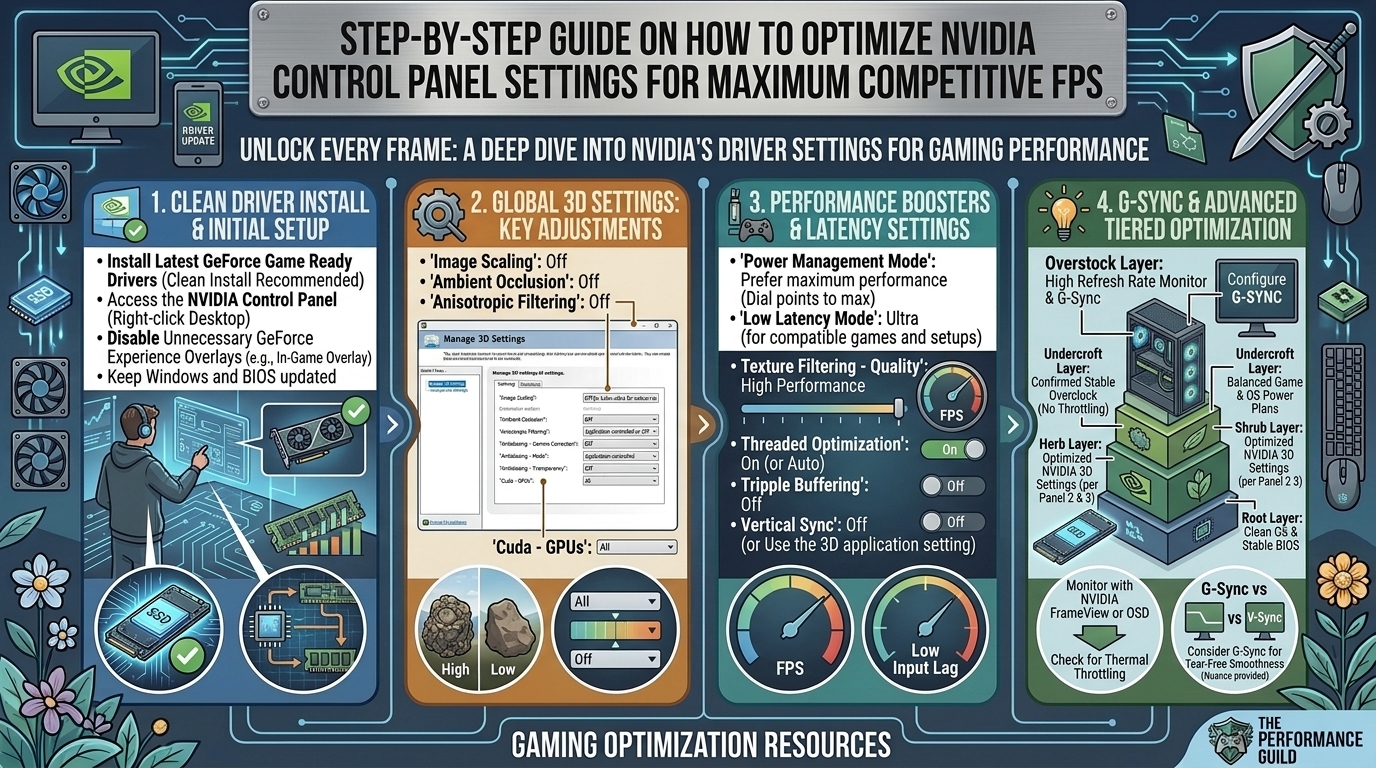
Whether you are climbing the ranks in competitive esports titles like Counter-Strike 2, Valorant, Apex Legends, Overwatch 2, or Call of Duty: Warzone, hardware output is only half the battle. You can own a high-tier NVIDIA GeForce RTX GPU paired with a 240Hz or 360Hz gaming monitor, but if your display drivers are running stock configurations, you are sacrificing critical frames and taking on extra millisecond latency spikes.
Default NVIDIA Control Panel configurations are engineered for visual fidelity and energy conservation—not competitive speed. This definitive, step-by-step optimization guide breaks down every parameter inside the driver control panel to deliver maximum frame rates, zero input lag, and razor-sharp motion clarity.
1. System Preparation & Clean Driver Installation
Before modifying control panel values, build your optimization setup on a clean driver profile. Residual registry entries from outdated drivers can cause micro-stutters and override explicit settings.
Step 1: Clean Driver Reset via DDU
- Download the latest GeForce Game Ready Driver directly from NVIDIA.
- Download Display Driver Uninstaller (DDU).
- Disconnect your PC from the internet to stop Windows Update from automatically downloading generic display drivers.
- Boot Windows into Safe Mode (
Shift+ click Restart > Troubleshoot > Advanced Options > Startup Settings > Restart > Press4). - Run DDU, select GPU and NVIDIA, then click Clean and restart.
- Install the official Game Ready Driver using the Custom (Advanced) installation type, and check Perform a clean installation.
Step 2: Set Windows Graphics Settings
- Press
Win + Ito open Settings > System > Display > Graphics. - Click Change default graphics settings.
- Toggle Hardware-accelerated GPU scheduling (HAGS) to ON.
- Toggle Optimizations for windowed games to ON.
- Restart your PC.
2. Global 3D Settings for Maximum Competitive FPS
Open the NVIDIA Control Panel by right-clicking your desktop and selecting it. Under the left sidebar navigation tree, click Manage 3D Settings.
Configure your Global Settings tab using the competitive parameters detailed below:
[NVIDIA Control Panel] ──► [3D Settings] ──► [Manage 3D Settings] ──► [Global Settings]
Complete Parameter Configuration Matrix
| NVIDIA Control Panel Feature | Recommended Competitive Value | Performance & Latency Benefit |
| Image Scaling (NIS) | Off | Prevents unwanted spatial upscaling latency when playing at native resolution. |
| Ambient Occlusion | Off | Removes ambient contact shadows; saves high GPU execution cycles. |
| Anisotropic Filtering | Off (or Application-Controlled) | Drops texture filtering passes; yields slight FPS gains on mid-range GPUs. |
| Antialiasing – FXAA | Off | FXAA adds a blurry post-processing pass and introduces frame delays. |
| Antialiasing – Gamma Correction | On | Keeps color/brightness scaling correct with minimal hardware impact. |
| Antialiasing – Mode | Off (or Application-Controlled) | Prevents the driver from forcing edge-smoothing over game settings. |
| Antialiasing – Transparency | Off | Stops Alpha-to-Coverage supersampling on alpha textures (leaves/fences). |
| Background Application Max Frame Rate | On (20–30 FPS) | Throttles background tasks (e.g., Discord, OBS) to save resources for active games. |
| CUDA – GPUs | All | Ensures your primary discrete graphics card handles all compute pipelines. |
| DSR – Factors | Off | Disables Dynamic Super Resolution render upscaling, saving massive VRAM resources. |
| Low Latency Mode | Ultra (or On) | Cuts render queue length down to zero for minimal input latency. |
| Max Frame Rate | Off (or set per display) | Handled by frame caps; unlock here unless matching G-Sync tolerances. |
| Monitor Technology | G-SYNC Compatible / Fixed Refresh Rate | Sets your display panel refresh behavior. |
| Multi-Frame Sampled AA (MFAA) | Off | Cuts additional temporal filtering overhead. |
| OpenGL Rendering GPU | Select your dedicated GPU | Forces your dedicated NVIDIA graphics card for OpenGL workloads. |
| Power Management Mode | Prefer Maximum Performance | Keeps GPU core and memory clocks at peak states, eliminating frame drops. |
| Preferred Refresh Rate | Highest Available | Forces the driver to utilize your panel’s top physical Hz throughput. |
| Shader Cache Size | 10GB (or Unlimited) | Prevents driver shader recompilation stutters across dynamic titles. |
| Texture Filtering – Anisotropic Sample | On | Optimizes anisotropic sample requests to raise texture fill rates. |
| Texture Filtering – Negative LOD Bias | Allow | Works alongside texture filtering to maintain crisp motion textures. |
| Texture Filtering – Quality | High Performance | Cuts texture filtering depth for a measurable FPS uplift. |
| Texture Filtering – Trilinear Optimization | On | Uses bilinear filtering where trilinear is unneeded to boost frame rates. |
| Threaded Optimization | On | Forces parallel CPU multi-threading across modern multi-core processors. |
| Triple Buffering | Off | Disables OpenGL extra frame buffering to prevent input lag additions. |
| Vertical Sync (V-Sync) | Off (Global) / On (G-Sync Stack) | Global setting depends on your display sync infrastructure. |
| VRS (Variable Rate Shading) | Off | Stops dynamic shading rate swaps that can cause visual distraction in competitive play. |
3. Deep-Dive: Key Latency & Frame Rate Engine Settings
Low Latency Mode: On vs. Ultra vs. NVIDIA Reflex
- Off: The CPU queues 1 to 3 frames in render memory before submitting them to the GPU. This improves average FPS slightly on weak CPUs, but adds significant input lag.
- On: Limits the render queue to 1 frame.
- Ultra: Submits the frame just-in-time right before the GPU begins execution. This provides the absolute lowest driver-level rendering latency.
Crucial Note on NVIDIA Reflex: If your game natively supports NVIDIA Reflex Low Latency (e.g., Valorant, Apex Legends, CS2), Reflex overrides the driver-level Low Latency Mode automatically. Set Reflex to On + Boost inside the game’s display settings to keep your GPU clocked high during low-load scenes.
4. Display, Resolution & Refresh Rate Calibration
Correct hardware display settings ensure your monitor operates at its true maximum potential.
Step 1: Force Maximum Native Refresh Rate & Full Dynamic Range
- Open NVIDIA Control Panel > expand Display > click Change resolution.
- Select your main competitive monitor.
- Scroll down to the PC category (do NOT use the TV / Ultra HD / HD category, which often locks refresh rates to 60Hz or 120Hz). Select your native pixel resolution (e.g.,
1920x1080or2560x1440). - Drop down the Refresh rate menu and choose the highest supported frequency (e.g., 144Hz, 240Hz, 360Hz, or 540Hz).
- Scroll down to section 3. Apply the following settings:
- Tick Use NVIDIA color settings.
- Set Desktop color depth to Highest (32-bit).
- Set Output dynamic range to Full (0-255).
Change Resolution Settings:
├── Resolution: PC -> 2560x1440 (Native)
├── Refresh Rate: 240Hz (Highest Available)
└── Output Dynamic Range: Full
Step 2: Configure Desktop Size & Position (GPU vs. Display Scaling)
Scaling mode dictates how non-native resolutions (like stretched 4:3 in CS2) display on your screen.
- Go to Display > Adjust desktop size and position.
- Under Select a scaling mode:
- For non-stretched native gameplay: Select No scaling (lowest processing delay).
- For stretched resolution play: Select Full-screen.
- Under Perform scaling on:
- Select Display if your monitor scaler features low latency.
- Select GPU if playing stretched
4:3resolutions or using custom frame ratios.
- Check the box Override the scaling mode set by games and programs.
5. Desktop Color Adjustments for Visual Clarity
Elevated digital vibrance makes enemy character models pop out against dark or muted backgrounds, speeding up your visual target acquisition time.
- Navigate to Display > Adjust desktop color settings.
- Select your main gaming display.
- Locate Digital Vibrance.
- Default:
50% - Recommended Competitive Setup: Move the slider to between 60% and 75%.
- Default:
- Move Gamma to
1.05 - 1.10if you need extra visibility in dark, unlit corners without blowing out bright regions.
6. G-SYNC vs. Fixed Refresh Rate: Low Latency Setup
Using G-SYNC properly eliminates screen tearing without introducing the severe input lag associated with traditional V-Sync.
Option A: The Zero-Tear Low Latency Setup (G-Sync + V-Sync + Frame Cap)
For ultra-smooth visuals without screen tearing:
- Go to Display > Set up G-SYNC.
- Check Enable G-SYNC, G-SYNC Compatible.
- Select Enable for full screen mode (prevents window focus drops).
- Go to Manage 3D Settings:
- Set Vertical sync to On inside the NVIDIA driver panel (never inside the game).
- Set Max Frame Rate to 3 to 4 FPS below your monitor’s native refresh rate (e.g., set to
236 FPSon a 240Hz monitor, or340 FPSon a 360Hz monitor).
- Why this works: Keeping your frame rate just below the refresh rate cap keeps G-SYNC active constantly, preventing the system from shifting into native V-Sync latency mode while eliminating frame tearing completely.
Option B: Pure Unlocked Competitive Mode (No Sync)
Used by professional players aiming for maximum raw frame output:
- Set up G-SYNC: Uncheck Enable G-SYNC.
- Manage 3D Settings:
- Vertical sync: Off.
- Max Frame Rate: Off.
- Unlocks raw frame rates (e.g., 500+ FPS), minimizing frame time delays at the cost of screen tearing.
7. PhysX & High-Performance Hardware Routing
- Click Configure Surround, PhysX in the left sidebar navigation menu.
- Locate PhysX settings on the right side of the pane.
- Change Processor from Auto-select to your dedicated NVIDIA GeForce RTX GPU.
- This stops your system from accidentally assigning physics engine calculations to your CPU cores, preventing unexpected frame dips during explosions or complex destruction physics.
Frequently Asked Questions (FAQ)
1. Does setting Power Management to “Prefer Maximum Performance” burn out my GPU?
No. It simply prevents your GPU core and memory clocks from dropping down to low idle states during light rendering moments. Your card’s internal thermal and power limiters remain fully active to protect the hardware.
2. Should I set Low Latency Mode to “Ultra” or “On”?
Set it to Ultra for competitive titles. If a game supports NVIDIA Reflex, turn Reflex on in-game instead; it overrides driver Low Latency Mode and manages system frame queues directly at the engine level.
3. Why is Texture Filtering set to “High Performance” instead of “Quality”?
“High Performance” lowers texture filtering passes slightly, freeing up GPU memory bandwidth. In fast-paced competitive games, the slight loss in visual detail is unnoticeable, but the gain in frame rate stability is immediate.
4. Should I enable NIS (NVIDIA Image Scaling) for competitive FPS?
No. NIS renders games at a lower internal resolution and sharpens the image. While it raises FPS on low-end hardware, the spatial upscaling step introduces processing overhead and visual artifacts that hurt target clarity.
5. What is the best Shader Cache Size for competitive gaming?
Set your Shader Cache Size to 10GB or Unlimited. Standard default settings cache fewer compiled shaders, causing your driver to rebuild them constantly during gameplay—which results in sudden micro-stutters.
6. Does Digital Vibrance reduce GPU performance?
Not at all. Digital Vibrance is a hardware-level display color adjustment handled by the display pipeline with zero impact on rendering frame rates or latency.
7. Should I choose GPU or Display scaling?
In most cases, select Display scaling if your monitor has a fast internal processor. If you play stretched resolutions (like 4:3 stretched in CS2) and your monitor stretches the image unevenly, select GPU scaling and check Override the scaling mode set by games and programs.
8. Does disabling Anisotropic Filtering improve FPS?
Yes. Turning off Anisotropic Filtering saves texture processing cycles. While textures angled far away from your view will look slightly blurrier, your overall rendering speed and frame time consistency will improve.
9. Why should I lock my frame rate 3 FPS below my monitor refresh rate when using G-Sync?
If your frame rate reaches or exceeds your monitor’s native refresh rate (e.g., 240 FPS on a 240Hz screen), G-Sync disengages and traditional V-Sync engages, causing input lag. Capping your FPS 3 to 4 frames below your display limit keeps G-Sync active constantly without input delay penalty.
10. Do I need to redo these settings whenever I update my NVIDIA driver?
If you select Perform a clean installation during driver updates, all NVIDIA Control Panel settings will reset to default factory values. Save your custom profiles or re-apply this guide’s parameters after every clean driver update.
Final Tuning Checklist
To get your PC fully optimized for competitive play, run through this quick final checklist:
- [ ] Clean display driver installed via DDU.
- [ ] Windows HAGS turned ON.
- [ ] Power Management Mode set to Prefer Maximum Performance.
- [ ] Low Latency Mode set to Ultra (or NVIDIA Reflex On + Boost in-game).
- [ ] Shader Cache Size set to 10GB or higher.
- [ ] Monitor refresh rate set to the highest native Hz output under PC settings.
- [ ] Digital Vibrance adjusted for visual target tracking.
Properly tuning your NVIDIA Control Panel removes systemic hardware bottlenecks, stabilizes frame delivery times, and keeps your input lag down to absolute physical minimums. Adjust your control panel settings today and feel the immediate improvement in input response during your next game.
Leave a Reply