Category: Blog

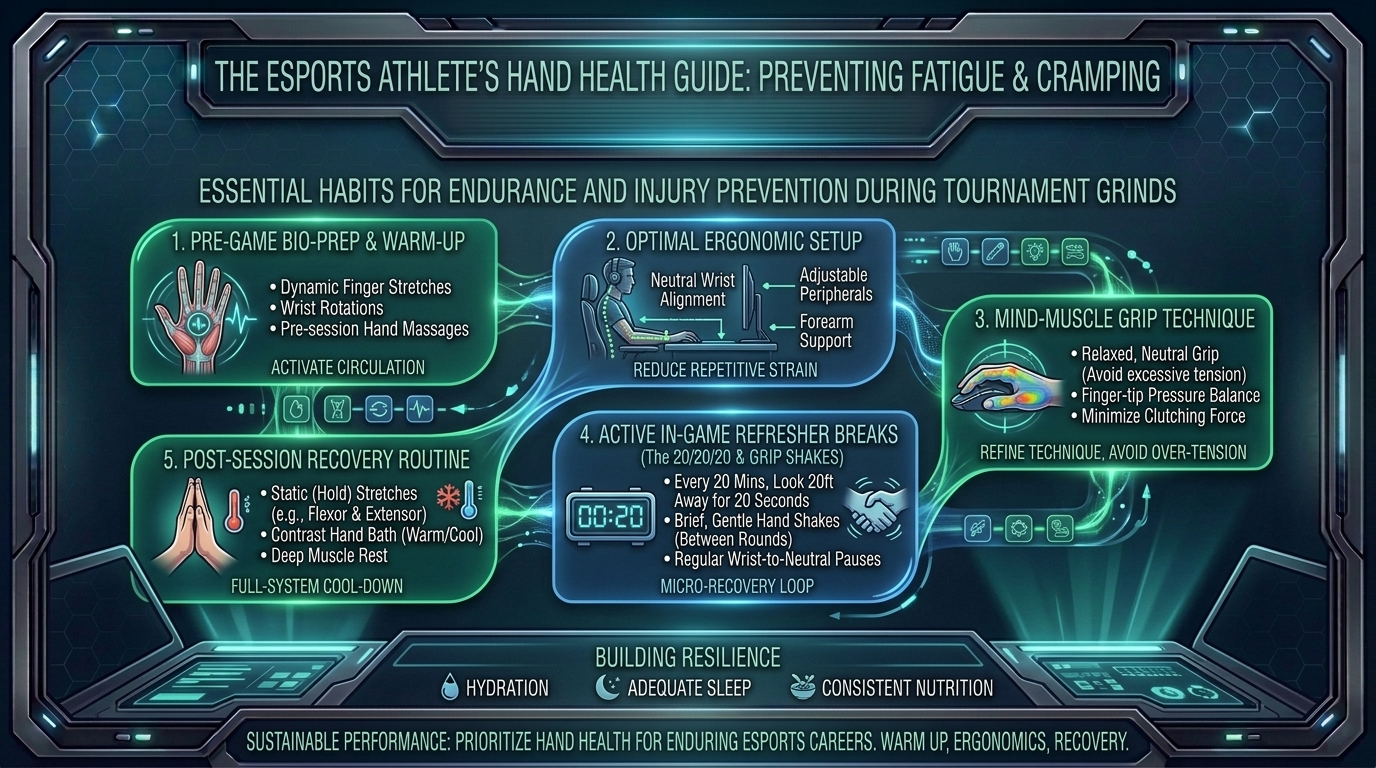
  • What are the best habits to prevent hand fatigue and cramping during multi hour esports tournament grind sessions

    What are the best habits to prevent hand fatigue and cramping during multi hour esports tournament grind sessions

    Whether you are pushing through an all-day VALORANT tournament bracket, grinding 12 hours of ranked Apex Legends, or competing in grueling Street Fighter 6 open pools, hand fatigue, finger cramping, and wrist stiffness are major obstacles for competitive esports athletes. Mechanical precision, reaction speed, and micro-tracking degrade rapidly when small intrinsic hand muscles fatigue or undergo repetitive strain.

    Beyond immediate performance drops, ignoring severe hand fatigue risks long-term mechanical injuries, such as Carpal Tunnel Syndrome (CTS), De Quervain’s Tenosynovitis, and wrist tendinitis.

    At The Gamer Buzz, we focus on competitive esports performance, physical training, peripheral optimization, and player health. This comprehensive guide breaks down the physiology of gaming-induced hand strain, ergonomic setup standards, active physical warm-up protocols, peripheral optimizations, and daily recovery habits designed to eliminate hand cramping during long tournament sessions.

    Whether competing in LAN arenas across Texas, streaming from gaming setups in California and San Francisco, leading collegiate gaming rosters in Washington, or grinding ranked ladders from New York, implementing proper hand-care protocols protects your physical health and prolongs your competitive edge.

    1. The Anatomy of Gaming Strain: Why Hand Fatigue and Cramping Occur

    Understanding the biomechanics of your hands and wrists helps you prevent pain before it limits your gameplay.

    Muscle Overuse, Static Tension, and Ischemia

    • Static Grip Tension: When holding a gaming mouse or controller continuously for hours, your hand muscles sustain static isometric contraction. This restricts blood flow (ischemia) to localized tissues, depleting oxygen and causing lactic acid accumulation that results in acute muscle cramping.
    • Repetitive Micro-Trauma: High-APM (Actions Per Minute) titles—such as StarCraft II, League of Legends, and fast-paced FPS games—require thousands of micro-clicks per hour. This repetitive flexor and extensor tendon friction can cause micro-inflammation in the wrist’s carpal tunnel.
    • Ulnar and Median Nerve Compression: Resting heavy forearm weight directly on sharp desk edges compresses the median and ulnar nerves, leading to tingling, numbness, and sudden finger weakness during high-stakes clutches.
    Strain FactorPhysiological ImpactSymptoms During GameplayPreventive Fix
    High Grip TensionReduced localized blood flow & muscle hypoxiaAcute palm cramping, stiff fingersLower grip pressure to 3–4/10 scale
    Sharp Desk CompressionMedian/Ulnar nerve compressionNumbness in pinky/ring finger or thumbPadded forearm sleeves or rounded desk edges
    Cold Ambient TempReduced joint fluid lubrication & stiffnessSlow reaction times, sluggish clicksHand warmers, heated sleeves, physical warm-ups
    Dehydration & Electrolyte LossInvoluntary muscle nerve misfiringSudden thumb and palm muscle spasmsElectrolyte intake (Sodium, Potassium, Magnesium)

    2. Dynamic Physical Warm-Ups & Physical Therapy Stretches

    Never start an intense tournament session cold. Performing a 5-minute dynamic warm-up increases synovial fluid lubrication in wrist joints and boosts blood flow to intrinsic hand muscles.

    1.Phase 1: Active Blood Flow Activation:Increases blood circulation and prepares tendons for load.

    Rub your hands together vigorously for 20 seconds, then open and close your fists rapidly 30 times. This elevates local skin temperature and pumps oxygenated blood into the forearm flexor and extensor muscles.

    2.Phase 2: Wrist Flexor & Extensor Dynamic Stretches:Stretches wrist flexors and reduces Carpal Tunnel pressure.

    Extend one arm straight out with your palm facing up. Use your opposite hand to gently pull your fingers downward toward the floor, holding for 15 seconds. Flip your hand (palm down) and gently pull your fingers back toward your body for 15 seconds. Repeat on both arms.

    3.Phase 3: Thumb & Tendon Glides:Mobilizes thumb thenar muscles used for side-buttons and controller sticks.

    Touch the tip of your thumb to the tip of each finger individually (Index, Middle, Ring, Pinky), making an “O” shape with maximum extension between each touch. Perform 10 cycles per hand to prevent thumb pad cramping.

    4.Phase 4: Nerve Flossing & Upper Body Relief:Relieves tension in upper neck and shoulder nerve pathways.

    Tilt your head slowly toward your left shoulder while extending your right arm outward with your palm flexed up, then reverse. This “flosses” the brachial plexus nerve pathway that travels from your neck down to your fingertips.

    3. Ergonomic Setup Standards & Peripheral Tuning

    Your desk setup and peripheral choices directly influence how much physical strain your hands endure during long tournament sessions.

    1. Desk and Armrest Height Optimization

    Set your desk and chair height so your elbows form a 90 to 100-degree angle, allowing your forearms to rest flat without lifting your shoulders or letting your wrists sag downward.

    2. Mouse Weight, Shape, and Grip Force

    • Lightweight Mice (Sub-60 Grams): Switching to an ultra-lightweight gaming mouse significantly reduces the inertia required to stop and start camera movements, decreasing strain on your wrist flexors.
    • Ergonomic Mouse Shells: Ensure your mouse shape matches your hand size and grip style (Palm, Claw, or Fingertip). Forcing a large hand onto a tiny mouse causes severe palm cramping over extended sessions.
    • Grip Tape Integration: Applying high-friction grip tape to your mouse shell prevents your fingers from slipping, allowing you to maintain full control using minimal grip pressure.

    4. In-Game Habit Adjustments During Grind Sessions

    Developing healthy habits during tournament matches preserves hand stamina over long gaming sessions:

    1. Enforce the “Micro-Pause” Protocol: During loading screens, agent selection, or round breaks, completely release your grip on your mouse or controller. Let your arms hang loosely by your sides for 10–15 seconds to restore blood flow.
    2. Monitor Your “Tension Scale”: Periodically check your grip force during gameplay. Aim for a tension rating of 3 or 4 out of 10. Tenser grips do not improve aim precision; they only accelerate physical fatigue.
    3. Use Hand Warmers at LAN Events: Cold tournament venues restrict blood flow to peripheral blood vessels. Keep air-activated or electric hand warmers near your desk to warm your hands between matches.
    4. Hydration & Electrolyte Management: Muscle cramps are often triggered by mild dehydration and electrolyte imbalances. Drink water mixed with essential electrolytes (magnesium, potassium, sodium) during long tournament sessions.

    10 Frequently Asked Questions (FAQ)

    1. Why do my hands cramp more during tournament matches than casual games?

    In high-stakes tournament matches, adrenaline elevates subconscious muscle tension. Players grip their mouse or controller tighter without realizing it, restricting blood flow and triggering rapid muscle cramping.

    2. Is it bad to crack my knuckles or wrists before gaming?

    Cracking your knuckles releases gas bubbles (cavitation) from joint synovial fluid and is generally harmless. However, avoid forcefully twisting your wrist joints, which can strain supporting ligaments.

    3. Should I use compression gloves while gaming?

    Compression gloves can improve local circulation and keep your hands warm. However, make sure they fit comfortably—gloves that are too tight can restrict joint mobility or increase nerve pressure.

    4. What is the difference between normal muscle fatigue and Carpal Tunnel Syndrome?

    Normal muscle fatigue subsides after rest and hydration. Carpal Tunnel Syndrome involves persistent numbness, tingling, or burning sensations in the thumb, index, and middle fingers that can linger long after gaming sessions end.

    5. How does mouse weight affect long-term hand fatigue?

    Lighter mice (under 60 grams) require less kinetic force to accelerate and decelerate. Lowering physical inertia reduces repetitive strain on the wrist and forearm muscles during high-APM gaming.

    6. What should I do if I experience sudden shooting pain in my wrist during a tournament match?

    Stop playing immediately during the next available pause or break. Apply ice to reduce acute inflammation, gently stretch the forearm, and avoid forcing movement through sharp pain.

    7. Does mouse pad friction influence hand strain?

    Yes. Mouse pads with high static friction force you to push harder to initiate movement, increasing hand strain. Hybrid or fast-cloth pads reduce initial sliding resistance, making micro-adjustments smoother and less taxing.

    8. How can controller players prevent thumb pad cramping?

    Controller players should use thumbstick extenders (such as KontrolFrees) to increase lever distance, reducing the physical thumb force needed to make micro-adjustments on the sticks.

    9. Can changing my in-game mouse sensitivity reduce arm and wrist strain?

    Switching from an ultra-low sensitivity to a moderate sensitivity balance reduces extreme forearm swiping, while moving away from an ultra-high sensitivity prevents excessive wrist micro-strain.

    10. When should I see a medical professional for gaming-related hand pain?

    If you experience persistent pain, burning, loss of grip strength, or numbness that lasts more than 24 hours after a gaming session, consult a physical therapist or medical specialist immediately.

    Conclusion

    Preventing hand fatigue and cramping during multi-hour esports tournament grind sessions comes down to maintaining healthy physical habits. By understanding gaming biomechanics, warming up with dynamic wrist stretches, optimizing your desk ergonomics, reducing peripheral grip tension, and keeping your hands warm and hydrated, you can protect your physical health and play at your peak for hours on end.

    For more competitive gaming health tips, hardware optimizations, and mechanical performance guides across Texas, California, San Francisco, Washington, and New York, stay tuned to The Gamer Buzz.
  • How to study professional esports player tournament VODs to steal advanced positioning and utility tactics

    How to study professional esports player tournament VODs to steal advanced positioning and utility tactics

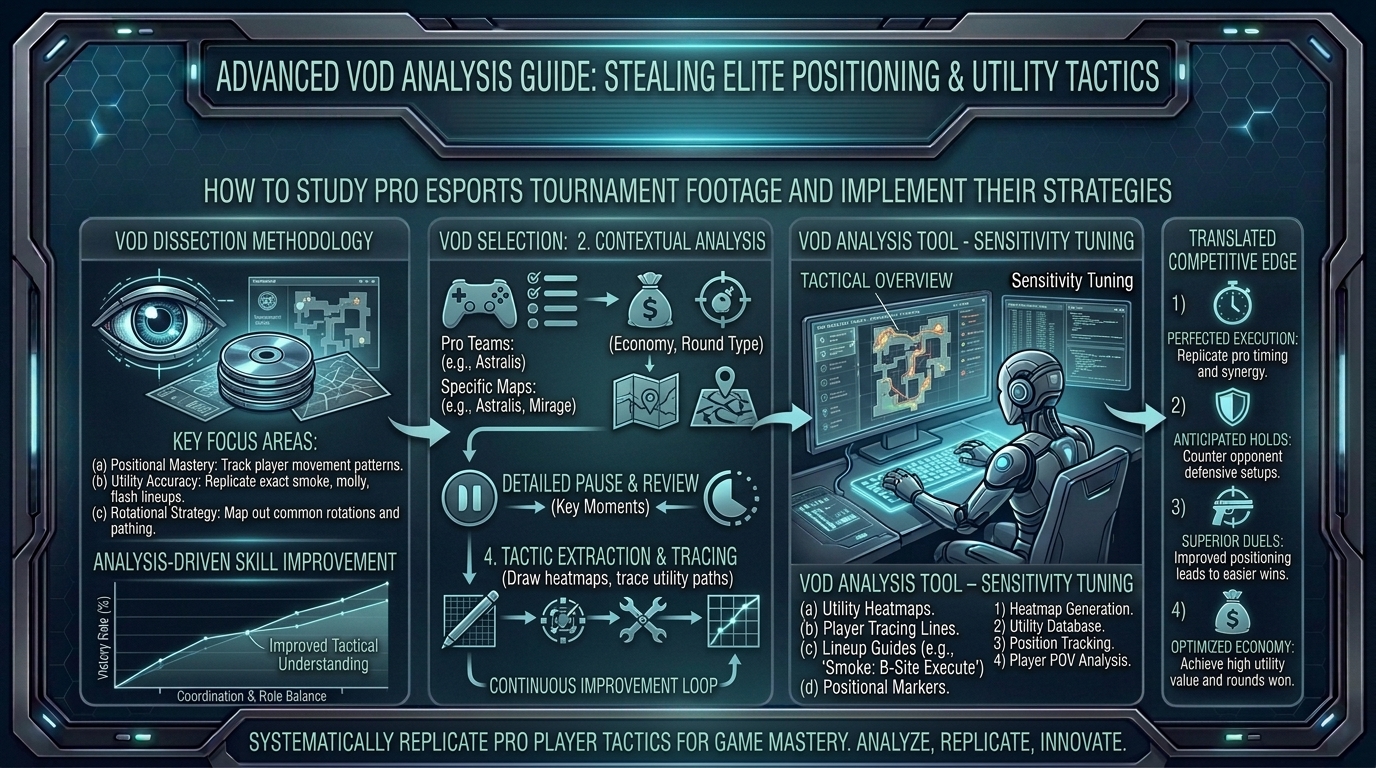
    How to Study Professional Esports Player Tournament VODs to Steal Advanced Positioning and Utility Tactics

    In high-tier competitive esports—whether holding tight sightlines in VALORANT, coordinating smoke executes in Counter-Strike 2, timing cooldown rotations in Overwatch 2, or anchoring end-game zones in Apex Legends—mechanical micro-aim is only half the battle. At the highest ranks, the real differentiator between an average player and an elite competitor is spatial awareness, micro-positioning, and utility efficiency.

    Most players watch tournament VODs (Video on Demand) like passive fans—cheering for flashy multi-kills and highlight-reel flicks. Professional players and analysts, however, watch VODs like forensic investigators. They decompose every frame to reverse-engineer why a pro stood in a specific pixel corner, held utility for an extra four seconds, or took a dynamic off-angle right before an engagement.

    At The Gamer Buzz, we break down competitive gaming mechanics, tactical analytics, and esports performance strategies. This comprehensive operational guide details how to study professional tournament VODs, extract high-level positioning and utility tactics, and implement them directly into your own ranked gameplay.

    Whether you are competing in local LAN tournaments across Texas, streaming ranked sessions in California and San Francisco, leading a collegiate esports squad in Washington, or grinding ranked leaderboards from New York, adopting a structured VOD review process will accelerate your competitive progression.

    1. Passive Viewing vs. Active VOD Analysis

    To extract actionable tactics from professional play, you must fundamentally change how you consume tournament footage.

    The Analysis Mindset Shift

    • Passive Entertainment Viewing: Watching the main broadcast feed, focusing on the killfeed, tracking the overall score, following the observer camera, and reacting to hype plays.
    • Active VOD Breakdown: Watching individual player perspective (POV) replays, analyzing minimap positioning relative to teammates, recording utility timings, calculating resource usage, and asking “Why did they do that?” at every turn.
    Analytical MetricMain Broadcast FeedPro POV / Observer VODOperational Focus
    Primary Visual TargetThe crosshair & kill notificationMinimap & crosshair placementMap Awareness: Player position relative to team structure
    Tactical ContextHighlighting multi-killsSetup pre-utility & movement pathsPreparation: The 15 seconds before the first shot is fired
    Outcome FocusWho won the engagement?Why was the engagement favorable?Execution: Angle management, trades, and cover utilization
    Key TakeawayVisual entertainmentRepeatable tactical systemNotebook Extraction: Actionable lineups and angle setups

    2. Setting Up Your VOD Study Workspace

    Before analyzing gameplay, build a setup that enables precise frame-by-frame scrubbing and structured note-taking.

    Hardware & Software Setup

    1. Dual-Monitor Workspace: Run the VOD playback on your primary display and maintain a structured note-taking system (such as Notion, Obsidian, or Google Docs) on your secondary screen.
    2. In-Engine Demo Viewers: Whenever available (e.g., CS2 demo files, Overwatch 2 replay viewer, or Rocket League replays), download the 3D demo files directly into your game client. In-engine viewers allow you to pause, fly around the map, inspect enemy sightlines, and rewatch plays from any perspective.
    3. Frame-Scrubbing Video Players: For pre-recorded VODs (YouTube, Twitch, VOD archives), use keyboard shortcuts (J, K, L on YouTube, or , and . for frame-by-frame stepping) to dissect micro-peeks and utility releases down to the exact millisecond.

    3. Step-by-Step Guide to Stealing Pro Positioning and Utility

    Extracting tactics from a pro VOD requires a systematic four-phase review process.

    1.Phase 1: Freeze-Frame Micro-Positioning & Angle Analysis:Analyze spatial placement before utility or shooting starts.

    Pause the VOD the exact instant a professional player takes up a defensive position or approaches a choke point.

    • Inspect Line-of-Sight: Observe how much of their character model is exposed to enemy vision.
    • Analyze Cover Hygiene: Check if they are standing flush against solid cover, using elevation changes, or holding a “one-way” vision angle.
    • Identify Off-Angles: Note positions that deviate from standard crosshair placement, forcing enemies to adjust their aim vertically or horizontally.

    2.Phase 2: Minimap Tracking & Team Spacing:Track how map information dictates player movement.

    Rewind the clip and shift your eyes from the center screen directly to the minimap.

    • Evaluate Crossfire Spacing: Measure the physical distance between the player and their nearest teammate. Are they within trade-kill range (1.5 to 3 seconds away)?
    • Identify Rotation Triggers: Pinpoint what piece of information (sound cue, enemy scan, utility ping) triggered the player to rotate or abandon a site.

    3.Phase 3: Utility Efficiency & Lineup Extraction:Deconstruct utility lineups, timing, and combo sequences.

    Analyze every utility cast (flashes, smokes, molotovs, recon darts, abilities) to understand its precise purpose.

    • Record Lineup Geometry: Pause at the moment of activation. Note the crosshair anchor point (e.g., “aligned with the top corner of the building antenna”).
    • Identify Purpose: Was the utility meant to inflict damage, flush an anchor out of position, block line-of-sight, or delay a fast retake?

    4.Phase 4: Custom Lobby Recreation & Ranked Drill Application:Test and adapt stolen tactics in custom lobbies.

    Load into a custom match on the same map immediately after your VOD session. Recreate the pro’s crosshair placement, practice the utility throw five times in a row, and drill the exact movement pathing until it becomes second nature.

    4. How to Spot and Copy Advanced In-Game Habits

    Beyond static lineups, look for subtle micro-habits that elevate a pro player’s tactical execution:

    1. Crosshair Placement Height Adjustments: Watch how top players adjust crosshair placement based on terrain elevation (stairs, ramps, boxes) rather than keeping it statically level.
    2. Bait-and-Switch Timing: Pay attention to how aggressive entry fraggers draw enemy attention while a supporting teammate holds a hidden angle to capitalize on the distraction.
    3. Utility Conservation: Take note of how often pros hold their abilities during early-round skirmishes, preserving high-impact utility for high-stakes late-round executes or retakes.
    4. Movement-Reset Mechanics: Watch how pros use counter-strafing, crouching, or shoulder-peeking to gather visual information without exposing their hitbox to return fire.

    10 Frequently Asked Questions (FAQ)

    1. Where can I find raw pro player VODs without spectator overlays?

    Look for official pro POV streams on Twitch, dedicated VOD archives on YouTube (such as Pro Tracker channels), or download in-game demo files directly from game clients (CS2, Overwatch 2, Rocket League) to view any player’s perspective.

    2. How many VODs should I watch per week?

    Focus on quality over quantity. Analyzing two to three round breakdowns or matches deeply per week—taking structured notes and practicing in custom lobbies—is far more effective than passively skimming twenty matches.

    3. Should I study VODs of my main character/agent or full team strategies?

    If playing solo queue, focus primarily on individual POV VODs for your specific main agent, hero, or role. If playing on a structured competitive team, study full broadcast VODs and minimap recordings to copy team executes and site setups.

    4. What is an “off-angle,” and why is it featured in pro VODs?

    An off-angle is a defensive standing or crouching position that isn’t typically pre-aimed by enemies rounding a corner. Pros use off-angles to catch opponents off-guard, securing easy opening kills before resetting to safety.

    5. Why do pros throw utility into empty areas where no enemies are visible?

    Pros often throw “pre-utility” to deny map control, clear dangerous corners proactively, or prevent aggressive early pushes based on timing windows and spawn advantages.

    6. How do I adapt a pro team’s complex utility setup for ranked solo queue?

    Extract individual utility pieces rather than complex 5-man sequences. Master a single powerful one-way smoke, pop-flash, or recon lineup that gives you an immediate individual advantage without needing team coordination.

    7. What should I look for when analyzing a losing round in a pro VOD?

    Losing rounds reveal counter-tactics. Analyze how the opposing team Baited out the pro’s utility, exploited a gap in map coverage, or won the round through superior trade-spacing.

    8. How does low latency affect pro positioning compared to my home setup?

    At LAN tournaments, ultra-low ping allows pros to hold tighter angles. Online in ranked lobbies, account for “peekers advantage” (network latency) by holding wider angles or actively shoulder-peeking rather than standing completely static.

    9. What is the best way to organize notes taken during a VOD review?

    Categorize notes by Map > Role/Agent > Phase (Early-Round Setup, Mid-Round Execute, Post-Plant). Include timestamp links or screenshots of crosshair lineups for quick reference before matches.

    10. Can lower-ranked players benefit from studying pro VODs, or is it too advanced?

    Players of all skill levels benefit immediately from copying pro crosshair placement, utility lineups, and basic cover management. However, lower-ranked players should avoid copying ultra-specific, high-risk bait plays that require sub-50ms reaction times or perfect team coordination.

    Conclusion

    Studying professional esports VODs is one of the fastest ways to elevate your tactical game sense, positioning, and utility execution. By shifting from passive entertainment viewing to active, frame-by-frame analysis, tracking team spacing on the minimap, recording utility lineups, and recreating pro setups in custom lobbies, you turn high-level tournament footage into a personal competitive advantage.

  • What are the best team composition strategies for balancing aggressive entry fraggers and passive support roles

    What are the best team composition strategies for balancing aggressive entry fraggers and passive support roles

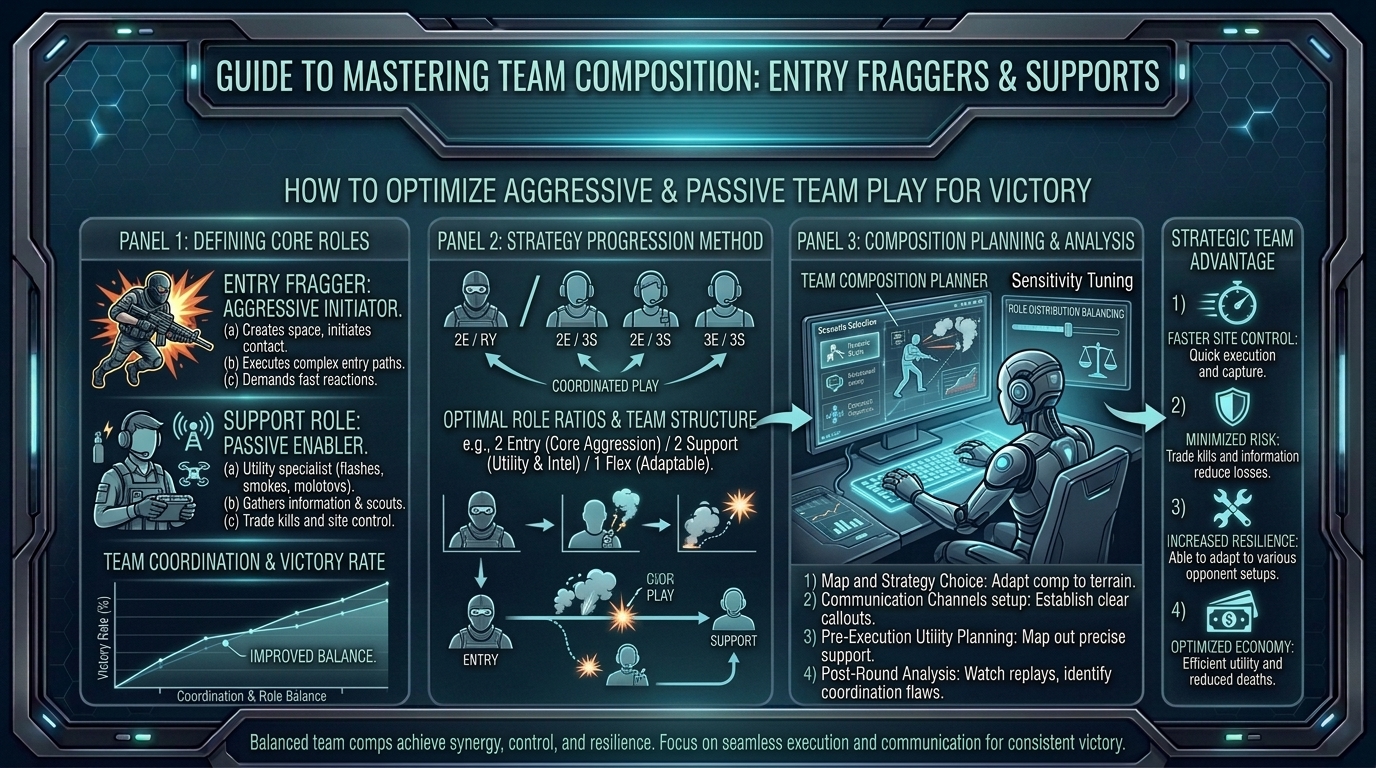
    What Are the Best Team Composition Strategies for Balancing Aggressive Entry Fraggers and Passive Support Roles?

    In high-tier competitive esports—whether coordinating tactical executes in VALORANT, pushing bomb sites in Counter-Strike 2, orchestrating team fights in Apex Legends, or managing lane pressure in Overwatch 2—team synergy dictates match outcomes. A roster stacked exclusively with hyper-aggressive entry fraggers results in reckless over-extensions, untraded deaths, and wasted utility. Conversely, a team composed entirely of passive support players lacks spatial initiative, ceding map control and allowing enemies to dictate the pace of play.

    Achieving victory at high ranks requires a balanced team composition strategy: pairing high-risk, high-mobility entry fraggers with disciplined, resource-enabling passive support roles.

    When aggressive vanguard players and calculated anchor supports operate in synchronization, your team opens map bottlenecks, secures trades instantly, and controls rounds with relentless efficiency.

    At The Gamer Buzz, we analyze competitive meta frameworks, tactical setups, and roster dynamics. This comprehensive guide breaks down the tactical mechanics of entry-support pairings, meta team compositions across major FPS and hero shooters, step-by-step role execution, and strategic tips to build balanced, winning team rosters.

    Whether organizing local esports rosters in Texas, competing in LAN arenas across California and San Francisco, leading collegiate gaming squads in Washington, or climbing ranked leaderboards from New York, balancing your team structure gives you an immediate tactical edge.

    1. The Dynamic Between Entry Fraggers and Passive Supports

    Understanding the core functions and psychological synergy between aggressive and passive roles forms the foundation of modern esports strategy.

    Role Definitions & Ecosystem

    • The Aggressive Entry Fragger (The Vanguard): Responsible for creating spatial pressure, breaching sightlines, gathering initial physical info, and securing the opening pick (first blood). They operate on high sensitivity, favor high-mobility characters or duelist archetypes, and rely on raw mechanical speed and entry pathing.
    • The Passive Support Role (The Anchor / Enabler): Responsible for utility setups, trade-fragging, map control maintenance, and mid-to-late round shot-calling. They operate with high spatial awareness, utilize utility to flush out defensive positions, and ensure the entry fragger is never lost without a reciprocal kill trade.
    Strategic MetricAggressive Entry FraggerPassive Support RoleSynergy & Composition Target
    Primary ObjectiveCreate space & secure opening killEnable entry & secure immediate trade kill1:1 Trade Ratio Minimum: Entry death must equal space or trade
    Utility FocusSelf-pop flashes, mobility dashes, entry smokesLong-range line-of-sight flashes, recon, smokes, healsUtility Stacking: Support utility clears corners before entry peeks
    PositioningTip of the spear (First across the threshold)Second-line contact / Rear-guard anchorTight Spacing: 1.5 to 3 seconds behind entry path
    Playstyle MindsetRisk-tolerant, high-speed, proactiveRisk-averse, patient, reactive/calculatingBalanced Tempo: Controlled aggression backed by defensive utility

    2. Strategic Team Compositions Across Top Competitive Titles

    Different titles enforce role synergy through character abilities and tactical design. Here is how to structure balanced entry-support compositions across major competitive titles:

    1. Tactical Shooters (VALORANT & CS2)

    • The Duo Execution Core: Pair a hyper-aggressive entry (e.g., Jett, Raze, or Entry Rifle) with a high-utility initiator or controller (e.g., Fade, Sova, Omen, or Support Flash/Smoke Rifle).
    • Composition Breakdown:
      • Primary Entry: Jett / Raze (Dashes/satchels onto site to disrupt crosshairs).
      • Second Entry / Trade: Reyna / Kay/O (Follows entry pathing, clears secondary angles).
      • Recon Support: Sova / Fade (Reveals back-site positions prior to entry jump).
      • Smoke Anchor: Omen / Astra / Viper (Blocks defender sightlines and anchors post-plant).
      • Sentinel / Site Anchor: Cypher / Killjoy (Holds flank routes during site pushes).

    2. Hero Shooters & Battle Royales (Apex Legends & Overwatch 2)

    • Apex Legends (Entry/Anchor Synergy):
      • Aggressive Fragger: Horizon / Wraith / Pathfinder (Creates immediate height/angle pressure).
      • Recon/Info Support: Seer / Crypto / Bloodhound (Scans positions to prevent entry traps).
      • Defensive Anchor: Gibraltar / Newcastle / Wattson (Provides reset domes, shields, and safe revive space).
    • Overwatch 2 (Dive & Brawl Balance):
      • Tank Vanguard: Winston / Doomfist (Dives backline, creating massive distraction).
      • Aggressive DPS: Tracer / Genji (Follows tank jump to finish low-HP targets).
      • Utility/Ranged DPS: Sojourn / Mei (Provides long-range pressure or area denial).
      • Main Support: Ana / Baptiste (Heals from safe distance, provides sleep/immortality utility).
      • Flex Support: Kiriko / Lucio (Provides swift engagement/disengagement mobility).

    3. Step-by-Step Guide to Executing Entry-Support Site Pushes

    A balanced team composition is useless without synchronized execution. Follow this operational framework during site pushes and team fights.

    1.Phase 1: Support Information Gathering & Pre-Utility:Prevents entry fraggers from peeking blind.

    Before the entry fragger crosses the choke point, the support player deploys recon utility (drones, darts, or flashes) and line-of-sight smokes to force defenders out of power angles.

    2.Phase 2: Aggressive Entry Breach:Disrupts enemy crosshair placement and opens physical space.

    The entry fragger uses mobility abilities or explosive movement to pop across the entry angle, drawing enemy crosshairs away from the main choke point toward site corners.

    3.Phase 3: Support Trade Pathing and Crossfire Setup:Ensures 100% trade-frag efficiency if the entry falls.

    The passive support player enters the space 2 steps behind the entry, matching the entry’s crosshair angle. If the entry fragger dies, the support immediately eliminates the exposed defender, securing a 1-for-1 trade.

    4.Phase 4: Site Lockdown & Flank Anchoring:Locks down access points and prevents retakes.

    Once space is secured, the support transitions to defensive mode, deploying flank traps or holding long angles, allowing the entry fragger to reload, heal, or take forward space.

    4. Tips for Balancing Aggressive & Passive Playstyles

    1. Enforce the “3-Second Rule” for Trade Fragging: A support player should never be more than 3 seconds away from assisting an entry fragger. If an entry fragger engages and dies alone, it is either an entry over-extension or a support positioning failure.
    2. Establish Clear In-Game Leader (IGL) Hierarchy: Passive support players often make the best IGLs because their position at the back of the push provides a broader view of the entire mini-map and enemy utility usage.
    3. Rotate Micro-Roles Based on Ultimate Economy: If your passive support player has a game-changing ultimate ready (e.g., Kay/O NULL-cmd or Lucio Sound Barrier), let them lead the tempo while entry fraggers play off their engagement window.
    4. Practice Utility Flash Synchronization: Entry fraggers must learn to peek with support flashes, not after them. Practice flash timings in custom lobbies until popping around corners right as support flash utility detonates becomes second nature.

    10 Frequently Asked Questions (FAQ)

    1. Can a team succeed with two hyper-aggressive entry fraggers?

    Yes! A “Double Duelist” or “Double Entry” composition works exceptionally well on wide maps, provided the remaining three roster spots are filled by dedicated recon, smoke, and anchor support roles.

    2. What makes a good passive support player in competitive games?

    A great support player possesses high spatial awareness, flawless utility lineups, disciplined communication, patience under pressure, and precise trade-frag timing.

    3. What is “Trade Fragging” and why is it critical for entry roles?

    Trade fragging occurs when a support player immediately kills the enemy who just eliminated their entry fragger. This ensures the team does not lose player advantage, trading 1-for-1 while gaining site control.

    4. How do you stop an entry fragger from constantly dying early without impact?

    Reinforce pre-entry utility protocols. Ensure support players flash or scan for the entry fragger before they peek, and instruct the entry to wait for support utility calls rather than solo-pushing.

    5. Should the In-Game Leader (IGL) play an entry or support role?

    Generally, the support or controller role makes the best IGL. Support players are less mechanically distracted by rapid entry peeks, allowing them to track enemy ultimate economies, call rotations, and manage round strategy.

    6. What should a passive support player do if the entry fragger refuses to push?

    The support player should use proactive utility—such as a flash, scan, or speed boost—to signal the engagement window, calling out specific target areas to give the entry fragger confidence to move.

    7. How does team composition balance change between attacking and defending sides?

    On attack, compositions rely on entry fraggers to open space. On defense, roles invert: passive support anchors hold site choke points while aggressive entry players act as “re-takers” or proactive info-gatherers (roamers).

    8. What are the best agents/heroes for players transitioning from entry to support?

    In VALORANT, try KAY/O or Skye (aggressive initiators). In Apex Legends, try Bloodhound or Valkyrie. In Overwatch 2, try Kiriko or Illari—characters that combine strong damage potential with team utility.

    9. How do you prevent passive support players from baiting their teammates?

    Define clear role expectations: “Baiting” occurs when a support player stays safe without trading their teammate. Enforce strict spacing rules so support players cross sightlines right behind the entry fragger.

    10. Is mechanical aiming skill less important for passive support roles?

    No. Support players often face high-pressure clutching situations (1v2, 1v3 post-plants) where top-tier aim, recoil control, and crosshair placement are required to win the round.

    Conclusion

    Mastering team composition strategies requires balancing raw aggressive entry power with disciplined, tactical support enabling. By establishing clear entry-support duos, maintaining tight trade-frag spacing, syncing utility deployment, and matching role compositions across games like VALORANT, CS2, Apex Legends, and Overwatch 2, your team creates an adaptable, winning roster structure capable of dominating any competitive lobby.

    For more esports team strategies, roster breakdowns, and competitive gaming guides across Texas, California, San Francisco, Washington, and New York, stay tuned to The Gamer Buzz.
  • How to practice tracking moving targets across different distances using specialized aim training software programs

    How to practice tracking moving targets across different distances using specialized aim training software programs

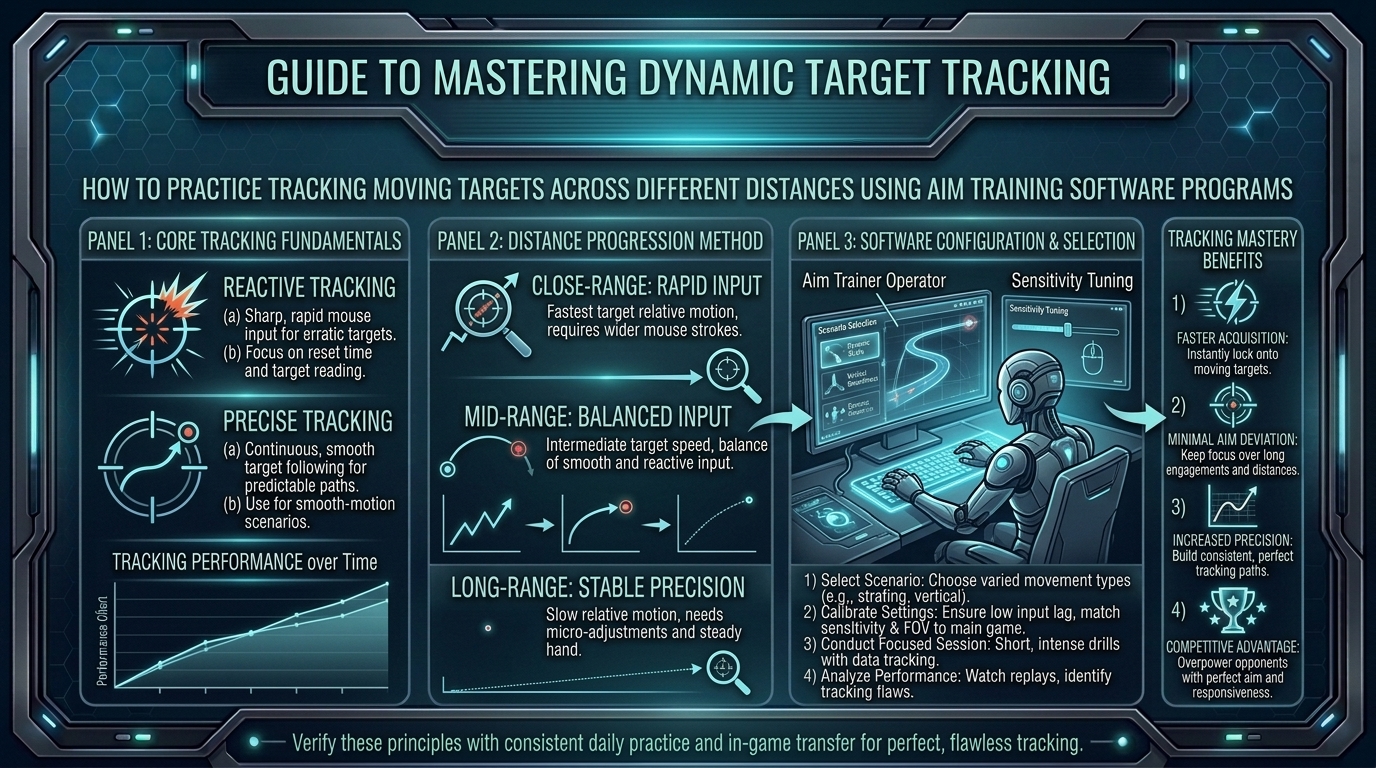
    How to Practice Tracking Moving Targets Across Different Distances Using Specialized Aim Training Software Programs

    Whether you are tracking a strafing opponent in Apex Legends, smooth-tracking headshots in VALORANT, matching movement speeds in Call of Duty: Warzone, or tracking high-speed targets in Overwatch 2, smooth target tracking is the foundation of mechanical aim dominance. Unlike click-timing (flicking), which requires a single precise tap, tracking demands continuous micro-adjustments, visual reaction processing, and muscular control across varying target speeds, accelerations, and angular distances.

    Many competitive players struggle with tracking because they train incorrectly. They either rely solely on in-game deathmatches—where target encounters are unpredictable—or use aim trainer scenarios that don’t match real-world combat physics.

    At The Gamer Buzz, we analyze esports mechanical training, peripheral optimization, and physical aiming techniques. This comprehensive guide breaks down how to use specialized aim training software like KovaaK’s and Aimlabs to isolate target tracking across short, medium, and long distances.

    Whether competing in regional esports circuits across Texas, grinding competitive queues in California and San Francisco, practicing in Washington, or climbing ranked ladders from New York, structured aim training accelerates your mechanical progression.

    1. The Biomechanics and Physics of Target Tracking

    Understanding how your eyes, brain, and arm muscles process motion helps you train more effectively.

    Smooth Pursuit vs. Reactive Micro-Flicks

    • Smooth Pursuit Eye Movements (SPEM): The human visual system naturally tracks moving objects smoothly only when your eyes can predict the target’s trajectory. When a target changes direction unpredictably, your vision momentarily loses track, causing your aim to lag behind.
    • Reactive Micro-Flicks: When a target changes direction or distance, you must make a micro-correction to snap back onto the center mass before resuming smooth tracking. Superior aim comes from minimizing the time delay between target direction changes and your arm’s micro-correction.
    • Target Size and Angular Velocity: As a target moves further away, its angular velocity decreases, requiring slower, ultra-precise wrist or finger movements. As a target gets closer, its angular velocity increases rapidly, requiring wide, high-speed forearm swipes.
    Distance CategoryPrimary Muscle Groups UsedMouse Movement TypeKey Aim Trainer Scenario Types
    Short Distance (Close-Range)Full Forearm, Elbow, & ShoulderWide, fast horizontal & vertical swipesClose Fast Strafe, Smoothness Trainers, Reactive Tracking
    Medium Distance (Mid-Range)Wrist & Forearm Micro-AdjustmentsSmooth continuous tracking with light pressureThin Gauntlet, Centering, Plaza Ground Tracking
    Long Distance (Long-Range)Fingertips & Fine Wrist JointsUltra-slow, micro-meter tracking adjustmentsPrecise Long Strafe, Air Smoothness, Tiny Targets

    2. Setting Up Aimlabs and KovaaK’s for Accurate In-Game Transfer

    Before launching training scenarios, match your aim trainer settings to your main competitive game to build accurate muscle memory.

    Crucial Sensitivity and Display Syncing

    • Sensitivity Match: Use exact sensitivity match profiles in KovaaK’s or Aimlabs (e.g., select the VALORANT, Apex Legends, or Overwatch preset). Do not change your DPI or in-game multiplier when switching between aim software and your main game.
    • Field of View (FOV) Sync: Match your in-game FOV type (e.g., Clamped Horizontal 103 for Overwatch/VALORANT or VFOV for Apex Legends). Incorrect FOV alters perceived target speed and ruins your spatial perception.
    • Disable Mouse Acceleration: Ensure Windows “Enhance Pointer Precision” is turned Off and Raw Input is Enabled in both your OS and aim software settings.

    3. Distance-Specific Tracking Routines and Scenarios

    To build complete mechanical tracking ability, isolate your practice across three core distance zones.

    1.Close-Range Tracking (High Angular Velocity):Develops rapid forearm swiping and high-speed reactivity.

    Train close-quarters strafing where targets move quickly across your FOV.

    • Recommended Scenarios: Close Fast Strafe (KovaaK’s), Circle Strafe, Close Reactive (Aimlabs).
    • Technique Focus: Keep your arm light on the mousepad. Avoid gripping the mouse too tightly, which creates friction and causes jittery tracking during fast directional changes.

    2.Mid-Range Tracking (Moderate Angular Velocity):Builds smooth tracking control and centering.

    Focus on targets maintaining moderate speed at mid-distance, requiring balanced wrist and forearm coordination.

    • Recommended Scenarios: Centering II (KovaaK’s), Smoothness Trainer, SphereTrack (Aimlabs).
    • Technique Focus: Maintain a steady crosshair glide directly over the center of the target model. Practice matching your hand speed to the target’s visual speed without overshooting.

    3.Long-Range Tracking (Low Angular Velocity, Tiny Targets):Develops precise fingertip micro-adjustments.

    Train against small targets moving slowly at long distance, isolating fine wrist and fingertip joint movement.

    • Recommended Scenarios: Thin Gauntlet (KovaaK’s), Long Strafe, MicroTrack (Aimlabs).
    • Technique Focus: Relax your hand and use subtle fingertip pressure adjustments to make micro-corrections without jerking the crosshair off-target.

    4.Vertical & Multi-Directional Bounce Tracking:Combines dynamic movement with verticality.

    Integrate verticality and jump arcs to prepare for multi-tier combat environments.

    • Recommended Scenarios: Bounce 360, Popcorn Tracking, Vertical Smoothness.
    • Technique Focus: Track targets through natural gravity arcs (parabolic curves) without snapping prematurely to where you think the target will land.

    4. How to Fix Common Tracking Mistakes: Tension & Prediction

    Most players hit a plateau in tracking performance due to two habits: over-tension and predictive aim.

    1. Eliminating Hand and Arm Tension

    Tensing your hand muscles creates instantaneous micro-stutters during camera motion. When your muscles are tense, your hand makes jerky, step-like movements rather than a smooth glide. Practice conscious relaxation: keep your grip light (about a 3 or 4 out of 10 in pressure) so your wrist and forearm glide smoothly across the mousepad.

    2. Reactive Aim vs. Predictive Guessing

    Predictive aiming happens when you guess where an enemy will strafe next and snap ahead of them. If the enemy changes direction, your crosshair flies into empty space. Train reactively: train your eyes to read the target’s torso movement, wait for the actual visual change in direction, and smooth-correct back onto target.

    10 Frequently Asked Questions (FAQ)

    1. Which aim trainer is better for tracking: KovaaK’s or Aimlabs?

    Both programs are excellent. KovaaK’s is famous for its massive community scenario library and advanced smoothness routines, while Aimlabs offers automated analytics, weakness identification, and official game-mode training suites.

    2. How long should I practice tracking in an aim trainer every day?

    A dedicated routine of 20 to 30 minutes per day before your main gaming session is optimal. Avoid over-training past 60 minutes, as mental and muscular fatigue leads to poor aiming habits.

    3. Should I use high sensitivity or low sensitivity for target tracking?

    Moderate to low sensitivities (e.g., 25 cm to 45 cm per 360°) provide the best balance between smooth tracking control and close-range swiping ability. Slightly higher sensitivity makes fine micro-tracking easier, while lower sensitivity improves raw smoothness.

    4. What is “Smoothness Training,” and why is it important?

    Smoothness training uses scenarios with thin, un-predictable targets moving at constant speeds. It forces you to eliminate micro-stutters, hand jitters, and over-flicking, resulting in a buttery-smooth crosshair glide.

    5. Why does my aim jitter when I try to track moving targets?

    Jittery tracking is usually caused by excessive hand tension, pressing down too hard on your mousepad, or using a mousepad/mouse-skate combination with high static friction. Relax your grip and focus on fluid motion.

    6. Should I focus on target headshots or center mass when practicing tracking?

    In general tracking scenarios, focus on staying dead-center on the target model. Once your smooth tracking baseline is established, move to precision scenarios featuring smaller head-sized targets.

    7. How does mousepad choice affect tracking performance?

    Smooth, hybrid, or glass mousepads with low static friction allow for effortless micro-adjustments, making them popular for tracking-heavy games like Apex Legends and Overwatch.

    8. Will aim training in software actually transfer to my main competitive game?

    Yes! Aim trainers isolate raw motor control, eye-hand coordination, and smoothness. Once these mechanical fundamentals become second nature, you can focus entirely on game sense, positioning, and utility usage in-game.

    9. How do I track targets that spam A-D strafes rapidly?

    Do not try to flick back and forth with every fast strafe. Instead, lower your hand tension, keep your crosshair centered along the enemy’s core movement axis, and make short, controlled micro-adjustments.

    10. Can high-refresh-rate monitors improve my tracking ability?

    Absolutely. Upgrading from 60Hz to 144Hz, 240Hz, or 360Hz significantly reduces motion blur and display latency, allowing your eyes to process visual target movement faster and smoother.

    Conclusion

    Mastering target tracking across short, medium, and long distances is a transformational mechanical skill for competitive gamers. By matching your in-game sensitivity and FOV settings inside specialized software like KovaaK’s or Aimlabs, breaking down practice into distance-specific routines, eliminating grip tension, and training reactively rather than predictively, you will see immediate improvements in your tracking accuracy and crosshair stability.

    For more esports mechanical guides, peripheral optimizations, and performance breakdowns across Texas, California, San Francisco, Washington, and New York, stay tuned to The Gamer Buzz.
  • What are the best ways to record and clip your best competitive esports highlight plays without performance drops

    What are the best ways to record and clip your best competitive esports highlight plays without performance drops

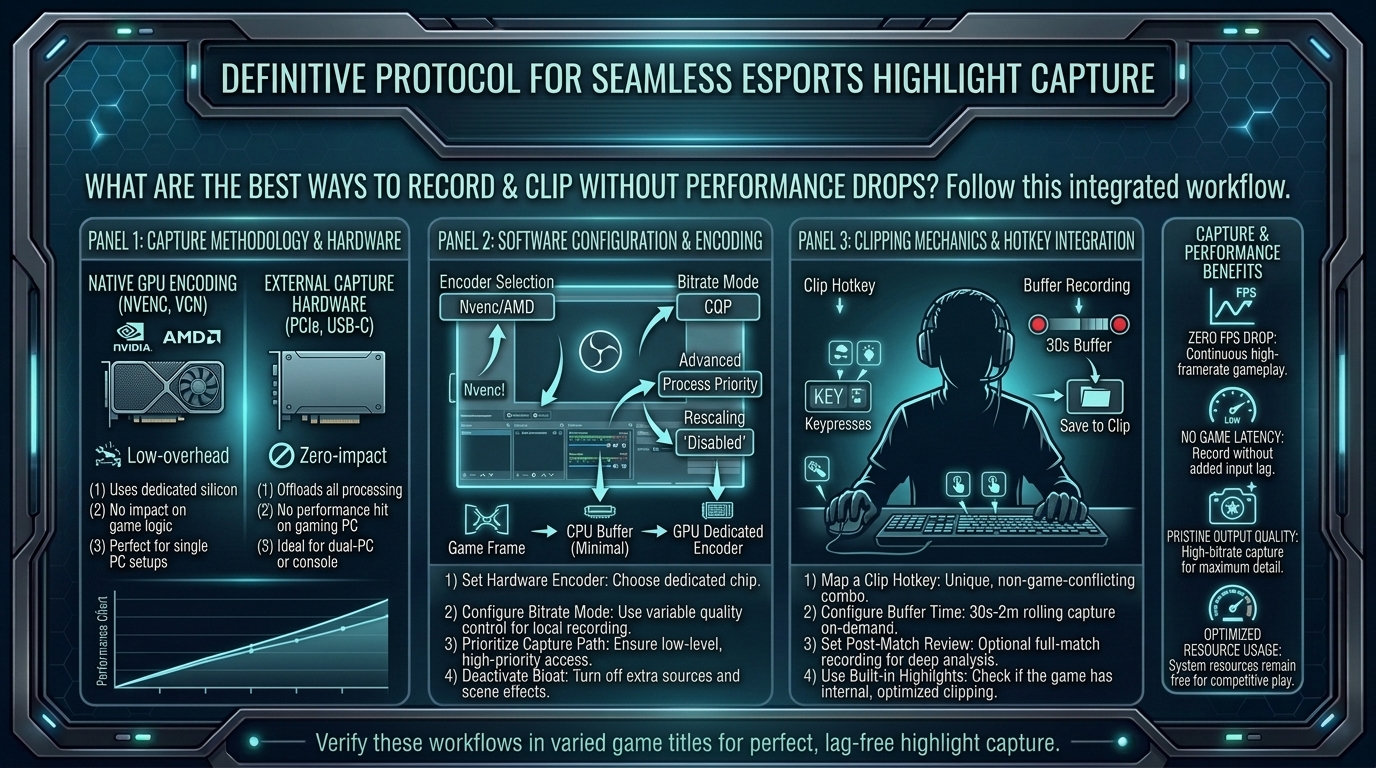
    What Are the Best Ways to Record and Clip Your Best Competitive Esports Highlight Plays Without Performance Drops?

    Capturing high-level gameplay highlights—whether dropping a 20-kill game in Apex Legends, pulling off a 1v5 clutch in VALORANT, or executing a frame-perfect combo in Street Fighter 6—is essential for content creators, esports athletes, and competitive gamers alike. However, running heavy recording software in the background can introduce severe performance drops: dropped frame rates, erratic frame timing, elevated input lag, and CPU/GPU thermal throttling.

    In competitive esports, dropping from 240 FPS to 180 FPS during an intense team fight introduces input latency that can cost you the round. To capture crisp, high-bitrate clips without compromising system responsiveness, you must configure hardware-accelerated encoding, leverage light background buffer recorders, and optimize your operating system pipeline.

    At The Gamer Buzz, we test performance hardware, streaming software, and esports optimization techniques. This comprehensive guide details how to configure hardware encoders, select low-overhead clipping tools, and capture your best plays smoothly.

    Whether competing in LAN arenas across Texas, streaming from gaming hubs in California and San Francisco, recording gameplay in Washington, or building a content brand from New York, these capture techniques protect your competitive edge.

    1. The Mechanics of Gameplay Capture: Hardware vs. Software Encoding

    Understanding how screen recording impacts system resources is the key to preventing game stutter and input latency.

    CPU (Software) vs. GPU (Hardware) Encoding

    • Software Encoding (x264 / CPU): Uses your CPU to compress and encode video frames in real time. This places heavy stress on processor cores needed for high frame rate rendering, leading to CPU bottlenecks, stuttering, and frame drops.
    • Hardware Encoding (GPU Dedicated Chips): Modern GPUs include dedicated, physically separate hardware blocks engineered strictly for video encoding (Nvidia NVENC, AMD AMF/VCE, and Intel QuickSync/AV1). Because these chips operate independently of the main graphics processing cores, recording incurs negligible impact on game frame rates.
    Encoder TypeHardware BlockCPU ImpactFPS LossIdeal Use Case
    Nvidia NVENC (AV1 / HEVC / H.264)Dedicated NVENC ASIC ChipNear 0%< 1–3%Premier setup for Nvidia RTX GPU owners
    AMD AMF (AV1 / HEVC / H.264)Dedicated VCN / AMF EngineNear 0%< 2–4%Best setup for AMD Radeon GPU users
    Intel QuickSync (QSV / AV1)Integrated GPU Encoder Block0% Main GPU< 1%Ideal dual-GPU or iGPU offload solution
    x264 (CPU Software Encoding)Main CPU CoresVery High10–25%Avoid for high-frame-rate competitive gaming

    2. Top Low-Overhead Clipping Tools for Esports

    Selecting the right software keeps background memory consumption low and eliminates frame pacing spikes during gameplay.

    1. OBS Studio (Replay Buffer)

    The gold standard for esports recording. OBS Studio’s Replay Buffer feature keeps a rolling window of recent gameplay (e.g., 30 to 120 seconds) stored directly in system RAM. When you press a designated hotkey, OBS instantly writes the buffer to disk without continuous disk-writing overhead.

    2. Nvidia ShadowPlay (GeForce Experience / Nvidia App)

    Built directly into Nvidia GPU drivers, ShadowPlay utilizes NVENC hardware with minimal driver-level latency. It offers instant replay capturing with ultra-low overhead, making it an effortless option for Nvidia users.

    3. SteelSeries Moments & Medal.tv

    Third-party clip apps offer automated clip triggers (e.g., auto-clipping kills or wins via game integrations). While convenient, ensure overlay features, social feeds, and Discord integrations are trimmed down to prevent background RAM bloat.

    3. Step-by-Step Configuration Guide for OBS Replay Buffer (Zero-Lag Setup)

    Set up OBS Studio Replay Buffer to record high-bitrate 1080p/4K clips using hardware acceleration.

    1.Run OBS Studio as Administrator:Ensures low-level system hardware access.

    Right-click your OBS Studio shortcut, select Properties > Compatibility, and check “Run this program as an administrator.” This grants OBS GPU priority, preventing video stutter when games run at 100% GPU utilization.

    2.Select Hardware Encoder (NVENC, AMF, or QSV):Bypasses CPU video compression.

    Navigate to Settings > Output. Set Output Mode to Advanced. Under the Recording tab, set your Video Encoder to Nvidia NVENC (H.264/AV1), AMD AMF, or Intel QuickSync.

    3.Configure Bitrate and Rate Control:Balancing visual quality with file size.

    Set Rate Control to CBR or CQP. For high-speed 1080p 60FPS clips, set bitrate between 20,000 Kbps and 35,000 Kbps (or CQP level 18–20). For 1440p/4K, use 50,000 Kbps+.

    4.Enable and Configure Replay Buffer:Allocates system memory for rolling clip saves.

    Check the “Enable Replay Buffer” box. Set Maximum Replay Time to your desired clip length (e.g., 60 seconds). Under the Hotkeys tab, assign a simple keyboard shortcut (e.g., Alt + F10 or F12) to “Save Replay.”

    5.Disable Extra Overlays and Unused Audio Tracks:Saves disk write cycles and CPU cycles.

    Disable unnecessary browser docks, third-party overlays, and high-sample-rate audio filters inside OBS to keep background CPU usage under 1%.

    4. Storage, Drive Speeds, and OS Optimizations

    Capture bottlenecks don’t just happen at the GPU level; slow storage drives and Windows settings can cause micro-stutters during clip saving.

    1. Dedicated Secondary Drive Storage

    Never write clips to your primary Windows OS drive or the drive where your active game is installed. Writing heavy video data to the active game drive introduces disk I/O latency, leading to asset loading hitches in-game. Save clips to a dedicated NVMe M.2 SSD or fast secondary SATA SSD.

    2. Windows Game Mode and Hardware-Accelerated GPU Scheduling (HAGS)

    • Enable Windows Game Mode: Prioritizes game processes over background Windows tasks.
    • Toggle HAGS: Test Hardware-Accelerated GPU Scheduling in Windows Display Settings. While HAGS optimizes GPU memory management, test your specific game—some esports titles (VALORANT, CS2) run smoother with HAGS enabled, while others show slight frame variance.

    10 Frequently Asked Questions (FAQ)

    1. Why does recording my gameplay cause frame stutters?

    Frame stutters occur when software encoding overloads your CPU, or when recording software competes with your game for system memory and GPU rendering resources. Using dedicated GPU hardware encoders (NVENC/AMF) resolves this.

    2. What is the best clip length to set for esports Replay Buffer?

    A rolling buffer of 45 to 90 seconds is ideal. This captures the entire round setup, execution, and clutch play without filling your RAM or generating unnecessarily large video files.

    3. Does running OBS as Administrator actually improve performance?

    Yes! Windows prioritizes administrative processes. Running OBS as an administrator ensures the OS reserves GPU hardware resources for video encoding, preventing frame drops during intense graphical moments.

    4. What is the difference between CBR, CQP, and VBR rate control?

    • CBR (Constant Bitrate): Maintains a fixed data rate, ideal for predictable file sizes and streaming.
    • CQP (Constant Rate Factor / Quality): Adjusts bitrate dynamically based on visual complexity, ensuring crisp quality during fast motion without wasting space on static screens.

    5. Should I clip gameplay in 60 FPS or 120 FPS?

    For social sharing (YouTube, TikTok, Twitter/X), 60 FPS is the gold standard. Recording at 120 FPS doubles encoder load and file sizes without providing visual benefits on platforms that cap video playback at 60 FPS.

    6. Can I use my CPU’s integrated graphics (iGPU) to record gameplay?

    Yes! Technologies like Intel QuickSync (QSV) allow OBS to encode video using your CPU’s integrated graphics chip, completely freeing up your main discrete GPU for game rendering.

    7. Why are my saved clips blurry or pixelated during fast mouse turns?

    Blurry video during fast motion is caused by insufficient bitrate. Increase your capture bitrate to 25,000–40,000 Kbps for 1080p or 50,000+ Kbps for 1440p, or switch to an AV1/HEVC encoder codec.

    8. Does Nvidia ShadowPlay use less performance than OBS Studio?

    Nvidia ShadowPlay runs at the driver level, making its baseline resource footprint slightly smaller than unoptimized OBS setups. However, a properly configured OBS Studio using NVENC delivers identical low-impact performance with much greater audio and video control.

    9. Will saving clips to an external HDD cause in-game lag?

    Saving directly to a mechanical external Hard Disk Drive (HDD) can cause brief lag spikes while the drive spins up to write files. Always write clips to an internal or high-speed external NVMe SSD.

    10. How much RAM does OBS Replay Buffer consume?

    A 60-second Replay Buffer running at 30,000 Kbps (1080p 60FPS) uses approximately 250 MB to 400 MB of RAM—a minimal amount on modern systems with 16GB or 32GB of RAM.

    Conclusion

    Recording and clipping your best competitive esports highlights doesn’t have to cost you precious frame rates or input responsiveness. By utilizing dedicated hardware encoders like NVENC, AMF, or QuickSync, configuring lightweight rolling RAM buffers in OBS Studio, and saving recordings to a secondary SSD drive, you can archive high-bitrate 60FPS plays while maintaining peak competitive system performance.

    For more esports hardware guides, system optimization tutorials, and streaming performance analysis across Texas, California, San Francisco, Washington, and New York, stay tuned to The Gamer Buzz.
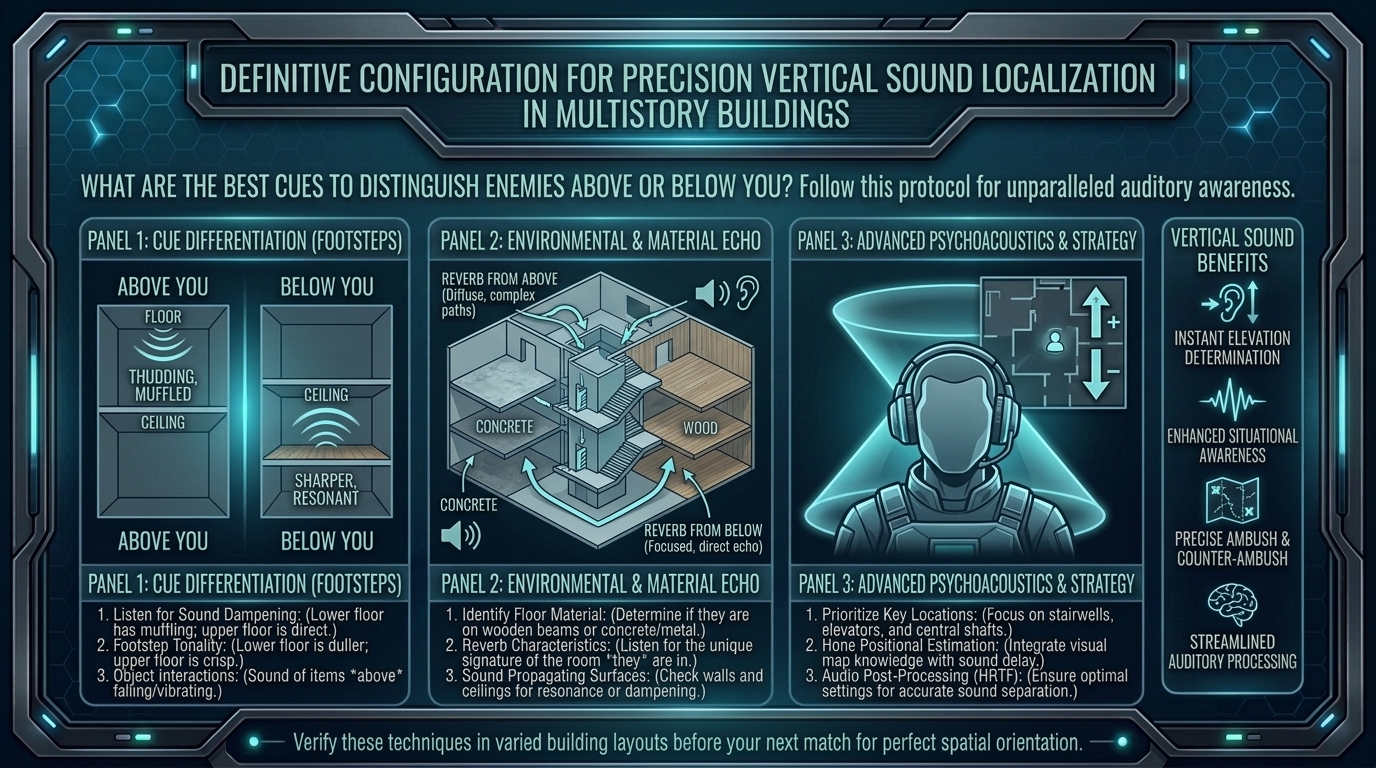
  • How to master vertical sound design cues to tell whether enemies are above or below you in multistory buildings

    How to master vertical sound design cues to tell whether enemies are above or below you in multistory buildings

    How to Master Vertical Sound Design Cues to Tell Whether Enemies Are Above or Below You in Multistory Buildings

    Whether holding a choke point in VALORANT, navigating multi-tier structures in Apex Legends, pushing a stairwell in Call of Duty: Warzone, or tracking footsteps in Rainbow Six Siege, vertical audio cues are among the most difficult sensory inputs to decipher in competitive gaming. Human ears are naturally better at detecting horizontal sound origins (left vs. right) than vertical height differences (above vs. below).

    When game engines attempt to model 3D spatial audio through stereo headphones, subtle acoustic cues—such as pitch shifts, material surface acoustics, and binaural HRTF filtering—are all that separate an enemy dropping down on your head from one sneaking up from the basement.

    Misinterpreting vertical audio leads to misplaced crosshair placement, wasted utility, and instant elimination. Mastering these acoustic details provides a massive spatial advantage in fast-paced multistory combat.

    At The Gamer Buzz, we analyze esports audio engineering, sound card setups, and spatial awareness techniques. This comprehensive guide breaks down the physical and acoustic science behind 3D audio, how modern game engines render verticality, optimal hardware/software settings, and step-by-step listening strategies to immediately pinpoint enemies across multi-level structures.

    Whether competing in regional tournaments in Texas, esports arenas across California and San Francisco, gaming lounges in Washington, or climbing ranked ladders from New York, honing your vertical sound processing will transform your tactical awareness.

    1. The Science of Vertical Audio: How Human Ears and Game Engines Process Height

    Understanding why vertical sound is tricky helps you consciously train your brain to pick up subtle spatial clues.

    How Humans Hear Verticality in the Real World

    Horizontal positioning relies on Interaural Time Difference (ITD) and Interaural Level Difference (ILD)—the tiny delays and volume variations between sound arriving at your left versus right ear. Vertical positioning, however, relies primarily on spectral filtering caused by the outer ear (pinna). As sound waves reflect off the folds of your pinna, certain frequencies are subtly boosted or cut depending on the angle of entry, allowing your brain to calculate elevation.

    How Game Engines Simulate Vertical Sound

    Stereo headphones cannot physically recreate pinna reflections without digital assistance. Modern game engines use three primary methods to communicate height:

    • Head-Related Transfer Function (HRTF): Algorithms that simulate how human ears alter sound waves coming from above, below, or behind you over a 3D sphere.
    • Material Surface Dynamics: Assigning distinct surface sound profiles to different floors—such as hollow wooden floorboards on upper levels versus heavy concrete or metal grating on lower levels.
    • Occlusion and Environmental Filtering: Muffling, dampening, or changing the reverberation of sounds passing through ceilings, floors, or closed doors.
    Acoustic Cue / ElementEnemy Above YouEnemy Below YouVisual / Strategic Impact
    Pitch & FrequencySharper, higher-frequency clatter; clear footstep impactMuffled low-end thud; heavy bass boom with rolled-off highsHigh: High frequencies indicate an un-occluded or overhead origin.
    Surface AcousticsThin wood, creaking ceiling joists, metal roof rattlingDense concrete, carpeted dampening, hollow sub-floor thudsCritical: Differentiates identical floor layouts by material sound.
    Environmental ReverbShorter reverb tail; dry, direct acoustic impactLong echo tail; boomy resonance filtering upward through stairwellsModerate: Helps identify open staircases vs. sealed floors.
    Occlusion Filter ProfileHigher clarity if floor boards are thin; direct ceiling transmissionHeavy low-pass filtering (sounds like audio through a thick wall)Essential: Tells you if an enemy is behind structural cover.

    2. Audio Hardware & Software Configuration for Maximum Vertical Clarity

    Before practicing in-game listening, optimize your sound pipeline to prevent dynamic range compression or artificial virtual surround sound clutter.

    Recommended Audio Setup

    • Use High-Quality Stereo Headphones: Open-back studio headphones (or precise closed-back IEMs) offer a cleaner soundstage than cheap “7.1 Virtual Surround” gaming headsets.
    • Disable Virtual 7.1 Surround Software: Turn off third-party virtual 7.1 software (Dolby Atmos for Headphones, DTS Headphone:X, or proprietary headset software) unless the specific game explicitly recommends it alongside its native HRTF setting. Layering multiple 3D spatial engines introduces phase cancellation, turning vertical cues into muddy noise.
    • Enable In-Game HRTF / 3D Audio: Ensure options like “HRTF” (CS2, VALORANT) or “3D Audio” (Apex Legends, Warzone) are explicitly toggled ON in your game’s audio settings menu.
    • Equalizer (EQ) Tuning: Use a flat/neutral EQ profile or apply a subtle boost to upper-mid frequencies (1 kHz – 4 kHz) to emphasize footstep snap while slightly taming heavy explosion bass (60 Hz – 250 Hz) that masks subtle overhead movement.

    3. Step-by-Step Listening and Angle-Tipping Strategy

    When audio cues sound ambiguous, sitting still won’t help. Use this dynamic angling technique to instantly resolve vertical confusion.

    1.Center Your Crosshair and Identify Horizontal Audio Pan:Locks onto basic horizontal plane line.

    When you hear a sound in a multistory building, rotate your camera horizontally until the sound centers evenly between your left and right ear channels.

    2.Tilt Your Camera Angle 30 to 40 Degrees (The Pitch-Tilt Method):Forces HRTF to shift spatial panning relative to elevation.

    Quickly tilt your crosshair up toward the ceiling or down toward the floor while continuing to listen. Because HRTF algorithms calculate spatial panning relative to your virtual ear orientation, tilting your head alters the left/right balance:

    • If you look DOWN and the sound shifts BEHIND/ABOVE your ear channels, the enemy is ABOVE you.
    • If you look DOWN and the sound shifts FORWARD/BELOW, the enemy is BELOW you.

    3.Cross-Reference Floor Surface Audio Profiles:Verifies underlying surface materials.

    Listen for surface material cues. If the building features wood on upper floors and concrete in the basement, match the acoustic texture (e.g., hollow wood clicks vs. dull concrete thuds) to your map knowledge.

    4.Listen for Action-Specific Vertical Cues:Exposes vertical movement intensity.

    Listen for telltale vertical actions: landing thuds after dropping off ledges, ladder climbing clatters, or rope zipline zips. A landing impact sound always indicates an enemy dropping down from a higher elevation.

    4. Game-Specific Vertical Audio Quirks and Map Awareness

    Different game engines handle verticality through custom audio tricks:

    • VALORANT: Features native HRTF built specifically for stereo headphones. Turning HRTF ON adds spatial height filters. Map design uses distinct floor textures (e.g., metal grates on A Tower in Haven) to clarify overhead positions.
    • Apex Legends: Features high verticality with ziplines and jump jets. Listen for the distinct whoosh of air displacement when an enemy falls past your level. The game uses a pitch-shifting filter: sounds above your head have a slightly higher frequency profile than footsteps below your feet.
    • Call of Duty: Warzone: Multistory structures in urban zones rely heavily on occlusion masking. Footsteps directly above you sound sharp and close, while footsteps below sound muffled by heavy concrete sub-flooring.
    • Rainbow Six Siege: Utilizes an advanced sound propagation engine. Sound in Siege does not travel through solid walls or floors; it travels through the shortest open path (hatches, doorways, drone holes). An enemy directly above a broken hatch will sound like they are right at the top of the opening.

    10 Frequently Asked Questions (FAQ)

    1. Why do footsteps directly above me sound identical to footsteps directly below me?

    Stereo headphones only have left and right speakers. Without proper HRTF spatial processing or intentional camera movement (tilting up/down), your brain lacks the spectral data needed to differentiate 180-degree vertical opposites.

    2. Should I turn on Windows Sonic or Dolby Atmos for competitive gaming?

    In most competitive games with built-in 3D audio (like VALORANT or CS2), disable Windows Sonic and Dolby Atmos. Using multiple spatial audio engines creates phase issues that blur fine detail. Only use spatial software if the game explicitly lacks native HRTF.

    3. Does increasing volume help me hear vertical footsteps better?

    No. Cranking your master volume to dangerous levels distorts your headset drivers and damages your hearing. Instead, use an EQ to boost footstep frequencies (1 kHz – 4 kHz) while dampening low-end explosion noise.

    4. What is the “Pitch-Tilt Method” for audio positioning?

    It is a technique where you quickly angle your camera up or down while listening to a continuous audio cue. Changing your virtual ear angle forces the HRTF engine to alter the sound’s left/right balance, immediately revealing whether the source is above or below.

    5. Why do footsteps sound completely different on different floors of the same building?

    Game developers assign different material textures (such as wooden floorboards on top floors vs. concrete in basements) so players can identify vertical position using surface sounds alone.

    6. Do open-back headphones provide better vertical positioning than closed-back headphones?

    Yes. Open-back headphones offer a wider, more natural soundstage and clearer instrument separation, making subtle HRTF frequency shifts easier for your brain to process.

    7. How does Rainbow Six Siege handle vertical sound differently than other FPS games?

    Siege uses sound propagation: audio travels through physical openings (open doors, windows, blown-out floor hatches) rather than passing directly through solid walls. A sound above you might actually come from a doorway to your left if that is the nearest open acoustic path.

    8. Can audio compression (Night Mode / Loudness Equalization) help with vertical audio?

    Audio compression levels the difference between quiet sounds (footsteps) and loud sounds (explosions). While this makes distant footsteps easier to spot, extreme compression can distort distance perception, making an enemy two floors above sound like they are right next to you.

    9. Why can’t I hear enemies dropping down from ledges above me?

    Many modern games apply dampening filters or reduce landing sound effects to prevent audio clutter during chaos. Look for subtle cues like air displacement, armor rustle, or quick directional footstep changes upon landing.

    10. How long does it take to train your brain to read HRTF vertical cues?

    With active practice—using the pitch-tilt method and learning map floor materials—most players notice a clear improvement in vertical spatial awareness within 1 to 2 weeks of continuous play.

    Conclusion

    Mastering vertical sound cues in multistory buildings requires a mix of proper hardware setup, game engine awareness, and active listening techniques. By disabling conflicting virtual surround software, enabling native in-game HRTF, leveraging surface acoustic differences, and using camera pitch-tilting to test ambiguous cues, you can pinpoint enemy elevations instantly.

    For more esports audio guides, hardware optimization tips, and competitive tactical analysis across Texas, California, San Francisco, Washington, and New York, stay tuned to The Gamer Buzz.
  • What are the best settings to disable motion blur and visual clutter for crystal clear vision in fast combat

    What are the best settings to disable motion blur and visual clutter for crystal clear vision in fast combat

    What Are the Best Settings to Disable Motion Blur and Visual Clutter for Crystal-Clear Vision in Fast Combat?

    In high-intensity fast combat games—whether tracking targets through dynamic smoke in Apex Legends, snapping to heads in VALORANT, tracking target motion in Call of Duty: Warzone, or tracking fast-moving targets in Fortnite—target clarity is paramount. Modern game developers often add cinematic post-processing features to make games look like blockbuster movies. However, filmic effects like camera motion blur, film grain, depth of field, and volumetric fog ruin target tracking, introduce frame latency, and obscure enemy silhouettes during fast combat turns.

    To achieve maximum target identification and instantaneous visual awareness, competitive esports athletes eliminate decorative visual bloat. Disabling high-contrast clutter translates directly to faster reaction times, cleaner tracking, and higher frame rates.

    At The Gamer Buzz, we test graphic configurations, monitor settings, and esports optimization techniques. This comprehensive optimization manual details how to disable cinematic artifacts, optimize graphics menus, and configure display settings to achieve maximum visual clarity in fast combat.

    Whether competing in local esports tournaments across Texas, LAN centers in California and San Francisco, competitive gaming hubs in Washington, or grinding high-tier ranked matches from New York, these visual adjustments provide a clean competitive edge.

    1. The Core Principles of Competitive Visual Clarity

    Game engines are designed by default to render immersive graphics, using blur and depth effects to hide asset pop-in and mask lower frame rates. In contrast, competitive settings prioritize readability, spatial consistency, and frame stability.

    Why Cinematic Graphics Hurt Competitive Performance

    • Motion Blur (Camera & Per-Object): Artificially smudges pixels across the screen when moving the camera or when objects cross your field of view. This reduces dynamic resolution, making tracking moving targets impossible during rapid mouse sweeps.
    • Depth of Field (DoF): Simulates a camera lens by blurring background elements while aiming down sights (ADS). In battle royale or arena shooters, blurred backgrounds mask flankers and distant targets.
    • Film Grain & Chromatic Aberration: Film grain overlays digital noise over your display, making static targets blur into background textures. Chromatic aberration distorts colors along object edges, creating visual distortion near the edges of your screen.
    • Volumetric Fog & Screen-Space Reflections: Volumetric lighting and ambient occlusion add heavy particle rendering that blocks line-of-sight in shadows or narrow choke points while dropping total FPS.
    Visual FeatureDeveloper Intent (Cinematic)Competitive StatusVisual Impact in Fast Combat
    Camera Motion BlurMimics movie camera shutter speedDISABLE (0%)Causes heavy pixel smearing during rapid 180° turns
    Per-Object Motion BlurAdds realism to moving objectsDISABLE (0%)Smudges enemy silhouettes as they jump or slide
    Depth of Field (DoF)Focuses camera on crosshair targetOFFBlurs background flankers and distant enemies when ADS
    Film GrainProvides a gritty cinematic aestheticOFF (0%)Creates artificial noise, masking subtle enemy movements
    Chromatic AberrationSimulates camera lens distortionOFFDistorts perimeter targets and degrades edge sharpness
    Ambient OcclusionSoftens shadows in corners/crevicesOFF / LOWDarkens dark corners where enemies hide

    2. In-Game Graphics Settings Optimization Guide

    To maximize spatial clarity and achieve high frame rates, adjust your graphics menu from cinematic eye candy to competitive readability.

    1.Turn Off Motion Blur, Film Grain, and Chromatic Aberration:Eliminates immediate camera and movement smearing.

    Navigate to your game’s Display or Video settings tab. Set Motion Blur to Off (or 0%), disable Per-Object Motion Blur, set Film Grain to 0%, and toggle Chromatic Aberration to Off.

    2.Disable Depth of Field and Lens Flare:Keeps distant backgrounds crisp while aiming.

    Set Depth of Field to Disabled. Turn off Lens Flare, Motion Blur Strength, and Camera Shake Intensity sliders completely to preserve clear sightlines during heavy explosion effects.

    3.Lower Shadow Quality and Ambient Occlusion:Increases shadow brightness to reveal hidden enemies.

    Set Ambient Occlusion (SSAO/HBAO) to Off or Low. Reduce Shadow Quality to Low or Medium. High-quality dynamic shadows darken corners and introduce visual noise without adding target tracking value.

    4.Drop Volumetric Effects and Screen-Space Reflections:Removes visual obstacles like dust, haze, and reflections.

    Set Volumetric Fog, Smoke Resolution, and Screen-Space Reflections to Low or Off. Cleared fog ensures long-range targets remain visible through choke points.

    5.Maximize Texture Filtering (Anisotropic) & Anti-Aliasing Tuning:Maintains razor-sharp character outlines.

    Set Anisotropic Texture Filtering to 16x (minimal performance cost, keeps ground and wall textures crisp at distance). Set Anti-Aliasing to Low (FXAA or SMAA) or Off to remove temporal blur (TAA) that softens enemy silhouettes.

    3. Monitor Hardware and GPU Control Panel Tweaks

    Disabling in-game visual clutter is only half the battle; your monitor and GPU drivers must also be configured to eliminate display ghosting, motion blur, and dark-corner obscurity.

    1. Monitor Overdrive and Motion Blur Reduction (MBR / ULMB)

    • Adjust Response Time Overdrive: Set your gaming monitor’s Overdrive setting to Fast or Medium. Avoid “Ultra” or “Extreme” modes, as excessive overdrive introduces inverse ghosting (bright trails behind moving objects).
    • Black Frame Insertion (BFI / DyAc / ELMB): If your monitor supports strobe backlighting (such as BenQ’s DyAc or ASUS ELMB), enable it to eliminate LCD hold-type motion blur. Note that BFI requires a bright room environment as it reduces overall panel backlight brightness.

    2. GPU Color and Dark Stabilizer Settings

    • Black Equalizer / Shadow Boost: Increase your monitor’s Black Equalizer to illuminate dark corners without washing out bright areas. This prevents enemies from blending into shadows.
    • Digital Vibrance / Color Saturation: Increase Nvidia Digital Vibrance or AMD Color Saturation to 60–65% via your GPU Control Panel. Saturated colors make enemy skins and red player outlines pop against grey urban backgrounds.

    4. Game-Specific Competitive Configurations

    Apex Legends & Call of Duty: Warzone

    • Field of View (FOV): Set between 104° and 110° to maximize peripheral vision without creating severe “fish-eye” distortion that shrinks center-screen targets.
    • Weapon Field of View: Set to Affected (in Call of Duty) so your ADS zoom scales relative to your base FOV, maintaining spatial awareness during close-quarters combat.
    • Particle Quality: Set to Low to prevent muzzle flash and explosion sparks from obscuring target models.

    VALORANT & Counter-Strike 2

    • Enemy Highlight Color: Set to Yellow (Deuteranopia/Protanopia) or Bright Cyan. Yellow highlights pop sharper against dark CS2/VALORANT textures than default Red.
    • Clarity & Bloom: Turn Off Bloom and Distortion. Keep Experimental Sharpening / FXAA tuned to preserve sharp head edges at long distances.

    10 Frequently Asked Questions (FAQ)

    1. Why do pro gamers turn off motion blur in competitive games?

    Motion blur blends moving pixels together, creating a muddy image during camera turns. Turning it off keeps enemy models sharp and distinct, making target tracking and flick-aiming precise.

    2. Does disabling motion blur increase FPS?

    Yes! Eliminating post-processing motion blur, volumetric fog, and ambient occlusion reduces GPU shader workloads, resulting in higher frame rates and lower input latency.

    3. What is Temporal Anti-Aliasing (TAA), and why is it bad for fast combat?

    TAA smooths jagged edges by blending information from previous frames. In fast-moving games, TAA creates heavy smearing and loss of clarity, making distant targets appear blurry when moving the camera.

    4. Should I use Nvidia Reflex or AMD Anti-Lag?

    Yes! Always enable Nvidia Reflex (On + Boost) or AMD Anti-Lag. These driver features bypass the GPU render queue, lowering system latency so your inputs render on screen instantly.

    5. What is the difference between monitor ghosting and motion blur?

    Motion blur is a software post-processing effect added by game engines. Ghosting is a hardware limitation where monitor pixels cannot change color fast enough, leaving trail artifacts behind moving objects.

    6. Should I use Sharpening filters (Nvidia Image Sharpening / AMD CAS)?

    Light sharpening (10–20%) helps make enemy silhouettes pop after turning off anti-aliasing. However, setting sharpening too high introduces distracting white edge halos around objects.

    7. Why do my eyes hurt when I turn off motion blur?

    If you are playing at lower frame rates (below 60 FPS), disabling motion blur can make camera pans feel choppy. Higher refresh rate monitors (144Hz, 240Hz, 360Hz) paired with high FPS deliver buttery-smooth motion without needing artificial blur.

    8. How does FOV (Field of View) impact visual clutter?

    Extremely high FOV settings (above 115°) shrink center-screen targets, making distant headshots difficult. Moderate FOV values (100° to 108°) balance peripheral sightlines with target sizing.

    9. What monitor settings help see enemies in dark corners?

    Enable Black Equalizer / Shadow Boost on your monitor and slightly bump GPU Digital Vibrance. This lifts dark shadows into readable mid-tones without blowing out bright daylight areas.

    10. Does turning off depth of field affect sniper scopes?

    No. Disabling depth of field keeps distant terrain and flank paths sharp while aiming down sights, preventing the game from artificially blurring targets outside your main crosshair area.

    Conclusion

    Maximizing target tracking and visual clarity in fast combat requires stripping away movie-style visual effects in favor of clean, consistent performance. By disabling camera motion blur, film grain, depth of field, and ambient occlusion, while configuring your monitor’s overdrive and color saturation, you create an un-cluttered visual canvas where enemy movements can be tracked instantly.

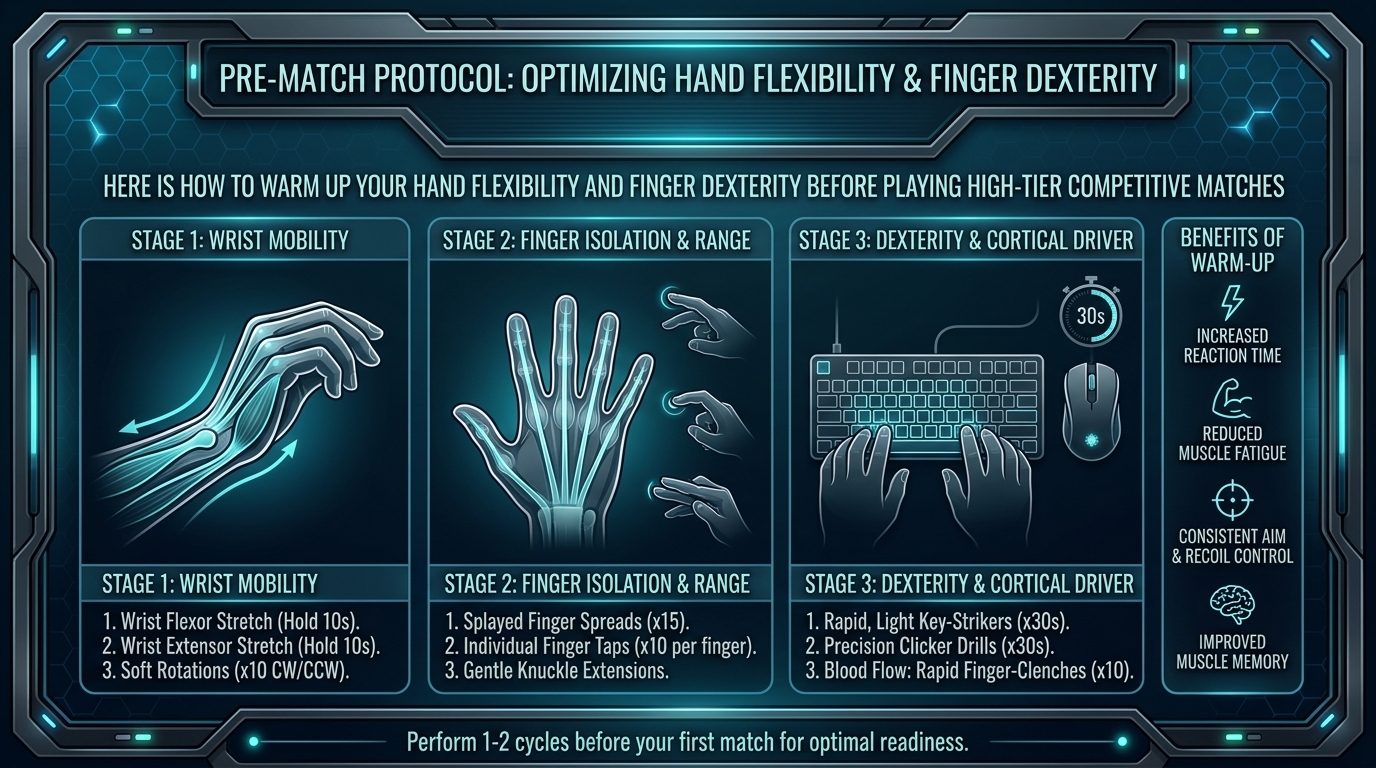
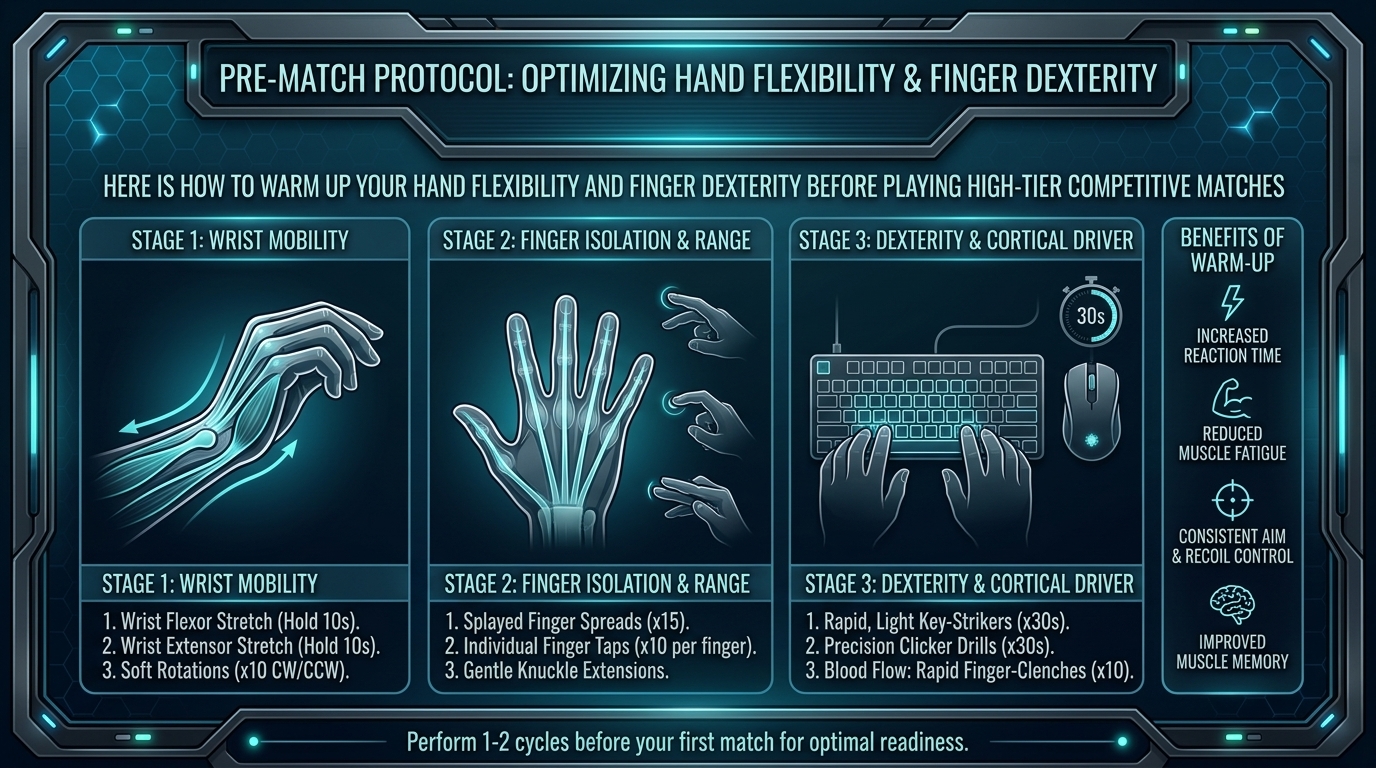
  • How to warm up your hand flexibility and finger dexterity before playing high tier competitive matches

    How to warm up your hand flexibility and finger dexterity before playing high tier competitive matches

    How to Warm Up Your Hand Flexibility and Finger Dexterity Before Playing High-Tier Competitive Matches

    Whether you are clicking heads in VALORANT, executing 180 APM build fights in Fortnite, micro-managing units in StarCraft II, or pulling off frame-perfect combos in Street Fighter 6, your hands are your primary input device. In high-tier competitive gaming, milliseconds define the difference between winning a round and getting sent back to the lobby.

    Yet, millions of competitive gamers jump directly into ranked matches cold. Cold hands lead to stiff joints, sluggish reaction times, missed inputs, and worst of all, chronic repetitive strain injuries (RSI) like carpal tunnel syndrome, de Quervain’s tenosynovitis, and wrist tendonitis.

    At The Gamer Buzz, we dive deep into esports performance, hardware, and physical wellness. This definitive guide breaks down the science, routines, and strategies needed to warm up your hand flexibility, optimize finger dexterity, and protect your joints before jumping into high-stakes ranked matches.

    Whether competing in regional LAN tournaments in Texas, esports arenas across California and San Francisco, gaming lounges in Washington, or grinding the ladder from an apartment in New York, proper physical warm-ups give you a measurable competitive edge.

    1. The Science of Hand Warm-Ups: Why Cold Hands Ruin APM

    Your hands contain a complex network of 27 bones, 34 muscles, and dozens of tendons and nerves working in precise sync. The muscles that control finger movements are located in your forearm and palm, connected to your fingers via long tendons running through your wrist.

    What Happens When You Play “Cold”

    • Reduced Nerve Conduction Velocity: Cold temperatures slow down electrical signals traveling along the median and ulnar nerves, resulting in delayed reaction times.
    • Synovial Fluid Viscosity: Synovial fluid acts as a natural lubricant inside your finger and wrist joints. When cold, it thickens, increasing friction and joint stiffness.
    • Reduced Blood Flow and Oxygenation: Inactive or cold hands receive less oxygenated blood, causing muscle fatigue, cramping, and shaky aim during tense clutch moments.
    Metric / AspectCold Un-Warmed HandsWarm-Up Prepared HandsPerformance Impact
    Nerve Signal SpeedSlower (Delayed reaction)Optimal (Instant input execution)High: 10–30ms faster reaction time
    Joint FrictionHigh (Stiff finger clicks)Low (Fluid, effortless micro-adjustments)High: Smoother tracking and recoil control
    Grip & ControlTense, jittery micro-movementsRelaxed, precise motor controlCritical: Reduces over-flicking in FPS games
    RSI & Injury RiskHigh (Elevated tendon strain)Extremely Low (Protects wrist longevity)Essential: Prolongs competitive gaming career

    2. Phase 1: Thermal Warm-Up (5 Minutes)

    Never stretch cold tendons. Stretching cold tissue can create micro-tears and worsen inflammation. The first step of any elite esports warm-up is increasing hand tissue temperature.

    Passive Thermal Methods

    • Warm Water Submersion: Run warm (not boiling) water over your hands, wrists, and forearms for 2 to 3 minutes, gently flexing your fingers into fists under the stream.
    • Rehab Hand Warmers or Heat Packs: Hold a microwavable gel pack or electric hand warmer between rounds to keep blood flowing in cold, air-conditioned tournament venues.
    • Self-Massage: Rub your palms together briskly for 60 seconds, then use your opposite thumb to massage the fleshy muscle at the base of your thumb (thenar eminence) and outer palm (hypothenar eminence).

    3. Phase 2: Hand Flexibility and Tendon Gliding Stretches (5 Minutes)

    Once your hands are warm, perform dynamic stretches to improve mobility without losing muscular tension. Hold stretches for 15 to 20 seconds; never bounce or force movements past comfortable resistance.

    1.The Extended Wrist Flexor and Extensor Stretch:Targets forearm flexors and wrist flexors.

    Extend your right arm straight in front of you with your palm facing up. Use your left hand to gently pull your right fingers back toward your body. Hold for 15 seconds. Flip your hand over (palm facing down) and pull fingers toward your body to stretch the top of your wrist. Repeat on the left arm.

    2.Nerve and Tendon Gliding Sequence:Frees median nerve sliding inside the carpal tunnel.

    Hold your hand straight up like a stop sign. Bend your fingers into a hook fist (finger tips touching upper pads), then make a full fist, then unbend into an L-shape (knuckles bent 90 degrees), and finally return to an flat open hand. Repeat 5 smooth cycles per hand.

    3.Thumb Abductor and Webbing Stretch:Relieves thumb tension from WASD and spacebar spam.

    Spread your hand wide. Gently pull your thumb back and away from your index finger using your opposite hand to stretch the webbing between thumb and forefinger. Hold for 15 seconds.

    4.Individual Finger Separations:Improves independent key clicking.

    Place your hand flat on your desk. Keep your palm flat while lifting one individual finger off the desk surface at a time, holding for 2 seconds. Focus on isolating your ring finger and pinky, which share tendon sheaths.

    5.Prayer and Reverse Prayer Stretches:Relieves forearm tension after heavy mouse flicks.

    Place your palms together in front of your chest in a prayer position. Slowly lower your hands toward your waist while keeping your palms pressed together until you feel a stretch in your lower wrists. Reverse by pressing the backs of your hands together pointing downward.

    4. Phase 3: Fine Motor Dexterity Drills (5 Minutes)

    After stretching, activate your motor nervous system with targeted dexterity drills before launching into your game client.

    Desk-Side Dexterity Drills

    1. The Finger Tap Sprint: Tap your thumb to index finger, thumb to middle finger, thumb to ring finger, and thumb to pinky in a rapid sequence. Cycle forward and backward for 30 seconds per hand.
    2. Stress Ball / Putty Squeezes: Use medium-resistance grip putty or a silicone stress ball. Perform 10 quick pulses, followed by a 5-second isometric hold.
    3. Pen / Stylus Twirling: Spin a pen or stylus between your index, middle, ring, and pinky fingers. This challenges fine-motor coordination and spatial hand awareness.

    5. Phase 4: In-Game Aim and APM Activation (10 Minutes)

    Now that your hands are warm, flexible, and responsive, transition into game-specific micro-drills to recalibrate eye-hand coordination.

    • FPS Players (VALORANT, CS2, Apex Legends): Spend 5–10 minutes in Aim Labs or KovaaK’s running micro-flex and tracking scenarios (e.g., Gridshot, Smoothness Trainer). Avoid heavy flick training immediately before a match.
    • MOBA & RTS Players (League of Legends, Dota 2, StarCraft II): Practice camera box scrolling, hotkey cycling, and precise unit micro in custom lobbies before entering ranked queues.
    • Fighting Game Players (Street Fighter, Tekken, Smash): Practice motion inputs (quarter-circles, DP motions, wave dashes) on your stick, leverless controller, or gamepad in training mode.

    10 Frequently Asked Questions (FAQ)

    1. How long before a competitive match should I start my hand warm-up?

    Begin your warm-up routine 15 to 20 minutes before queuing. This gives your body enough time to increase joint temperature and motor activation without inducing muscle fatigue.

    2. Can stretching cold hands cause injuries?

    Yes! Stretching cold, stiff tendons acts like pulling on a frozen rubber band—it can cause micro-tears, joint inflammation, and tendon strain. Always perform a 2-minute thermal warm-up (warm water or massage) before stretching.

    3. What is the difference between wrist stiffness and Carpal Tunnel Syndrome?

    Wrist stiffness is temporary joint friction solved by warm-ups. Carpal Tunnel Syndrome involves chronic numbness, tingling, or burning sensations radiating into the thumb, index, and middle fingers due to median nerve compression. If you experience persistent numbness, consult a physical therapist or doctor immediately.

    4. Should I use compression gloves while gaming?

    Compression gloves help retain heat and promote blood circulation, making them great for players prone to cold hands in air-conditioned rooms. However, ensure they are not so tight that they restrict finger movement or cut off circulation.

    5. Why do my hands get cold while playing intense competitive matches?

    Cold hands during gaming are often caused by stress-induced vasoconstriction (the “fight-or-flight” response), where your nervous system draws blood away from extremities toward core organs. Deep breathing exercises combined with thermal hand warmers counter this reaction.

    6. Are hand grippers good for esports training?

    Heavy crushing hand grippers are generally not recommended for esports. They build bulk forearm strength rather than fine motor control and can overwork your flexor tendons. Light grip putty or finger band extensions are far safer and more effective.

    7. How often should I take hand breaks during a long gaming session?

    Follow the 50/10 Rule: After every 50 minutes of intense gaming, take a 10-minute break. Step away from your desk, shake out your hands, drink water, and perform light wrist flexor stretches.

    8. What ergonomics adjustments prevent hand strain?

    Ensure your desk and chair allow your elbows to rest at a 90-to-100-degree angle, with your wrists lying flat (neutral spine position) rather than bent upward or downward against the edge of your desk.

    9. Can warm-ups improve my in-game APM (Actions Per Minute) and aim accuracy?

    Yes! Scientific studies in motor performance show that warm, lubricated joints and active nerve pathways reduce latency between your brain’s command and your finger’s physical click, improving both APM stability and micro-aim adjustments.

    10. How do I maintain finger dexterity as I grow older in competitive gaming?

    Consistent daily hand mobility work, proper desk ergonomics, staying hydrated, and avoiding playing through joint pain will maintain your finger flexibility and response speeds well into your late 20s, 30s, and beyond.

    Conclusion

    Your hands are your physical interface with the digital world. Treating them with the same care professional athletes give their bodies is the secret to unlocking peak APM, sharp aim, and career longevity in competitive gaming. By combining thermal heat, dynamic tendon stretches, dexterity activation drills, and structured in-game practice, you ensure your hands perform flawlessly in every high-stakes clutch.

  • What are the best strategies for defending bomb sites and holding defensive crossfire setups with your teammates

    What are the best strategies for defending bomb sites and holding defensive crossfire setups with your teammates

    Welcome to The Gamer Buzz, your premier competitive strategy and tactical intelligence authority. Whether you are anchoring high-stakes defensive sites from advanced setups in San Francisco, New York, and Seattle, or locking down objective corridors across competitive ranked lobbies in Texas, California, and Washington, one fundamental tactical truth determines your win rate: the team holding the site holds all the spatial cards.

    When you are on the defensive side of a competitive tactical shooter (Counter-Strike 2, Valorant, Rainbow Six Siege), your objective is not necessarily to hunt down every enemy player. Your objective is to waste time, deny map control, and force the attackers into catastrophic positioning traps. Yet, in solo queue and uncoordinated team lobbies, defense often devolves into uncoordinated individual positioning, lone-wolf peeking, and rapid site collapses.

    Defending a bomb site successfully requires geometric mastery, synchronized crossfire positioning, utility economy, and psychological discipline. In this exhaustive, master-level guide, we break down tactical defensive blueprints, crossfire angles, sound concealment, and step-by-step strategies to turn any bomb site into an impenetrable fortress.

    1. The Geometry of Defense: Crossfires vs. Sequential 1v1s

    Before examining specific utility lines or map positions, you must understand the core geometric principle that separates winning defensive teams from losing ones: the crossfire.

    [Attacker Entering] ➔ [Defender A (Bait/Hinged Angle)] AND [Defender B (Punishing Crossfire Angle)]
    

    The Trap of the Linear Duel

    • The Rookie Mistake: Two defenders peek the same hallway side-by-side or hold sequential angles facing the exact same direction. When the attacker rounds the corner, they only have to win a single 1v1 gunfight at a time. If they win the first duel, they immediately turn and kill the second defender.
    • The Power of the Orthogonal Crossfire: A true crossfire forces the attacker’s brain and eyes to split in two separate directions simultaneously. If an attacker peeks Defender A, Defender B has a direct side-on or rear angle to shoot the enemy without putting themselves in the enemy’s primary crosshair. Crossfires mathematically convert an even 1v1 into an unfair 2v1 advantage.

    2. The 4-Stage Defensive Strategy Blueprint

    Locking down an objective requires a disciplined, multi-phase approach that begins long before the round timer hits zero.

    Stage 1: Pre-Round Information Denial and Default Holding

    • Do Not Waste Early Utility: Attackers often send a lone player to make noise, throw fake flashes, or bait out early defensive utility at the start of a round. Do not panic-dump your smokes or incendiary grenades in the first 10 seconds.
    • Passive Info Play: Hold passive information angles where you can see or hear enemy movement without exposing your body to sniper fire. Let them walk into your information net.

    Stage 2: Delaying the Rush (The Utility Speed Bump)

    When the attacking team commits to a full-speed explosive rush on your site, your primary goal is not to heroically ace them—it is to slow their momentum to a dead crawl.

    • Staggered Utility Layers: Drop your first smoke deep into the choke point to completely block vision. Once that smoke dissipates halfway, drop your Molotov or incendiary fire onto the choke point floor. By the time they burn through your utility layers, 15 to 20 seconds of the round timer have vanished, panicking the attackers.

    Stage 3: Crossfire Discipline (Holding Fire)

    • The Discipline of Silence: If you are holding a tight crossfire angle with a teammate, do not shoot the moment you see the first enemy toe. If you shoot prematurely, you alert the rest of the attacking team, giving them time to turn, trade you out, and deploy defensive utility.
    • The Ambush Execution: Wait until multiple attackers have completely pushed past your threshold, committing themselves deep onto the site with their backs turned or weapons lowered. When you both open fire simultaneously, you secure multiple instant kills before the enemy can react.

    Stage 4: Strategic Retiring and Site Yielding

    • Knowing When to Give Ground: If the enemy team executes a massive 5-man crunch with ultimate abilities and heavy utility dumping, trying to stubbornly hold the site alone is suicide.
    • The Clean Fall-Back: Call out “Yielding site, holding retake angles” to your team. Fall back safely to a connected hallway or site entrance while staying alive. Preserving your life and your weapon preserves your team’s economy and sets up a structured retake scenario.

    3. Comprehensive Matrix: Defensive Positioning vs. Attack Counter-Strategies

    Defensive StrategyMap / Scenario ApplicationCore ObjectiveRisk Factor
    Aggressive Mid-Control PushEarly round contest over central map arteriesDeny attacker information and pinch flanks.High risk of getting caught by a 5-man rush.
    Crossfire Site AnchorHolding standard bomb site choke pointsForce attackers into an inescapable 2v1 crossfire cross-angle.Requires strict discipline not to break position early.
    Cross-Map Retake SetupPlaying passive anchors with long rotationsStall site plant while teammates rotate from opposite site.Vulnerable if attackers fake and rush your site directly.
    Information Trap PlayUsing sensor/scouting utility on alternate pathsCatch silent rotators moving through unattended flanks.Leaves primary site slightly thinner on direct defense.

    4. Advanced Defensive Habits: Sound and Psychology

    • The Power of Absolute Silence: When holding a defensive angle waiting for an enemy push, take your fingers off your movement keys. Even minor shifts on the keyboard create micro-sound cues that alert headphones-wearing attackers to your exact hiding spot.
    • The Counter-Fake Strategy: If you suspect the enemy team is notorious for faking site executions, do not send all your rotators flying across the map at the first sign of utility. Leave an anchor with escape utility on the weak site while other defenders edge closer to connectors to gather concrete visual confirmation.

    10 Frequently Asked Questions (FAQ)

    1. What is the biggest mistake defenders make in competitive matches?

    Impatience. Defenders frequently get restless, push out of standard cover to hunt for flashy opening kills, and get punished by an attacking trade-fragger, leaving their bomb site wide open.

    2. How do I set up a proper crossfire with a random teammate who has no mic?

    Observe their positioning on the mini-map. If they are holding a wide angle looking at a doorway, position yourself perpendicular to that doorway looking from a different cover spot so that anyone peeking them exposes their side to you.

    3. Should I always play on the bomb site itself as a defender?

    Not necessarily. Many elite defensive setups use site-adjacent control (holding outer courtyards, connectors, or choke points) to delay the enemy before they even reach the bomb site. Playing off-site gives you more space to stall time.

    4. What should I do if the attackers execute a slow, methodical default setup?

    Patience is your best weapon. Do not peek out of boredom. Let them waste time crawling through map sectors while your team gathers information and prepares a synchronized counter-rotation.

    5. How do I handle enemy smokes blocking my defensive line of sight?

    When attackers smoke your holding angle, do not push blindly through the smoke. Back up into a deeper off-angle position, listen closely for audio footsteps emerging from the smoke, and punish them as they step out into the open site.

    6. Is it better to stack one bomb site or split defenders evenly?

    Site distribution depends heavily on team economy, map meta, and enemy tendencies. If the enemy team has heavily favored attacking one specific site in previous rounds, shifting an extra defender to stack that site is a smart tactical read.

    7. How do I manage my utility economy across multiple defensive rounds?

    Never dump all your high-value utility in the first 10 seconds of every round. Save your smokes and stalling grenades for when you hear concrete audio cues indicating an active enemy execution push.

    8. What is an “off-angle” and when should I use it?

    An off-angle is a positioning spot that deviates slightly from common pre-aimed corners where players naturally look. Use off-angles sparingly (once or twice per match) to catch overconfident attackers off guard, as they will check those spots standardly later in the match.

    9. How do I communicate effectively with my defensive co-anchor?

    Keep your callouts crisp: call out exact utility land spots, enemy numbers pushing your lane, and request backup before your health drops below 50%. Never wait until you are dead to ask for help.

    10. Where can I find more advanced tactical team strategies and map guides?

    Bookmark The Gamer Buzz and check back regularly for our comprehensive database of professional esports guides, defensive map setups, and competitive rank-up tips!

    Conclusion

    Defending bomb sites and holding defensive crossfire setups with your teammates is the ultimate test of patience, structural discipline, and geometric awareness. By abandoning reckless individual peeks, layering your utility to stretch out the round clock, locking down true orthogonal crossfires, and maintaining absolute audio silence, you transform vulnerable bomb sites into impenetrable roadblocks. Build your defensive framework, hold your ground, and shut down every attacking lobby you face!

  • How to choose the right glass or cloth mousepad surface texture for your specific competitive playstyle needs

    How to choose the right glass or cloth mousepad surface texture for your specific competitive playstyle needs

    how to choose the right glass or cloth mousepad surface texture for your specific competitive playstyle needs

    Welcome to The Gamer Buzz, your ultimate destination for competitive esports performance analysis, peripheral breakdowns, and hardware setups tuned for winning. Whether you are dialing in your tracking aim from a tech hub in San Francisco, New York, or Seattle, or building out your ultimate competitive rig in Texas, California, or Washington, one often-overlooked peripheral holds the key to your aiming mechanical precision: your mousepad surface texture.

    For years, mousepads were treated as afterthoughts—cheap pieces of fabric slapped onto a desk to prevent wooden surfaces from scratching. However, in modern competitive titles like Counter-Strike 2, Valorant, Apex Legends, Overwatch 2, and Call of Duty, the mousepad surface is half of the aiming equation. The interaction between your mouse’s PTFE or glass skates and the pad’s material dictates your physical friction, stopping power, micro-adjustment capability, and aiming consistency.

    Today, the competitive scene is split down the middle in an intense debate: Glass vs. Cloth (and hybrid surfaces).

    Should you chase the friction-free, lightning-fast glide of tempered glass, or do you need the tactile stopping power of a high-density, control-focused cloth pad? In this comprehensive, master-level guide, we break down mousepad physics, material science, aim mechanics, and step-by-step selection frameworks to help you choose the perfect surface for your exact competitive playstyle.

    1. The Physics of Mousepad Surfaces: Static vs. Dynamic Friction

    To understand how a mousepad impacts your aim, you must first master the two fundamental physical forces that occur whenever you move your mouse: static friction and dynamic friction.

    [Mouse at Rest] ➔ [Break Static Friction (Initial Motion)] ➔ [Dynamic Friction (Glide)] ➔ [Stopping Power (Deceleration)]
    

    Static Friction (Initial Breakaway Force)

    • What it is: The physical resistance you must overcome to start moving your mouse from a complete standstill.
    • Why it matters: High static friction makes micro-adjustments feel “sticky” or heavy. Low static friction lets your mouse glide instantly with the slightest twitch of your hand.

    Dynamic Friction (Glide Resistance)

    • What it is: The continuous resistance your mouse experiences while it is actively sliding across the mousepad surface.
    • Why it matters: Dynamic friction dictates how much physical effort is required to sustain long, sweeping tracking motions (like following a fast-moving target across your screen).

    Stopping Power (Deceleration / Stopping Force)

    • What it is: The pad’s ability to help your hand bring the mouse to a dead stop precisely when you finish a fast flick shot.
    • Why it matters: Without adequate stopping power, your hand will overshoot targets, forcing you to waste milliseconds making corrective adjustments.

    2. Glass Mousepads: The High-Speed Precision Revolution

    Tempered glass mousepads (such as the Superglide Glass Mousepad, SkyPAD/Wallhack 4.0, or Razer Atlas) have stormed the competitive gaming world. Engineered from toughened, micro-etched tempered glass, these pads offer an entirely different aiming sensation compared to traditional fabric.

    The Advantages of Glass Mousepads

    • Near-Zero Static Friction: Glass surfaces eliminate the “tug” when starting a movement. Micro-adjustments feel effortless because the initial resistance is virtually nonexistent.
    • Infinite Durability & Easy Maintenance: Unlike cloth pads that degrade, fray, absorb skin oils, and develop slow spots over months of use, glass pads never wear out. A quick wipe with a microfiber cloth and glass cleaner restores them to day-one condition instantly.
    • Unmatched Consistency: Glass is impervious to humidity, sweat, and temperature fluctuations. Your glide remains 100% identical whether you play in a cold room or a humid summer environment.

    The Drawbacks of Glass Mousepads

    • Zero Natural Stopping Power: Because friction is so low, your hand muscles must do 100% of the physical work to stop the mouse. If you lack elite motor control, your flick shots will consistently overshoot.
    • Debris Sensitivity: A single speck of dust, hair, or skin flake on a glass pad creates a crunchy, jarring sensation under your mouse skates.
    • Sleeve Requirement: Human skin sticks to glass. Playing on a glass pad virtually requires wearing a compression arm sleeve to prevent your forearm from dragging against the surface.
    • Rapid Skate Wear: Glass eats standard PTFE (Teflon) mouse feet for breakfast. You will need to replace your mouse skates significantly more often.

    3. Cloth Mousepads: The Classic Tactile Control Standard

    Cloth mousepads remain the most popular choice among professional esports athletes, particularly in tactical shooters. Fabric pads range from soft, mud-like control surfaces to tightly woven, water-resistant hybrid speed pads.

    The Advantages of Cloth Mousepads

    • Superior Stopping Power & Feedback: The soft base foam (poron or rubber) under the fabric allows you to press down slightly with your wrist or hand to dig your mouse skates into the pad, creating on-demand braking force for precision flicks.
    • Tactile Comfort: Soft fabric feels warm, cushioned, and natural against your wrist and forearm, eliminating the need for compression sleeves.
    • Forgiving Ergonomics: Cloth pads absorb minor hand tremors and micro-shakes, providing a smoother, more stabilized crosshair feel for players with higher sensitivities.

    The Drawbacks of Cloth Mousepads

    • Humidity Sensitivity: Standard cloth fibers absorb ambient moisture. On humid days, a soft cloth pad can feel muddy, sticky, and drastically slower than on dry days.
    • Wear & Slow Spots: Over time, skin oils, dead skin cells, and physical friction wear down the fabric fibers, creating permanent “slow spots” in the center of the pad.

    4. The Mousepad Surface Spectrum: Speed vs. Control Matrix

    Surface CategoryRepresentative ExamplesFriction LevelIdeal Game GenresBest Playstyle / Aiming Style
    Ultra-Fast GlassWallhack (SkyPAD) 4.0, Superglide GlassNear-Zero Static / Ultra-Low DynamicFast Trackers (Apex Legends, Overwatch 2)Wrist/Arm Trackers with elite motor control.
    Hybrid / Speed ClothArtisan Raiden, Lethal Gaming Gear NeptuneLow Static / Moderate-Low DynamicFast Shooters & Battle RoyalesHigh-speed flickers who want low resistance.
    Balanced / All-RounderArtisan Zero, Saturn Pro, SteelSeries QCKBalanced Static / Moderate DynamicAll Genres (CS2, Valorant, Apex)Hybrid players wanting equal speed and control.
    Control / Slow ClothZowie G-SR, Gamesense RadarModerate-High Static / High DynamicTactical Shooters (CS2, Valorant)Low-sensitivity arm shooters who prioritize precision stopping.

    5. How to Choose Based on Your Game and Aiming Mechanics

    Scenario A: The Tactical Shooter Specialist (CS2, Valorant)

    • Primary Requirement: Extreme stopping power, crisp static crosshair placement, and zero overshooting on headshots.
    • Recommended Choice: Control to Balanced Cloth Pads (e.g., Artisan Zero, Saturn Pro, Zowie G-SR-SE). The tactile braking force helps anchor your crosshair onto tight angles without accidental micro-drifting.

    Scenario B: The Tracking Battle Royale Competitor (Apex Legends, Overwatch 2, The Finals)

    • Primary Requirement: Smooth, continuous multi-directional tracking of fast-moving targets, verticality adjustments, and zero initial movement resistance.
    • Recommended Choice: Glass Mousepads or Hybrid Speed Pads (e.g., Wallhack 4.0, Artisan Raiden). The low static friction allows your crosshair to track erratic enemy strafes without stuttering or catching on fabric fibers.

    10 Frequently Asked Questions (FAQ)

    1. Are glass mousepads better than cloth mousepads for competitive gaming?

    Neither is universally “better.” Glass pads excel in fast tracking, durability, and humidity resistance, while cloth pads provide superior stopping power, tactile control, and comfort. The right choice depends on your game genre and physical control preferences.

    2. Can I use glass skates on a glass mousepad?

    No! Never use glass mouse skates on a glass mousepad. Glass-on-glass contact will cause extreme scratches, ruin both surfaces, and destroy your glide. Always use standard PTFE (Teflon) or specialized UHMWPE skates on glass pads.

    3. Do I need to wear an arm sleeve when using a glass mousepad?

    Yes, in almost all cases. Your skin’s natural moisture and sweat will stick to the smooth glass surface, creating heavy drag. A smooth compression arm sleeve allows your forearm to glide effortlessly alongside your mouse.

    4. How long does a good cloth mousepad last before needing replacement?

    High-end cloth pads with dense Poron bases (like Artisan or Lethal Gaming Gear) typically last 1 to 2 years with proper cleaning. Budget cloth pads often show wear and slow spots within 3 to 6 months of daily competitive play.

    5. How do I properly clean a glass mousepad?

    Glass pads are effortless to maintain. Spray the surface with a standard glass cleaner or isopropyl alcohol solution and wipe it clean with a lint-free microfiber cloth. It dries instantly and is ready for immediate play.

    6. How do I clean a cloth mousepad without ruining the surface texture?

    Fill a bathtub or sink with lukewarm water and a few drops of mild liquid dish soap or baby shampoo. Gently scrub the fabric surface using a soft microfiber cloth, rinse thoroughly with cool water to remove all soap residue, and let it air dry completely flat for 24 hours.

    7. What base foam firmness should I choose for my cloth pad (Soft, Mid, Extra Soft)?

    • Mid: Provides a firm, consistent surface similar to a hard pad with zero cushion sink.
    • Soft: The industry sweet spot, offering comfortable wrist cushioning and moderate press-down stopping power.
    • Extra Soft (XSoft): Allows you to press your mouse deep into the foam for extreme emergency stopping power, though it can feel inconsistent if you push down heavily during normal movement.

    8. Does mousepad size matter for competitive gaming?

    Yes. Low-sensitivity competitive players who perform wide arm swipes require large or extra-large desk pads (e.g., 490x420mm or larger) to ensure they never run out of physical mouse surface during intense turnarounds.

    9. Why does my mouse feel sticky on my cloth pad on rainy or humid days?

    Standard cloth fibers absorb water vapor from the air, swelling the fabric and increasing friction against your mouse skates. If humidity is a major issue in your climate, switch to a humidity-resistant hybrid pad or a glass mousepad.

    10. Where can I find more hardware and peripheral optimization guides?

    Bookmark The Gamer Buzz and check back regularly for our comprehensive database of professional esports hardware breakdowns, mouse reviews, and competitive aiming optimization guides!

    Conclusion

    Choosing between a glass or cloth mousepad surface texture comes down to understanding your primary game genre, physical aim mechanics, and environment. If you demand zero static friction, effortless high-speed tracking, and infinite durability, step onto a tempered glass pad (and don an arm sleeve). If your gameplay centers on razor-sharp stopping power, tactile feedback, and precise tactical crosshair placement, anchor your setup with a premium control or hybrid cloth pad. Match your surface to your playstyle, calibrate your friction, and click heads with absolute precision!