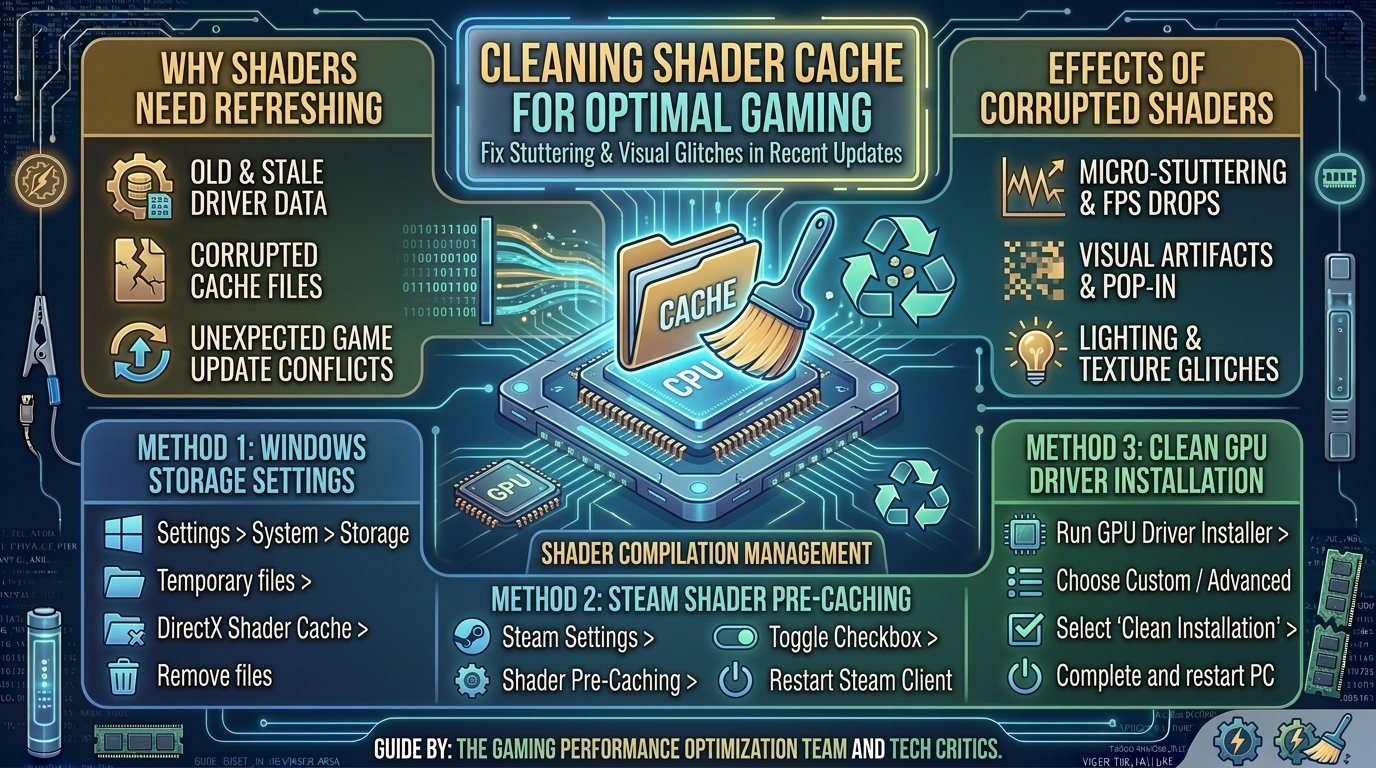
How to Clear Shader Cache Files in Windows to Fix Visual Glitches and Stuttering in Recent Game Updates
Few issues ruin a gaming session faster than sudden micro-stutters, frame rate hitches, or severe visual glitches immediately after installing a new game patch or graphics driver update. You might be playing a game that ran smoothly yesterday, only to encounter severe frame drops, flashing textures, or invisible geometry today.
In most cases, these post-patch performance issues are not caused by failing hardware or poorly optimized game updates. Instead, they stem from corrupted, outdated, or mismatched shader cache files.
This technical troubleshooting guide covers how shader caching works in Windows 10 and 11, step-by-step procedures for clearing GPU shader caches across NVIDIA, AMD, Intel, DirectX, and Steam environments, and tips to keep your gaming PC stutter-free.
Shader Cache Troubleshooting Matrix
| Symptom | Primary Cause | Secondary Cause | Recommended Action |
| Micro-Stutter When Entering New Areas | Shader compilation taking place during gameplay. | Outdated or low Shader Cache size setting. | Increase GPU Shader Cache Size limit to 10GB or Unlimited. |
| Flashing or Missing Textures Post-Patch | Corrupted DirectX / GPU Shader Cache. | Incompatible old shader compiled under prior driver. | Purge DirectX Shader Cache & GPU driver cache folders. |
| Game Freezes/Hangs on “Compiling Shaders” Screen | Corrupted Steam / In-Game Shader Pre-compilation. | Disk I/O bottleneck on storage drive. | Reset Steam Shader Pre-Caching data; verify game files. |
| Frame Drops After Upgrading GPU Driver | Stale driver shader cache conflict. | Leftover driver residual registry files. | Run DDU in Safe Mode, then rebuild fresh shader cache. |
1. What Are Shader Cache Files and Why Do They Cause Stuttering?
What Is Shader Compilation?
A shader is a computer program executed directly by your Graphics Processing Unit (GPU) that determines how lighting, shadows, reflections, atmospheric fog, and material textures are rendered in real time. Because every GPU architecture (NVIDIA Ada Lovelace, AMD RDNA 3, Intel Arc) interprets graphics instructions differently, raw game code must be compiled into machine language specific to your exact graphics card and driver version.
Why Shader Caches Exist
Compiling shaders on the fly while playing an open-world game requires massive CPU processing power. If the GPU has to pause mid-frame to compile a new lighting shader, your system experiences a noticeable compilation stutter.
To eliminate this latency, modern game engines and display drivers store compiled shaders on your SSD in a dedicated directory called the Shader Cache. The next time you render that lighting effect or visit that game area, your system instantly loads the pre-compiled file from your storage drive instead of compiling it again.
FIRST RUN (Shader Compilation):
[ Game Request ] ---> [ CPU Compiles Shader ] ---> [ Gameplay Stutter ] ---> [ Saved to Shader Cache ]

SUBSEQUENT RUNS (Cached Execution):
[ Game Request ] ---> [ Instant Read from Shader Cache ] ---> [ 60+ FPS Smooth Gameplay ]
Why Shader Caches Become Corrupted
Shader caches cause visual glitches and performance drops under specific conditions:
- Graphics Driver Updates: Installing a new display driver alters how your GPU executes graphics code. If old shaders compiled under a previous driver remain in your cache folder, the game engine attempts to read mismatched instructions, causing graphic artifacts, flickering textures, or game crashes.
- Game Title Updates & Patches: When developers update game lighting, geometry, or engine scripts, old cached shaders become obsolete. If the game fails to overwrite these files automatically, you will experience severe stutters.
- Improper System Shutdowns: If your PC crashes or loses power while a game is actively writing to the cache, the shader files can become corrupted.
2. Step-by-Step Guide: How to Clear Shader Caches in Windows
Method 2.1: Clear Windows DirectX Shader Cache (Universal)
Windows maintains a system-wide DirectX Shader Cache used by games running on DirectX 11 and DirectX 12.
- Press
Win + Ito open Windows Settings. - Navigate to System > Storage.
- Select Temporary Files.
- Check the box labeled DirectX Shader Cache (ensure other personal folders like Downloads remain unchecked).
- Click Remove files at the top of the window.
[ Settings > System > Storage ] ---> [ Temporary Files ] ---> Check [ DirectX Shader Cache ] ---> Click [ Remove Files ]
Method 2.2: Clear NVIDIA GPU Shader Cache (GeForce Graphics Cards)
NVIDIA GPUs store compiled shaders in local AppData directories.
- Right-click your desktop and open NVIDIA Control Panel.
- Go to Manage 3D Settings > Global Settings.
- Scroll down to Shader Cache Size, set it to Disabled, and click Apply.
- Press
Win + R, type%LOCALAPPDATA%\NVIDIA, and hit Enter. - Open and delete all files inside these folders (if present):
DXCacheGLCache
- Press
Win + R, type%LOCALAPPDATA%\NVIDIA Corporation\NV_Cache, and delete all files inside. - Return to NVIDIA Control Panel and change Shader Cache Size back to Driver Default or 10 GB (recommended), then click Apply.
Method 2.3: Reset AMD Radeon Shader Cache (AMD Graphics Cards)
AMD provides a direct one-click button inside the Radeon software to purge cached shaders safely.
- Right-click your desktop and launch AMD Software: Adrenalin Edition.
- Click the Gaming tab at the top, then select Graphics.
- Scroll down to the bottom and expand the Advanced section.
- Locate Reset Shader Cache and click the Perform Reset button.
- Click OK to confirm. Your screen may flash briefly as the cache resets.
[ AMD Adrenalin Software ] ---> [ Gaming > Graphics ] ---> [ Advanced ] ---> Click [ Reset Shader Cache ]
Method 2.4: Reset Steam Shader Pre-Caching Data
Steam automatically downloads pre-compiled shader packages for your specific GPU architecture to minimize in-game stuttering.
- Launch Steam and open Settings from the top-left menu.
- Select Downloads from the left sidebar.
- Scroll down to Shader Pre-Caching.
- Toggle Enable Shader Pre-Caching to OFF, click OK, then toggle it back to ON.
- (Optional) To delete stored pre-compiled Steam shaders on your drive, navigate to your Steam installation folder (e.g.,
C:\Program Files (x86)\Steam\steamapps\shadercache) and delete the numerical game folders inside.
3. Optimal Shader Cache Settings for Smooth Gaming
Once you have cleared out old or corrupted files, configure your GPU settings to prevent future shader-related stutters:
- Increase Shader Cache Size Limit: Default Windows or driver settings limit shader caches to 1 GB or 4 GB. Modern open-world titles (like Hogwarts Legacy, Call of Duty: Warzone, or Cyberpunk 2077) can easily exceed 5 GB of shader data.
- In NVIDIA Control Panel, set Shader Cache Size to 10 GB or Unlimited. This prevents the driver from deleting older compiled shaders when switching between games.
- Allow Initial Shader Compilation to Complete: When launching a game for the first time after clearing your cache, many titles present a “Building Shaders” or “Optimizing System” progress bar on the main menu. Do not skip this process or force-close the game. Let the progress bar reach 100% so all shaders compile cleanly onto your SSD.
Shader Cache Cleaning Workflow Checklist
+---------------------------------------------------------------------------------+
|                       SHADER CACHE CLEANUP CHECKLIST                            |
+---------------------------------------------------------------------------------+
| [ ] Cleared Windows DirectX Shader Cache via Storage Settings                    |
| [ ] Disabled NVIDIA Shader Cache / Reset AMD Radeon Shader Cache                |
| [ ] Deleted cached files inside %LOCALAPPDATA%\NVIDIA\DXCache                   |
| [ ] Re-enabled Shader Cache and set capacity limit to 10GB or higher            |
| [ ] Toggled Steam Shader Pre-Caching to refresh game downloads                   |
| [ ] Relaunched game and allowed main menu Shader Compilation to complete to 100% |
+---------------------------------------------------------------------------------+
Frequently Asked Questions (FAQ)
Q1: Will clearing my shader cache delete my game saves or settings?
A: No. Shader cache files only store compiled graphics rendering instructions. Deleting them will not affect your saved games, keybindings, graphics settings, or user profiles.
Q2: Why does my game stutter for a few minutes after clearing the shader cache?
A: This is completely normal. After clearing your cache, your GPU must rebuild and compile new shader files as you encounter visual effects for the first time. Once compiled, the stuttering will stop completely.
Q3: How often should I clear my GPU shader cache?
A: You only need to clear your shader cache when experiencing visual glitches, missing textures, or frame rate stutters after a major game patch, GPU driver update, or hardware upgrade.
Q4: Can a full SSD cause shader cache compilation errors?
A: Yes. If your primary storage drive is completely full, Windows and your GPU drivers will fail to write new shader files to disk, leading to severe in-game stuttering or crashes. Keep at least 15% free space on your drive.
Q5: What is the difference between DirectX Shader Cache and Vulkan Shader Cache?
A: DirectX Shader Cache holds pre-compiled instructions for games running on Microsoft DirectX 11 and 12 APIs. Vulkan Shader Cache handles games (like Doom Eternal or Baldur’s Gate 3) running on the open-source Vulkan rendering engine.
Q6: Should I clear my shader cache before or after updating my GPU drivers?
A: It is best practice to clear your shader cache after installing a new display driver to ensure no lingering legacy shader files conflict with the updated driver microcode.
Q7: Can corrupted shader cache files cause games to crash to the desktop (CTD)?
A: Yes. If a game engine reads a corrupted or incomplete shader file, it can trigger memory access violations (0xC0000005) that instantly crash the game to the desktop.
Q8: Does enabling Resizable BAR affect shader cache compilation?
A: Resizable BAR allows your CPU to access your GPU’s VRAM faster, which can speed up the transfer of compiled shader data into VRAM, further reducing micro-stutters.
Q9: Where are Intel Arc GPU shader caches stored?
A: Intel Arc graphics cards store compiled shaders under %LOCALAPPDATA%\Intel\ShaderCache. You can manually purge files inside this directory to reset your Intel GPU cache.
Q10: Is it better to set Shader Cache Size to “Driver Default” or “10 GB”?
A: Setting Shader Cache Size to 10 GB is recommended for modern PC setups. Driver Default settings can sometimes limit storage allocation too tightly, causing older game shaders to be overwritten prematurely when playing multiple titles.
Conclusion
Clearing corrupted or outdated shader cache files is one of the most effective ways to fix post-patch stuttering, missing textures, and visual anomalies in modern PC games. By purging system-level DirectX caches, resetting GPU driver directories, and configuring a generous 10 GB cache size limit, you ensure your graphics card renders games smoothly and efficiently across every game update.
Leave a Reply