Author: rblvai

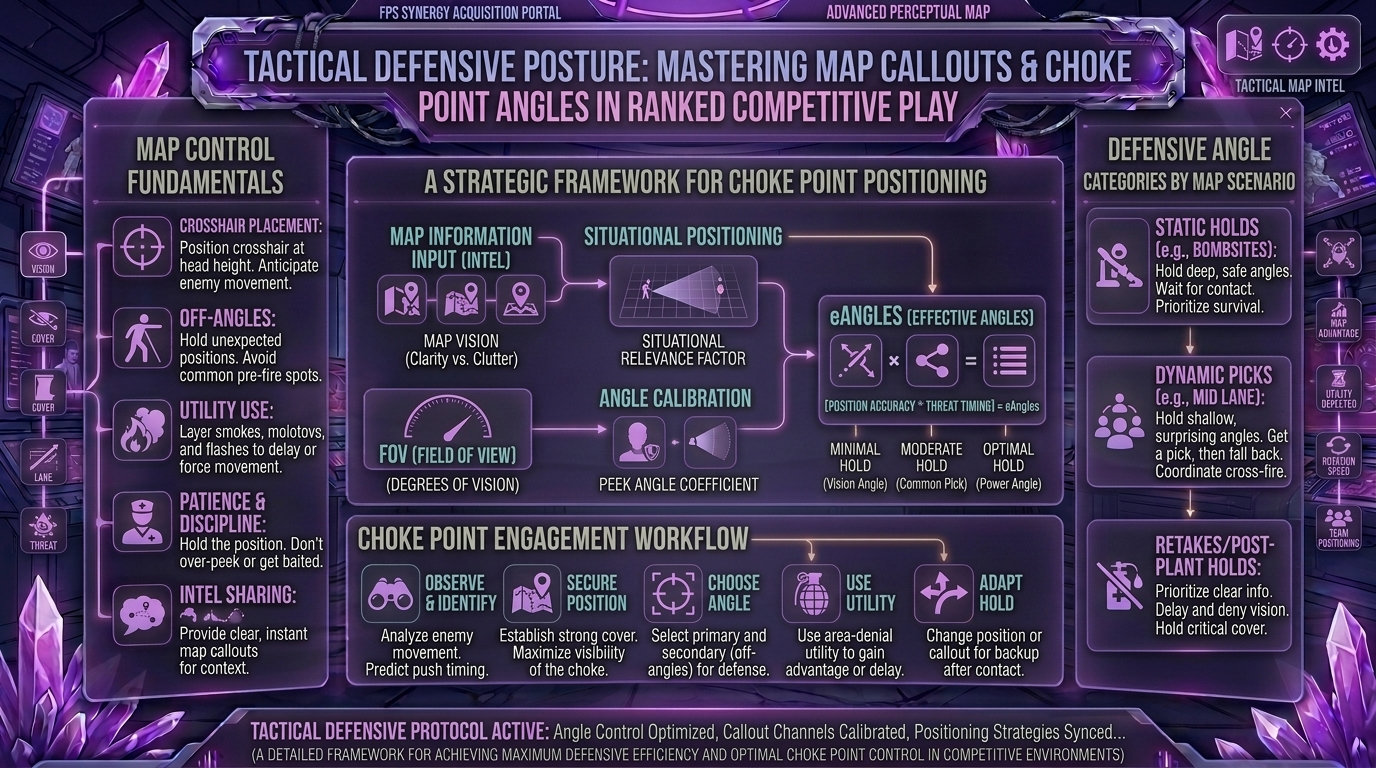
  • What are the best map callouts and positioning angles to hold choke points on competitive multiplayer maps

    What are the best map callouts and positioning angles to hold choke points on competitive multiplayer maps

    What Are the Best Map Callouts and Positioning Angles to Hold Choke Points on Competitive Multiplayer Maps

    Welcome to The Gamer Buzz, your premier competitive tactical hub. Whether you are climbing the ranked ladders from the high-performance gaming setups of San Francisco, New York, and Seattle, or locking down map control across Texas, California, and Washington, one rule of competitive multiplayer games remains absolute: map control wins rounds.

    In tactical first-person and hero shooters (such as Counter-Strike 2, Valorant, Rainbow Six Siege, or Overwatch 2), maps are defined by architecture. Specifically, they are structured around choke points—narrow hallways, doorways, courtyards, and tunnels that attacking teams must push through to reach objectives. Knowing how to name these areas cleanly and holding the correct defensive angles dictates whether you stop a rush or gift the enemy an easy site take.

    In this exhaustive, master-level guide, we break down standard map callout architecture, the geometry of optimal holding angles, crosshair placement theory, and advanced strategies to lockdown competitive choke points effortlessly.

    1. The Geometry of Holding Choke Points: Active vs. Passive Angles

    When defending a critical choke point, your positioning determines your survival rate. Most players fall into the trap of standing completely exposed in the middle of a doorway, acting as an easy target for pre-firing attackers.

    Mastering map geometry requires understanding three primary holding angles:

    1. The Advantage of Distance (The Pyramidal Peek)

    • The Physics: The player standing further back from a corner or doorway sees the enemy sooner than the approaching player sees them, thanks to perspective geometry and field-of-view arcs.
    • Application: Never press your back flat against the wall immediately next to a choke point doorway. Step back 3 to 5 meters. This gives you a wider vision cone into the corridor while making your body a much smaller, harder-to-hit target for anyone entering.

    2. Crossfire Setups (The 90-Degree Principle)

    • A single defender holding a choke point can easily be overwhelmed by utility or traded out by a standard dual-peeking entry duo.
    • The Solution: Establish crossfires with a teammate. Position yourselves so that if an enemy peeks the choke point, they are forced to choose between looking at Player A or Player B—exposing their side or back to whichever teammate is not being looked at.

    3. Off-Angles (Breaking Pre-Aim Expectations)

    • Good attackers pre-aim standard headshot angles automatically. An off-angle is any non-standard position—such as standing out in the open near a weird box, crouching tightly against a shadow, or hugging an unconventional corner.
    • Use off-angles sparingly; they rely on psychological element-of-surprise and will lose effectiveness if used every single round.

    2. Standardized Callout Architectures in Competitive Maps

    If your team does not speak the same language when reporting enemy movements, coordination collapses. Professional map callouts generally follow standard logical naming conventions based on geography, architecture, and color coding.

    The Universal Callout Blueprint

    • Spawns and Yards: Areas where teams originate (T-Spawn, CT-Spawn, Defender Yard).
    • Cardinals and Landmarks: Structural features that immediately identify an area (Blue Container, Red Garage, Church, Market, Generator).
    • Elevations: Verticality indicators (Catwalk, Heaven, Rafters, Nest, Underpass, Basement).
    • Routes: Direct transit corridors (Main, Short, Long, Banana, Alley, Connector).

    3. Step-by-Step Protocol for Locking Down a Choke Point

    When the round timer hits zero and the enemy team executes their strategy, holding a choke point requires a calm, disciplined 4-stage execution:

    [Phase 1: Early Info Gathering] ➔ [Phase 2: Utility Delay] ➔ [Phase 3: Crossfire Discipline] ➔ [Phase 4: Fallback / Retake]
    

    Phase 1: Early Info Gathering (0:00 to 1:30)

    • Do not waste utility or give away your position immediately. Use passive camera placement, sound cues, or quick peek-information lines to see if the enemy is committing resources to your site or faking elsewhere.

    Phase 2: Utility Delay (Executing the Slowdown)

    • When you hear footsteps or see utility landing (smokes, flashbangs, stun grenades), do not panic-spray through the smoke blindly.
    • Drop delay utility—such as incendiary grenades, molotovs, or area-denial traps—directly into the mouth of the choke point to stall their momentum and force them to take burn damage or rotate.

    Phase 3: Crossfire Discipline & Trigger Control

    • Hold your crosshair locked at head height, pre-aiming the exact pixel where an enemy’s head will clear the wall frame.
    • Do not fire at the first pixel of an arm or shoulder. Wait for the core body or head to cross your crosshair before unleashing a controlled burst.

    Phase 4: Recognizing When to Fall Back

    • If the enemy executes a full five-man crunch with coordinated utility dumps, flashing your position and smoking you out, do not try to hero-clutch against odds. Fall back to a secondary containment site, preserve your weapon for the economy, and wait to execute a team retake alongside your surviving rotators.

    4. Advanced Defensive Tactics: Controlling Choke Points Matrix

    Choke Point TypePrimary ThreatRecommended Defense StrategyBest Utility Response
    Wide Open CourtyardsSnipers, long-range riflesHold tight cover, use smoke walls to break sightlinesSmokes to split vision, flashes to cross safely
    Narrow Indoor CorridorsShotguns, spray weapons, rushesPlay off-angles, hold crossfires, maintain distanceMolotovs/Incendiaries to block entry floors
    Vertical Multi-Tier RampsAerial movement, high-ground peeksSplit crosshairs between upper and lower thresholdsSlow traps, concussion fields, or direct stun utility

    10 Frequently Asked Questions (FAQ)

    1. What is the most common mistake players make when holding a choke point?

    Peeking aggressively as a defender. As the defending team, attackers must come to you. Holding a passive, disciplined angle forces them to push into your crosshair.

    2. Should I always crouch-peek or crouch-hold a choke point angle?

    No. Crouching locks your movement speed to zero and lowers your head directly into standard standing crosshair pre-aim positions, making you an easy target.

    3. How do I communicate callouts clearly when my team is panicking?

    Keep your calls short and factual. Use the 4-part callout structure: [Number] + [Location] + [Status] (e.g., “Two pushing cat, one tagged 50”).

    4. What is a “default setup” in tactical shooters?

    A default setup is a standard map distribution where defenders spread out across map lanes to safely gather information and prevent early fast rushes before committing to rotations.

    5. How do I counter an enemy team that executes a heavy utility push on a choke point?

    Use delaying utility to stall them, and if the pressure becomes overwhelming, concede map space cleanly instead of feeding consecutive individual deaths.

    6. Are off-angles better than standard headshot angles?

    Off-angles are situational tools used to catch enemies off-guard once or twice per match. Standard angles are fundamentally safer because your cover is closer for an instant retreat.

    7. How does weapon choice affect my ability to hold a choke point?

    Submachine guns and shotguns excel at holding tight, narrow corridors, while assault rifles and sniper rifles dominate long-range open courtyards and choke entryways.

    8. What should I do if a teammate blocks my retreat path while holding a choke point?

    Always maintain situational awareness of your teammates’ positions. Politely call out spacing over voice chat (“Get behind me, don’t crowd this door”).

    9. Why do professional players look at walls or floors while waiting for a push?

    They are hiding their crosshair placement and vision cones from potential wall-bang angles or flashes, snapping their crosshairs back to the corner only when audio cues indicate an enemy is swinging.

    10. Where can I find more map guides and pro callout breakdowns?

    Bookmark The Gamer Buzz and check back regularly for our comprehensive database of professional strategy guides, map breakdowns, and competitive tactical tips!

    Conclusion

    Mastering map callouts and positioning angles to hold choke points is the ultimate separator between disorganised casual lobbies and elite tactical teams. By understanding distance geometry, setting up effective crossfires, maintaining strict utility discipline, and communicating with clean, concise callouts, you will lock down objectives and watch your win-rate skyrocket. Gear up, learn those map layouts, and dominate your next competitive match!
  • How to communicate effectively with random teammates in voice chat during ranked competitive multiplayer matches

    How to communicate effectively with random teammates in voice chat during ranked competitive multiplayer matches

    Welcome to The Gamer Buzz, your ultimate competitive tactical hub. Whether you are grinding ranked ladders from high-performance setups in San Francisco, New York, and Seattle, or locking in your comms setups across Texas, California, and Washington, one truth remains absolute: raw mechanical aim alone will only take you so far.

    In competitive multiplayer titles (such as Counter-Strike 2, Valorant, Apex Legends, or Overwatch 2), solo-queuing means stepping into the trenches with total strangers. Effective voice communication can bridge skill gaps, turn certain defeat into miraculous comebacks, and elevate a disorganized lobby into a synchronized unit.

    In this exhaustive, master-level guide, we break down the psychology of solo-queue comms, the golden rules of concise information architecture, ego management, and advanced callout strategies required to dominate ranked matches.

    1. The Golden Rule of Comms: Concise Information Density

    The number one mistake players make in voice chat is turning their microphone into a live-streaming podcast. When adrenaline spikes during a clutch situation, unoptimized communication floods audio channels with acoustic noise, drowning out crucial sound cues like enemy footsteps or ability activations.

    The Anatomy of an Elite Callout

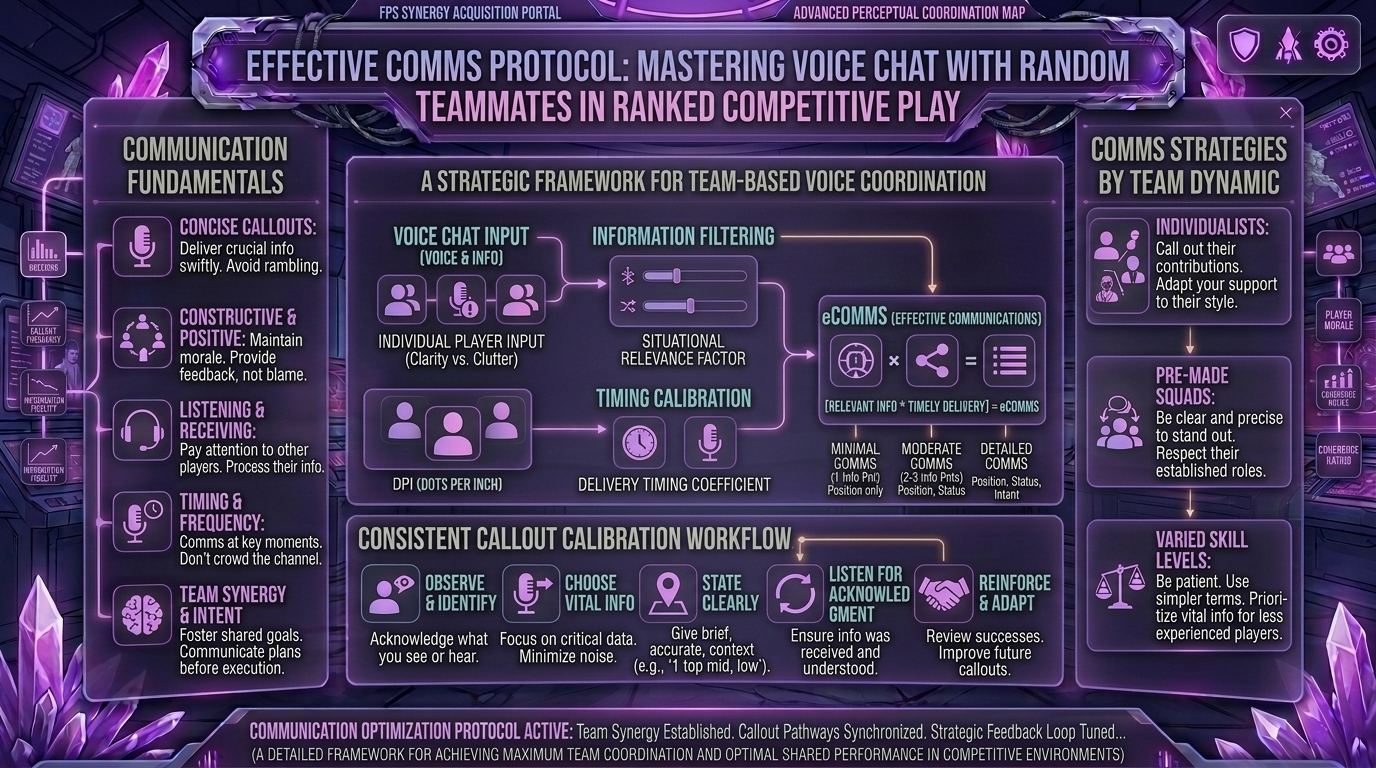
    To give your random teammates actionable data instantly, structure your voice lines using the 4-Part Callout Formula:

    $$\text{[Number of Enemies]} + \text{[Exact Location]} + \text{[Health/Damage Status]} + \text{[Action/Direction Marker]}$$

    • Bad Callout: “He’s right there! Oh man, he’s shooting at me, look out behind the box, he’s hacking!”
    • Elite Callout: “Two players, B-Site Long, one tagged for 80, planting spike.”

    By stripping away panic, emotion, and vague pronouns (“over there,” “he,” “that guy”), you give your teammates everything they need to execute a counter-play in less than two seconds.

    2. Managing Lobby Psychology and Preventing “Tilt”

    When you play with random strangers, you are managing emotional states as much as map geometry. Toxicity breeds failure; the moment a teammate starts tilting, team win-probability drops precipitously.

    Strategies for De-Escalating Toxic Lobbies:

    1. The Positive First Impression: Speak during the very first round picker or pistol round with a calm, upbeat tone (“Hey team, let’s play together, good luck everyone”). Establishing a friendly baseline drastically reduces the likelihood of targeted toxicity later.
    2. Never Argue Back: If a teammate flames you for missing a shot, do not waste energy typing or shouting back. Mute them immediately if necessary, or reply with neutral accountability (“My bad, missed my spray, let’s reset for the next round”).
    3. Praise Small Successes: Acknowledge clutch plays, successful trades, or good utility usage. Positive reinforcement builds trust, transforming uncommunicative strangers into active participants who will share information with you.

    3. Establishing Audio Etiquette and Hardware Discipline

    Your communication is only as good as your physical audio pipeline. If your microphone sounds like a jet engine taking off, even the best tactical callout will get you muted.

    • Microphone Placement and Noise Gates: Position your mic roughly two inches from your mouth and slightly off-center to prevent heavy breathing sounds. Configure software noise suppression (Discord, NVIDIA Broadcast, or in-game filters) to eliminate keyboard clatter and room echo.
    • The “Dead Silence” Rule: During high-stakes 1vX clutch situations, absolute silence is mandatory. Do not offer backseat coaching, do not state where the enemy was two rounds ago, and let the surviving player focus entirely on audio queues.

    4. Adapting Communication Styles to Match Game Phases

    Match PhaseCommunication FocusOptimal Comms Density
    Buy / Strategy PhaseEconomy alignment, site execution, utility mappingModerate to high (Keep plans simple and flexible)
    Mid-Round ActionEnemy positions, health states, spike/objective statusLow & strict (Only vital location/damage data)
    Clutch / Retake ScenarioSilent observation; ping system usageAbsolute zero voice clutter (Allow 1v1 audio focus)

    5. Utilizing Ping Systems as a Non-Verbal Backbone

    Even when voice chat is tense or teammates refuse to speak, modern games feature powerful non-verbal radial menus and ping tools.

    • Use ping systems to mark enemy positions visually, confirm bomb sites, or request utility backup.
    • Pings combined with a brief verbal confirmation (“Pinging enemy Jett on platform” ) create a dual-layer of communication that is impossible to misinterpret.

    10 Frequently Asked Questions (FAQ)

    1. What should I do if nobody on my team is using a microphone?

    Keep making clear callouts anyway. Often, silent teammates are listening to voice chat even if they choose not to speak. Your information will still guide their rotations.

    2. How do I handle an aggressive or toxic teammate who mic-spams?

    Call them out calmly once (“Hey man, keep comms clear for sound cues, please”). If they continue or escalate, mute them instantly to protect your mental focus.

    3. Is it better to designate an in-game leader in solo-queue?

    If someone steps up with a positive attitude and clear macro strategies, support them. If no natural leader emerges, keep your calls focused on micro-play and tactical teamwork.

    4. Why do people get mad when I talk after I die?

    Dying players often give delayed or panicked callouts that confuse living teammates. Only speak immediately post-death to report enemy damage numbers and exact last-known locations.

    5. How can I overcome ranked voice chat anxiety?

    Start small. Begin by speaking purely factual, neutral callouts during the first few rounds. As you realize how much it helps your team win, your confidence will naturally build.

    6. Should I use push-to-talk or open mic?

    Always use push-to-talk. Open mics pick up background noises, heavy breathing, family conversations, and mouse clicks that ruin your team’s auditory awareness.

    7. What is the best way to suggest a strategic change after losing 4 rounds in a row?

    Frame it constructively rather than critically. Instead of saying “Stop rushing B!”, say “Let’s try a slow default map control play this round and see if we catch them stacking”.

    8. Does language barrier impact ranked comms?

    In regions with diverse player bases, rely heavily on standardized international map callouts (e.g., A-Main, Catwalk, Banana) and universal ping wheels to transcend language gaps.

    9. How do I stop myself from making excuses when I die?

    Focus your mental energy on what actionable data your death provides. Shift immediately from blaming game mechanics to calling out enemy health bars and positions.

    10. Where can I find more team strategy guides and pro tips?

    Bookmark The Gamer Buzz and check back regularly for our comprehensive database of competitive breakdowns, game intelligence articles, and tactical progression guides!

    Conclusion

    Communicating effectively with random teammates in voice chat is an acquired skill that transforms chaotic solo-queue lobbies into cohesive, winning squads. By mastering concise callout structures, protecting your team’s mental morale, respecting audio discipline, and keeping information clean and actionable, you will drastically increase your match win-rate. Turn on your mic, stay positive, and climb those competitive ladders!

  • What are the best mouse sensitivity and DPI settings for consistent muscle memory development in FPS games

    What are the best mouse sensitivity and DPI settings for consistent muscle memory development in FPS games

    What Are the Best Mouse Sensitivity and DPI Settings for Consistent Muscle Memory Development in FPS Games

    Welcome to The Gamer Buzz, your ultimate competitive hardware and performance authority. Whether you are climbing the ranked ladders from the high-tech hubs of San Francisco, New York, and Seattle, or tuning your setup across Texas, California, and Washington, mastering your input settings is the absolute foundation of elite aim.

    In first-person shooter (FPS) games, consistency is the holy grail. You can spend hundreds of hours in aim trainers, but if your physical mouse settings fluctuate, your brain can never successfully map out reliable, repeatable muscle memory. Marketing campaigns love to push astronomical numbers—like 25,000 or 30,000 DPI—as symbols of performance. In reality, competitive FPS dominance relies on a much lower, more precise physics-based sweet spot.

    In this exhaustive, master-level guide, we break down how DPI, in-game sensitivity, eDPI, and polling rates interact, revealing the exact settings used by esports professionals to cement mechanical consistency.

    1. Demystifying DPI and In-Game Sensitivity: The Core Equation

    To find settings that build lasting muscle memory, you first need to understand what your hardware is actually doing.

    What is DPI?

    DPI stands for Dots Per Inch (sometimes referred to as CPI). It measures how many digital pixels your cursor travels on screen for every physical inch you move your mouse across your pad.

    • A setting of 400 DPI moves your cursor a shorter physical distance than 1600 DPI when moving the mouse the exact same distance.
    • DPI only controls your sensor’s hardware scaling baseline; it does not inherently make your aim better or more accurate.

    The Magic Metric: eDPI (Effective DPI)

    Because every game handles sensitivity sliders differently, professional communities rely on eDPI to compare settings universally:

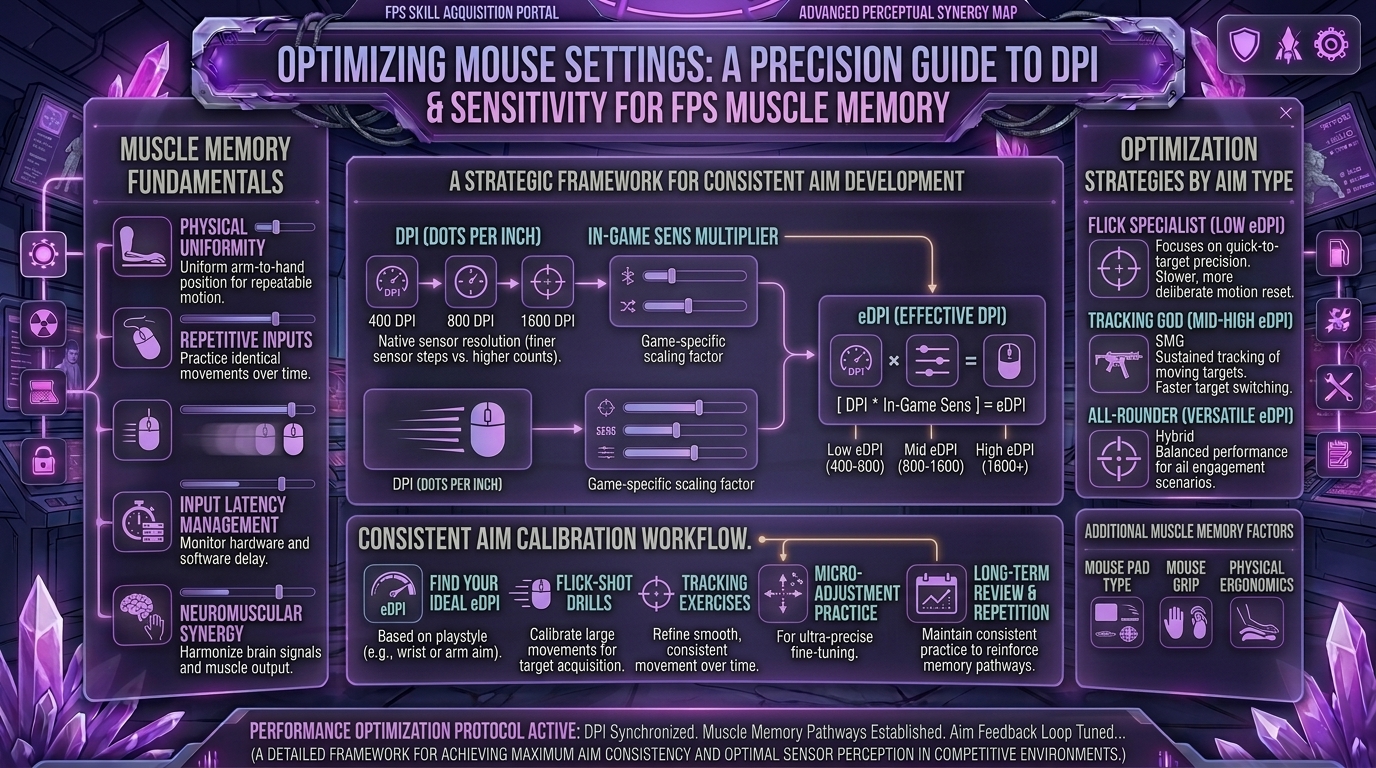
    $$\text{eDPI} = \text{Mouse DPI} \times \text{In-Game Sensitivity}$$

    For example, a player using 400 DPI with a 2.0 in-game sensitivity and a player using 800 DPI with a 1.0 in-game sensitivity both possess an identical 800 eDPI. Their physical hand movement required to execute a 360-degree rotation is completely identical.

    2. What Do the Pros Use? The Modern Hardware Standard

    Data compiled across top-tier competitive esports titles (Counter-Strike 2, Valorant, Apex Legends) shows an overwhelming consensus among elite players:

    Mouse DPI SettingPercentage of FPS ProsWhy They Choose It
    800 DPI~59% (Dominant Standard)Strikes a flawless balance between smooth desktop navigation at 1440p/4K and granular in-game slider adjustments.
    400 DPI~21% (Veteran Choice)Traditional standard heavily favored by legacy tactical rifle competitors who locked in their profiles years ago.
    1600 DPI~17% (High-Speed Sensor)Modern choice for ultra-low sensitivity players who want the cleanest high-frequency sensor reporting signal.

    The Sweet Spot eDPI Ranges by Game Genre

    When combining your DPI and in-game sensitivity, your target effective range should generally fall into these game-specific brackets to ensure precision micro-adjustments:

    • Tactical Shooters (CS2 / Valorant): 180 to 350 eDPI (Requires large arm sweeps for turns, micro-wrist adjustments for headshots).
    • Tracking-Heavy Battle Royales (Apex Legends / The Finals): 800 to 1,200 eDPI (Requires faster rotational arcs to track hyper-mobile targets).

    3. The cm/360 Rule: Measuring Your Physical Movement

    If you switch from one game to another, relying on in-game sensitivity numbers will ruin your muscle memory because different game engines render fields of view and yaw angles differently. The only universal metric for muscle memory is cm/360—the exact physical centimeters your hand must move across your mousepad to perform a complete 360-degree rotation.

    • Elite Tactical Standard: Most tactical FPS competitors use a cm/360 range between 34 cm and 50 cm.
    • This means a full pivot of your arm moves your character around completely, while micro-adjustments across a 5-to-10 centimeter window handle everyday tracking and target acquisition.

    4. Step-by-Step Guide to Locking In Your Permanent Sensitivity

    If your aim feels inconsistent, jittery, or muddy, reset your configuration using this methodical process:

    [Phase 1: Clear Software Bloat] ➔ [Phase 2: Set 800 DPI Baseline] ➔ [Phase 3: The Wall Test] ➔ [Phase 4: Lock and Commit]
    
    1. Disable Windows Acceleration: Go to Windows Mouse Settings, open Additional Mouse Options, navigate to Pointer Options, and uncheck “Enhance pointer precision”. This raw input setting is the #1 enemy of muscle memory.
    2. Lock Your DPI: Set your mouse hardware profile permanently to 800 DPI. Stop changing your DPI via side buttons on the fly; consistency is built through repetition.
    3. Choose a Baseline eDPI: Start right in the middle of the pro average (e.g., matching a standard 240 eDPI in Valorant or 800 eDPI in CS2).
    4. The Strafe-Tracking Test: Stand in front of a static wall in a practice range, place your crosshair on a bullet hole, and strafe left and right continuously. If your crosshair easily stays locked on that single point without drifting or forcing your wrist to cramp, your baseline is correct.

    5. Hardware Checklist: Polling Rates and Mousepads

    Your sensitivity settings are only as good as the surface and sensor translating your hand movements:

    • Polling Rate (1000Hz Standard): Set your mouse polling rate to 1000Hz (or 1-1ms response time). While 4000Hz and 8000Hz options exist, 1000Hz provides rock-solid stability without wasting CPU overhead or introducing weird jitter.
    • The Mousepad Requirement: Low-to-medium sensitivities require physical estate. If you run a low eDPI, you need a large control or hybrid mousepad (at least 450mm wide) so your mouse never runs off the edge during a critical flick.

    10 Frequently Asked Questions (FAQ)

    1. Is higher DPI better for competitive aiming?

    No. Higher DPI simply increases cursor velocity. For precision aiming, running an extremely high DPI makes your mouse overly sensitive to natural hand micro-shakes, harming consistency.

    2. Should I use different sensitivities for different games?

    Ideally, no. Try to match your cm/360 distance across all FPS titles using third-party calculator tools so your muscle memory carries over seamlessly.

    3. Why do some pros use 400 DPI while others use 800?

    Both output identical precision on modern sensors. 400 DPI is a legacy holdout habit from old CS:GO veterans, while 800 DPI has become the modern default because it provides smoother desktop navigation.

    4. How long does it take for muscle memory to adapt to a new sensitivity?

    If you make a major adjustment, expect a 1-to-2 week transition period where your brain recalibrates its spatial awareness. Avoid constantly tweaking your slider during this adjustment phase.

    5. Does monitor resolution affect my mouse sensitivity?

    Your physical mouse movement maps to angles in 3D game engines, not screen pixels, meaning your in-game cm/360 remains constant regardless of whether you play on 1080p, 1440p, or 4K.

    6. What causes my crosshair to feel “floaty” or delayed?

    Floaty aim is usually caused by V-Sync enabled in your graphics settings, Windows pointer acceleration turned on, or a low polling rate. Turn V-Sync off and ensure raw input is active.

    7. Should I use arm aiming or wrist aiming?

    A healthy blend of both is ideal. Use your arm and elbow for large camera rotations and sweeping turns, and reserve your wrist and fingers for precise micro-adjustments.

    8. How can I test if my current sensitivity is too high?

    If you routinely overshoot targets, miss micro-adjustments, or feel like your hand is shaking uncontrollably during high-stress gunfights, your sensitivity is likely too high. Lower it by 10% increments.

    9. Do lightweight mice change how sensitivity feels?

    Yes. A lighter mouse (under 60 grams) requires less initial physical force to move, which can make a medium sensitivity feel faster initially until your hand adjusts to stopping it.

    10. Where can I find more pro settings and hardware guides?

    Bookmark The Gamer Buzz and check back regularly for our deep-dive configuration breakdowns, gear reviews, and competitive optimization tips!

    Conclusion

    Developing elite, consistent muscle memory in FPS games isn’t about chasing viral settings or maxed-out DPI specs—it is about discipline and mathematical consistency. By locking your mouse hardware to 800 DPI, disabling Windows pointer acceleration, grounding your setup in a proven eDPI bracket, and committing to a uniform cm/360 rotation, you give your brain the stable foundation it needs to perform. Set your baseline, trust the process, and watch your accuracy skyrocket!

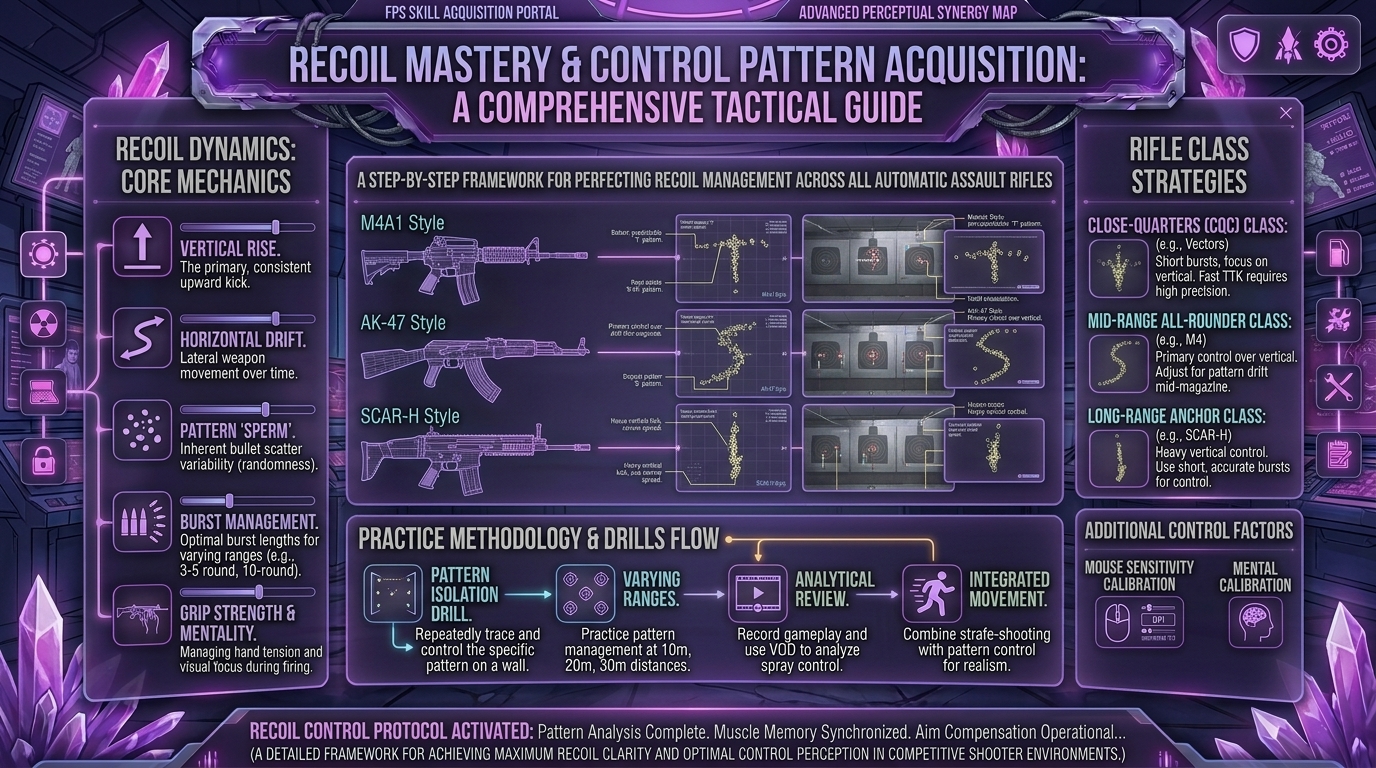
  • How to practice and master recoil control patterns for every automatic assault rifle in tactical shooting games

    How to practice and master recoil control patterns for every automatic assault rifle in tactical shooting games

    Welcome to The Gamer Buzz, your premier competitive performance authority. Whether you are grinding competitive ladders from the gaming epicenters of San Francisco and New York, dialing in low-latency hardware setups across Texas and California, or tuning your frame pacing in Washington, mastering weapon mechanics is the definitive separator between average players and esports-tier competitors.

    In tactical first-person shooters (such as Counter-Strike 2, Valorant, BattleBit, or realistic military sims), automatic assault rifles are the cornerstone of your team’s economy and firepower. However, unlike arcade shooters where bullets laser-beam straight forward, tactical shooters feature fixed, complex recoil patterns and randomized spread recovery.

    If you do not master counter-strafing, recoil dampening, and spray compensation, your bullets will fly harmlessly over your opponent’s head past the fourth round. In this exhaustive, master-level guide, we break down the physics of gun kick, step-by-step muscle memory routines, weapon-specific spray management, and advanced training frameworks required to turn you into a laser-accurate rifle god.

    1. The Anatomy of Gun Kick: Spread vs. Recoil vs. Recovery

    To control a weapon, you first need to understand the invisible physics governing every single bullet leaving your barrel. Modern tactical shooters separate bullet deviation into three distinct pillars:

    First-Shot Accuracy and Standing Spread

    • The First-Bullet Infallibility: In tactical games, your very first shot when stationary and standing still has a near 100% chance of landing dead-center on your crosshair.
    • Movement Penalty: The moment you move, jump, or fire while walking, spread expands exponentially. Counter-strafing (tapping the opposite movement key to instantly halt momentum) is mandatory before pulling the trigger.

    Recoil Patterns (Pattern Memorization)

    • Unlike games with random recoil spread, premier tactical rifles feature pre-determined, hardcoded recoil paths.
    • For example, a weapon might kick vertically straight up for the first 5 bullets, pull sharply to the right for bullets 6 through 15, and oscillate horizontally back and forth for the remainder of the magazine. Your mouse movement must mirror this pattern in reverse to keep bullets grouping tightly together.

    Recovery Time (Resetting the Bloom)

    • If you dump an entire 30-round magazine and stop firing, your gun does not instantly return to zero. It suffers from recoil recovery delay. Learning to burst-fire (3 to 5 rounds) or tap-fire lets your weapon bloom reset organically.

    2. Universal Techniques for Countering Recoil

    Before learning individual weapon blueprints, you must build the foundational physical habits that apply across all tactical shooters:

    1. The Pull-Down Reflex: The universal reaction to firing an automatic rifle is pulling your mouse downward to counter vertical climb. Master the timing of when the vertical pull transitions into horizontal tracking.
    2. Arm vs. Wrist Engagement: For small 3-round bursts, your wrist and fingers handle the micro-adjustment. For full 30-round spray transfers, you must engage your forearm to drag the mouse down across your mousepad.
    3. Pacing Your Bursts: In long-range engagements, do not spray. Fire controlled 2-to-3 round micro-bursts, resetting your crosshair between each burst to maintain maximum accuracy.

    3. Weapon-Specific Spray Breakdowns

    While every game has its own unique arsenal, assault rifles generally fall into three structural categories:

    Rifle ArchetypeRecoil TendencyOptimal Engagement RangeRecommended Fire Technique
    High-Caliber Heavy RiflesSteep vertical climb, harsh left-right jitterMedium to Long Range2-tap bursts or tightly controlled 5-bullet sprays
    Standard Assault CarbinesModerate vertical rise, smooth diagonal pullClose to Medium RangeFull 10-to-15 round spray transfers with smooth mouse tracking
    Bullpup / Compact RiflesLow initial kick, heavy horizontal oscillationClose QuartersAggressive tracking, rapid tap-firing, and mobility utilization

    Mastering the First 8 Bullets

    Statistics show that 90% of tactical gunfights are decided within the first 5 to 8 bullets. If you haven’t secured a headshot or high-damage body tally by bullet eight, you are either dead or forced to reset. Therefore, your primary practice focus should always be the initial vertical pull and directional transition of the first third of your magazine.

    4. Step-by-Step Training Routine for Recoil Mastery

    Practicing in live matches is inefficient because you spend 80% of your time dead, spectating, or running back to sites. Use this dedicated 30-minute training protocol:

    [Phase 1: Wall-Shooting Spray Tests] ➔ [Phase 2: Deathmatch Tracking] ➔ [Phase 3: Utility Integration]
    

    Phase 1: The Blank Wall Test (10 Minutes)

    • Stand 10 meters away from a solid, neutral wall in a custom practice server.
    • Fire a full magazine without touching your mouse to memorize the raw pattern shape.
    • Next, fire while actively pulling your mouse to counter the pattern, attempting to cluster all 30 bullet holes into a tight circle the size of a coin.

    Phase 2: Static Target Re-centering (10 Minutes)

    • Use built-in practice range bots or custom training maps. Practice snapping to a target, firing a controlled 5-bullet burst, and immediately snapping to a secondary target while managing the recoil reset cooldown.

    Phase 3: Movement and Counter-Strafing Sprays (10 Minutes)

    • Practice peek-shooting: strafe out from cover, instantly counter-strafe to zero your velocity, fire a controlled burst, and step back behind cover before your spray pattern loses control.

    5. Common Recoil Control Mistakes to Avoid

    • Crouch-Spraying Every Single Time: While crouching slightly tightens your recovery bloom in some games, developing a reliance on dropping to the floor makes you an easy, stationary target for skilled snipers.
    • Over-Compensating Horizontally: Beginners often panic when the gun pulls sideways and aggressively jerk their mouse back and forth, creating wild, uncontrollable bullet scatters. Smooth, calculated tracking is superior to jittery corrections.
    • Ignoring Sound Cues: Audio design in tactical shooters tells you when your weapon has fully reset its recovery state. Learn to listen to the mechanical click of your rifle bolt resetting.

    10 Frequently Asked Questions (FAQ)

    1. Are recoil patterns completely random in tactical shooters?

    No. In premier competitive tactical shooters, recoil patterns are 100% deterministic (the same every time you hold down the trigger). Only minor bullet spread/bloom introduces RNG elements.

    2. How many bullets should I fire in a standard burst?

    For long-range fights, stick to 2 to 3 rounds. For medium-range engagements, 5 to 7 bullets form the optimal damage window before horizontal recoil becomes difficult to manage.

    3. Does my mouse sensitivity affect my ability to control recoil?

    Massively. If your sensitivity is too high, tiny hand movements will send your spray flying off target. Finding a balanced, lower eDPI gives you the physical desk space required to drag your mouse smoothly downward.

    4. Why do my bullets miss even when my crosshair is on the enemy?

    This is usually caused by movement inaccuracy (firing while walking or running) or weapon recovery bloom penalties from firing too fast without letting the gun reset.

    5. Should I pull down slower or faster as the magazine empties?

    You must match the exact pacing of the pattern. Most rifles pull down fastest during the opening bullets, requiring a slower, more deliberate horizontal balancing act toward the middle and end of the magazine.

    6. Is it better to tap-fire or spray?

    It depends entirely on the distance. Tap-fire and micro-bursting dominate long-range angles, while full-automatic spraying is necessary to overwhelm enemies in tight corridors and site takes.

    7. How long does it take to build recoil muscle memory?

    With a disciplined 15-to-20 minute daily wall-test and target-practice routine, most players notice significant improvements in their spray control consistency within 3 weeks.

    8. Do attachments and scopes change recoil patterns?

    In games featuring weapon customization, attachments like compensators, heavy barrels, or angled grips alter the shape and severity of the recoil pattern, making vertical climb easier to manage at the cost of other stats.

    9. What is a “spray transfer”?

    A spray transfer is the advanced technique of killing one enemy, maintaining your ongoing trigger pull, and seamlessly dragging your compensating crosshair over to a second adjacent enemy mid-magazine.

    10. Where can I find more tactical weapon guides and pro settings?

    Bookmark The Gamer Buzz and check back regularly for our comprehensive database of professional weapon tier lists, game breakdowns, and competitive improvement guides!

    Conclusion

    Mastering recoil control patterns for every automatic assault rifle in tactical shooting games is a rewarding journey that transforms you from a panicked shooter into a calculated tactical operator. By understanding weapon physics, drilling your muscle memory against practice walls, and maintaining strict burst discipline, you will dominate your gunfights and climb the competitive ladder with absolute confidence. Lock in your sensitivity, head to the practice range, and start landing those crisp, controlled sprays!

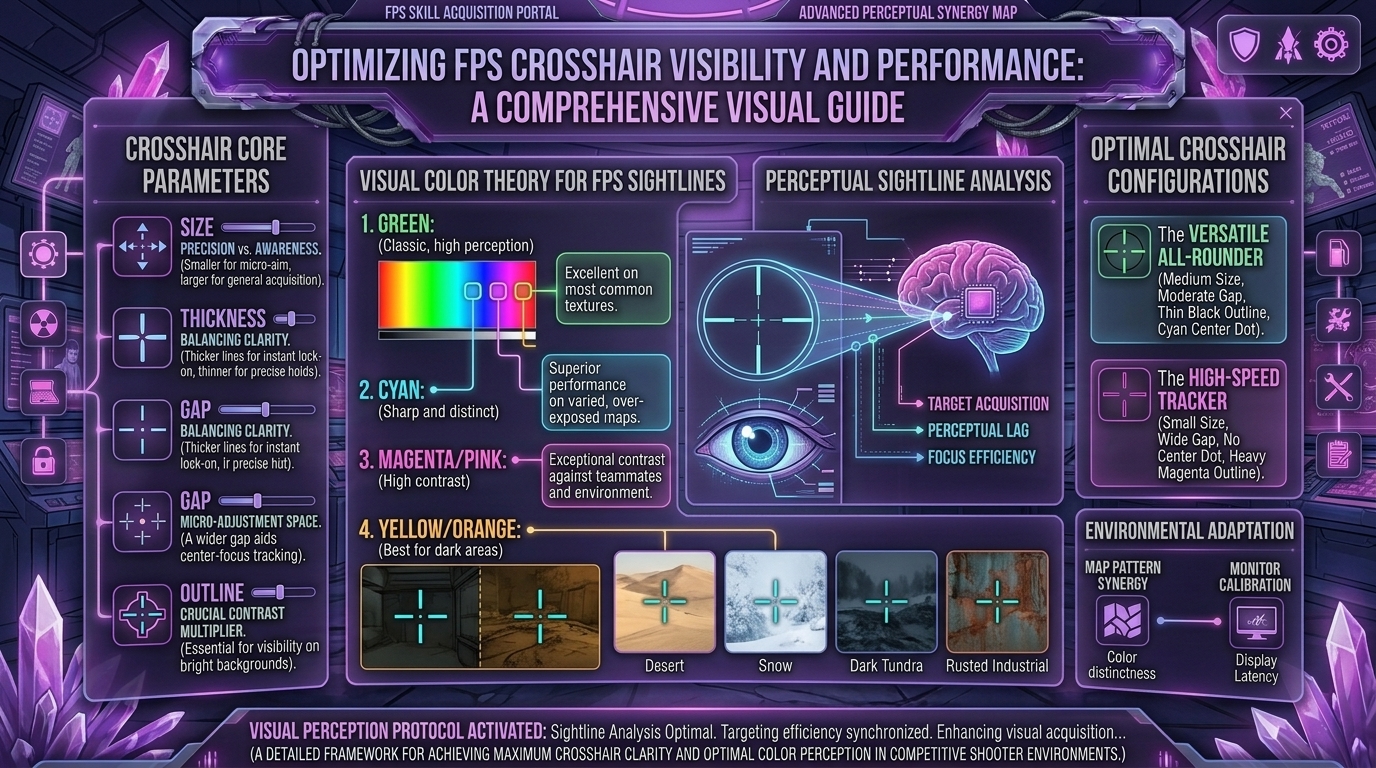
  • What are the best crosshair settings and color combinations for high visibility in competitive shooter matches

    What are the best crosshair settings and color combinations for high visibility in competitive shooter matches

    What Are the Best Crosshair Settings and Color Combinations for High Visibility in Competitive Shooter Matches

    Welcome to The Gamer Buzz, your premier competitive tactical hub. Whether you are climbing the ranked ladders from the vibrant gaming setups of San Francisco, New York, and Seattle or tuning your hardware performance across Texas and California, optimizing your visual interface is just as important as your physical aim.

    In high-stakes tactical first-person and third-person shooters (such as Valorant, Counter-Strike 2, Apex Legends, and Overwatch 2), fractions of a second decide gunfights. If you lose track of your crosshair for even a millisecond amid visual utility, smoke grenades, map shadows, and bright character abilities, your accuracy plummets.

    In this exhaustive, master-level guide, we break down the definitive crosshair settings, color theory principles, and contrast configurations required to maximize visual clarity and lock down your competitive aim.

    1. The Core Psychology of Crosshair Visibility

    Your crosshair is the visual bridge between your hand-eye coordination and the game world. When selecting your settings, your primary goal is high visual contrast against dynamic backgrounds.

    Most tactical shooter maps feature mixed color palettes: concrete grays, earthy browns, dark interior shadows, and brightly lit outdoor plazas. A poor crosshair color blends seamlessly into these textures, causing “reticle loss” during tracking movements.

    The 3 Pillars of an Optimal Crosshair:

    1. Uninterrupted Center Space: Leaving an inner center gap prevents your reticle from completely obscuring an enemy’s head at long ranges.
    2. Dynamic Adaptation (Outlines): Utilizing subtle black outlines ensures your crosshair pops whether you aim against a dark wall or a blinding flash of light.
    3. Zero Visual Noise: Turning off dynamic movement and firing error spreads keeps your aiming reference point static, predictable, and disciplined.

    2. Choosing the Best Crosshair Colors: The Pro Tier List

    Color science plays a massive role in human reaction times. Certain wavelengths trigger faster cognitive registration in the visual cortex.

    Crosshair ColorVisibility RatingMap CompatibilityBest Use Case
    Cyan / Light BlueS-Tier (Elite)Exceptional on 95% of mapsUniversally favored by pros; stands out against grays and earth tones.
    Bright Neon GreenS-Tier (Elite)Highly reliable everywhereNatural human eye sensitivity makes green pop instantly in peripheral vision.
    Hot Pink / MagentaA-Tier (Great)Excellent on green/nature mapsPerfect if you frequently lose your crosshair in neutral environments.
    Pure WhiteB-Tier (Good)Balanced, but can blend on snow mapsClean and minimalist, best paired with a thin black outline.
    Yellow / OrangeC-Tier (Situational)Poor on desert/sunlit mapsCan wash out entirely under bright lighting or sandy environmental textures.

    3. Recommended Numerical Settings for Precision and Tracking

    While personal preference dictates shape, mathematical consistency governs performance. Use these structural dimensions as your baseline:

    • Center Dot: Off (or set to 1-pixel tiny dot if you prefer tap-firing). Large dots block micro-adjustments at long distances.
    • Inner Line Length: 4 to 6 units. Keeps the reticle compact enough not to obstruct targets.
    • Inner Line Thickness: 1 to 2 units. Thicker lines can obscure heads during precise spray transfers.
    • Outer Lines: Disabled (0). Outer lines add unnecessary visual clutter that distracts from tracking movement.
    • Outlines: Enabled (Opacity 1, Thickness 1). This creates a high-contrast border around your core color, ensuring visibility against white walls and skyboxes.

    4. Crosshair Styles: Cross vs. Dot vs. T-Shaped

    Different weapons and playstyles benefit from different structural geometries:

    [The Classic Cross] ➔ Best for general tracking and spray pacing
    [The T-Shape]       ➔ Best for absolute headshot and tap-firing precision
    [The Minimal Dot]   ➔ Best for high-tier riflers with elite micro-adjustments
    
    • The Classic Cross: Features four equal lines meeting in the center with a small gap. Offers great visual feedback for movement and weapon recoil pacing.
    • The T-Shaped Crosshair: Removes the top vertical line entirely. This opens up clear vertical space directly above your enemy’s head, making it nearly impossible to lose sight of the target during vertical tracking or elevation changes.
    • The Minimalist Dot: Strips away all lines, leaving a single focal point. Highly rewarding for confident players, though it can occasionally vanish during chaotic, high-recoil screen shakes.

    5. Tailoring Crosshairs for Different Monitor Resolutions

    Your physical display setup changes how lines render on screen:

    • Native 16:9 Widescreen: Standard crosshair settings appear balanced. Stick to default line thicknesses (1).
    • Stretched 4:3 Resolutions: If you run a stretched aspect ratio (popular in legacy tactical shooters to make character models appear wider), your horizontal pixels are stretched. You may need to slightly adjust your crosshair thickness or length parameters so the reticle does not look warped or distorted during fast camera pans.

    10 Frequently Asked Questions (FAQ)

    1. What is the absolute best crosshair color for competitive shooters?

    Cyan and bright neon green are widely considered the best overall choices because they rarely match the natural background textures of modern map designs.

    2. Should I use a center dot on my crosshair?

    It depends on your weapon preference. Center dots are fantastic for single-tap precision weapons (like guardian or sniper variants), but can obstruct vision when spraying rifles at long range.

    3. Why do professional players frequently change their crosshairs?

    Some pros change crosshairs to psychologically reset a cold streak, combat visual fatigue, or adapt to newly released maps with unfamiliar color grading.

    4. Are black outlines necessary?

    Yes, outlines act as a visual safety net. If your bright cyan crosshair passes over a bright skybox or white wall, the black outline keeps the center point legible.

    5. Should I turn movement error on or off?

    Always turn movement and firing error off. You want your crosshair to remain completely static so your brain develops consistent spatial muscle memory without visual distractions.

    6. Can a bad crosshair actually ruin my aim?

    Indirectly, yes. If your crosshair blends into the map or is too large to see enemy heads at a distance, you will miss shots due to visibility loss rather than bad mechanics.

    7. How do I import custom crosshair codes?

    Most modern competitive shooters feature an in-game profile settings menu where you can copy and paste community or professional share codes instantly.

    8. Is a smaller crosshair always better?

    Generally yes, because it prevents target obscuration, but making it too small can cause you to lose track of it during chaotic, high-speed multi-enemy engagements.

    9. How do graphics settings affect crosshair visibility?

    Lowering post-processing, removing motion blur, and turning off ambient occlusion can drastically sharpen your game’s visual clarity, making any crosshair color stand out much better.

    10. Where can I find more pro settings and crosshair codes?

    Bookmark The Gamer Buzz and check back regularly for our comprehensive database of professional configuration breakdowns, gear guides, and tactical tips!

    Conclusion

    Your crosshair is the ultimate tool for translating visual intent into accurate gameplay execution. By swapping to a high-contrast color like cyan or green, enabling subtle black outlines, and keeping your layout clean and static, you will instantly improve your target acquisition speed. Pick your preferred style, lock in your settings, and start landing those clean opening frags in your next match!

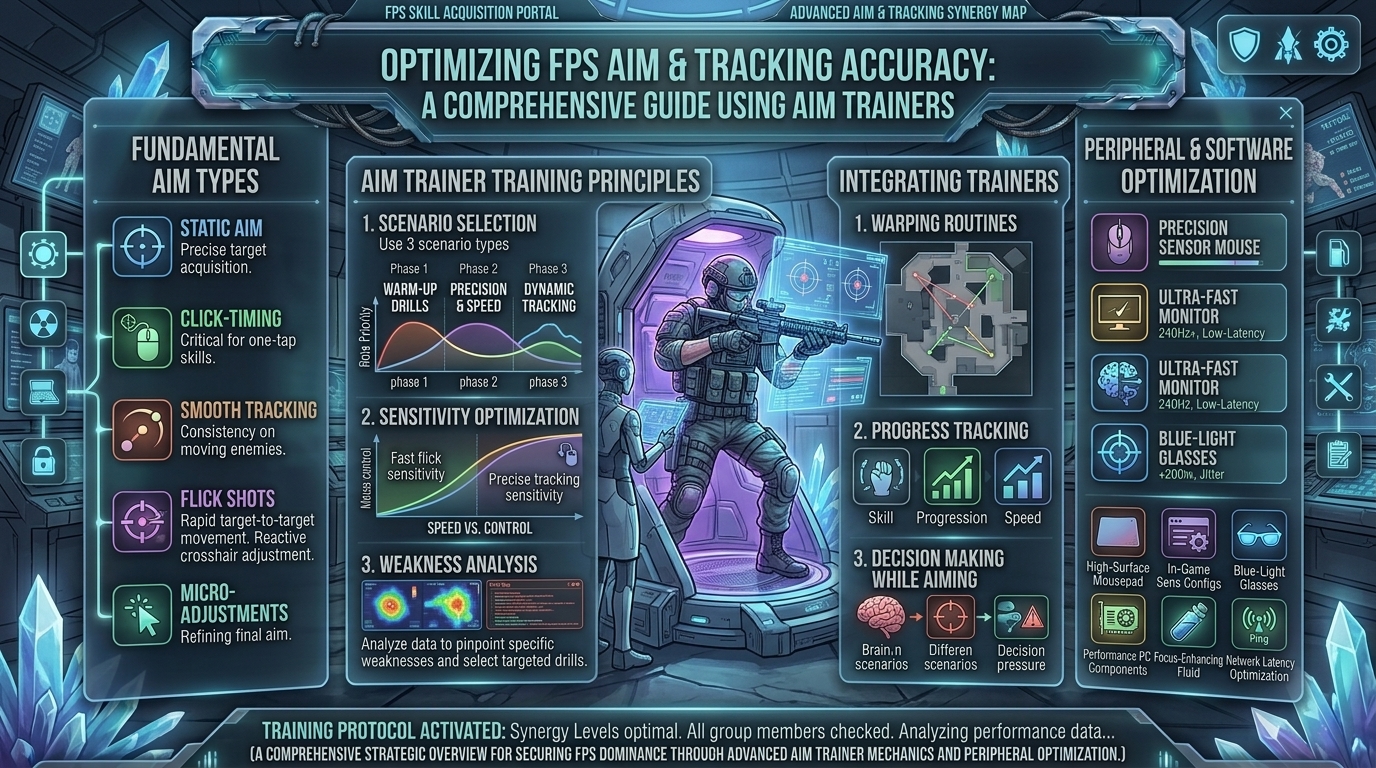
  • How to improve your aim and tracking accuracy in tactical first person shooter games using aim trainers

    How to improve your aim and tracking accuracy in tactical first person shooter games using aim trainers

    Welcome to The Gamer Buzz, your ultimate competitive performance nexus. Whether you are grinding competitive ladders from the high-paced esports hubs of San Francisco and New York, dialing in your hardware setups across Texas and California, or tuning your gear in Washington, mastering precision mechanics is the ultimate pathway to climbing ranks.

    In tactical first-person shooter (FPS) games—such as Counter-Strike 2, Valorant, Rainbow Six Siege, or hardscaped tactical tactical shooters—raw mechanical execution separates casual players from elite competitors. While in-game deathmatch servers help, dedicated aim trainers (like KovaaK’s, Aimlabs, or Aimbeast) offer surgical, isolated environments designed to fast-track your muscle memory.

    In this exhaustive, master-level guide, we break down the definitive routines, sensitivity metrics, tracking techniques, and training frameworks required to permanently elevate your aim and tracking accuracy.

    1. The Mechanics of Aim: Flicking vs. Tracking vs. Target Switching

    Before jumping into a training routine, you must understand the three fundamental pillars of mouse control. Different tactical scenarios demand distinct physical mechanics:

    • Flicking (Ballistic Aim): Rapidly transitioning your crosshair from point A to point B in a straight line. Essential for holding angles, reacting to unexpected peeks, and executing fast entry frags.
    • Tracking (Smooth Pursuit): Keeping your crosshair locked onto a moving target at a consistent speed. Crucial for tracking targets strafing across open corridors or dealing with movement abilities.
    • Target Switching: Fluidly shifting your crosshair from one eliminated target to the next. Vital for multi-kill spray transfers and dealing with chaotic multi-opponent engagements.

    In tactical shooters, smooth tracking combined with precise first-bullet accuracy dictates your win rate in dual-gunfights.

    2. Optimizing Your Hardware and Sensitivity Baseline

    You cannot build consistent muscle memory on an unstable foundation. Before opening an aim trainer, audit your physical gaming environment:

    The Golden Rule of Sensitivity: eDPI

    Your effective DPI (eDPI)—calculated as your Mouse DPI multiplied by your In-Game Sensitivity—determines your rotational arc.

    • Tactical Shooter Standard: Most elite tactical FPS pros run a low-to-medium eDPI (equivalent to roughly 200 to 400 DPI with a 1.5 to 3.0 in-game sensitivity in games like Valorant).
    • The Arm vs. Wrist Debate: Low sensitivities force you to use your entire forearm for large sweeps and your wrist/fingers for micro-adjustments. This minimizes erratic shaking during high-stress gunfights.

    Ergonomics and Gear Checklist

    • Mousepad Real Estate: Use a large desk-mat style mousepad (at least 450mm x 400mm) to allow unobstructed arm movement.
    • Posture: Sit with your elbow at a 90-degree angle, resting your forearm comfortably on the desk surface without pinching your wrist nerve.

    3. Designing an Effective Daily Aim Training Routine

    Aim training is like going to the gym; mindless repetition leads to plateauing or injury (wrist fatigue). Structure your 30-to-45-minute daily routine using this proven framework:

    [Phase 1: Warm-Up & Micro-Adjustments] ➔ [Phase 2: Fluid Tracking] ➔ [Phase 3: Dynamic Flicking] ➔ [Phase 4: In-Game Transfer]
    

    Phase 1: Warm-Up and Micro-Adjustments (5–10 Minutes)

    • Focus on slow, deliberate crosshair placement. Do not rush.
    • Use static grid scenarios to practice stopping your crosshair on target without over-flicking (overshooting).

    Phase 2: Smooth Tracking Mastery (10–15 Minutes)

    • Select reactive tracking and smooth tracking scenarios (e.g., Pasu, Cataic Teleport, or Smoothbot routines).
    • Focus on keeping your crosshair glued to the center of the moving target rather than aggressively twitching back and forth.

    Phase 3: Dynamic Flicking and Speed (10 Minutes)

    • Integrate scenarios featuring targets that change direction or spawn unpredictably.
    • Push your speed threshold until you miss roughly 20% of your shots, then dial back slightly to maintain control.

    Phase 4: In-Game Transfer (5 Minutes)

    • Jump immediately into a deathmatch or unrated match in your primary tactical shooter to apply your fresh muscle memory to actual geometry, recoil patterns, and head-height crosshair placement.

    4. Common Aim Training Mistakes to Avoid

    Even dedicated players often stunt their growth by falling into bad habits inside aim trainers:

    • The “Score-Chasing” Trap: Constantly grinding the exact same easy scenario just to see a high score on a leaderboard does not build functional skill. Challenge your weaknesses.
    • Ignoring Crosshair Placement: In tactical shooters, holding crosshairs at head height and anticipating enemy angles beats raw flick speed 90% of the time. Combine aim training with map awareness.
    • Tensing the Wrist and Arm: Keeping your hand rigid restricts micro-adjustments. Stay loose, breathe evenly, and initiate movements smoothly.

    5. Tailoring Aim Workouts for Specific Tactical Shooters

    Game Genre / TitlePrimary Aim FocusRecommended Training Task Types
    Tactical Snipers / Hold AnglesFirst-bullet accuracy, crosshair stabilityStatic clicking, micro-adjustments, target acquisition
    Movement-Heavy ShootersVertical tracking, rapid target switchingReactive tracking, bounce tracking, multi-target switches
    Recoil-Based ControlSmooth horizontal tracking, pacingStatic control grids, sustained tracking runs

    10 Frequently Asked Questions (FAQ)

    1. Which aim trainer is better: Aimlabs or KovaaK’s?

    Both are exceptional tools. Aimlabs is free and features robust analytics and data breakdown, while KovaaK’s is renowned for its vast community-created scenario workshop and fine-tuned physics engine. Choose the one that fits your workflow.

    2. How many hours a day should I spend in an aim trainer?

    For optimal improvement without burning out your wrist, 30 to 45 minutes a day before your regular gaming session is more than enough. Consistency beats marathon sessions.

    3. Will aim training instantly make me a rank-one player in tactical shooters?

    No. Aim is only one pillar of tactical FPS success. Game sense, positioning, economy management, utility usage, and team communication account for the rest of your performance.

    4. Should I change my sensitivity between games and aim trainers?

    Never. Always match your exact eDPI across your aim trainer and your primary tactical shooter to ensure true 1:1 muscle memory transfer.

    5. Why does my hand hurt after aim training?

    Hand or wrist pain is a sign of excessive tension or poor posture. Stop immediately, stretch your wrists, lower your grip intensity, and ensure your arm rests naturally on your desk.

    6. Is it normal for my accuracy to feel worse immediately after training?

    Yes! Sometimes your hand experiences temporary fatigue right after a rigorous training routine. Give your muscles a 10-minute break before jumping into ranked matches.

    7. How long does it take to see noticeable improvements in-game?

    With a disciplined, structured daily routine, most players notice a tangible improvement in their confidence, crosshair stability, and duel win-rates within 2 to 4 weeks.

    8. What is “smoothness” in tracking and why does it matter?

    Smoothness refers to eliminating jittery, micro-corrections when following a moving target. High smoothness results in consistent damage output and prevents missed shots during chaotic strafe battles.

    9. Should I use visual effects or custom crosshairs in aim trainers?

    Keep your visual settings clean and distraction-free. Use a simple, high-visibility crosshair (like a small cyan or green dot/cross) that mirrors what you use in your main games.

    10. Where can I find advanced daily playlists and benchmark routines?

    Check out community-driven benchmark routines like the Voltaic or RiddBott playlists, and bookmark The Gamer Buzz for more expert guides, hardware breakdowns, and competitive tips!

    Conclusion

    Improving your aim and tracking accuracy in tactical first-person shooters is a marathon, not a sprint. By optimizing your physical setup, maintaining a disciplined daily routine across dedicated aim trainers, and balancing your raw mechanics with tactical game sense, you will shatter your previous performance ceilings. Lock in your sensitivity, fire up your training playlist, and start dominating those competitive lobbies!

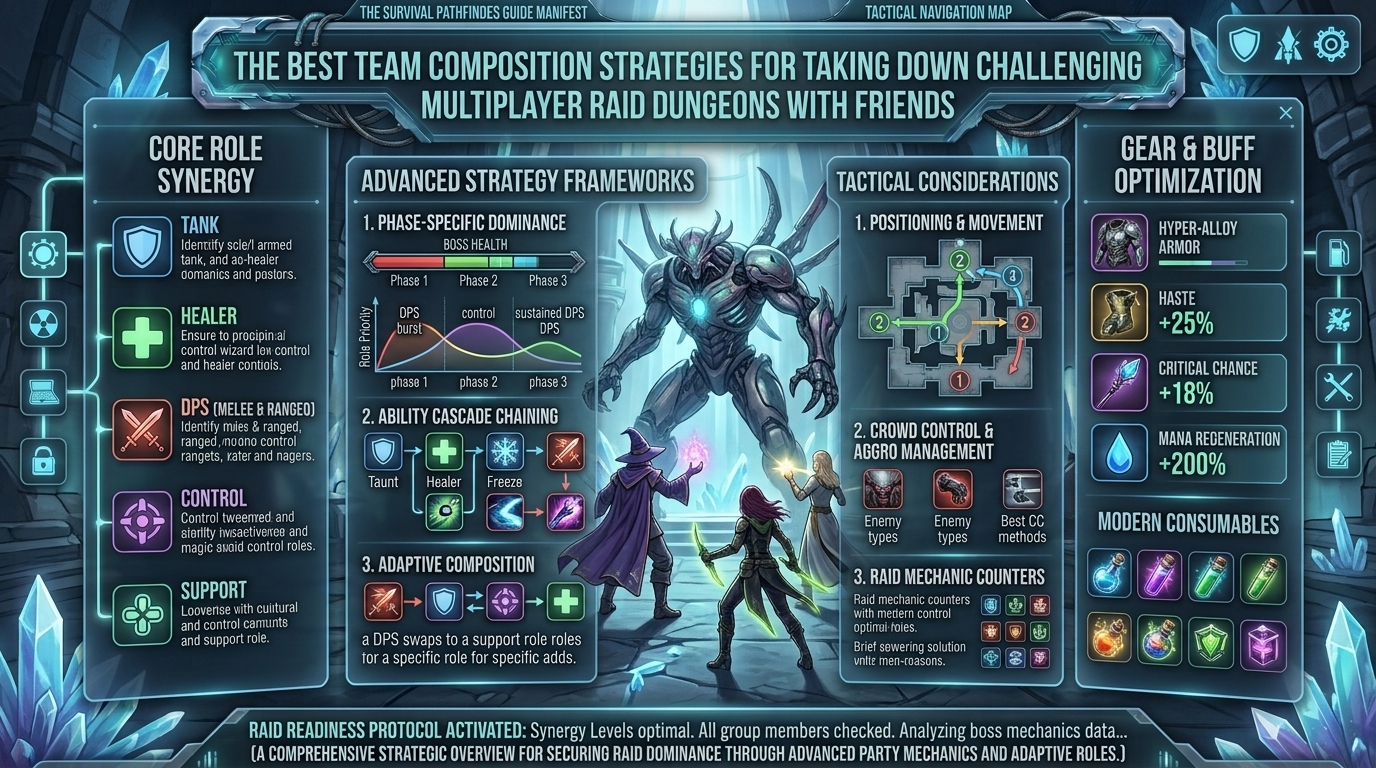
  • What are the best team composition strategies for taking down challenging multiplayer raid dungeons with friends

    What are the best team composition strategies for taking down challenging multiplayer raid dungeons with friends

    Welcome to The Gamer Buzz, your premier tactical database for endgame PvE progression, high-end strategy guides, and elite meta breakdowns. Whether you are coordinating a late-night raid squad from your home setup in New York, San Francisco, Seattle, Austin, or Los Angeles, stepping into high-difficulty multiplayer dungeons requires more than just high item-level gear. It requires surgical precision, balanced roles, and flawless team synergy.

    Taking down punishing raid bosses with friends is the ultimate test of communication and class optimization. In this exhaustive, master-level guide, we break down the definitive team composition strategies, role architectures, and synergy frameworks used by world-first raiding guilds to effortlessly melt endgame dungeon encounters.

    1. The Holy Trinity of Raid Architecture: Tanks, Healers, and DPS

    At the core of almost every successful multiplayer raid dungeon lies the classic Holy Trinity framework. While modern game designs occasionally experiment with hyper-offensive, role-agnostic comps, structured dungeon design heavily rewards a balanced distribution of core responsibilities.

    The Breakdown of Core Responsibilities

    • The Anchor (Main Tank): Responsible for manipulating boss positioning, managing aggro tables (threat generation), and soaking devastating single-target tank-buster mechanics. A good tank minimizes boss movement so that stationary DPS classes can channel maximum output.
    • The Lifeblood (Healers & Support): Tasked with counteracting raid-wide environmental damage, dispensing targeted spot-healing during critical phases, and providing vital defensive/offensive buffs (such as damage reduction, haste, or resource regeneration).
    • The Engine (Damage Dealers / DPS): Divided into burst damage, sustained damage, single-target specialists, and target-swapping trash clearers. Their primary objective is pushing damage phases quickly to skip lethal boss mechanics.

    2. Advanced Synergy Frameworks: Buff Stacking and Debuff Windows

    Elite raid groups do not just bring high individual damage numbers; they engineer multiplier buckets through coordinated class stacking.

    Key Synergy Concepts to Implement:

    1. Armor Shred and Vulnerability Windows: Always ensure your composition features at least one class capable of applying major armor reduction or damage amplification debuffs. Aligning high-burst cooldowns with a synchronized debuff window multiplies overall team output exponentially.
    2. Resource and Mana Batteries: Long raid encounters inevitably lead to resource starvation. Including specs that restore energy, mana, or cooldown speeds to nearby teammates keeps your damage dealers cycling rotations without awkward downtime.
    3. Aura and Passive Layering: Stack physical-oriented support buffers in physical-heavy sub-groups, and magic-scaling amplifiers with caster-heavy setups to maximize passive yield.

    3. Designing for Encounters: Fixed vs. Flex Compositions

    When building a static roster for your regular gaming group, flexibility is your greatest asset. Boss encounters generally fall into three distinct tactical archetypes:

    Boss Encounter TypePrimary Team FocusRecommended Composition Adjustments
    Single-Target DPS CheckPure output velocity, high boss uptimeLean heavy into sustained DPS classes; minimize unnecessary utility.
    Add-Heavy / Swarm ControlArea-of-Effect (AoE) disruption, crowd controlInclude hybrid specs with strong cleave, target pulling, and root utilities.
    Mechanic-Heavy EnduranceMobility, active mitigation, complex movementBalance ranged vs. melee ratios to ensure seamless platform execution.

    4. Communication and Callout Hierarchies

    Even the most mathematically optimized team composition will wipe repeatedly if communication is cluttered. Establishing a clean Command Structure before pulling the boss is critical:

    • The Raid Leader (Shot Caller): Usually played by the main tank or a veteran support player, this person dictates overall strategy, positioning shifts, and burn phases.
    • The Utility Lead: Coordinates interrupt rotations, cleansing schedules, and defensive cooldown spacing for raid-wide wipe mechanics.
    • Clear Radio Discipline: Keep non-essential chatter to absolute zero during high-intensity burn windows. Clean audio channels save lives.

    10 Frequently Asked Questions (FAQ)

    1. Is a balanced Holy Trinity team required for every game?

    Not always. Some action RPGs or hybrid titles allow full-DPS or self-sustaining builds to clear content, but structured endgame raid dungeons almost always require dedicated threat management and healing support.

    2. How many tanks should we run in a standard raid group?

    For standard 5-player dungeons, you need 1 tank. For larger 8-to-10-player raids, 2 tanks are standard (one active boss tank and one off-tank for mechanics or add management).

    3. What is a “DPS Check” and how do we beat it?

    A DPS check is a mechanic where the boss enrages or wipes the party if its health pool is not depleted within a specific timer. Beat it by dumping all offensive cooldowns simultaneously during designated vulnerability phases.

    4. Should we stack duplicate classes or maintain class diversity?

    While stacking multiple copies of the absolute strongest meta class can maximize raw output, maintaining reasonable diversity prevents gear distribution bottlenecks and ensures you have access to diverse utility kits.

    5. How important is positioning during raid boss encounters?

    Critical. Poor positioning can cleave the entire melee group, pull boss frontal cones toward ranged players, or drag the boss out of ground-targeted damage zones.

    6. What causes most endgame raid wipes?

    Greed. Players trying to squeeze in “one more cast” instead of respecting mechanics, dodging lethal floor indicators, or executing necessary target switches account for the vast majority of wipes.

    7. How do we fix low healing output during sustained raid fights?

    Check your healers’ stat priorities (such as haste, critical strike, or spirit regeneration) and ensure utility cooldowns like barrier shields and damage reduction circles are being rotated sequentially rather than overlapping.

    8. Are ranged DPS safer to run than melee DPS?

    Ranged DPS generally have an easier time maintaining uptime while dodging ground hazards, but melee classes frequently possess superior burst potential and crucial interrupt toolkits. Balance is key.

    9. How should we handle loot distribution among friends?

    Establish a fair loot philosophy early—whether rolling main-spec over off-spec, utilizing a point system, or rotating drops transparently to prevent burnout and friction within the group.

    10. Where can I find more raid guides and advanced strategies?

    Keep checking back right here at The Gamer Buzz for comprehensive dungeon walkthroughs, boss breakdown guides, and cutting-edge meta analysis!

    Conclusion

    Conquering challenging multiplayer raid dungeons with friends is one of the most rewarding experiences in gaming. By mastering the fundamental trinity roles, engineering intelligent buff-and-debuff synergies, and maintaining clean communication protocols, your group will transform from a casual squad into a well-oiled progression machine. Form your squad, study the mechanics, and go claim those world-first victories!

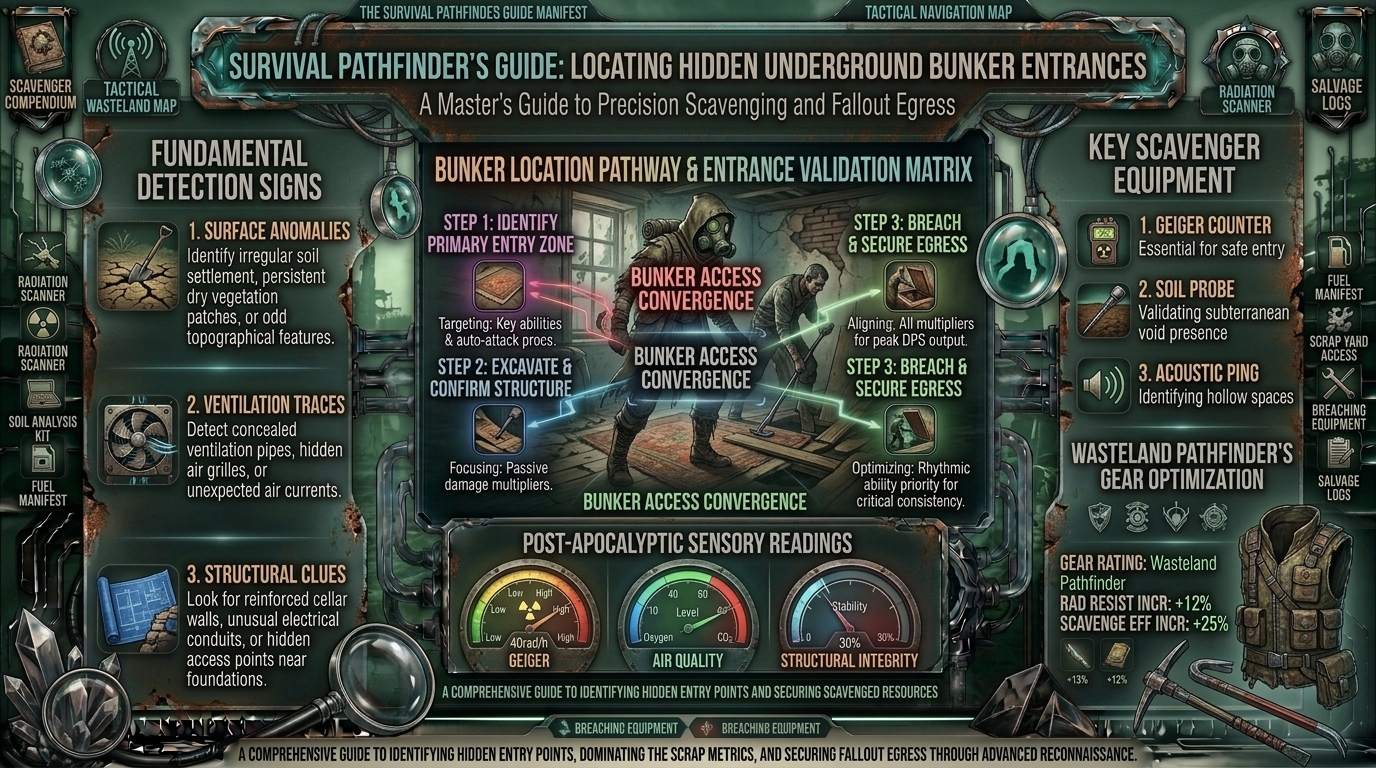
  • How to find hidden underground bunker entrances beneath abandoned farmhouses in post apocalyptic open worlds

    How to find hidden underground bunker entrances beneath abandoned farmhouses in post apocalyptic open worlds

    How to Find Hidden Underground Bunker Entrances Beneath Abandoned Farmhouses in Post-Apocalyptic Open Worlds

    Welcome to The Gamer Buzz, your ultimate tactical gaming portal connecting survivalists and open-world explorers from the tech hubs of San Francisco, New York, and Seattle to the wide-open landscapes of Texas and California.

    When you drop into a desolate wasteland, a nuclear-ravaged sandbox, or a zombie-infested rural countryside, your survival depends entirely on scavenging. Among all the structures scattered across the map, abandoned farmhouses hold the greatest potential rewards. Beneath their decaying floorboards, overgrown yards, and rusted-out tractor sheds often lie hidden pre-war underground bunkers packed with military-grade gear, rare crafting blueprints, and gripping environmental lore.

    In this master-level, exhaustive guide, we dive deep into the psychology of map design, environmental storytelling cues, systematic grid searches, and advanced breach tactics required to find every hidden bunker in your favorite post-apocalyptic open worlds.

    1. The Architectural Psychology of Wasteland Bunkers

    Game developers do not scatter underground bunkers at random. Environmental artists and level designers rely on realism and pre-war civilian psychology to dictate where players will find hidden subterranean shelters. Understanding why a farmer or local militia built a bunker in a specific spot gives you an instant advantage when scouting from a distance.

    The Logic Behind Rural Shelters

    • Discretion and Isolation: Constructing a massive underground vault requires heavy machinery (backhoes, cement mixers, and cranes). Dense urban areas or busy roads make secrecy impossible. Rural farmhouses offer privacy, wide acreage, and visual cover.
    • The “Cover Story” Infrastructure: Every bunker needs a plausible reason for its surface-level footprint. Barns, root cellars, dairy processing shacks, and old grain silos provided natural camouflage for construction noise, excavated earth removal, and steel deliveries.
    • Resource Proximity: Preppers built shelters near natural water tables, arable land, and livestock yards. If a farmhouse has a dried-up well or a stream nearby, look closely at the surrounding earth.

    2. Top 10 Environmental Indicators of a Hidden Bunker

    Developers always leave breadcrumbs. If you approach an abandoned farmhouse and notice any of the following ten environmental anomalies, you are standing directly on top of a hidden underground entrance:

    1. Unusual Concrete Pours: Mismatched concrete slabs inside a rusted root cellar or tractor shed usually seal off a vertical shaft or emergency escape hatch.
    2. Abnormal Ground Depressions: Earth naturally settles over underground cavities. A circular or rectangular indentation in a flat field or behind a barn indicates a hollow space below.
    3. Double-Wide Drainage or Septic Lines: If surface pipes lead away from the house toward a dead end in the yard, follow them. They frequently run parallel to hardened air-filtration shafts.
    4. Impossibly Heavy Debris Piles: A stack of rusted tractors, heavy iron machinery, or collapsed hay bales sitting directly over flat earth is often a developer’s way of masking a heavy steel hatch.
    5. Mismatched Vegetation Growth: Unnatural weed patches, dead rings of grass, or exceptionally green patches can indicate that topsoil depth has been altered by a buried concrete bunker roof.
    6. Surplus Electrical Infrastructure: Look for buried utility conduits, heavy-duty fuse boxes running underground, or old telegraph poles leading away from the main house toward an outbuilding.
    7. Disguised Air Vents: Fake hand-pumps, decorative yard wishing wells, or hollow wooden tree stumps frequently serve as disguised intake or exhaust pipes for deep subterranean shelters.
    8. Locked Outbuildings with No Loot: If an auxiliary shed contains zero items and features reinforced steel doors or heavy padlocks, it is often a staging room or elevator shaft leading down.
    9. Low-Frequency Audio Cues: In games with immersive audio design, walking near hidden air vents can reveal a faint, low electrical hum or an air-filtration fan whirring underground.
    10. Environmental Notes & Diaries: Pay close attention to pre-war terminal entries, crumpled notes on desks, or graffiti left by previous survivors mentioning “old man Miller’s storm shelter.”

    3. Systematic Search Strategies: The Quadrant Grid Sweep

    Don’t wander aimlessly across rural maps hoping to trip over a hatch. Elite open-world scavengers use a systematic Quadrant Grid Sweep to clear farmsteads efficiently and safely:

    [Phase 1: Perimeter Recon] ➔ [Phase 2: Outbuilding Audit] ➔ [Phase 3: Sub-Floor Inspection] ➔ [Phase 4: Audio/Tool Scan]
    
    • Phase 1: Perimeter Reconnaissance (The 100-Meter Radius): Circle the farmhouse at a wide distance using scoped weapons or binoculars. Look for broken fences, hidden access roads, or clearings in the tree line where heavy trucks could have parked during pre-war construction.
    • Phase 2: Outbuilding Audit: Clear all auxiliary structures (barns, silos, tool sheds, pigsties). Check behind stacked hay bales, underneath workbench tables, and behind sliding barn doors.
    • Phase 3: Sub-Floor and Cellar Inspections: Access the main farmhouse basement. Many underground military or civilian bunkers connect via a false wall, a sliding bookshelf, or a bricked-off cellar tunnel in the basement’s deepest corner.
    • Phase 4: Metal Detector & Audio Scans: If the game mechanics permit, utilize audio cues or scanning tools to detect underground metallic density changes.

    4. Unlocking the Vault: Bypass Mechanics and Puzzles

    Once you locate the physical entrance—whether it’s a heavy steel bulkhead door, a biometric security pad, or a chained hatch—you need to know how to open it.

    • Power Restoration Puzzles: Many high-tier bunkers require you to restore local power before the entrance mechanism unlocks. Look for emergency generator units outside, fuel cans in nearby sheds, or junction boxes requiring electrical fuses.
    • Hacking and Lockpicking Minigames: Ensure your inventory is stocked with bobby pins, digital decrypters, or lockpicks. Farmhouse bunkers often feature intermediate to master-tier mechanical locks guarding high-tier loot caches.
    • Explosive Breaching: If standard entry fails, check for structural weak points. Frag grenades, remote charges, or heavy melee weapons can sometimes blast through rotted wooden floor hatches or brittle concrete seals.

    5. Loot Tiering and Risk Assessment

    What can you expect to find once you break through? The risk-reward payout scales with how well-hidden the bunker is:

    Bunker TypeCommon Security LevelKey Loot ClassDanger Rating
    Civilian Storm CellarLow (Wooden Hatch / Simple Padlock)Canned food, basic medical supplies, civilian handgunsLow (Feral wildlife, basic infected)
    Survivalist Prepper VaultMedium (Code Lock / Heavy Steel Door)Military surplus rifles, ammunition, tactical gear, water purifiersMedium (Booby traps, automated turrets)
    Government/Contractor CacheHigh (Biometric Scanner / Power Restoration)Prototype weapons, high-tier armor schematics, rare lore tapesHigh (Heavy security bots, elite hostiles)

    10 Frequently Asked Questions (FAQ)

    1. Do all open-world games feature underground bunkers?

    No, it depends entirely on the game’s setting. Post-apocalyptic, nuclear wasteland, and zombie-survival genres (like Fallout, State of Decay, or DayZ) heavily feature them, while high-fantasy settings rarely do.

    2. Can I get permanently trapped inside a farmhouse bunker?

    Generally, no. Modern game design ensures that once you open a bunker entrance, an interior exit path or fast-travel trigger unlocks so you don’t get stuck.

    3. What tools should I always carry when hunting for bunkers?

    Always pack lockpicks, a supply of fuel cans, a melee weapon for tight corridors, a flashlight or night-vision mod, and spare medical items.

    4. Are bunkers marked on the map automatically?

    Rarely. Most high-value bunkers remain completely unmarked until you physically discover the entrance, read a localized map note, or unlock regional radio tower recon syncs.

    5. How do I deal with interior booby traps?

    Keep your eyes locked on doorframes and floors. Many prepper bunkers use tripwires connected to shotgun shells, landmines, or flashbangs. Disarm them carefully to harvest the components.

    6. Why is a specific outbuilding locked with no obvious key?

    The key is usually hidden nearby. Search the main farmhouse desk, check pockets of infected wandering the perimeter, or look inside a nearby doghouse or vehicle trunk.

    7. Do bunkers respawn loot over time?

    In persistent online survival titles, loot containers typically respawn after a set server reset timer. In single-player RPGs, loot is usually a one-time find per playthrough.

    8. What is the best time of day in-game to search farmhouses?

    Daytime is vastly superior for outdoor visual scanning (spotting subtle ground depressions and shadows), while nighttime can make interior bunker exploration more atmospheric and dangerous.

    9. Can zombies or hostile NPCs spawn inside closed bunkers?

    Yes. Many high-tier bunkers serve as instanced dungeon dens where hostile factions, mutants, or ghouls sleep or wait in ambush. Always breach rooms with your weapon raised.

    10. Where can I find more survival guides and game breakdowns?

    Bookmark The Gamer Buzz and check back regularly for our comprehensive database of hidden maps, loot tables, and advanced tactical open-world guides!

    Conclusion

    Mastering the art of finding hidden underground bunkers beneath abandoned farmhouses is what separates casual scavengers from true wasteland survival legends. By training your eyes to spot unnatural environmental changes, systematically sweeping property quadrants, and preparing for interior security challenges, you will unlock some of the best gear and lore-rich experiences your game has to offer. Gear up, stay vigilant, and happy hunting out there in the wasteland!

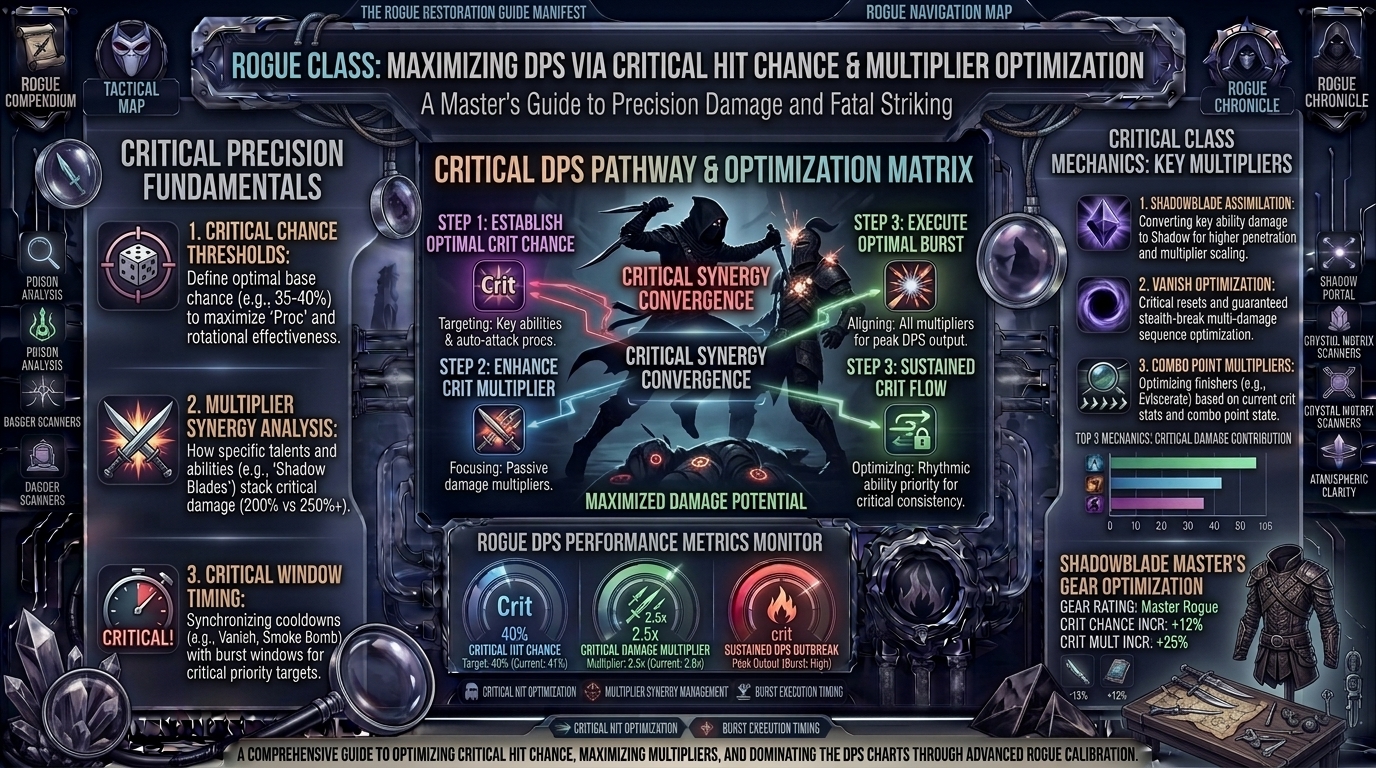
  • What are the best critical hit chance and critical damage multipliers for maximizing rogue class DPS output

    What are the best critical hit chance and critical damage multipliers for maximizing rogue class DPS output

    What Are the Best Critical Hit Chance and Critical Damage Multipliers for Maximizing Rogue Class DPS Output

    Welcome to The Gamer Buzz, your definitive nexus for high-performance action RPG optimization, tactical breakdown guides, and advanced class builds. Whether you are cutting down foes in dark fantasy isometric worlds or securing high-tier endgame clears across New York, California, and Washington, mastering your damage output is the ultimate key to progression.

    For players running the Rogue Class, speed, precision, and multiplicative scaling reign supreme. Among all offensive attributes, Critical Hit Chance (CHC) and Critical Damage Multiplier (CHD) form the bedrock of elite damage-per-second (DPS) architecture.

    In this exhaustive guide, we dissect the mathematical sweet spots, gear breakpoints, and multiplier synergies required to turn your Rogue into an unstoppable DPS powerhouse.

    1. The Anatomy of Rogue Damage: Understanding the Core Pillars

    To maximize your Rogue’s output, you first need to understand how damage calculation handles critical strikes. In most modern ARPGs (such as Diablo IV or similar fast-paced fantasy titles), damage is not just an additive stack; it relies heavily on bucket-based multiplicative scaling.

    Your final damage calculation generally looks like this:

    $$\text{Final Damage} = \text{Base Weapon/Skill Damage} \times \text{Core Stat Multiplier} \times \text{Damage vs. Conditional Buckets} \times (\text{1 + [CHC} \times \text{CHD])}$$

    Critical Hit Chance (CHC) vs. Critical Damage (CHD)

    • Critical Hit Chance (CHC): Dictates how frequently your attacks land as a critical strike. Without a stable baseline of CHC, massive critical damage modifiers are rendered useless because they rarely trigger.
    • Critical Damage Multiplier (CHD): Determines the bonus magnitude of damage dealt when a critical strike occurs.

    The golden rule of optimization is avoiding diminishing returns through stat imbalance. Stacking pure Critical Damage while leaving your Critical Hit Chance at 5% results in terrible, inconsistent DPS. Conversely, having 100% CHC with base-level CHD leaves immense amounts of damage on the table.

    2. Determining the Ideal Breakpoints for CHC and CHD

    What are the actual target numbers you should aim for on your gear, paragon boards, and passive trees? While exact numbers fluctuate depending on specific patches and scaling caps, elite endgame theorycrafting points to several clear benchmarks:

    The Critical Hit Chance Sweet Spot

    • Early to Mid Game: Aim for 35% to 45% CHC. At this stage, your attack speed is moderate, and consistent triggers are needed to smooth out clear times.
    • Endgame / Tier-Max Content: Push for 55% to 75+% unbuffed CHC, scaling up to near-cap limits (or 100% via temporary buffs, skill activations, and specific item aspects like Zan Gar or precision procs).

    The Critical Damage Multiplier Ratio

    Because critical damage often suffers from additive pooling with other vulnerable or core damage buckets in modern scaling systems, you want to maintain a healthy ratio.

    • A reliable historical benchmark for balanced output is maintaining roughly a 1:3 or 1:4 ratio between your overall independent damage multipliers and raw critical strike stats, ensuring that every point of CHC translates to an exponential leap in average DPS.

    3. Gear Affixes: Where to Find Critical Stats

    Maximizing your stats requires knowing precisely which gear slots can roll Critical Hit Chance and Critical Damage.

    Equipment SlotPriority Stat 1Priority Stat 2Optimization Note
    Head / HelmetCritical Hit ChanceCooldown Reduction / Max EnergyEssential slot for securing base CHC.
    GlovesCritical Hit ChanceAttack Speed / Skill RanksLook for Greater Affixes (GA) here.
    RingsCritical Hit ChanceCritical Damage / Vulnerable DmgRings are your primary vehicle for scaling crits.
    AmuletMovement Speed / CDRPassive Ranks / Critical MultipliersLook for percentage-based multiplier aspects.
    WeaponsCritical Damage / VulnerableDexterity / Core Skill DamageTwo-handed weapons double your output values.

    4. Leveraging Rogue Skill Trees and Specializations

    Gear is only half the battle. The Rogue class toolkit features inherent passives and specializations designed to artificially inflate or completely bypass standard stat limitations.

    • Exploit / Precision / Control Passives: Utilizing passives that scale damage based on how frequently you land critical strikes or crowd-control enemies will drastically multiply your baseline output.
    • Specialization Synergy: Align your chosen specialization (such as Preparation, Combo Points, or Inner Sight) with high-attack-speed weapon setups (Daggers and Swords). Higher attack speeds naturally result in more check-rolls for Critical Hit Chance per second.
    • Imbuements: Shadow, Poison, or Cold imbuements often interact uniquely with critical strikes, causing chain reactions, spreading damage, or triggering massive burst multipliers against vulnerable elites.

    5. Advanced DPS Strategies: Attack Speed and Lucky Hits

    Many Rogue players make the mistake of isolating CHC and CHD from other mechanical stats. In reality, Attack Speed and Lucky Hit Chance act as multipliers to your critical engine.

    1. The Attack Speed Velocity Principle: If character A hits 2 times per second with a 40% CHC, and character B hits 4 times per second with a 40% CHC, character B triggers twice as many critical events in the same timeframe, stabilizing their overall DPS output and triggering on-crit passives much faster.
    2. Lucky Hit Integration: Many elite Rogue builds rely on critical hits to trigger Lucky Hit effects (such as resource restoration, cooldown resets, or barrier generation). Ensuring your CHC is high keeps your resource loops infinitely sustained during extended boss fights.

    10 Frequently Asked Questions (FAQ)

    1. Should I stack Critical Damage or Vulnerable Damage first?

    In contemporary meta builds, damage buckets are often balanced or adjusted via balance patches. Generally, you should balance them out; stacking too much into a single bucket causes diminishing returns. Aim to keep critical stats scaling in tandem with your core damage multipliers.

    2. Is 100% Critical Hit Chance necessary for a Rogue?

    Not strictly necessary, but getting as close to 75–85% sustained (with temporary buffs pushing you to 100%) ensures maximum consistency and eliminates bad RNG streaks during high-tier progression.

    3. Do damage-over-time (DoT) builds benefit from Critical Strike Damage?

    Traditionally, raw periodic damage ticks (like pure poison stacking) do not critically strike unless specified by unique items or specific legendary aspects designed to make DoTs crit. If you run a direct-hit core skill build (like Twisting Blades or Rapid Fire), CHC and CHD are mandatory.

    4. How does Attack Speed affect my critical DPS?

    Attack speed does not change the damage of an individual critical hit, but it increases the frequency of your attack rolls, drastically improving your real-world DPS and proc rates.

    5. What are Greater Affixes and why do they matter for crits?

    Greater Affixes represent max-rolled, enhanced versions of standard stats found on endgame gear items. Finding a ring or glove with a Greater Affix in Critical Hit Chance provides a massive baseline jump to your damage calculations.

    6. Why is my Rogue dealing low damage despite high Critical Damage?

    If your Critical Damage is sitting at 400% but your Critical Hit Chance is only 10%, you are only critting 1 out of every 10 attacks. Lower your raw critical damage slightly in exchange for boosting your Critical Hit Chance baseline.

    7. Which weapons give the best inherent stat baselines for a Rogue?

    Swords typically provide inherent Critical Strike Damage or percentage-based boosts, making them top-tier choices for off-hand or main-hand slot optimization depending on your preferred core setup.

    8. How do Paragon Boards influence my critical build?

    Endgame Paragon boards feature specialized legendary nodes and glyphs (such as Exploit, Canny, or Pride) that scale your damage exponentially based on your total Dexterity and critical strike metrics.

    9. Can defensive stats ruin my offensive critical output?

    While you need survivability (Armor, Resistances, Damage Reduction), sacrificing too many offensive affix slots on rings, gloves, and weapons will severely throttle your clear speeds. Balance defensive layers primarily on your chest, pants, and amulet slots.

    10. Where can I test my Rogue’s actual DPS output?

    The best testing ground is high-tier training dummies or repeating standardized endgame boss encounters, tracking your average time-to-kill (TTK) while adjusting individual gear pieces and passive setups.

    Conclusion

    Maximizing your Rogue class DPS output is a delicate science of mathematical balancing. By prioritizing a stable, high baseline of Critical Hit Chance (55%+), pairing it with scaling Critical Damage Multipliers, and supporting your engine with rapid attack speeds and balanced damage buckets, you will transform your gameplay experience. Implement these gear priorities, fine-tune your skill trees, and watch your damage numbers soar to the absolute top of the leaderboards!

  • How to complete the lighthouse beacon restoration puzzle to guide lost merchant ships safely into harbor

    How to complete the lighthouse beacon restoration puzzle to guide lost merchant ships safely into harbor

    Few video game tropes capture a sense of atmosphere quite like a darkened coastline threatened by treacherous shoals, jagged rocks, and swirling fog. Across various adventure, role-playing, and puzzle titles—ranging from indie exploration gems to grand fantasy epics—the lighthouse beacon restoration puzzle stands out as a classic milestone.

    When coastal visibility drops and heavy gales roll in, local ports depend entirely on a functioning beacon to steer incoming merchant vessels away from disaster. Restoring these monumental structures usually requires more than just flipping a switch; it demands gathering rare resources, aligning complex optical systems, repairing mechanical winches, and solving intricate logic hurdles.

    Whether you are navigating this puzzle from a gaming setup in New York, San Francisco, Seattle, Austin, or Los Angeles, this ultimate master guide breaks down everything you need to know. Follow these professional tips, step-by-step instructions, and strategic workarounds to smoothly restore the beacon, save the merchant fleet, and unlock your game’s best rewards.

    Phase 1: Preparation and Resource Gathering

    Before rushing headfirst into a crumbling coastal tower, you need to understand what the puzzle demands. Most modern games lock progression behind missing components or specialized items. Walking in unprepared results in frustrating backtracking.

    1. Stockpile Essential Materials

    Lighthouses are old, weathered, and usually neglected. Expect to invest standard crafting goods or currency into their restoration. Standard requirements typically include:

    • Structural Reinforcements: Treated planks, metal sheets, or stone blocks to fix broken entry bridges or stairwells.
    • Electrical or Optical Components: Specialized lenses, copper wiring, or mechanical gears (such as an Aelmorite Reflector or high-tier electronics).
    • Fuel or Power Sources: Oil canisters, combustible fluids, or battery cores to feed the main flame once operational.

    2. Clear Your Inventory Space

    Because restoration puzzles frequently require you to carry heavy or bulky mechanical items (like counterweights, shattered glass, or heavy iron doors), make sure your inventory or vehicle storage has plenty of empty slots before you dock at the island.

    Phase 2: Step-by-Step Walkthrough to Restore the Beacon

    While mechanics vary across different titles, most lighthouse restoration quests follow a standardized sequence of operational milestones. Here is the foolproof blueprint to completing the objective efficiently:

    [Inspect Broken Bridge] ---> [Secure Materials & Fix Pathway] ---> [Access Interior Tower] 
                                                                              |
    [Ignite / Power Beacon] <--- [Align Optics & Mechanisms] <--- [Lower & Repair Core Bulb]
    

    Step 1: Repair Access Routes and Structural Integrity

    You cannot fix what you cannot reach. Often, the path leading to the lighthouse—such as a suspension bridge, a rocky cliffside path, or a flooded cellar—is damaged.

    • Search nearby coastal wreckage or crates to find baseline building materials.
    • Use local workbenches or crafting stations to convert raw materials (like raw wood into treated planks).
    • Interact with the structural prompt to clear the path to the main tower entrance.

    Step 2: Locate and Lower the Lamp Mechanism

    Inside the lighthouse, you will typically find that the primary light source—the heavy glass Fresnel lens or high-output bulb—is either shattered, misaligned, or stuck on the top floor.

    • Ascend to the apex of the tower and locate the internal winch or pulley control system.
    • Lower the lamp assembly down to a middle or ground-floor workspace where you can safely perform maintenance without falling.

    Step 3: Install Replacement Parts and Clean the Optics

    Once the mechanism is safely at ground level, inspect it closely:

    • Apply your gathered components (such as fresh wiring, replacement glass plates, or reflectors).
    • Clear away any rust, blockages, or magical seals interfering with the rotation track.
    • Double-check that all components lock securely into place before attempting to raise the unit back up.

    Step 4: Hoist and Calibrate the Beacon

    Using the internal winches or automated pulleys, send the fully repaired lamp housing back up to the top floor stage by stage. Ensure that tracking rails do not jam mid-transit. Once seated at the summit, engage the final power switch or rotation mechanism to get the light spinning smoothly across the horizon.

    Pro Tips for Fast and Flawless Completion

    • Check Every Corner First: Developers love hiding secondary quest items (like journal entries, hidden keys, or bonus loot chests) on intermediate balconies and storage rooms inside the lighthouse. Do a complete sweep on your way up.
    • Bring a Co-op Partner: If the game supports multiplayer, divide the labor. Have one player gather wood and metal while the other handles the internal mechanical puzzles to cut your completion time in half.
    • Pay Attention to Light Refraction: If the puzzle features mirrors, crystals, or color-coded beams, always work backward from the target harbor exit windows to trace where the light needs to beam out.

    Frequently Asked Questions (FAQ)

    1. What do I do if the lighthouse bulb is stuck and won’t lower?

    Check the intermediate floors for a jammed secondary lock or an unpowered generator. Often, safety mechanisms prevent the winch from operating until the base electrical grid is turned on.

    2. Where can I find rare reflectors or specialized lenses?

    These are typically acquired by exploring nearby sunken shipwrecks, trading with port merchants, or completing minor side-quests for local NPCs living near the coastline.

    3. How do I know if the merchant ships are safe once the puzzle is solved?

    Once the puzzle is fully completed, a cinematic or environmental trigger will play showing the beam cutting through the fog, followed by ships safely entering the harbor and unlocking new vendor stock or trade routes.

    4. Can I skip the lighthouse puzzle and still access late-game port areas?

    In most games featuring this puzzle, the lighthouse acts as a mandatory gatekeeper. Skipping it means remaining locked out of safe nocturnal sailing, high-tier coastal trade, and vital regional questlines.

    5. Why is the light spinning, but ships are still crashing?

    Make sure you have removed all physical obstructions blocking the tower windows (such as heavy iron shutters or overgrown ivy) and that you are using the correct color lens if the harbor requires a specific signal frequency.

    6. Are there hidden achievements tied to restoring lighthouses?

    Yes! Many games reward completionists with secret achievements or trophies—such as “Keeper of the Flame” or “Safe Harbor”—for restoring coastal beacons under specific time limits or without making errors.

    7. What kind of rewards should I expect upon completion?

    Typical rewards include massive experience point (XP) payouts, unique cosmetic sailor outfits, rare blueprints, high-value currency caches, and discounted merchant prices at the local port.

    8. What should I do if I run out of crafting materials mid-puzzle?

    Check your vehicle inventory or fast-travel back to the nearest supplier or town vendor to purchase or scavenge basic components rather than trying to brute-force the puzzle without them.

    9. Do weather conditions affect how the lighthouse puzzle functions?

    In dynamic survival or exploration titles, active storms can disrupt electrical components or obscure your view of the beam testing, making it wise to rest or wait out severe weather before final calibration.

    10. Is this puzzle randomized on multiple playthroughs?

    While the core steps remain consistent, certain logic elements—like mirror angles, color sequences, or exact component locations—can occasionally be randomized on higher difficulty settings.

    Conclusion

    The lighthouse beacon restoration puzzle is a rewarding test of resource management, spatial awareness, and step-by-step logic. By methodically repairing the access routes, lowering and servicing the optical housing, and properly calibrating the rotation mechanics, you ensure that lost merchant ships find their way home through even the thickest fog. Take your time, prep your inventory, and enjoy the brilliant view from the top of the tower once your hard work finally pays off.