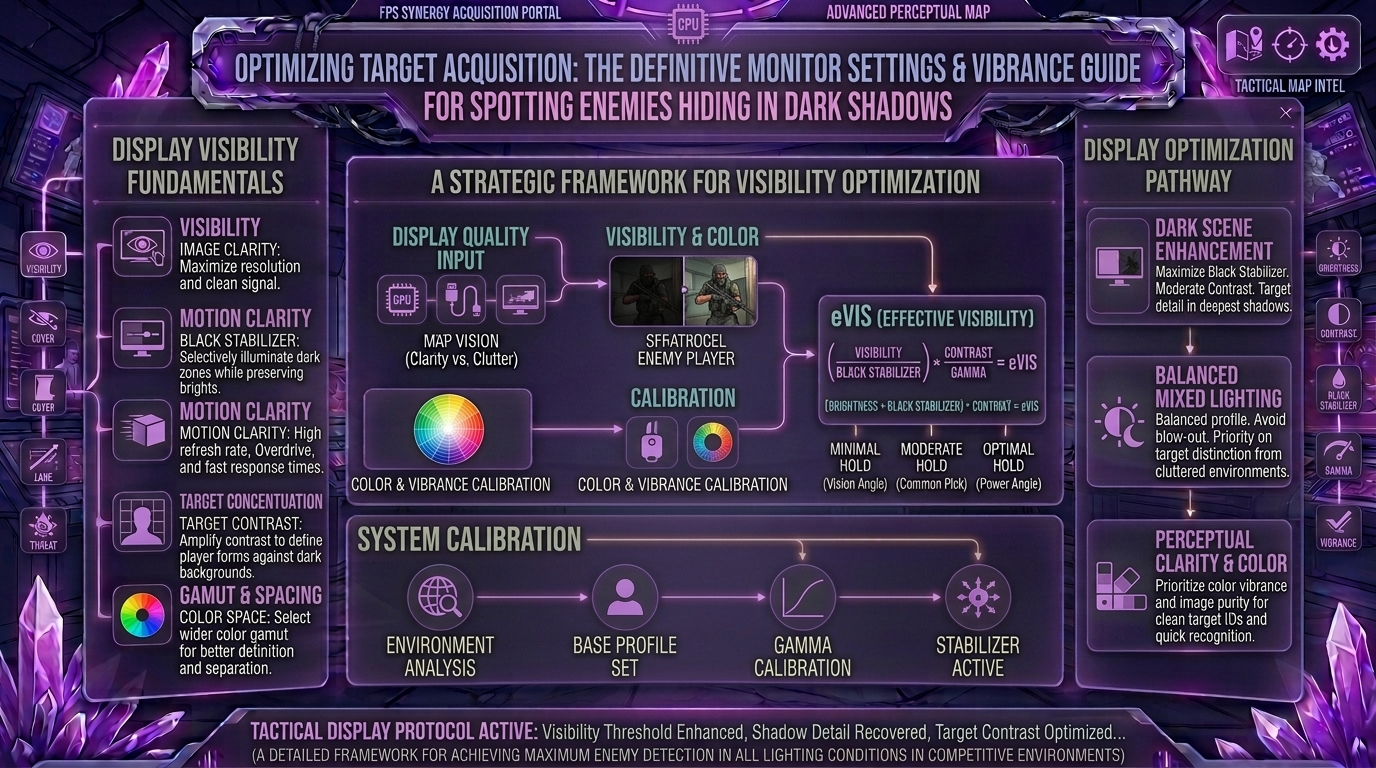
Author: rblvai

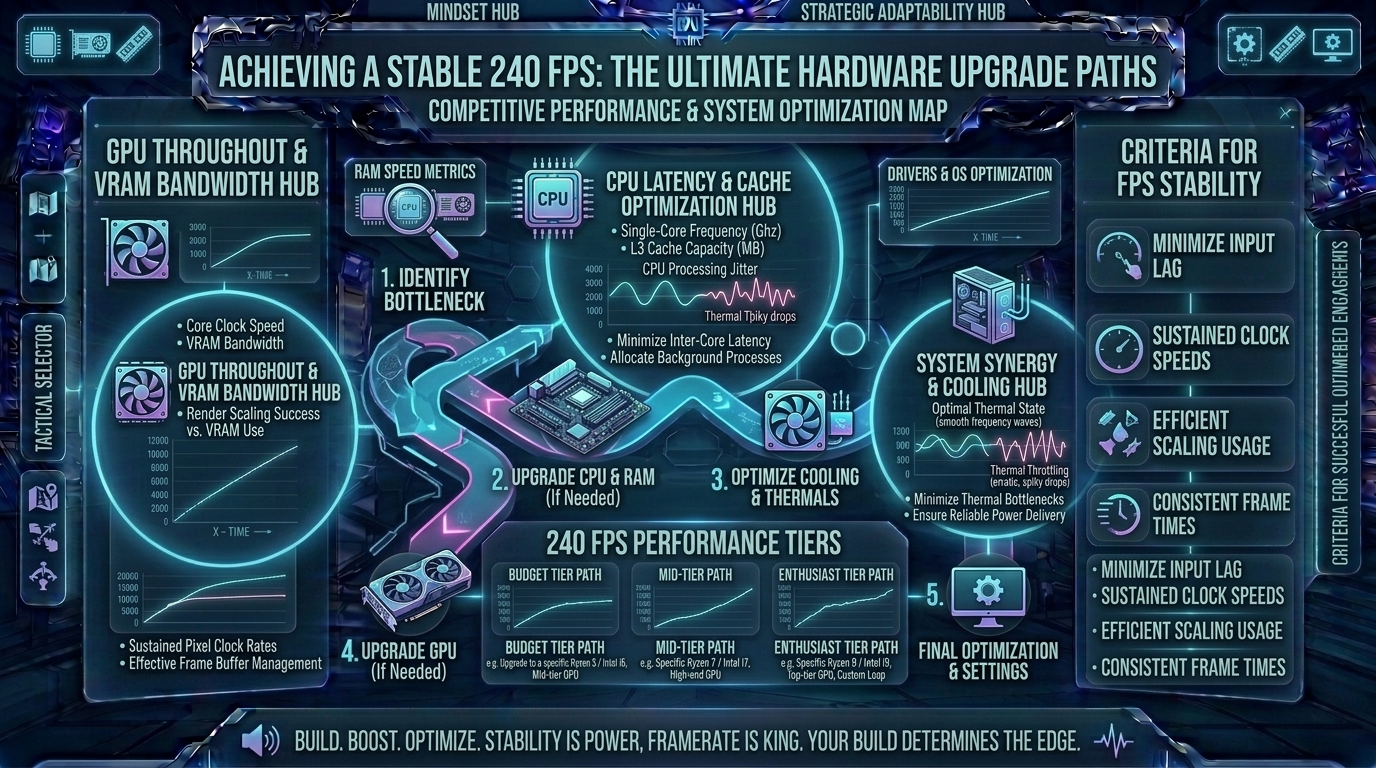
  • What are the best hardware upgrade paths to achieve a stable 240 frames per second in competitive multiplayer games

    What are the best hardware upgrade paths to achieve a stable 240 frames per second in competitive multiplayer games

    Welcome to The Gamer Buzz, your premier competitive hardware authority. Whether you are tuning custom rig configurations from high-end tech hubs in San Francisco, New York, and Seattle, or benchmarking system stability across gaming dens in Texas, California, and Washington, one performance standard defines modern competitive play: the 240 FPS threshold.

    In fast-paced tactical and hero shooters (such as Counter-Strike 2, Valorant, Apex Legends, Overwatch 2, and Call of Duty), moving from a standard 60Hz or 144Hz setup to a buttery-smooth 240Hz monitor changes everything. It cuts display input latency down to roughly 4.17 milliseconds, smooths out motion blur, and gives you crucial visual feedback fractions of a second before your opponents.

    However, pairing a high-refresh monitor with a frame rate that constantly fluctuates between 140 and 240 FPS introduces severe stuttering and erratic input lag. To achieve a rock-solid, unyielding 240+ FPS baseline, you need a targeted hardware upgrade path. In this exhaustive, master-level guide, we break down system bottlenecks, memory architecture, and the absolute best component upgrade sequences to guarantee a stable 240 FPS.

    1. The Core Bottleneck: Why Competitive Games Need Specific Hardware

    Unlike cinematic single-player AAA games that lean almost entirely on your graphics card (GPU) at high resolutions, competitive multiplayer titles place the vast majority of their workload squarely onto your processor (CPU) and memory subsystem.

    • The 240 FPS CPU Wall: Rendering 240 distinct frames every single second forces your CPU to calculate player hitboxes, netcode packets, physics engines, and tick rates every 4.16 milliseconds. If your CPU cannot keep up, your graphics card sits idle waiting for instructions, resulting in sudden frame drops during chaotic teamfights.
    • The Golden Rule of Upgrades: Never blindly buy the most expensive graphics card while leaving an aging processor in your system. Identify your primary performance bottleneck first.

    2. The 4-Stage Strategic Upgrade Path

    If you are currently struggling to maintain stable high frame rates, do not tear down your entire computer at once. Follow this optimized, budget-conscious upgrade path:

    [Stage 1: RAM & Storage Audit] ➔ [Stage 2: The CPU & Motherboard Core] ➔ [Stage 3: GPU & VRAM Matching] ➔ [Stage 4: Power & Thermal Delivery]
    

    Stage 1: Memory (RAM) and Storage Overhaul

    If you are running old DDR4 memory kits running below 3200MHz or single-stick configurations, your CPU is constantly starved for data.

    • The Upgrade: Jump straight to a dual-channel 32GB DDR5 kit running at 6000MHz (with low CAS latency like CL30 or CL32). Dual-channel DDR5 bandwidth drastically stabilizes your 1% low frame rates, eliminating micro-stutters when turning corners quickly.
    • Storage: Ensure your game is installed on a fast NVMe PCIe Gen4 or Gen5 SSD to accelerate asset streaming and eliminate texture-loading hitches.

    Stage 2: The CPU Core (The 240 FPS Engine)

    This is the most critical upgrade for competitive titles. You need a processor featuring massive single-core instruction-per-clock (IPC) performance and large L3 cache pools.

    • The Champion Choice: Processors equipped with AMD’s 3D V-Cache technology—such as the legendary AMD Ryzen 7 7800X3D or newer X3D chips—are the absolute gold standard for competitive esports. Their massive stacked L3 cache allows game assets to sit directly on the CPU die, virtually eliminating memory latency and guaranteeing sky-high, stable minimum frame rates well past 300+ FPS.
    • Alternative Value: Modern mid-range multi-core powerhouses like the Intel Core i5 or AMD Ryzen 5 series handle high refresh rates effortlessly when paired with fast memory.

    Stage 3: The Graphics Card (GPU) Match

    Once your CPU can push 240 frames, your GPU needs to render them cleanly—especially if you play at native 1080p or competitive 1440p resolutions.

    • The Sweet Spot: Cards in the mid-to-high tier (such as NVIDIA’s RTX 4070 / RTX 5070 series or AMD’s Radeon RX lines) chew through competitive graphic presets (all settings low-to-medium for maximum visibility) with absolute ease, ensuring your frame rate never dips when smoke grenades or utility explosions flood your screen.

    Stage 4: Power Supplies (PSU) and Cooling Reserves

    Pushing components to maintain 240+ stable frames generates steady thermal output.

    • Cooling: Invest in a robust dual-tower air cooler or a 240mm/280mm AIO liquid cooler. Thermal throttling lowers clock speeds instantly, destroying your frame stability mid-match.
    • Power: Ensure an 80+ Gold certified power supply (750W to 850W) provides clean, uninterrupted electrical current to prevent voltage drops under sudden gaming loads.

    3. Comprehensive Matrix: Component Upgrade Impact on 240 FPS

    Hardware ComponentImpact on 240 FPS StabilityRecommended Target Spec for 240+ FPS
    CPU (Processor)Critical (The Bottleneck): Dictates average FPS and 1% lows.AMD Ryzen 7 X3D series or equivalent high-IPC chip.
    RAM (Memory)High: Prevents stuttering and stabilizes frame pacing.32GB DDR5-6000MHz (Dual-Channel, Low Latency).
    GPU (Graphics Card)Moderate-High: Renders frames cleanly at competitive resolutions.Modern mid-to-high tier card with robust VRAM headroom.
    Storage (SSD)Low-Moderate: Eliminates load-screen stutter and asset lag.Fast NVMe PCIe Gen4/Gen5 SSD.
    Cooling & PSUFoundational: Prevents thermal throttling and system crashes.Quality 750W+ 80+ Gold PSU with efficient tower cooler.

    4. In-Game Optimization Tricks Alongside Hardware Upgrades

    Even with flagship hardware, sloppy in-game settings can sabotage your 240 FPS goal. Maximize your hardware investment with these adjustments:

    • Drop Resolution Scaling and Shadows: Turn down shadow quality, particle detail, and ambient occlusion. Shadows calculated by the CPU eat up precious frame overhead during team fights.
    • Unlock and Cap: Never leave your frame rate uncapped if it violently swings between 200 and 400 FPS (which introduces variable input lag). Instead, use an in-game frame cap or specialized limiter set right above your stable minimum (e.g., capped steady at 300 FPS) to ensure consistent frame delivery times.
    • Disable Fullscreen Optimizations: Right-click your game’s .exe file, navigate to properties, compatibility, and disable fullscreen optimizations to ensure direct hardware access.

    10 Frequently Asked Questions (FAQ)

    1. Is a 240Hz monitor required if my PC hits 240 FPS?

    Yes, absolutely. If your PC renders 240 frames per second but you display them on a standard 60Hz monitor, your screen can only physically show 60 of those frames, making your hardware upgrades pointless.

    2. Why do my average frames say 300 FPS, but the game still feels stuttery?

    Check your 1% low and 0.1% low frame rates. If your average is 300 FPS but your 1% lows drop to 110 FPS during action sequences, your game will experience noticeable stutters. Upgrading your RAM speed and CPU cache fixes this.

    3. Does resolution matter for achieving 240 FPS in competitive games?

    Yes. Playing at 1080p shifts the workload heavily onto your CPU, while 1440p shifts more weight onto your GPU. Most competitive professionals play at 1080p or stretched resolutions to maximize raw frame rates.

    4. Is 16GB of RAM enough, or do I need 32GB for 240 FPS?

    While 16GB is technically enough for pure game execution, modern background apps (Discord, web browsers, recording software) easily saturate 16GB, causing micro-stutters. Upgrading to 32GB of fast DDR5 provides a safe buffer for absolute frame stability.

    5. Why are AMD X3D processors recommended so heavily for competitive games?

    Their massive L3 cache allows games to store large datasets directly on the processor die, bypassing slower system RAM lookups and driving industry-leading minimum frame rates.

    6. Can an outdated power supply cause my computer to drop frames?

    Indirectly, yes. If your power supply is old or lacks sufficient wattage headroom, voltage fluctuations can cause your CPU or GPU to down-clock automatically to protect components, tanking your frame rate.

    7. Should I overclock my CPU and RAM to hit 240 FPS?

    Enabling XMP or EXPO profiles in your BIOS to run your RAM at its rated high speed is mandatory. However, manual aggressive CPU overclocking yields minimal real-world FPS gains compared to the thermal risks involved.

    8. Does background software affect competitive frame stability?

    Yes. RGB lighting apps, overlay software, and browser hardware acceleration consume valuable CPU threads. Close unnecessary background apps before launching ranked matches.

    9. How do I monitor my frame rates and 1% lows accurately?

    Use lightweight performance monitoring overlays like MSI Afterburner with RivaTuner Statistics Server (RTSS) to track real-time frame times, CPU usage, and 1% lows while playing.

    10. Where can I find more hardware benchmarking guides and PC optimization tips?

    Bookmark The Gamer Buzz and check back regularly for our comprehensive database of professional esports hardware reviews, component testing, and competitive optimization guides!

    Conclusion

    Achieving a stable, unyielding 240 frames per second in competitive multiplayer games is the ultimate hardware milestone for serious competitors. By prioritizing single-core CPU power, fast dual-channel DDR5 memory, balanced GPU muscle, and clean thermal management, you eliminate micro-stutters and input lag bottlenecks. Upgrade your system intelligently, lock in your performance settings, and experience the fluid clarity of true 240 FPS gaming!
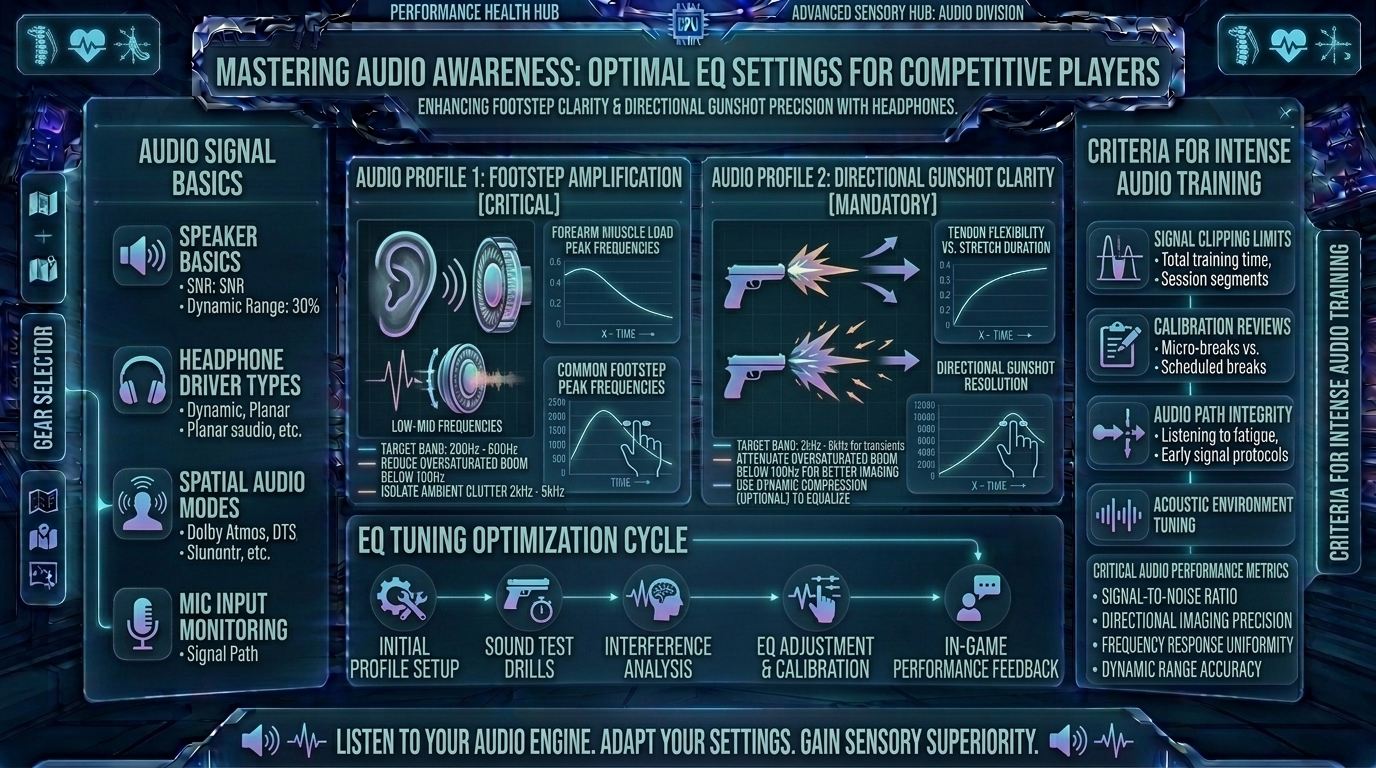
  • What are the best audio equalizer settings to hear enemy footsteps and directional gunshots more clearly in headphones

    What are the best audio equalizer settings to hear enemy footsteps and directional gunshots more clearly in headphones

    What Are the Best Audio Equalizer Settings to Hear Enemy Footsteps and Directional Gunshots More Clearly in Headphones

    Welcome to The Gamer Buzz, your ultimate competitive performance and audio-tuning hub. Whether you are competing from high-end setups in San Francisco, New York, and Seattle, or dialing in your hardware gear across Texas, California, and Washington, one truth remains absolute: spatial audio is your invisible radar.

    In tactical multiplayer shooters (such as Counter-Strike 2, Valorant, Apex Legends, Call of Duty, and Rainbow Six Siege), visual information only tells half the story. Long before an enemy rounds a corner or peeks a choke point, your ears can track their exact movement. However, out-of-the-box audio profiles on gaming headsets are often artificially bloated with heavy bass and cinematic explosions. This drowns out the subtle, high-frequency clatter of footsteps and distant directional gunshots under a muddy wall of sound.

    By mastering audio equalization (EQ), you can surgically strip away unnecessary acoustic clutter and amplify the frequencies that matter most. In this exhaustive, master-level guide, we break down acoustic frequencies, psychoacoustics, headset hardware considerations, and the exact EQ curves required to hear every footstep with absolute clarity.

    1. The Acoustic Anatomy of Competitive Audio: Frequencies Explained

    To configure an equalizer properly, you must understand what sound looks like on a spectrum. Sound frequency is measured in Hertz (Hz), ranging from deep sub-bass rumbles to ultra-high treble crunches.

    [Sub-Bass: 20Hz - 60Hz] ➔ [Mid-Bass / Mud: 100Hz - 250Hz] ➔ [Midrange / Voices: 500Hz - 2kHz] ➔ [Footstep Treble: 3kHz - 8kHz]
    

    1. The Danger Zone: Muddy Bass (100Hz to 250Hz)

    • What lives here: Engine roars, explosion shockwaves, heavy ambient background music, and deep room reverb.
    • The Problem: Game developers often pump this frequency range to make cinematic single-player campaigns feel immersive. In competitive games, it creates an acoustic fog that masks critical sounds. You must cut this range down.

    2. The Critical Zone: Footsteps and Reloads (3kHz to 8kHz)

    • What lives here: Boot leather scuffs on concrete, tile, or metal; pin pulls on grenades; weapon reload clicks; and the sharp transient crack of distant gunshots.
    • The Solution: This is your target zone. By gently boosting this frequency spectrum, enemy footstep signatures cut through ambient noise instantly.

    2. Step-by-Step Guide to Setting Up Your Equalizer

    Whether you use software like SteelSeries Sonar, Dolby Atmos, Equalizer APO with Peace GUI, or Razer THX Spatial, follow this structured protocol to build your competitive profile:

    Step 1: Flat Baseline Reset

    Start by flattening all equalizer sliders to 0dB. Reset any cinematic “V-shaped” presets that emphasize high bass and high treble while scooping out the middle.

    Step 2: Slashing the Low-End Mud

    • Drop the 60Hz to 250Hz sliders down by -3dB to -6dB.
    • Result: Explosions and environmental rumbles become muted and controlled, ensuring they never deafen you or drown out subsequent audio cues.

    Step 3: Boosting the Intelligibility Window

    • Raise the 3kHz to 6kHz sliders up by +3dB to +5dB.
    • Result: This sharpens the high-mid transients of footsteps and tactical actions, giving them a distinct “crispness” that trains your brain to react faster.

    Step 4: Smoothing Out Harsh Treble

    • Keep the ultra-high range (8kHz to 16kHz) flat or slightly reduced (-1dB). Pushing this range too high introduces ear fatigue and harsh static hissing during long sessions.

    3. Comprehensive Matrix: The Ultimate Competitive Audio EQ Profile

    Frequency Band (Hz)Adjustment Value (dB)Acoustic Purpose / Competitive Benefit
    32 Hz – 63 Hz-4 dBRemoves deep sub-bass rumble from map ambiance and explosions.
    125 Hz – 250 Hz-5 dBCuts out low-end “mud” that masks footsteps and reloads.
    500 Hz – 1 kHz0 dB (Flat)Preserves natural teammate voice chat clarity in Discord/In-game comms.
    2 kHz – 4 kHz+2 dBEnhances weapon switch sounds and character gear jingles.
    4 kHz – 8 kHz+4 dBThe Sweet Spot: Maximizes footstep scuffs, surface impacts, and pin pulls.
    8 kHz – 16 kHz-1 dBPrevents high-frequency ear strain and electronic hiss artifacts.

    4. Hardware vs. Software: Choosing the Right Audio Setup

    Your equalizer settings are only as good as the hardware reproducing them. Understanding your acoustic chain prevents common hardware bottlenecks:

    • Open-Back vs. Closed-Back Headphones: Open-back headphones (like the Sennheiser/EPOS PC38X) feature breathable earcups that allow sound waves to escape naturally, creating an exceptionally wide soundstage for pin-point directional accuracy. Closed-back headphones isolate external room noise better but trap sound inside, which can color low-end frequencies.
    • Virtual Surround Sound — Friend or Foe?: Most software-based “7.1 Surround Sound” toggles add artificial reverb and echo to game engines that are already natively binaural (designed for stereo). Turn off virtual 7.1 surround sound. Stick to high-quality stereo output paired with a precise custom EQ profile for maximum directional clarity.

    10 Frequently Asked Questions (FAQ)

    1. Should I use gaming headset software or a third-party equalizer like Equalizer APO?

    Both work well, but third-party tools like Equalizer APO with Peace GUI or suite software like SteelSeries Sonar give you parametric control down to individual frequencies rather than basic 3-band sliders.

    2. Why do gunshots sound so loud compared to footsteps in my game?

    Because dynamic range in modern games is massive. Using a compressor or “Night Mode / Volume Normalization” setting in your game audio options compresses the gap between loud explosions and quiet footsteps.

    3. Will changing my EQ get me banned for cheating?

    No. Audio equalizers, third-party sound profiles, and headphone tuning apps operate entirely on your local operating system audio drivers. They are 100% legal and used universally by esports professionals.

    4. Do I need an expensive DAC/Amp to hear footsteps better?

    Not necessarily. While a dedicated USB DAC/Amp provides cleaner power delivery and eliminates motherboard electrical static interference, modern motherboards and high-end gaming headsets drive clear audio just fine on their own.

    5. Why can’t I tell if a footstep sound is coming from above or below me?

    Vertical audio cues rely on subtle frequency changes caused by your outer ear (pinna) shape. If a game engine’s binaural audio engine is poorly optimized, vertical sound can be notoriously difficult to pinpoint regardless of your EQ settings.

    6. What is “soundstage” and why does it matter for competitive gaming?

    Soundstage refers to the physical sense of space and distance a pair of headphones creates. A wide soundstage lets you accurately judge whether an enemy is 5 meters away behind a wall or 25 meters away across an open courtyard.

    7. Should I enable “HRTF” (Head-Related Transfer Function) in-game settings?

    Yes, absolutely. Turn HRTF on in games like Counter-Strike 2 or Valorant. It applies psychoacoustic modeling based on human ear anatomy to dramatically improve 360-degree directional audio accuracy.

    8. How do I prevent ear fatigue during multi-hour gaming sessions?

    Avoid excessive treble boosts (+8dB or higher in high frequencies). High-frequency fatigue causes headaches and ear ringing; keep your EQ adjustments balanced and moderate.

    9. Can in-game audio settings conflict with my custom equalizer?

    Yes. If your game engine has a built-in “Midnight Mode,” “Dynamic Range Compression,” or a preset headphone profile enabled, it may counteract or distort your custom Windows EQ settings. Choose one primary audio pipeline.

    10. Where can I find more hardware and audio optimization guides?

    Bookmark The Gamer Buzz and check back regularly for our comprehensive database of professional esports setups, acoustic reviews, and competitive improvement guides!

    Conclusion

    Hearing enemy footsteps and directional gunshots clearly is no longer a matter of guessing—it is a science of acoustic tuning. By stripping away muddy low-end frequencies, boosting the critical 4kHz to 8kHz footstep zone, disabling artificial virtual surround sound, and enabling game HRTF settings, you unlock a massive competitive advantage. Tune your audio profile, trust your ears, and never get caught off-guard by a flanking enemy again!

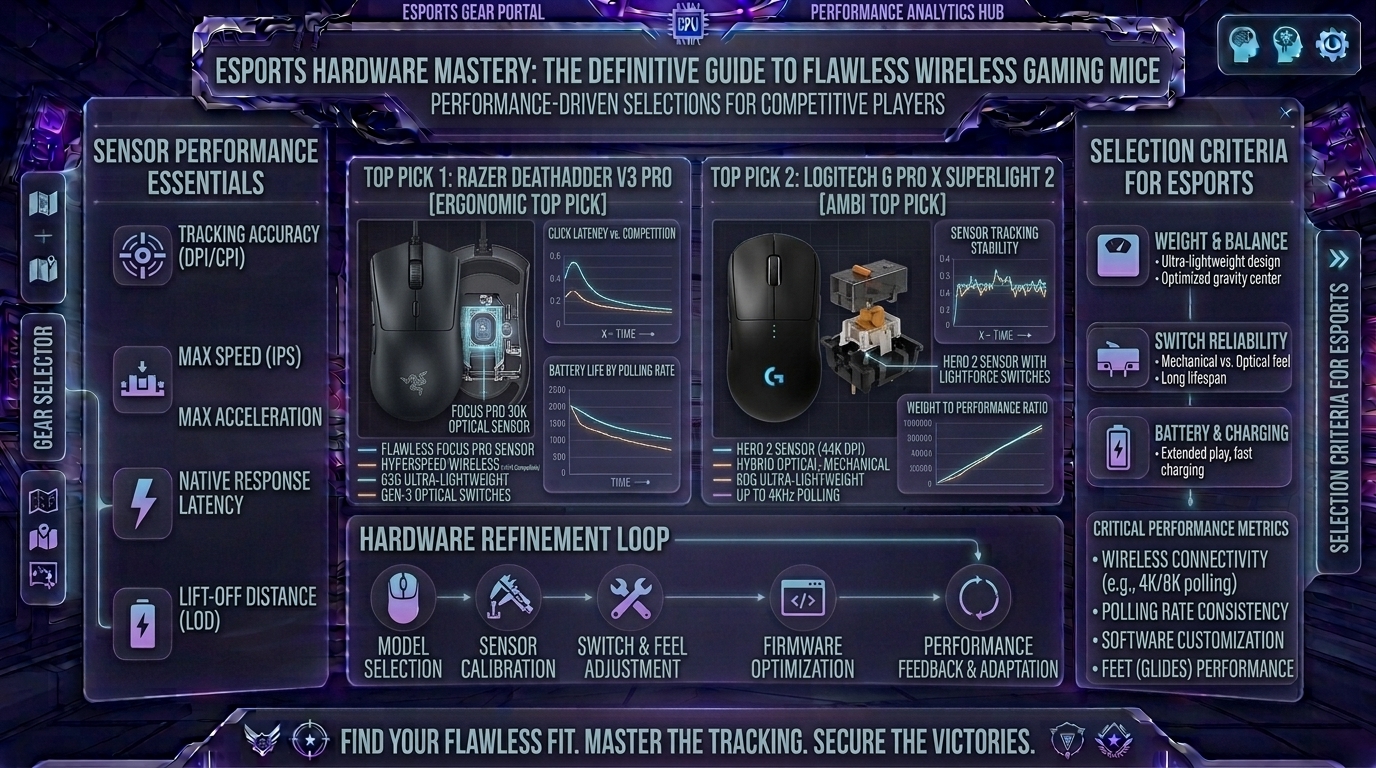
  • What are the best wireless gaming mouse models with flawless sensor performance for competitive esports players

    What are the best wireless gaming mouse models with flawless sensor performance for competitive esports players

    Welcome to The Gamer Buzz, your premier competitive hardware and performance authority. Whether you are grinding ranked matches from high-performance gaming rigs in San Francisco, New York, and Seattle, or dialing in your peripherals across Texas, California, and Washington, one reality remains crystal clear: your connection to the digital world depends entirely on your mouse sensor.

    Gone are the days when wireless gaming mice suffered from input lag, connection drops, or heavy battery packs. Today, elite wireless gaming mice match or exceed the latency, tracking fidelity, and stability of traditional wired mice while giving you total freedom of movement.

    In competitive multiplayer titles (such as Counter-Strike 2, Valorant, Apex Legends, and Overwatch 2), a single pixel can mean the difference between winning a clutch and watching the defeat screen. In this exhaustive, master-level guide, we break down what makes a sensor “flawless,” analyze polling rates, weight metrics, ergonomics, and present the absolute best wireless gaming mice on the market.

    1. The Anatomy of a Flawless Sensor: What Makes an Esports Mouse Tick?

    To the untrained eye, any optical mouse tracking movement across a desk looks identical. Under the hood, however, engineering a top-tier competitive sensor requires immense precision.

    Key Metrics of Modern Flagship Sensors:

    • Zero Hardware Acceleration: A flawless sensor features a 1:1 translation ratio. If you move your hand exactly 2 inches across your mousepad, the cursor moves the exact same distance regardless of how fast or slow you performed the sweep.
    • High Maximum IPS (Inches Per Second) & Acceleration: Modern flagship sensors track movements exceeding 650+ IPS and 50g+ of acceleration. This ensures that even during lightning-fast flick shots, the sensor never “spins out” or loses tracking.
    • Ultra-Low Lift-Off Distance (LOD): When you lift your mouse to reposition it back to the center of your pad, a low LOD (typically 1mm to 2mm) cuts off tracking instantly, preventing unwanted crosshair jitter.

    2. The Elite Contenders: Best Wireless Gaming Mice

    1. Logitech G PRO X Superlight 2 — The Gold Standard

    • Sensor: HERO 2 (Up to 32,000 DPI, 888 IPS, 88g acceleration capability)
    • Weight: ~60g
    • Battery Life: Up to 95 Hours
    • Connectivity: LIGHTSPEED 2.4GHz Wireless
    • Why it dominates: The Superlight 2 is the ubiquitous choice across professional esports stages. Weighing a featherlight 60 grams, it pairs Logitech’s bulletproof LIGHTSPEED wireless protocol with hybrid optical-mechanical switches. It delivers crisp tactile feedback without double-clicking issues, making it the benchmark weapon for tactical FPS players.

    2. Razer Viper V4 Pro / V3 Pro — Ultimate Symmetry & Precision

    • Sensor: Razer Focus Pro (Optical Gen-2 / Gen-3 35K/40K)
    • Weight: ~54g – 63g
    • Battery Life: Up to 90+ Hours
    • Connectivity: HyperSpeed 2.4GHz (Supports native 4000Hz/8000Hz polling)
    • Why it dominates: Built for pure speed and symmetrical handling, the Viper series offers an ultra-low profile shape ideal for fingertip and claw grip styles. Razer’s HyperPolling wireless dongle unlocks native multi-thousand hertz polling rates, shaving milliseconds of input latency off every click and movement.

    3. Razer DeathAdder V3 HyperSpeed / V4 Pro — Ergonomic Excellence

    • Sensor: Razer Focus X / Focus Pro Optical
    • Weight: ~55g – 81g
    • Battery Life: Up to 100+ Hours
    • Connectivity: HyperSpeed Wireless
    • Why it dominates: If your hand cramps using flat, symmetrical mice, the DeathAdder series provides a legendary right-handed ergonomic contour. It fills out your palm naturally while keeping the weight down to ultra-light tiers, blending all-day comfort with flawless sensor accuracy.

    4. ASUS ROG Harpe Ace Aim Lab Edition — The Precision Tool

    • Sensor: ROG AimPoint (36,000 DPI)
    • Weight: 54g
    • Battery Life: Up to 100 Hours
    • Connectivity: Tri-mode (2.4GHz RF, Bluetooth, Wired)
    • Why it dominates: Developed in direct collaboration with Aim Lab software developers, the Harpe Ace is engineered explicitly for target-switching accuracy. Its lightweight eco-nylon frame and pro-tested symmetrical shape make it a favorite for players who treat aim training like a discipline.

    3. Comprehensive Matrix: Choosing Your Esports Mouse

    Mouse ModelPrimary Shape / Grip StyleWeightPolling Rate SupportBest Suited For
    Logitech G PRO X Superlight 2Ambidextrous / Universal Claw & Palm60gUp to 4,000HzAll-around competitive FPS dominance.
    Razer Viper V4 Pro / V3 ProLow-Profile Symmetrical / Fingertip54g – 63gNative 8,000HzFast twitch-aiming and micro-adjustments.
    Razer DeathAdder V3 HyperSpeedRight-Handed Ergonomic / Palm55g – 81gUp to 8,000HzComfort-focused players and larger hand sizes.
    ASUS ROG Harpe Ace Aim LabBalanced Symmetrical / Claw54gUp to 1,000Hz+Structured training and data-driven aimers.

    4. Understanding Polling Rate: Is 8000Hz Worth It?

    A common question among modern hardware enthusiasts is whether upgrading from a standard 1,000Hz polling rate (reporting mouse position 1,000 times per second, or every 1ms) to 4,000Hz or 8,000Hz provides a competitive edge.

    • The Physics: An 8,000Hz dongle reports your mouse position every 0.125 milliseconds, smoothing out cursor trajectories on high-refresh-rate monitors (360Hz+).
    • The Tradeoff: Higher polling rates consume significantly more CPU resources and drain your mouse battery much faster. While elite players with high-end gaming rigs can feel the micro-smoothness, casual players will find a rock-solid 1,000Hz or 2,000Hz setting more than sufficient.

    10 Frequently Asked Questions (FAQ)

    1. Is wireless mouse technology truly lag-free compared to wired mice?

    Yes. Modern 2.4GHz wireless protocols (like Logitech LIGHTSPEED and Razer HyperSpeed) feature response times under 1 millisecond, outperforming legacy wired connections and eliminating input lag entirely.

    2. Does a higher DPI make a mouse sensor more accurate?

    No. DPI (Dots Per Inch) measures cursor sensitivity scaling, not tracking precision. Most professional esports players compete at a native 400 to 800 DPI, relying on physical hand movement rather than ultra-high cursor speeds.

    3. How often do I need to charge a competitive wireless gaming mouse?

    Flagship wireless mice feature energy-efficient sensors lasting anywhere from 80 to 100+ hours of continuous gaming on a single charge. With normal usage, you only need to plug it in via USB-C once every couple of weeks.

    4. What is mouse spin-out and how do flawless sensors prevent it?

    Spin-out occurs when rapid physical movements exceed a cheap sensor’s maximum tracking speed, causing the cursor to freeze or shoot randomly into the sky. Flagship sensors eliminate this entirely with massive 600+ IPS thresholds.

    5. Does mouse weight really impact my aim performance?

    Lighter mice (under 65 grams) reduce wrist fatigue and lower the physical inertia required to start and stop your crosshair movement, making micro-flicks faster and less straining over long sessions.

    6. Can I use a wireless gaming mouse on a Bluetooth connection for competitive games?

    Never. Bluetooth introduces noticeable input latency (often 8ms to 15ms+) and potential packet drops. Always use the dedicated 2.4GHz USB dongle plugged in close to your mousepad.

    7. What is lift-off distance (LOD) and why does it matter?

    LOD is the height at which your mouse stops tracking when lifted off the desk. A low LOD prevents your crosshair from stuttering or shifting when you pick up your mouse to recenter it on your pad.

    8. Are glass mousepads compatible with optical gaming sensors?

    Yes, but specialized glass pads require modern optical sensors that can handle reflective surfaces without losing tracking. Always check sensor compatibility if you plan to switch to a glass surface.

    9. How do I clean my mouse sensor to maintain peak performance?

    Use a dry, clean cotton-tip swab (Q-tip) to gently clear dust, hair, or debris out from inside the small optical sensor recess on the bottom of your mouse. Avoid using liquids or harsh chemicals.

    10. Where can I find more hardware reviews and peripheral setup guides?

    Bookmark The Gamer Buzz and check back regularly for our comprehensive database of professional hardware reviews, sensor tests, and competitive optimization guides!

    Conclusion

    Upgrading to a wireless gaming mouse with a flawless sensor removes the last remaining mechanical barrier between your hand movements and your on-screen crosshair. Whether you prefer the featherlight symmetry of the Logitech G PRO X Superlight 2, the razor-sharp precision of the Razer Viper, or the ergonomic palm comfort of the DeathAdder series, investing in elite peripheral hardware instantly elevates your competitive potential. Choose your weapon, optimize your setup, and dominate your next ranked lobby!

  • How to manage your economy and buy decisions correctly across different rounds in tactical round based shooters

    How to manage your economy and buy decisions correctly across different rounds in tactical round based shooters

    Welcome to The Gamer Buzz, your premier competitive performance and strategy hub. Whether you are grinding ranked ladders from high-end tactical rigs in San Francisco, New York, and Seattle, or optimizing team chemistry across Texas, California, and Washington, one structural pillar dictates competitive success more than raw aim: the in-game economy.

    In tactical round-based multiplayer titles (such as Counter-Strike 2, Valorant, and Rainbow Six Siege), matches are an ongoing financial chess match. You can have the best mechanical aim in the lobby, but if you buy a high-tier rifle when your team is saving, or force-buy solo while everyone else is broke, you are sabotaging your team’s win rate.

    Mastering the economy means treating credits or cash not just as currency, but as team power. In this exhaustive, master-level guide, we break down core economic phases, mathematical benchmarks, sync-buying rules, and advanced strategies to manage your wallet like a professional esports competitor.

    1. The Core Economic Cycle: Understanding Every Round Type

    Every round in a tactical shooter falls into one of five distinct economic categories. Knowing what phase you are in dictates how you fight, where you position, and what gear you buy.

    [Phase 1: Pistol Round] ➔ [Phase 2: Conversion / Anti-Eco] ➔ [Phase 3: The Bonus Round] ➔ [Phase 4: Full Buy / Save Loop]
    

    1. The Pistol Round (Round 1 & Round 13)

    • The Dynamic: Both teams start on absolute financial parity with a baseline budget (e.g., 800 credits in Valorant or $800 in Counter-Strike).
    • The Buy Strategy: Spend as close to zero as possible on unspent cash. Invest in a mix of light armor, utility abilities, or upgraded sidearms (like a Ghost or Sheriff) depending on your agent/operator role. Winning the pistol round snowballs into a massive early economic lead.

    2. The Eco Round (The Save)

    • The Dynamic: After losing a round, your team lacks the funds to purchase primary rifles and heavy shields.
    • The Buy Strategy: Spend little to nothing. Buy basic pistols (or nothing at all) to guarantee that your bankroll rolls over into the next round, allowing your entire team to purchase primary rifles simultaneously.

    3. The Anti-Eco Round

    • The Dynamic: You anticipate that the enemy team lost the previous round and is currently on a budget save.
    • The Buy Strategy: Buy weapons that excel at countering close-range, low-armor opponents (such as SMGs, shotguns, or standard rifles) without overspending. Your primary goal is to avoid giving the enemy cheap kills that let them loot your expensive rifles.

    4. The Bonus Round

    • The Dynamic: Triggered after winning a pistol round and successfully converting the anti-eco. Your team keeps the cheaper weapons (like Spectres or Bulldogs) from the previous round instead of upgrading.
    • The Buy Strategy: Do not upgrade to heavy rifles yet. Play aggressively, take map control, and try to steal enemy weapons. Even if you lose this round, your team’s economy remains completely safe for a full rifle buy next round.

    5. The Full Buy

    • The Dynamic: Both teams have accumulated enough wealth to field primary assault rifles (Vandal, Phantom, AK-47, M4), heavy shields, and full utility.
    • The Buy Strategy: Spend your money completely. Coordinate utility combinations (smokes, flashes, molotovs) with your team to execute or defend bomb sites.

    2. The #1 Ranked Economy Mistake: Split Buying

    In solo-queue ranked matches, the single most common economic failure is split buying (e.g., two players full-buy, one half-buys, two players save).

    Why Split Buying Destroys Win Rates

    • Impaired Trade Efficiency: If your teammate has an economy pistol and light armor while you have an assault rifle, you cannot take fair, coordinated dual fights. If you die, they cannot trade out the enemy effectively.
    • Economic Staggering: Split buying breaks the team’s financial sync, ensuring your team never fields a synchronized 5-man full buy for the rest of the half.

    The Golden Rule of Team Unity: Always match your team’s lowest common denominator. If two teammates are forced to save, you must save with them—even if you personally have enough cash to buy a rifle alone. Buying alone turns your expensive weapon into an isolated donation for the enemy team.

    3. Comprehensive Matrix: Economic States and Tactical Goals

    Round Economic StateFinancial Target / ThresholdOptimal Team StrategyPrimary Objective
    Full Save (Eco)Sub-1,500 credits remainingSpend nothing; stack a site together.Secure minimum loss bonus; preserve bank for next round.
    Force BuySpending down to 0 creditsExecute a fast, aggressive rush with cheap guns.Catch opponents off-guard; break enemy economy momentum.
    Bonus RoundCarrying SMGs/Bulldogs overPlay structured defaults; hunt for rifle upgrades.Maximize economic surplus while keeping next-round buy safe.
    Full Buy3,900+ credits availableLayer utility, execute coordinated site hits.Convert map control into objective wins and round victories.

    4. Advanced Economic Calculations: Understanding Loss Bonuses

    In modern tactical shooters, the game features a loss bonus mechanic designed to prevent matches from becoming complete blowouts. Understanding how loss streaks scale helps you predict when the enemy team is forced to save versus when they can afford a surprise force-buy.

    • 1 Round Loss: Base loss bonus payout (e.g., 1,900 credits)
    • 2 Consecutive Losses: Increased payout (e.g., 2,400 credits)
    • 3+ Consecutive Losses: Maximum loss payout tier (e.g., 2,900 credits)

    Note: Planting the spike on attack or securing individual kills grants extra cash additions that can unexpectedly fund a force-buy even after a round loss. Factor spike plants into your opponent’s economy tracking!

    10 Frequently Asked Questions (FAQ)

    1. What is a “force buy” and when should my team do it?

    A force buy is when a team spends all remaining credits to purchase whatever weapons, armor, and utility they can afford, even though they lack funds for a full rifle buy. It is typically used on the final round of a half or during match-point scenarios where you cannot afford to let the enemy close out the game.

    2. Should I buy armor or a better gun if I am short on cash?

    Always prioritize armor and basic utility over a luxury weapon. A player with a cheaper submachine gun and heavy armor will almost always win against a player with an expensive rifle and zero armor.

    3. How do I communicate our economy strategy clearly in solo-queue?

    Use a simple 3-part callout at the start of the buy phase: Round type (“We are full saving”), Tactical goal (“Playing together for exit picks”), and Next real round (“Full buying on round 4”).

    4. Is it ever okay to buy an Operator (sniper rifle) if it breaks my team’s economy?

    No. If buying an expensive sniper rifle forces you or your teammates to drop armor or forgo essential abilities, it drastically reduces your team’s overall win probability.

    5. What should I do if a teammate refuses to save and buys every round?

    Accept that you cannot control their individual wallet, but do not follow their bad financial habits. Keep your economy aligned with the other three teammates who are cooperating so you maintain a cohesive 4-man buy structure.

    6. Does killing enemies help fix a broken team economy?

    Yes! Each individual kill grants an extra cash bounty (typically 200 credits), and planting the spike on attack grants additional funds to every team member.

    7. Why do professional teams sometimes “save” weapons during a lost round?

    If a round is mathematically unwinnable (e.g., a 1v4 scenario with 10 seconds left), surviving players will hide and preserve their rifles. Carrying an expensive rifle into the next round saves thousands of credits.

    8. How do agent utility costs factor into my round-buy calculations?

    Different agents have vastly different ability costs (ranging from cheap charges to expensive molotovs and recon tools). Always calculate your ability budget alongside your gun and armor purchases.

    9. What is the “minimum next-round credit check”?

    Modern UI displays your guaranteed minimum credits for the following round at the bottom of the buy menu. Always check this number before buying to ensure you aren’t accidentally trapping your team in a broken economy loop.

    10. Where can I find more team strategy and economic breakdown guides?

    Bookmark The Gamer Buzz and check back regularly for our comprehensive database of professional tactical guides, map breakdowns, and competitive rank-up tips!

    Conclusion

    Managing your economy correctly across different rounds is the ultimate mental differentiator that separates casual players from elite tactical competitors. By eliminating split buys, respecting loss bonuses, understanding round cycles like bonus and anti-eco phases, and syncing your wallet with your teammates, you take control of the mathematical odds in every match. Balance your books, coordinate your buys, and dominate your next competitive lobby!

  • What are the best tactical utility grenade line ups to clear common camping spots on competitive maps

    What are the best tactical utility grenade line ups to clear common camping spots on competitive maps

    Welcome to The Gamer Buzz, your premier competitive tactical authority. Whether you are climbing the ranked ladder from high-performance setups in San Francisco, New York, and Seattle, or locking down map control across Texas, California, and Washington, one tactical truth remains absolute: utility wins rounds.

    Raw mechanical aim and sharp reflexes are essential, but they cannot save you when an enemy player is tucked deep inside an obscure architectural blind spot, holding a passive crosshair waiting for you to walk into their crosshairs. In tactical first-person and hero shooters (such as Counter-Strike 2, Valorant, Rainbow Six Siege, and Apex Legends), standard entry fragging without utility is a recipe for disaster.

    To break through stubborn defensive holds, you need tactical utility line-ups—precise, geometry-based grenade tosses that flush enemies out of hidden corners, deny site retakes, and secure map control safely. In this exhaustive, master-level guide, we break down utility physics, bounce mechanics, team synchronization protocols, and the absolute best line-ups to clear common map camping spots.

    1. The Physics of Utility: Understanding Trajectory, Ticks, and Bouncing

    Before memorizing pixel-perfect line-ups, you must understand how game physics interact with your throwable objects. Grenade execution relies on three primary throwing mechanics:

    1. Throw Types and Velocity Vectors

    • Left-Click (Heavy Throw): Maximum distance, high arc, used for long-range cross-map executes and deep site coverage.
    • Right-Click (Underhand Toss): Short distance, low arc, perfect for rolling grenades under doorframes or clearing immediate corner traps.
    • Combined Left + Right Click (Medium Throw): A balanced medium-range arc used for mid-distance site placements.

    2. The Mechanics of Movement Momentum

    In games featuring sub-tick or tick-rate dynamics (like Counter-Strike 2), throwing a grenade while moving forward adds your character’s velocity vector to the grenade’s trajectory.

    • The Jump-Throw Bind: For consistent, pixel-perfect long-range line-ups, you must use a dedicated jump-throw bind. Releasing a grenade manually during a jump introduces human frame-timing variance; a bind ensures the grenade leaves your hand at the exact apex of your jump every single time.

    2. Categorizing Common Camping Spots and Anti-Camping Utility

    Defenders love spots that offer natural head-glitches, tight cover, or deep shadows. To clear them efficiently, you must match the correct type of utility to the structural problem.

    [Spot Type: Deep Niche / Corner] ➔ [Utility Choice: Molotov / Incendiary] ➔ [Result: Flushes Enemy Out]
    [Spot Type: Elevated Nest / Rafter] ➔ [Utility Choice: High-Arc Flashbang] ➔ [Result: Blinds Static Holder]
    [Spot Type: Long Corridor / Tunnel] ➔ [Utility Choice: Fragmentation / Blast] ➔ [Result: Direct Lethal Pressure]
    

    1. Area Denial (Molotovs / Incendiaries)

    • Target: Tight corners, behind default boxes, and narrow choke tunnels.
    • Objective: Force campers to either burn to death or step out of cover directly into your team’s pre-aimed crosshairs.

    2. Vision Removal (Smokes)

    • Target: Snipers nests, heaven positions, and long cross-angles.
    • Objective: Cut off enemy line-of-sight entirely, allowing your team to safely cross open courtyards without getting picked off.

    3. Step-by-Step Protocol for Executing a Utility Push

    Throwing random grenades hoping for a lucky kill is a waste of vital team resources. Execute your utility sequences using this 4-step tactical protocol:

    1. Information Gathering: Confirm via audio cues or ping systems that a defender is holding a specific target pocket.
    2. Timing Synchronization: Coordinate with your entry fragger so your utility explodes the exact millisecond they swing the corner.
    3. Flashing and Popping: Ensure flashbangs detonate behind cover or overhead so they blind the defender without blinding your pushing teammates.
    4. The Trade Sweep: Follow up your utility explosion immediately with a coordinated two-man swing to clean up any displaced enemies.

    4. Comprehensive Matrix: Utility Types vs. Defensive Positions

    Defensive Camping SpotPrimary Tactical ThreatOptimal Utility CounterExecution Goal
    Behind Default Site BoxesHead-glitch angle, tight coverMolotov / IncendiaryFlush enemy out into open floor space.
    Elevated Rafters / HeavenLong-range line-of-sight dominanceHigh-Arc Smoke WallIsolate and blind the vertical sniper.
    Dark Corner / Shadow NicheSurprise close-range crossfireFlashbang / Recon DartBlind or reveal hidden positioning.
    Narrow Choke TunnelRush prevention / spam lanesFragmentation / HE GrenadeDeal heavy splash damage to clustered defenders.

    5. Common Utility Mistakes to Avoid

    • Holding Grenades Too Long: Cooking a grenade for too long in your hand risks blowing up your own team if you get peeked and killed mid-animation.
    • Throwing Utility Without Communication: Dropping a smoke or flash without telling your team often blocks your own entry fraggers or blinds your teammates instead of the enemy.
    • Wasting High-Value Utility Early: Tossing all your smokes and incendiaries in the first 10 seconds of a round leaves your team defenseless during the actual site execution phase.

    10 Frequently Asked Questions (FAQ)

    1. Why do I need a jump-throw bind instead of just jumping manually?

    Manual jump-throws vary by milliseconds every time you press the keys, causing your long-range smokes to bounce off walls incorrectly. A jump-throw bind automates absolute frame perfection.

    2. How do I practice utility line-ups effectively?

    Load up a custom server with infinite ammo, grenade trajectory tracers enabled, and round-time freezes turned on. Spend 15 minutes practicing 3 core map line-ups before playing ranked.

    3. What should I do if an enemy rushes me while I am pulling out a utility grenade?

    Drop the utility immediately, pull out your weapon, and fight. Never die with a grenade in your hand while trying to line up a tactical throw.

    4. Are bounce line-ups better than direct line-ups?

    Bounce line-ups allow you to throw utility safely around corners and over high walls without exposing your physical body to enemy sniper angles. Both have specialized uses.

    5. How many pieces of utility should a single player buy per round?

    Always prioritize a mix based on your team economy: at least one information/flash tool and a smokescreen or area-denial grenade if budget permits.

    6. Why did my flashbang blind my own teammates?

    You likely threw a direct flash or failed to bounce it off a wall behind your teammates. Always ensure flashbang trajectories detonate out of your team’s direct field of view.

    7. Can utility damage break enemy utility items?

    Yes! High-explosive grenades and molotovs can destroy enemy traps, tripwires, and proximity utilities if placed correctly in choke doorways.

    8. What is the best way to coordinate utility with random solo-queue teammates?

    Type or speak a simple plan in voice chat before the round starts: “I will smoke heaven, you flash main, let’s execute B-site together”.

    9. How do game updates affect custom grenade line-ups?

    Major map reworks or physics updates occasionally alter wall angles and skybox ceilings, breaking older line-ups. Always verify your favorite line-ups after patch notes drop.

    10. Where can I find visual video guides for map line-ups?

    Bookmark The Gamer Buzz and check back regularly for our comprehensive database of professional video line-ups, map geometry guides, and tactical team strategies!

    Conclusion

    Mastering tactical utility grenade line-ups is the definitive edge that turns average solo-queue squads into coordinated, unstoppable competitive teams. By understanding trajectory physics, choosing the correct counter-utility for common camping spots, and executing synchronized team plays, you strip away the safety nets of defensive campers. Step into a practice server, lock in your line-ups, and dominate your next competitive map!

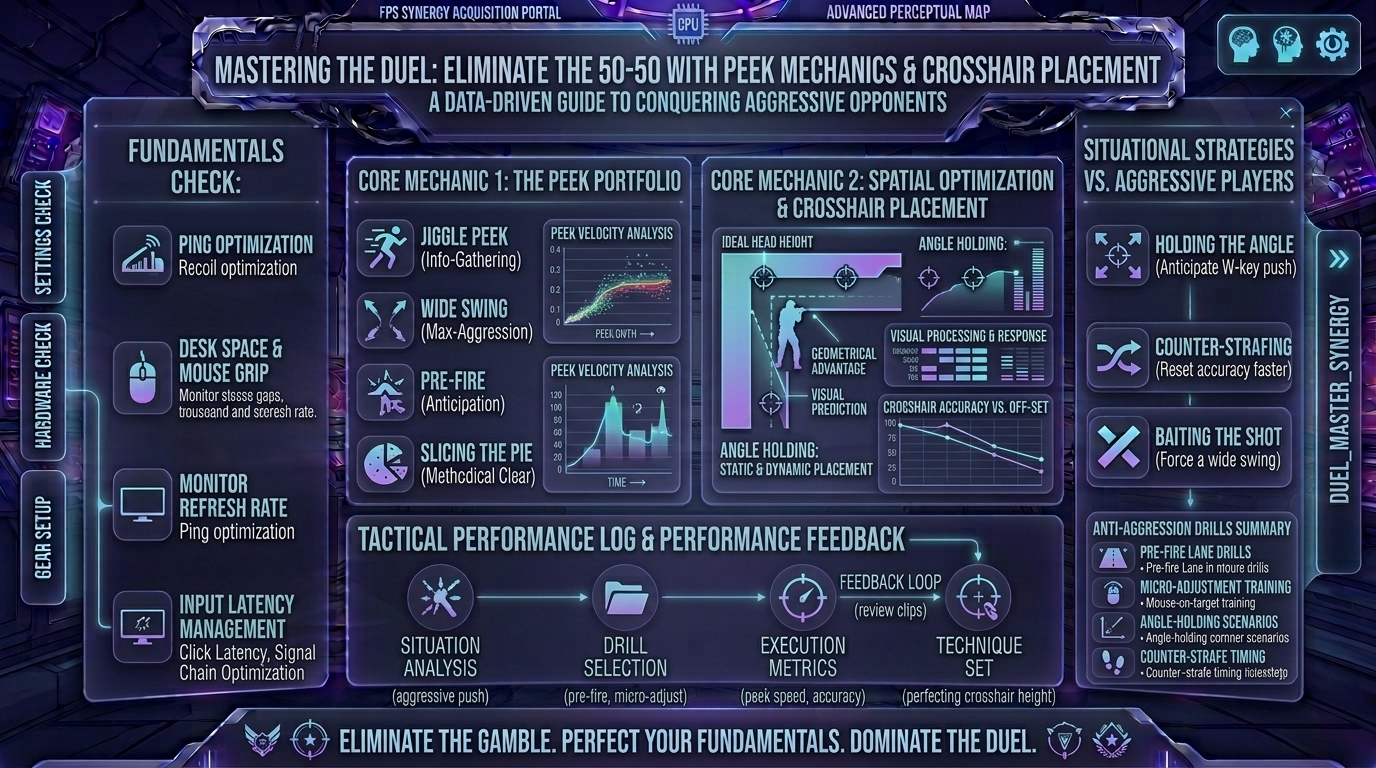
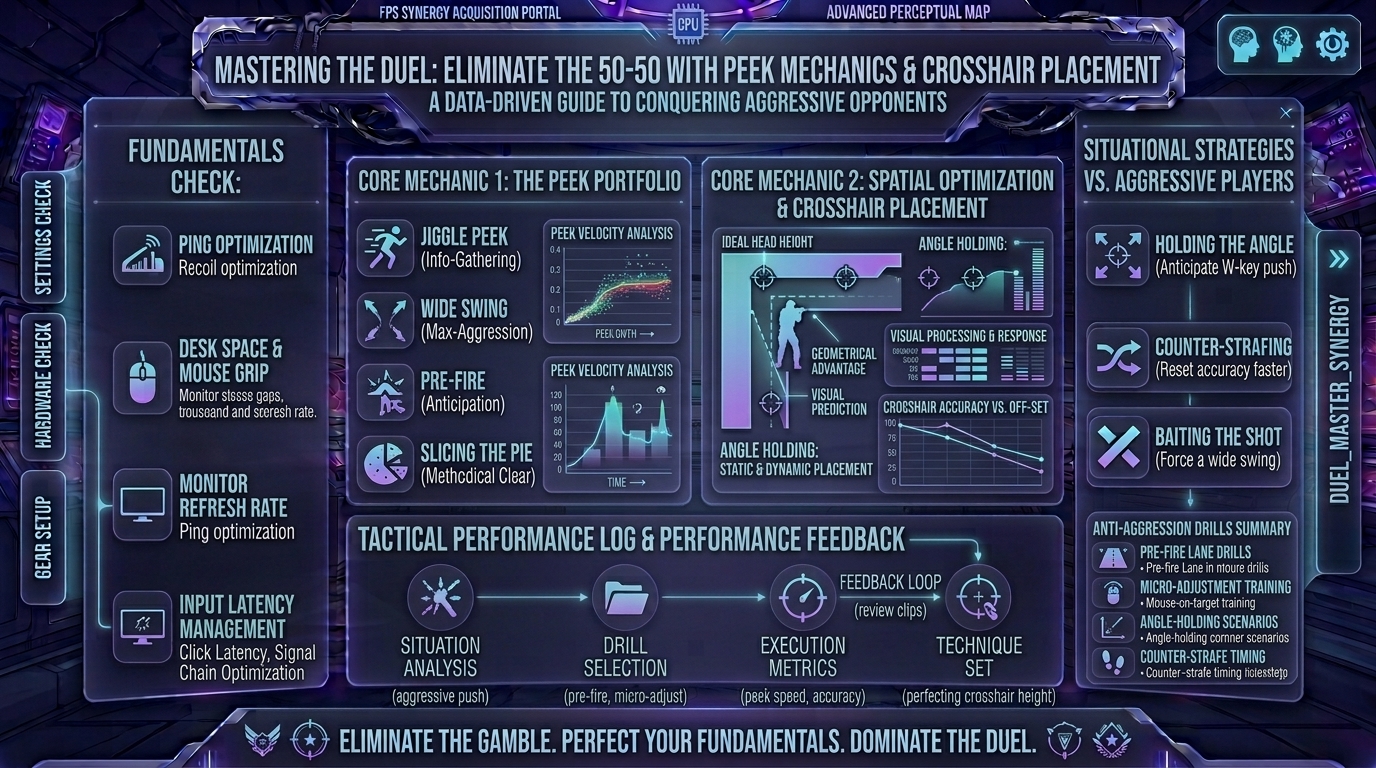
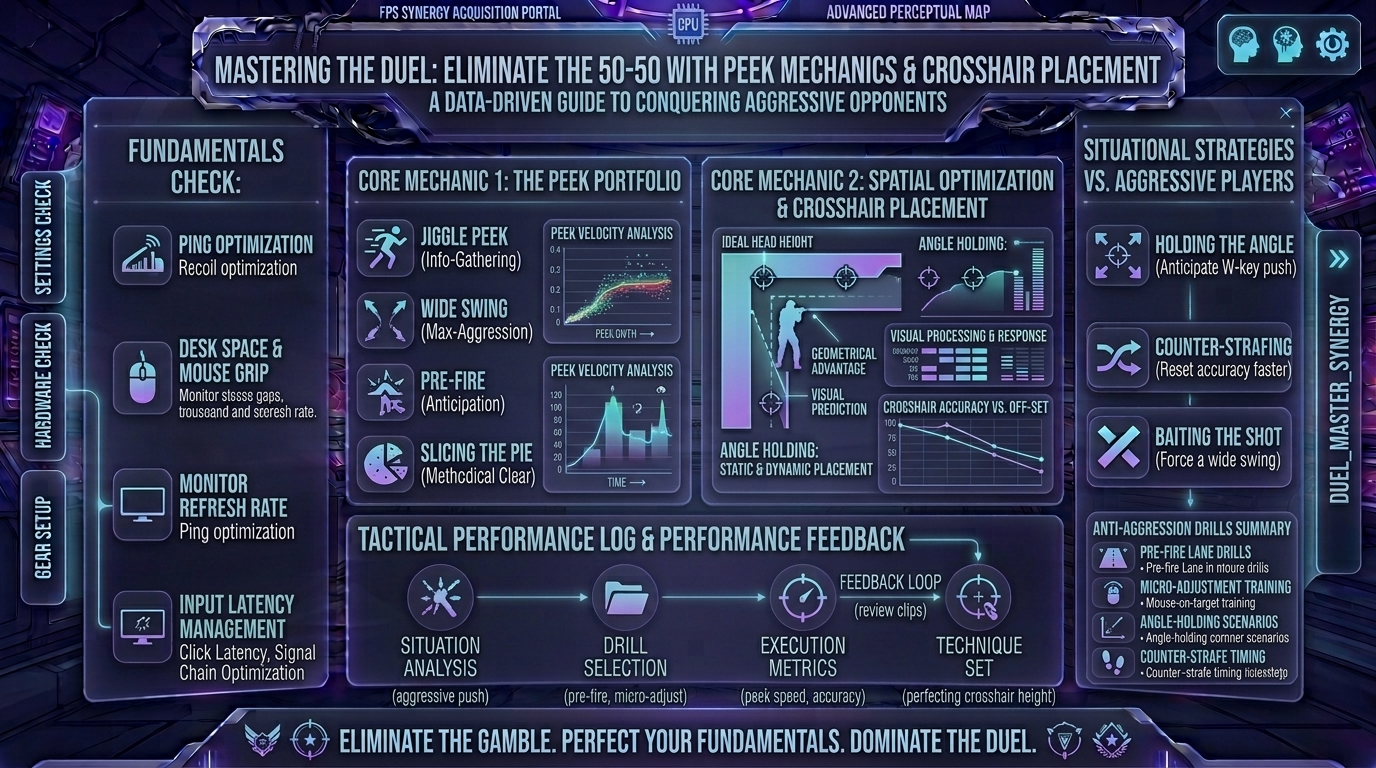
  • How to master peek mechanics and crosshair placement to win 50 50 gunfights against aggressive enemy players

    How to master peek mechanics and crosshair placement to win 50 50 gunfights against aggressive enemy players

    Welcome to The Gamer Buzz, your ultimate competitive performance authority. Whether you are grinding ranked matches from high-performance gaming rigs in San Francisco, New York, and Seattle, or locking down tactical lobbies across Texas, California, and Washington, you have undoubtedly run into that one hyper-aggressive enemy player.

    You know the type: they sprint around corners, shoulder-peek with lightning speed, and instantly melt you before your brain even registers that they are on your screen. You feel like you never even had a chance to react.

    In competitive multiplayer titles (such as Counter-Strike 2, Valorant, Rainbow Six Siege, and Apex Legends), 50/50 gunfights against aggressive players are won long before the first bullet leaves your barrel. They are won through spatial geometry, elite peek mechanics, and pixel-perfect crosshair placement.

    In this exhaustive, master-level guide, we break down the physics of peeker’s advantage, the anatomy of proper clearing techniques, and step-by-step strategies to turn those terrifying 50/50 duels into consistent wins.

    1. The Physics of Combat: Understanding Peeker’s Advantage

    Why does it always feel like an enemy pushing around a corner sees you a fraction of a second before you see them? The answer lies in network code and human response loops, commonly known as peeker’s advantage.

    Network Latency and Interpolation

    • The Data Journey: When a stationary player holds an angle, their client sends their position to the server, and the server relays it to the moving enemy. When an attacker swings around a corner, their movement inputs hit the server before the server has time to update the stationary defender’s screen.
    • The Time Delta: This creates a temporal window of roughly 50 to 150 milliseconds where the attacker sees the defender before the defender sees the attacker on their monitor.
    • The Fix: Because you cannot completely eliminate network delay, you must adapt your defensive and offensive positioning so that peeker’s advantage works for you—or cannot hurt you. Never hug a wall tightly when holding an angle; stand further back to leverage perspective geometry.

    2. The Core Anatomy of Elite Crosshair Placement

    If you find yourself constantly flicking wildly across your mousepad to hit enemies, your baseline habits are broken. Crosshair placement is the art of eliminating the need to flick.

    [Default Head-Height Discipline] ➔ [Pre-Aiming Common Angles] ➔ [Clearing Slices of Geometry]
    

    1. Head-Height Discipline

    • Most players keep their crosshairs drifting toward the floor or mid-torso while running across the map. This forces a vertical mouse movement every time an enemy appears, wasting critical milliseconds.
    • The Rule: Keep your crosshair locked permanently at estimated enemy head height, accounting for steps, ramps, and elevated platforms. Make it a subconscious habit.

    2. Pre-Aiming Map Geometry

    • Never look at an open expanse of a wall when clearing a corner. Trace your crosshair along the exact edge of the wall, doorframe, or box where an enemy’s head is statistically likely to appear. When you clear a room, your crosshair should “sweep” the geometry dynamically.

    3. Mastering Advanced Peek Mechanics

    Different situations demand different peeking tools. Relying exclusively on a wide, clumsy run around a corner makes you an easy target for an angle-holder. Master these four fundamental peek types:

    1. The Info / Shoulder Peek (Baiting Shots)

    • How to execute: Tap your movement keys to flash just your shoulder or arm past the corner edge for a fraction of a second, then immediately counter-strafe back into cover.
    • Purpose: To bait an enemy sniper or rifle-holder into wasting a shot or revealing their exact position without risking your life.

    2. The Wide Swing (Punishing Passive Holders)

    • How to execute: A swift, uninterrupted movement across a wide arc past a doorway or corner, keeping your momentum high.
    • Purpose: Used when you know an enemy is holding a tight, static angle. By swinging wide, you break their crosshair placement expectation, forcing them to adjust their aim rapidly while you shoot while stable.

    3. The Jiggle Peek (Clearing Information Safely)

    • How to execute: Rapidly tapping A-D-A-D (or left-right movement keys) back and forth across a threshold without fully committing your body.
    • Purpose: Gathers spatial intel on multiple enemy positions without allowing opponents time to lock onto your hitbox.

    4. The Dead-Stop Counter-Strafe

    • How to execute: Moving in one direction, tapping the opposite movement key for a single frame to cancel your velocity entirely, and firing a clean 1-to-3 bullet burst at the exact moment of absolute stillness.

    4. Comprehensive Matrix: Choosing the Right Peek for Every Scenario

    Scenario / ThreatOptimal Peek TechniqueKey Tactical Objective
    Suspected Enemy Sniper Holding LaneShoulder Peek / Jiggle PeekForce a missed shot; gather visual confirmation.
    Close-Quarters Room EntrySlicing the Pie (Step-by-Step Clearing)Isolate individual angles one micro-slice at a time.
    Pushing a Passive Defending AnchorWide Swing Momentum PeekOverwhelm their reaction time and break pre-aim alignment.
    Retaking a Site with Multiple AnglesUtility-Backed Flash PeekBlind or displace defenders before exposing your hitbox.

    5. Common Mistakes That Cost 50/50 Duels

    • Moving While Shooting: Firing your weapon while your movement keys are still depressed introduces extreme bullet spread randomness. Always ensure your counter-strafe stop is absolute before pulling the trigger.
    • Crouch-Spamming Out of Panic: Pressing the crouch button the millisecond you see an enemy locks your movement speed to zero and lowers your head directly into their pre-aimed crosshair height, turning you into a stationary target.
    • Staring at Your Crosshair Instead of the Target: Focus your visual attention on the enemy player model, using your peripheral vision to guide your crosshair placement rather than staring blankly at the center dot of your screen.

    10 Frequently Asked Questions (FAQ)

    1. What is the absolute best sensitivity for mastering crosshair placement?

    A medium-to-low sensitivity range (allowing roughly a 360-degree rotation across your entire mousepad) gives you the fine motor control required for precise micro-adjustments and head-height tracking.

    2. Why do I get killed instantly even when I feel like I reacted first?

    This is typically due to peeker’s advantage combined with delayed server registration. If you were holding a static angle right against a wall, the aggressor saw you before your screen updated.

    3. How do I practice counter-strafing effectively?

    Spend 10 minutes daily in a deathmatch or custom practice map focusing purely on the rhythm of tapping A, stopping, firing one bullet, and tapping D.

    4. Is crouching ever a good idea during a duel?

    Crouch-peeking can occasionally throw off an enemy’s initial headshot crosshair, but it should be used sparingly as a situational mix-up, not a default habit.

    5. How can I stop myself from panicking and flinching during gunfights?

    Focus on your breathing and treat individual gunfights as mechanical execution drills rather than high-stakes emotional moments. Desensitize yourself by playing more deathmatches.

    6. What does “slicing the pie” mean in tactical shooters?

    It is a corner-clearing technique where you walk in a wide arc around a doorway, opening up tiny “slices” of the room sequentially so you only expose yourself to one angle at a time.

    7. Should I use dynamic crosshairs or static crosshairs?

    Always use a static crosshair. Dynamic crosshairs expand and contract based on movement, creating visual clutter and distracting your eye focus during frantic gunfights.

    8. How do I win 50/50 duels against players with much faster reaction times?

    By relying on positioning and pre-aiming. If your crosshair is already resting on the exact pixel where their head must appear, you don’t need a fast reaction time—you just click.

    9. Why does my aim feel shaky when peeking aggressive players?

    Tension in your hand and wrist causes micro-jitters. Relax your grip on your mouse, keep your forearm loose, and focus on smooth, controlled momentum.

    10. Where can I find more advanced combat and mechanic guides?

    Bookmark The Gamer Buzz and check back regularly for our comprehensive database of professional esports guides, hardware tips, and competitive tactical breakdowns!

    Conclusion

    Mastering peek mechanics and crosshair placement turns you from a reactive target into an aggressive, calculated threat in 50/50 competitive duels. By understanding peeker’s advantage, maintaining strict head-height crosshair discipline, utilizing intelligent shoulder and wide swings, and eliminating panicked movement, you will dominate your ranked lobbies. Step into your next match with confidence, lock your crosshair on target, and climb the competitive ladder!

  • what are the best warm up routines and aim training playlists before jumping into competitive ranked matches

    Welcome to The Gamer Buzz, your premier competitive performance authority. Whether you are grinding ranked ladders from high-intensity gaming setups in San Francisco, New York, and Seattle, or tuning your hardware performance across Texas, California, and Washington, one truth remains absolute: cold hands lose gunfights.

    Jumping straight into a competitive ranked match without preparing your nervous system, physical hand muscles, and visual focus is the equivalent of a professional sprinter running a marathon cold. Your hand feels stiff, your micro-adjustments are jittery, and your reaction time lags behind opponents who have already been playing for hours.

    In this exhaustive, master-level guide, we break down the science of neuromuscular priming, physical hand care, customized aim training playlists, and step-by-step pre-game warm-up routines guaranteed to get you peaking right at round one.

    1. The Science of the Pre-Game Warm-Up: Neuromuscular Priming

    Why do physical warm-ups matter so much in esports? Precision aiming relies entirely on neuromuscular coordination—the rapid communication loop between your eyes, brain, spine, hand muscles, and mouse sensor.

    What Happens When You Skip a Warm-Up?

    • Synaptic Latency: Cold muscle tissue and unprimed neural pathways result in delayed muscle contraction times, slowing your flick speed by 30 to 80 milliseconds.
    • Inconsistent Muscle Memory: Without a baseline tuning phase, your brain guesses your sensitivity scale, leading to severe overflicking and underflicking during your first two competitive matches.
    • Increased Injury Risk: Cold wrists and fingers gripping a mouse tightly under high stress are far more prone to repetitive strain injuries (RSI), carpal tunnel discomfort, and tendonitis over long sessions.

    A proper 15-to-20-minute warm-up flushes fresh blood into your forearms, resets your spatial awareness, and synchronizes your hand-eye coordination before the stakes matter.

    2. The 4-Phase Pre-Game Warm-Up Blueprint

    Do not waste your warm-up time randomly shooting walls or grinding aim scenarios indefinitely. Structure your routine using this optimized 4-phase protocol:

    [Phase 1: Physical Hand & Wrist Care] ➔ [Phase 2: Static Micro-Adjustments] ➔ [Phase 3: Fluid Dynamic Tracking] ➔ [Phase 4: In-Game Deathmatch]
    

    Phase 1: Physical Hand and Wrist Stretches (3 Minutes)

    Before touching your mouse, prepare your physical hardware:

    • The Prayer Stretch: Place your palms together in front of your chest and lower your hands until you feel a gentle stretch in your forearms. Hold for 20 seconds.
    • Wrist Rotations: Slowly rotate your wrists clockwise 10 times, then counter-clockwise 10 times to lubricate the joint capsules.
    • Finger Flexing: Spread your fingers wide apart as far as possible, hold for 3 seconds, and relax into a loose fist. Repeat 5 times.

    Phase 2: Static Micro-Adjustments (5 Minutes)

    Open your preferred aim trainer (KovaaK’s, Aimlabs, or Aimbeast) and load up a static grid-clicking scenario (such as Gridshot, Sixshot, or Tile Frenzy – Strafe).

    • The Golden Rule: Do not rush. Focus entirely on smooth, deliberate movements. Ensure your crosshair stops dead on the target center without overshooting. Speed will come naturally once accuracy is locked in.

    Phase 3: Fluid Dynamic Tracking (5 Minutes)

    Switch from static clicking to a reactive tracking scenario (such as Pasu, Cataic Tracking, or Smoothbot).

    • Keep your crosshair glued to the moving target. Focus on eliminating jittery hand corrections and maintaining a smooth, constant pursuit velocity.

    Phase 4: In-Game Deathmatch / Retake Server (5–7 Minutes)

    The final step bridges aim trainers with actual game geometry, sound design, and recoil mechanics.

    • Jump into a community deathmatch server or an unrated deathmatch mode in your primary game.
    • Constraint Training: For the first two minutes, do not crouch at all. Focus entirely on head-height crosshair placement, counter-strafing, and clean first-bullet accuracy.

    3. Curated Aim Training Playlists for Every Game Type

    Different tactical games require completely different hand-eye mechanics. Choose the routine tailored to your specific competitive title:

    Game Genre / FocusRecommended Aim Trainer TasksPrimary Mechanical Goal
    Tactical Snipers / Tap Shooters (CS2 / Valorant)Sixshot, MicroShot, 1wall6targets_smallAbsolute first-bullet headshot precision and micro-flicks.
    Tracking-Heavy Hero Shooters (Apex Legends / Overwatch)Smoothbot, Air Voltaic, Centering V3Sustained tracking velocity against high-mobility targets.
    Dynamic Spray & Transfer Shooters (The Finals / Call of Duty)Tile Frenzy, Multiclick, Reflex MicroFast target switching, spray recovery, and multi-kill flow.

    4. Common Warm-Up Mistakes to Avoid

    Even dedicated players often ruin their warm-up efficacy by falling into counter-productive habits:

    • The “Marathon Burnout” Trap: Spending 2 hours in an aim trainer before playing your ranked matches. Aim training should be a short, intense primer—not an exhaustion workout. If your hand feels tired before you even queue up, you’ve trained too much.
    • Chasing High Scores During Warm-Ups: Your focus in a warm-up should be form, smoothness, and accuracy, not setting personal leaderboard records. Worrying about scores causes tension and erratic hand movements.
    • Skipping the Physical Stretches: Ignoring hand stretches leads to chronic forearm fatigue and inconsistent aiming performance halfway through an evening gaming session.

    10 Frequently Asked Questions (FAQ)

    1. How long should my pre-game warm-up routine be?

    An ideal warm-up takes between 15 and 20 minutes total. Anything shorter may leave your hands cold; anything longer risks burning out your hand muscles before ranked matches begin.

    2. Should I warm up every single day, or only before ranked sessions?

    You should perform a brief 5-to-10 minute physical stretch and micro-adjustment routine every day you play, even if you are just playing casual game modes.

    3. What is the best aim trainer for beginners?

    Aimlabs is fantastic for beginners because it is free on Steam, features intuitive UI, and provides automated data analytics breaking down your strengths and weaknesses. KovaaK’s is renowned for its massive community scenario library.

    4. Why do I feel worse in my first ranked match even after warming up?

    Sometimes your brain experiences a minor transition shock when moving from an abstract aim trainer box into complex game maps with visual clutter. Give yourself one warm-up match in casual or deathmatch to smooth out the transition.

    5. Does my in-game sensitivity need to match my aim trainer sensitivity?

    Yes, absolutely. Always calculate your exact eDPI and cm/360 distance so that your muscle memory translates 1:1 between your aim trainer and your competitive game.

    6. Can I warm up using just in-game deathmatch servers?

    Yes, if you don’t use third-party aim trainers, a dedicated 10-minute deathmatch session focusing strictly on crosshair placement and stop-shooting mechanics works wonderfully.

    7. What should I do if my hand starts cramping during my warm-up?

    Stop immediately. Shake out your hand, stretch your wrists, and drink water. Cramping is a direct sign of excessive gripping tension or poor desk posture.

    8. Should I change my crosshair or settings during a warm-up?

    Never tweak settings right before playing. Keep your hardware, sensitivity, and crosshair locked in permanently so your nervous system builds reliable neural pathways.

    9. How do I know if my warm-up routine is actually working?

    Track your match win-rates and initial performance during rounds 1 through 5 over a two-week period. If you notice fewer missed easy shots and quicker target acquisition in early rounds, your routine is succeeding.

    10. Where can I find more pro warm-up routines and performance guides?

    Bookmark The Gamer Buzz and check back regularly for our comprehensive database of competitive optimization guides, hardware reviews, and tactical rank-up tips!

    Conclusion

    Warming up before jumping into competitive ranked matches is the ultimate edge that separates casual ladder-climbers from disciplined esports competitors. By following a structured 4-phase routine—combining physical hand care, targeted aim trainer tasks, and game-specific deathmatch practice—you prime your nervous system for peak performance. Lock in your routine, stretch your hands, and head into your next lobby ready to dominate!

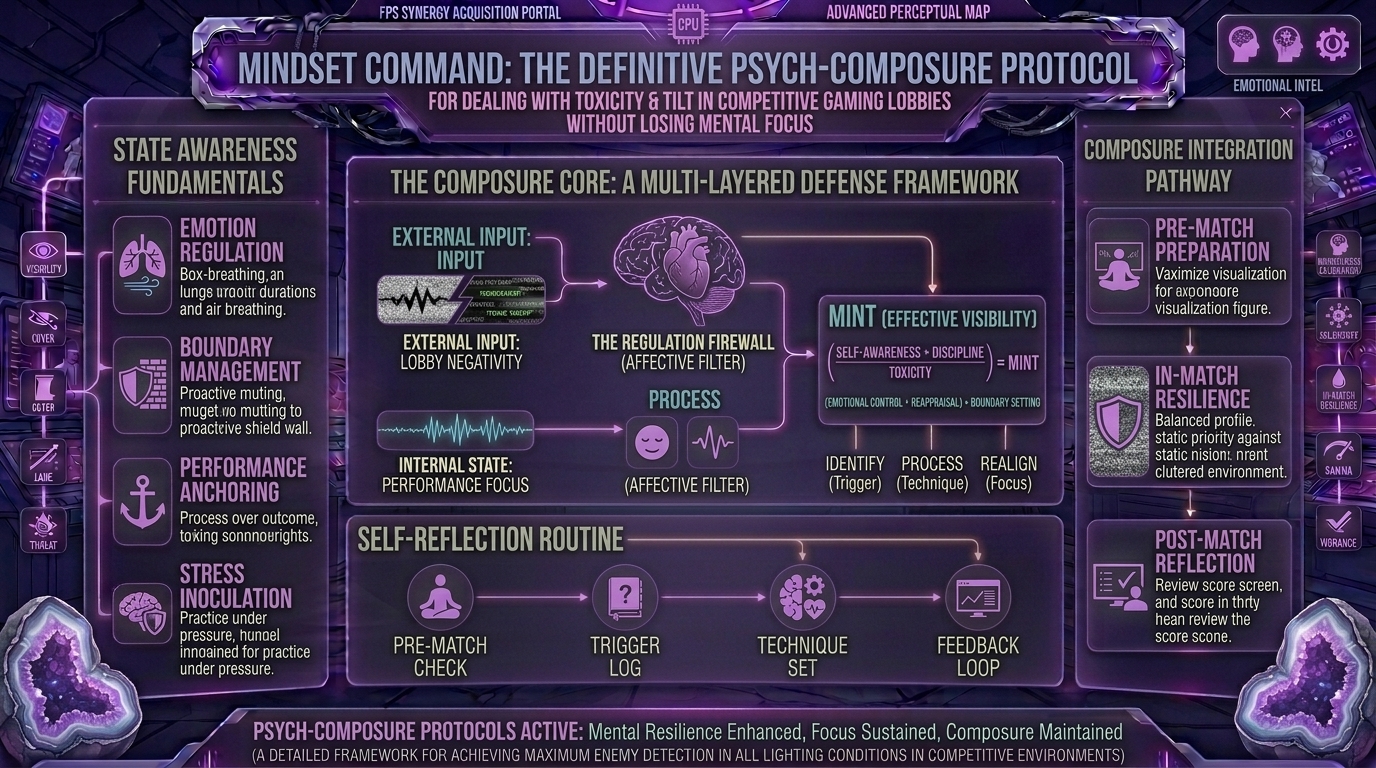
  • How to deal with toxicity and tilt in ranked competitive gaming lobbies without losing your mental focus

    How to deal with toxicity and tilt in ranked competitive gaming lobbies without losing your mental focus

    Welcome to The Gamer Buzz, your ultimate competitive performance and mindset hub. Whether you are grinding ranked ladders from high-pressure servers in San Francisco, New York, and Seattle, or tightening your execution across Texas, California, and Washington, every competitive gamer shares a universal enemy.

    That enemy isn’t the enemy team’s smurf, bad hit registration, or awkward map architecture. It is tilt—and the toxic teammates who trigger it.

    In competitive multiplayer titles (such as Counter-Strike 2, Valorant, League of Legends, Apex Legends, and Overwatch 2), solo-queuing is a psychological lottery. You will encounter griefers, keyboard warriors, mic-spammers, and people who give up after losing the pistol round. If you lack the mental armor to handle them, toxicity acts like a virus, dragging your personal performance down right along with theirs.

    In this exhaustive, master-level guide, we break down the neuro-psychology of tilt, the mechanics of emotional containment, step-by-step de-escalation tactics, and the framework required to protect your mental focus and climb the ranked ladder.

    1. The Psychology of Tilt: What Happens to Your Brain Under Stress

    Before you can fight tilt, you need to understand what it actually is. Coined originally from poker, tilt describes a state of mental or emotional frustration where a player adopts suboptimal strategies, acts aggressively, and experiences a steep drop in cognitive control.

    The Arousal-Performance Curve

    In sports psychology, the Yerkes-Dodson Law dictates a curvilinear relationship between arousal (stress) and performance.

    • A mild amount of stress keeps you alert, focused, and reacting quickly.
    • However, when a toxic teammate starts screaming, insulting your family, or throwing rounds, your stress crosses the tipping point. Your heart rate spikes, your breathing becomes shallow, your muscles tense up, and your brain’s prefrontal cortex (responsible for tactical decision-making and spatial awareness) effectively short-circuits.

    You stop thinking about map control, crosshair placement, or win conditions. Instead, your internal monologue shifts entirely to anger, revenge, and self-doubt. When you tilt, you are essentially playing handicapped.

    2. The 3-Tier Tilt Management Framework

    Mastering your mental game requires an active defense system. Elite esports competitors rely on a structured, three-tiered framework to catch and kill tilt before it snowballs.

    [Tier 1: Early Detection] ➔ [Tier 2: Immediate Containment] ➔ [Tier 3: The Hard Reset Protocol]
    

    Tier 1: Early Physical Detection

    Your body will always recognize tilt before your conscious mind admits it. Watch out for these warning signs:

    • A sudden tightening or “death-grip” on your mouse.
    • Hunched shoulders or stiffened wrists.
    • Sighing heavily or feeling a sudden surge of heat in your chest.
    • The urge to type an angry response back into chat.

    Tier 2: Immediate Containment (The Non-Engagement Rule)

    The number one law of surviving a toxic lobby is simple: Do not feed the fire.

    • Toxic players thrive on validation and reactions. If you type a paragraph defending yourself or scream back over voice comms, you have handed them total control over your emotional state.
    • The Mute Button is a Weapon: The second someone proves they are more interested in venting than winning, mute their text and voice channels instantly. Every second you spend listening to a toxic player complain is processing power stolen from your mini-map awareness.

    Tier 3: The Hard Reset Protocol (Between Rounds)

    If a round goes disastrously wrong because of teammate mistakes, use a physical micro-reset:

    1. Take your hands completely off your mouse and keyboard for 3 seconds.
    2. Take a deep, deliberate breath in through your nose for 4 seconds, and exhale slowly through your mouth.
    3. Say a short internal trigger phrase to anchor yourself back to reality, such as: “Reset. Next play. Focus on my own game.”

    3. Advanced Tactical Strategies for De-Escalating Lobbies

    Sometimes, a teammate isn’t a lost cause—they are just frustrated, having a rough day, or misinterpreting the game state. If you want to pull a lobby back from the brink of collapse, deploy these psychological tactics:

    • Kill ‘Em with Neutral Data: If a teammate starts yelling about how everyone else is trash, do not argue about their skill level. Respond with flat, objective tactical data to redirect their attention: “We have site control, let’s just group up for the trade”.
    • Acknowledge Good Plays: Even if someone is obnoxious, if they clutch a round or secure a clean entry frag, drop a brief “nice shot”. Positive reinforcement can instantly disarm defensive players and turn a toxic teammate into a cooperative asset.
    • Protect the Silent Majority: In almost every toxic lobby, 1 or 2 players are screaming while the other 2 or 3 are sitting in silence, miserable and scared to use their mics. By keeping your comms calm, clear, and positive, you create a safe space for the quiet players to re-engage.

    4. Setting Session Boundaries: The 2-Loss Rule

    No matter how mentally strong you are, accumulated fatigue and persistent bad luck will eventually wear you down. Setting structural boundaries prevents a single tilt-heavy session from destroying your overall rank progress.

    Boundary StrategyRule ParametersPurpose / Benefit
    The Two-Loss RuleIf you lose 2 consecutive matches due to griefers or heavy tilt, stop queuing immediately.Prevents emotional carryover (“revenge queueing”) into your next match.
    The 5-Minute ResetTake a mandatory 5-minute break between every match to stand up, stretch, and drink water.Flushes out adrenaline residue and physical muscle tension.
    The Daily CapSet a hard limit on ranked matches per day (e.g., max 4 to 5 intense matches).Protects your overall cognitive sharpness and prevents burnout.

    10 Frequently Asked Questions (FAQ)

    1. What is the single best thing to do when a teammate starts screaming in voice chat?

    Mute them immediately. Do not waste energy trying to reason with an irate stranger; your priority is preserving your own mental clarity and auditory focus.

    2. Is it ever worth arguing back to prove I am right?

    Never. Even if you are match-MVP and your teammate is playing terribly, arguing back destroys team synergy, ensures nobody makes useful callouts, and guarantees a loss.

    3. How do I stop letting a loss ruin my mood for the rest of the day?

    Practice the 5-Minute Rule. Once you close the game, walk away from your desk, do something physical (like making tea or stretching), and consciously separate your self-worth from your digital ranking icon.

    4. What causes some players to become toxic instantly?

    Most toxic players are projecting their own insecurity, performance anxiety, or frustration from previous losses. Recognizing that their outbursts are about them—not you—makes it much easier to ignore.

    5. Should I report toxic players if it feels like nothing happens?

    Always report them. Even if automated systems don’t instantly ban them, filing a report fulfills a psychological need for justice, helping you process your frustration and move on cleanly.

    6. How can I stay calm when I am personally playing badly?

    Accept that variance and bad games happen to everyone, including esports professionals. Focus entirely on utility usage and supporting your teammates rather than forcing flashy hero plays to fix your score.

    7. Does playing with a duo partner help reduce tilt?

    Massively. Having a calm, trusted friend in your voice party isolates you from the erratic mood swings of random solo-queue teammates and keeps morale grounded.

    8. How do I recover my confidence after a massive losing streak?

    Take a 24-hour break from ranked modes. Play a casual game mode, watch a replay to analyze structural mistakes objectively, or focus purely on mechanical aim training without rank pressure.

    9. What is “queue anxiety” and how do I beat it?

    Queue anxiety is the fear of losing rank. Combat it by shifting your mental focus away from your rank icon and onto personal improvement goals (e.g., “In this match, I am going to focus entirely on positioning cleanly”).

    10. Where can I find more mental training guides and competitive tips?

    Bookmark The Gamer Buzz and check back regularly for our comprehensive database of competitive psychology articles, hardware breakdowns, and rank-up strategy guides!

    Conclusion

    Toxicity and tilt are inevitable constants in ranked competitive gaming, but letting them dictate your performance is entirely optional. By understanding the neuroscience of stress, establishing a rigid 3-tier tilt management protocol, protecting your focus with the mute button, and setting strict session boundaries, you take total control of your competitive destiny. Guard your mental space, stay level-headed, and climb those ranks with absolute confidence!

  • What are the best monitor settings and color vibrance adjustments to spot enemy players hiding in dark shadows

    What are the best monitor settings and color vibrance adjustments to spot enemy players hiding in dark shadows

    Welcome to The Gamer Buzz, your premier competitive performance and hardware tuning hub. Whether you are climbing the ranked ladder from high-performance setups in San Francisco, New York, and Seattle, or dialing in your display calibrations across Texas, California, and Washington, one frustrating experience unites all competitive gamers: clearing a room, missing an enemy tucked deep inside a dark corner, and only seeing them on the death recap screen.

    In competitive first-person shooters (such as Counter-Strike 2, Valorant, Apex Legends, Call of Duty, and Rainbow Six Siege), map design relies heavily on realistic shadows, dim architectural archways, and moody interior lighting. While cinematic lighting looks incredible, it creates a massive competitive disadvantage.

    If your monitor crushes dark grays into pure black, you are playing blind. In this exhaustive, master-level guide, we break down the exact monitor settings, specialized features like Black Equalizer, color vibrance metrics, and hardware adjustments required to instantly expose enemies hiding in dark shadows.

    1. The Physics of Shadow Distortion: Why You Can’t See Enemies

    To fix a visual problem, you first need to understand how monitors handle luminance.

    Most stock monitor profiles are calibrated out-of-the-box for media consumption—movies and single-player games where deep, crushed blacks create a cinematic contrast. In these modes, the monitor maps darker RGB levels down to absolute black to make images look rich.

    However, in a competitive shooter, crushed blacks mean a camouflage shield for enemy characters wearing dark tactical gear.

    Contrast vs. Gamma vs. Black Level

    • Contrast: Governs the distance between your monitor’s brightest white and darkest black. Setting contrast too high clips bright highlights (like window glare or skyboxes) while deepening shadows.
    • Gamma: Controls how midtones and dark tones are distributed. A baseline gamma of 2.2 is standard, but lifting or shifting your local shadow curve exposes hidden midtone shapes without washing out the entire image.
    • Black Equalizer / Shadow Boost: A specialized hardware-level feature found on modern gaming monitors that selectively brightens the darkest areas of an image without blowing out bright highlights or muzzle flashes.

    2. Step-by-Step Monitor Calibration for Maximum Shadow Visibility

    Stop relying on default “Game Mode” presets, which often over-sharpen the image or add artificial blue tints that strain your eyes. Follow this structured calibration protocol:

    [Phase 1: Gamma Baseline] ➔ [Phase 2: Black Equalizer Tuning] ➔ [Phase 3: Color Vibrance Scaling] ➔ [Phase 4: In-Game Verification]
    

    Phase 1: Establishing Your Gamma Baseline

    1. Access your monitor’s On-Screen Display (OSD) physical menu.
    2. Set your Gamma target to 2.2 or 2.3.
    3. Avoid pushing gamma to maximum values (like 2.6+), which crushes colors, or dropping it too low, which turns dark corridors into a milky gray fog.

    Phase 2: Tuning Black Equalizer (Shadow Boost)

    Different monitor brands call this feature different names (BenQ Black eQualizer, ASUS Shadow Boost, MSI Black Tuner, LG Black Stabilizer).

    • The Sweet Spot: Set your Black Equalizer to a moderate value between 7 and 12 (on a standard 0-to-20 scale).
    • The Danger Zone: Pushing Black Equalizer to maximum (20) ruins your monitor’s contrast ratio, making the screen look entirely washed out and making it difficult to distinguish enemy outlines against gray backgrounds.

    Phase 3: Optimizing Color Vibrance

    Color vibrance (or digital vibrance in GPU software) does not just make colors look pretty; it changes color saturation.

    • In standard settings, a dark shadow mixed with earthy brown character models creates low contrast.
    • By boosting Color Vibrance to between 12 and 15 (or 75% to 80% in software control panels), uniform khaki and black clothing separates sharply from environmental grays and browns, making enemy silhouettes pop out in your peripheral vision.

    3. GPU-Level Adjustments: NVIDIA Control Panel vs. AMD Adrenalin

    If your monitor lacks advanced hardware shadow controls, you can adjust color properties directly through your graphics card driver software.

    NVIDIA Control Panel Settings

    1. Right-click your desktop and open the NVIDIA Control Panel.
    2. Navigate to Display ➔ Adjust desktop color settings.
    3. Scroll down to Choose how color is set and select Use NVIDIA settings.
    4. Adjust Digital Vibrance to roughly 65% to 75% (test in a custom match to find your comfort ceiling).
    5. Nudge the Gamma slider up slightly (to roughly 1.05 to 1.10) to lift shadow floors globally without washing out core textures.

    AMD Software: Adrenalin Edition

    1. Open AMD Software and navigate to Gaming ➔ Display.
    2. Locate Color Saturation and bump it up to 130–140.
    3. Adjust custom brightness and contrast sliders conservatively to retain dark-room atmosphere while opening up shadow visibility.

    4. Comprehensive Matrix: Monitor Settings for Competitive Advantage

    Setting ParameterRecommended TargetPurpose / Impact
    Monitor Brightness70% to 85% (Room Dependent)Balances ambient light washout without causing eye fatigue.
    Contrast Ratio45% to 50% (Default baseline)Preserves white highlights while maintaining edge definition.
    Gamma Curve2.2The universal standard for accurate midtone and shadow distribution.
    Black EqualizerLevel 8 to 12Selectively reveals dark corners without destroying overall contrast.
    Color Vibrance65% to 75% (GPU) / 12-15 (OSD)Increases color saturation to make player models stand out from backgrounds.
    Sharpness5 (Default mid-point)Avoids artificial white halo artifacting around character models.
    Response Time / OverdriveFast / High (Avoid max extreme)Eliminates ghosting and motion blur so moving targets stay crisp.

    5. Common Calibration Mistakes to Avoid

    • Maxing Out All Brightness Sliders: Turning your monitor brightness, in-game gamma, and GPU brightness all to maximum creates a blinding, flat white haze where edges blend together, destroying your ability to spot subtle pixel movements.
    • Ignoring Room Ambient Lighting: If you calibrate your monitor in a pitch-black room using high black equalizer settings, stepping into a brightly lit room or playing during daytime sun will make your screen look washed out. Match your display tuning to your actual playing environment.
    • Relying on HDR for Competitive Shooters: While HDR is stunning for cinematic single-player titles, standard dynamic range (SDR) with tuned black equalizers is vastly superior for competitive multiplayer games because it provides predictable, flat lighting without HDR tone-mapping delays.

    10 Frequently Asked Questions (FAQ)

    1. What is the difference between regular brightness and Black Equalizer?

    Regular brightness raises the luminance of the entire screen uniformly, turning blacks into an ugly gray wash. Black Equalizer uses non-linear processing to lift only the darkest shadow tones while leaving bright highlights and skyboxes untouched.

    2. Will high color vibrance hurt my eyes during long sessions?

    Extremely high vibrance (100%) can cause eye fatigue over a multi-hour gaming session. Sticking to a balanced range of 65% to 75% provides the visibility benefit without burning your retinas.

    3. Do expensive OLED monitors need Black Equalizer settings?

    OLED panels feature infinite contrast and pixel-level black reproduction. While they handle dark scenes brilliantly, true black pixels can still hide dark-clothed enemies in pitch-black rooms, making slight shadow boost adjustments or in-game gamma tweaks helpful.

    4. Why do professional esports players use low-end TN or Fast-IPS panels?

    Pros prioritize motion clarity, rapid response times (1ms or lower), and high refresh rates (360Hz+) over cinematic color accuracy. Fast-IPS and TN panels prevent ghosting, ensuring enemies don’t blur when moving across dark backgrounds.

    5. Can changing these monitor settings get me banned for cheating?

    No. Black Equalizer, color vibrance, and hardware monitor settings are built directly into physical monitor firmware and official GPU control panels (NVIDIA/AMD). They are 100% legal and used universally in competitive esports.

    6. How do I test if my new shadow settings are actually working?

    Load up a custom game map, walk into the darkest indoor corner or tunnel, and check if you can clearly distinguish the outline of a stationary character model from 15 meters away without squinting.

    7. Should I use dynamic contrast settings?

    Disable dynamic contrast. Dynamic contrast constantly shifts backlight levels based on what’s currently on screen, causing distracting brightness jumps whenever you move your crosshair or open menus.

    8. Does game-specific in-game brightness matter if my monitor is calibrated?

    Yes. Use your monitor settings as your hardware baseline, then perform minor tweaks using the in-game brightness slider of individual titles to account for specific map lighting engines.

    9. Why does my game look grainy or pixelated after boosting dark areas?

    Lifting the black floor exposes compression artifacts, film grain, and shadow noise built into the game engine’s textures. If it looks too noisy, lower your Black Equalizer by 2 units and increase color vibrance instead.

    10. Where can I find more display optimization and hardware guides?

    Bookmark The Gamer Buzz and check back regularly for our comprehensive database of professional hardware settings, monitor reviews, and competitive improvement guides!

    Conclusion

    Spotting enemy players hiding in dark shadows is no longer a matter of luck—it is a science of hardware optimization. By locking in a proper gamma baseline, utilizing a moderate Black Equalizer setting, dialing in your color vibrance, and eliminating muddy display presets, you strip away the camouflage of dark maps. Tune your display settings, hop into a practice lobby, and ensure that no enemy ever hides from your crosshair again!

  • How to analyze your own gameplay demo replays to identify mistakes and rank up to higher competitive tiers

    How to analyze your own gameplay demo replays to identify mistakes and rank up to higher competitive tiers

    Welcome to The Gamer Buzz, your ultimate competitive performance and analytics hub. Whether you are grinding ranked ladders from high-performance gaming setups in San Francisco, New York, and Seattle, or tuning your strategies across Texas, California, and Washington, one truth remains absolute: raw mechanics will only take you halfway up the ladder.

    At some point, every competitive player hits a ceiling. Your aim is sharp, your reaction time is crisp, yet you find yourself trapped in the same rank. Why? Because the difference between a mid-tier player and an elite competitor isn’t how fast they shoot—it’s how they make decisions.

    The single most effective tool for breaking through your plateau is demo replay analysis. In this exhaustive, master-level guide, we break down how to record, dissect, and learn from your own matches, turning every defeat into a personalized masterclass in tactical improvement.

    1. The Psychology of Demo Review: Why Most Players Fail at It

    Watching your own replays can be a humbling, sometimes painful experience. Most players approach demo reviews with the wrong mindset, treating it like watching an action movie where they critique every missed shot.

    The Shift from Outcome-Based to Process-Based Thinking

    • The Trap: Looking only at what happened (e.g., “I missed the shot and died”). This leads to mechanical frustration without addressing root causes.
    • The Solution: Analyzing why it happened (e.g., “Why was I standing wide out in the open without cover when I engaged? Why didn’t I check my radar before pushing? Why was my economy mismanaged?”).

    When you analyze a demo, you must separate your ego from the character on screen. Watch yourself as if you are coaching a stranger. Every death is a data point; every lost round is a structural failure in decision-making.

    2. The 4-Phase Demo Analysis Framework

    Do not spend three hours watching an entire 45-minute match from start to finish—you will lose focus and burn out. Instead, use a structured 4-Phase Analysis Protocol that focuses on high-yield learning moments:

    [Phase 1: Death-Only Audit] ➔ [Phase 2: Opening Duel Review] ➔ [Phase 3: Macro Rotation Check] ➔ [Phase 4: Economy & Utility Audit]
    

    Phase 1: The Death-Only Audit (10 Minutes)

    • Fast-forward through the match and stop only on your deaths.
    • For every death, ask three mandatory questions:
      1. Did I take a fair fight, or was I caught out of position?
      2. Was I trading a teammate, or was I fighting isolated?
      3. Did I have a route to safety (cover) before engaging?
    • Keep a physical notepad. Tally how many deaths were mechanical losses versus positioning/decision errors. You will likely find that 70% of your deaths trace back to poor positioning.

    Phase 2: Opening Duel Review (10 Minutes)

    • Look specifically at the first 30 seconds of every round.
    • Did you take the opening duel? Did you win or lose it?
    • Opening duels dictate round win probabilities heavily in tactical games. If you consistently lose opening peeks as an entry fragger or defender, your crosshair placement, timing, or angle-clearing habits need immediate remediation.

    Phase 3: Macro Rotations and Map Control (10 Minutes)

    • Switch your camera to free-roam mode or spectator view to look at the entire map context.
    • Did you over-rotate too early on defense because of a single fake? Did you get caught static on attack while your team was executing elsewhere?
    • Look at how you traded map space and whether your positioning supported your team’s overarching macro strategy.

    Phase 4: Utility and Economy Check (5 Minutes)

    • Look at your inventory at the end of rounds. Did you die with utility (flashes, smokes, grenades) unspent?
    • Analyze your financial management: did you force-buy when your team was saving, breaking your team’s economy alignment?

    3. Metrics That Matter: Quantitative Data Tracking

    Beyond watching the visual demo, track your personal statistics over a 20-match sample size to identify macro-trends:

    Metric CategoryWhat to TrackTarget Benchmark for Rank-Ups
    First-Blood Success RatePercentage of opening duels wonAbove 55% for aggressive roles
    Trade EfficiencyHow often you trade fallen teammatesImmediate trade within 3 seconds
    Utility Damage / ImpactValue gained from utility deploymentHigh enemy disruption, flash duration, or entry denial
    Clutch Win RateSuccess rate in 1v2 or 1v3 scenariosStaying composed and isolating 1v1s

    4. Step-by-Step Guide to Recording and Setting Up Your Replays

    Before you can analyze, you need clean recording and playback files:

    1. Utilize In-Game Replay Systems: Modern competitive games automatically save match demo files on local servers or cloud storage. Download your last 3 ranked matches immediately after playing while your memory of the matches is still fresh.
    2. Third-Party Recording Software: If you want to review your own live perspective, coordinate software like OBS Studio or NVIDIA GeForce Experience to clip specific chaotic moments.
    3. Establish a Routine: Dedicate one demo review session for every three live matches played. If you play 6 games a night, review 2 demos the following day. Consistency breeds awareness.

    5. Common Demo Review Mistakes to Avoid

    • Blaming Teammates in Replays: When watching your demo, completely ignore what your random teammates are doing for the first pass. Focus 100% of your attention on your own inputs, positioning, and mistakes. You cannot control randoms; you can only control yourself.
    • Over-Analyzing Mechanics Over Macro: If you missed a flick shot, accept it as variance and move on. Focus your energy on correcting the positioning error that forced you into a difficult flick in the first place.
    • Passive Watching: Never watch a demo like a television show with your hands off the keyboard. Pause constantly, rewind, check mini-maps, and talk out loud through your decision-making process.

    10 Frequently Asked Questions (FAQ)

    1. How long should a single demo review take?

    A thorough review of a full match should take roughly 20 to 30 minutes. You don’t need to watch every second; skip dead time, buy phases, and rounds where nothing happened to focus on key engagements.

    2. Should I review games I won, or only games I lost?

    Review both. Wins often hide terrible habits that you got away with because the enemy team capitalised less. Analyzing a win helps you identify dangerous risks that should have been punished.

    3. What is the biggest sign that my positioning is bad?

    If you frequently find yourself dying from multiple angles simultaneously (getting crossfired or shot in the side/back), your positioning lacks cover discipline and isolation.

    4. How do I know if my crosshair placement is drifting?

    In your demo, pause right before an enemy appears on screen. Look at where your crosshair is pointing—is it locked at head height against the corner, or is it staring at the floor or ground 10 feet away?

    5. Can I use pro player demo files to improve my own?

    Yes! Downloading professional tournament demos and watching how a pro player in your exact role moves, holds angles, and reacts to information is one of the fastest ways to learn macro play.

    6. Is it normal to feel frustrated while watching my own mistakes?

    Extremely normal. Seeing your own panic, whiffs, or bad rotations can be painful, but that discomfort is the emotional catalyst for long-term behavioral change and rank climbing.

    7. Should I take notes during a demo review?

    Always. Writing down repeating mistakes (e.g., “I push too aggressively on defensive pistol rounds” ) anchors the lesson in your brain, making you mindful of it in your next live match.

    8. How many games should I review before seeing an rank increase?

    If you actively implement changes based on your demo notes, most players notice a tangible improvement in decision-making and match consistency within 2 to 3 weeks.

    9. What if my game doesn’t have a demo playback feature?

    Use screen-recording software to capture your full competitive matches, or stream your sessions privately so you can review the video file later.

    10. Where can I find more analytical guides and improvement tips?

    Bookmark The Gamer Buzz and check back regularly for our comprehensive database of competitive breakdowns, tactical guides, and game intelligence articles!

    Conclusion

    Analyzing your own gameplay demo replays is the ultimate differentiator between players who plateau in low-to-mid tiers and those who ascend to elite competitive ranks. By replacing ego with objective data, utilizing the 4-phase audit protocol, and systematically eliminating positional and macro errors, you will transform how you experience and win competitive games. Download that demo, grab a notepad, and start your journey to the top of the ladder!