Author: rblvai

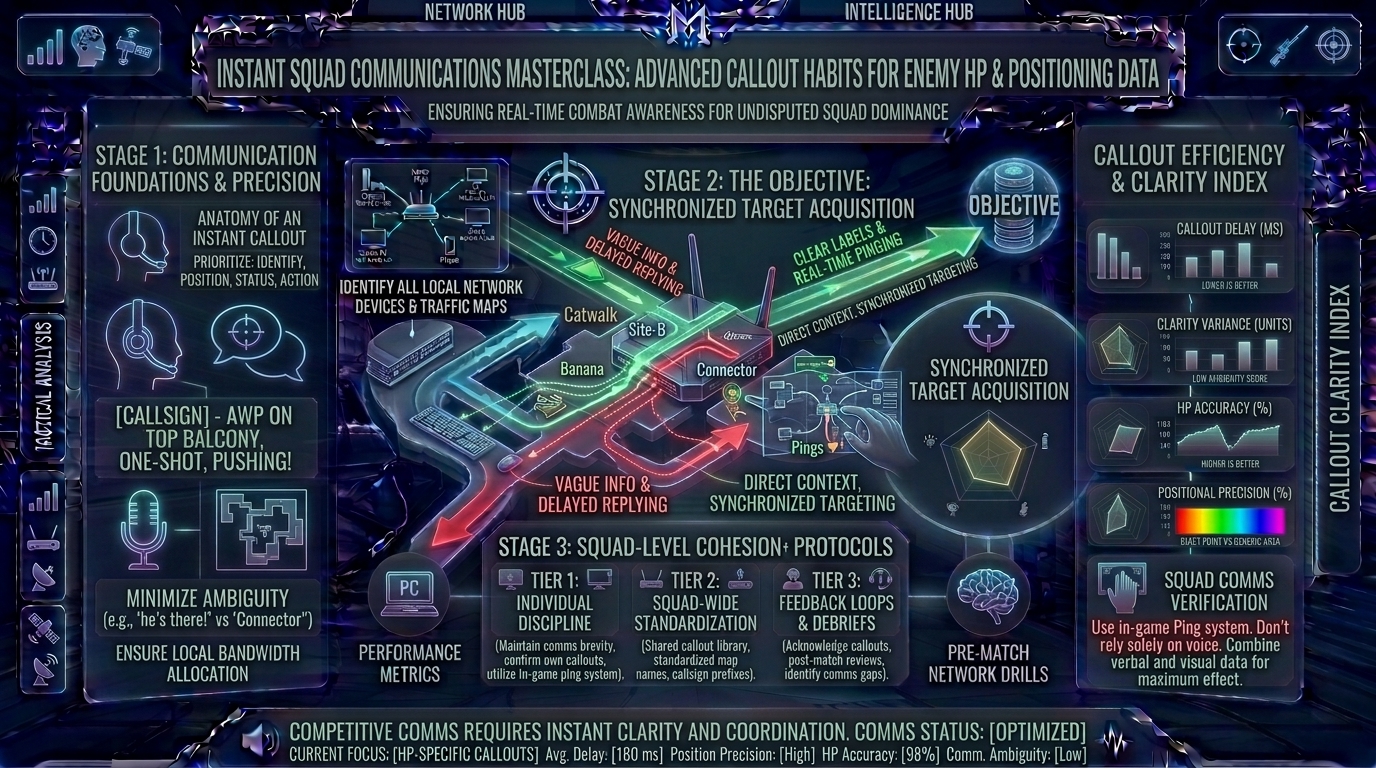
  • What are the best communication callout habits to share enemy health and positioning data instantly with squadmates

    What are the best communication callout habits to share enemy health and positioning data instantly with squadmates

    Welcome to The Gamer Buzz, your definitive competitive performance and tactical intelligence authority. Whether you are orchestrating team callouts from high-rise tech setups in San Francisco, New York, and Seattle, or coordinating tactical squad plays across competitive servers in Texas, California, and Washington, one absolute truth rules multiplayer gaming: information is worth more than raw mechanical aim.

    Picture this scenario: You engage an enemy player in a chaotic hallway, crack their armor down to a sliver of health, and get traded out. You scream into your microphone, “He’s right there! He’s right there!” Your surviving teammate rounds the corner completely blind, gets caught off guard by a full-health opponent holding an angle, and your team loses the round.

    Bad communication is just as destructive as having terrible aim. In fast-paced competitive titles (Counter-Strike 2, Valorant, Apex Legends, Call of Duty, Rainbow Six Siege), split-second information sharing separates winning squads from uncoordinated chaos. Mastering elite callout habits means transforming your voice comms into a crisp, military-grade radar system for your team. In this exhaustive, master-level guide, we break down cognitive load management, the anatomy of a perfect callout, directional terminology, and step-by-step habits to turn your squad into a synchronized unit.

    1. The Psychology of Comms: Why Vague Callouts Destroy Rounds

    Before looking at specific mapping terminology, you must understand how the human brain processes auditory information under high-stress conditions.

    The Trap of Emotional Comms

    • The Panic Reaction: When surprised by an enemy, untrained players default to emotional expressions: gasping, yelling curses, or shouting vague descriptors like “He’s low!”, “He’s shooting at me!”, or “Look out!”.
    • The Cognitive Bottleneck: These emotional outbursts force your teammates to waste precious cognitive bandwidth trying to decode what you mean, rather than focusing on their own crosshair placement and survival. A clean callout must eliminate ambiguity instantly.

    2. The 4-Stage Anatomy of a Perfect Callout

    Every elite competitive callout follows a strict, standardized formula. Think of it as a data packet that your squad’s brains process automatically.

    [Stage 1: Quantity / Identity] ➔ [Stage 2: Exact Location / Landmark] ➔ [Stage 3: Movement Vector] ➔ [Stage 4: Exact Health / Status]
    

    Stage 1: Quantity or Target Identity

    • Always start your call with how many enemies you are looking at, or who they are. Saying “Two pushing long” or “It’s the enemy Cypher” immediately tells your team the scale of the threat.

    Stage 2: Location (Using Standardized Map Landmarks)

    • Never use relative or subjective directions from your own POV (like “to my left” or “behind that box”), because your teammates are looking in entirely different directions. Use agreed-upon map callout names (Heaven, Arch, Generator, CT, Mid Doors).

    Stage 3: Movement Vector (What Are They Doing?)

    • Inform your team of their trajectory. Are they standing still holding an angle, sprinting aggressively, planting the objective, or rotating away? Verbs create temporal context.

    Stage 4: Precise Health or Resource Status

    • This is where rounds are won. Never just say “He’s low.” Give an exact numerical metric or concrete percentage if possible: “He’s tagged for 140” or “He has no shields left.”

    3. Comprehensive Matrix: Bad Comms vs. Elite Competitive Callouts

    Game SituationBad / Casual Comms (Avoid)Elite Pro Callout HabitCompetitive Benefit
    Spotted Enemy“He’s right there! Shoot him!”“One enemy, cat walk, moving toward B-site.”Instantly directs teammates’ crosshairs to the exact map location.
    Damaged Enemy“He’s super low! One-shot!”“Phoenix tagged for 135, white health, default box.”Eliminates guessing; lets teammate know if body shots will secure the kill.
    Dying / Post-Death“Omg wallhack! This game is trash!”“Dead. Looking from Heaven, holding a sniper.”Leaves audio channels completely clear for surviving players to hear footsteps.
    Utility Incoming“Watch out, grenade!”“Flashbang landing default garage in 2 seconds.”Gives teammates precise timing to look away or reposition.

    4. Advanced Squad Habits: Keeping Audio Channels Clean

    • The Dead Silence Rule: The moment your health drops to zero and you enter spectate mode, your microphone etiquette changes entirely. Stop giving backseat tactical directions. Your voice channel belongs exclusively to the surviving player so they can hear audio cues like enemy footsteps, reloads, and plant sounds.
    • The Ping + Voice Synergy: Never rely on voice alone. Combine a crisp verbal call with an active, middle-mouse map ping. Visual indicators cut through linguistic confusion, language barriers, and background noise instantly.

    10 Frequently Asked Questions (FAQ)

    1. What is the single most important habit for better in-game communication?

    Conciseness. Keep every callout under three seconds. Strip away filler words like “uh,” “I think,” “maybe,” and “like.” Deliver raw, actionable data immediately.

    2. How do I stop panicking and shouting when surprised by an enemy?

    Practice deliberate breath control during gunfights. Train your brain to view a sudden enemy encounter as an information-gathering event rather than a life-or-death crisis. Speak in a calm, flat, analytical tone.

    3. Should I use relative directions (left/right) if playing with close friends?

    Even with close friends, relative terms fail the moment your team splits up or looks in opposite directions. Always anchor your callouts to permanent map landmarks or compass headings.

    4. How can I learn standard map callout names quickly?

    Spend 10 minutes in a custom server or check online map strategy diagrams before playing a new map. Many games display official zone names in the bottom corner of the HUD whenever you walk into a new sector—pay attention to them!

    5. What should I do if a teammate constantly clogs voice comms with toxicity?

    Mute them immediately without arguing. Protecting your team’s auditory focus and mental state is vastly superior to listening to someone complain about past rounds.

    6. Is it better to call out damage numerical values or general status?

    Numerical values are always superior. Saying “Tagged for 120” gives your team objective data. Saying “He’s weak” is subjective; to one player, 50 health feels strong, while to another, it feels weak.

    7. How do I communicate effectively if I don’t have a working microphone?

    Rely heavily on the game’s in-game ping wheel, radial communication menus, and text quick-chat bindings. Pair your pings with team movements so they understand your strategic intent.

    8. Why is “dead silence” so crucial in clutch situations?

    In competitive audio engines, ambient footsteps and subtle reloads play at low decibel levels. If dead teammates are talking or breathing heavily into their mics, the clutch player cannot hear critical audio queues.

    9. How do I handle teammates who refuse to listen to callouts?

    Lead by example. Continue giving clean, objective callouts even if they ignore them. Over the course of a match, disciplined communication often rubs off on random teammates.

    10. Where can I find more team strategy and communication guides?

    Bookmark The Gamer Buzz and check back regularly for our comprehensive database of professional esports guides, tactical map breakdowns, and competitive rank-up tips!

    Conclusion

    Mastering communication callout habits is the ultimate force multiplier for any competitive squad. By replacing emotional outbursts and vague descriptions with structured, concise data packets detailing quantity, location, movement, and exact health status, you empower your teammates to make lightning-fast, confident decisions. Clean up your comms, protect your audio channels, and call your squad straight to victory in every ranked lobby!
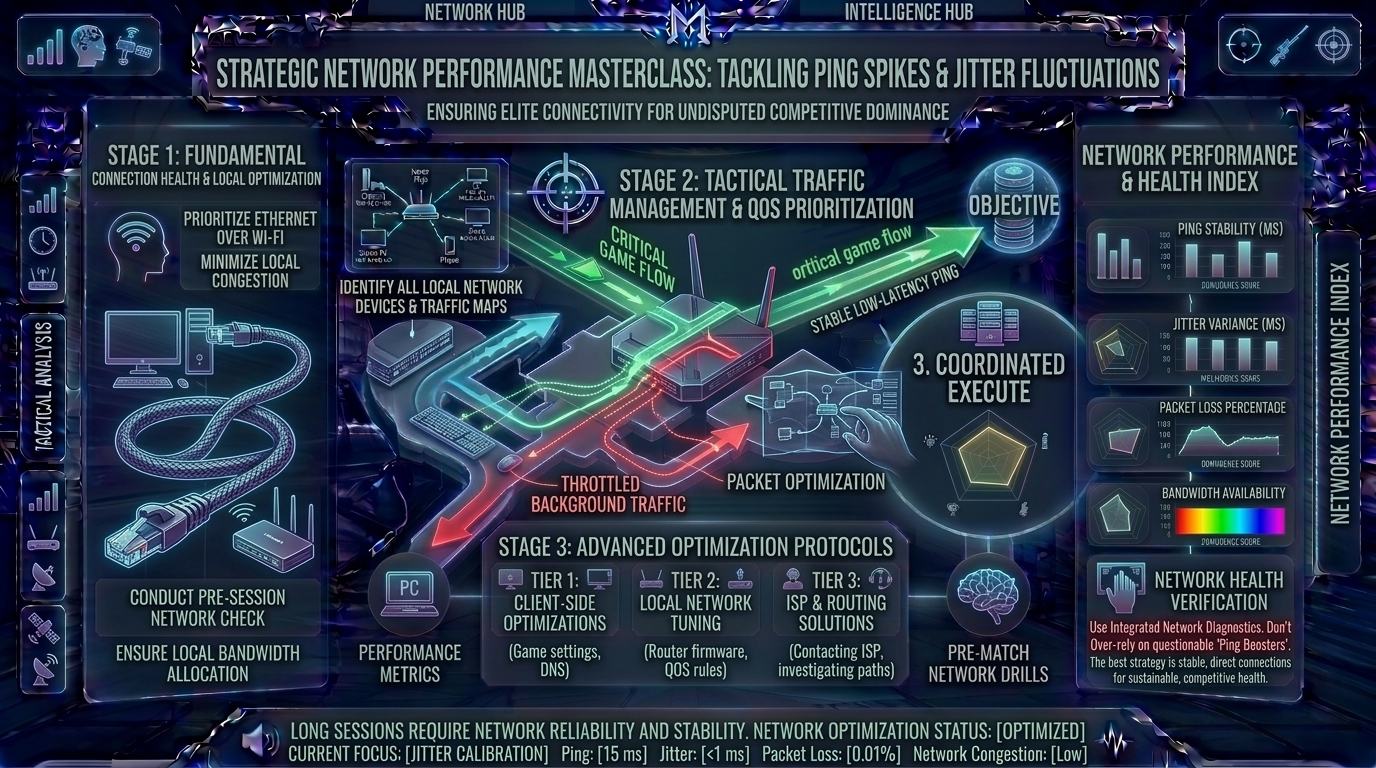
  • How to deal with ping spikes and jitter fluctuations during crucial moments in online competitive matches

    How to deal with ping spikes and jitter fluctuations during crucial moments in online competitive matches

    Welcome to The Gamer Buzz, your definitive competitive performance and network stability authority. Whether you are troubleshooting fiber connections from high-tech hubs in San Francisco, New York, and Seattle, or battling intermittent packet loss across residential internet networks in Texas, California, and Washington, one reality unites all competitive gamers: nothing causes more immediate rage than a sudden ping spike during a 1v1 clutch.

    Picture the scene: You have outsmarted the enemy team, positioned your crosshair perfectly, and are about to secure the final elimination to win the match. Suddenly, your latency leaps from a pristine 20ms to 650ms. Your character teleports backward into a wall, your shots fail to register, and you watch helplessly as the defeat screen flashes.

    In competitive multiplayer games (Counter-Strike 2, Valorant, Apex Legends, Overwatch 2, Call of Duty), raw download speed matters far less than network consistency. Latency spikes, packet loss, and jitter fluctuations turn skilled outplays into luck-based disasters. In this exhaustive, master-level guide, we break down network diagnostics, wired optimization pipelines, Quality of Service adjustments, and step-by-step mitigation strategies to bulletproof your connection.

    1. The Anatomy of Network Instability: Ping, Packet Loss, and Jitter

    To fix connection stutter, you must first understand the three core metrics that dictate online gaming performance.

    [Game Client Input] ➔ [Packet Transmission (Ping)] ➔ [Jitter (Variance)] ➔ [Server Registration / Response]
    

    1. Ping (Latency)

    • Ping measures the round-trip time (RTT) it takes for a data packet to travel from your gaming PC or console to the game server and back, measured in milliseconds (ms). High ping means a constant delay between your physical click and the server’s registration.

    2. Jitter (The Silent Killer)

    • Jitter is the variance in your ping over time. If your ping fluctuates wildly between 15ms, 120ms, 45ms, and 300ms from second to second, your game engine struggles to predict player movement accurately, resulting in heavy rubber-banding and desynchronization.

    3. Packet Loss

    • Packet loss occurs when data packets transmitted between your machine and the server vanish entirely into the digital void. Even with a low ping of 20ms, a 5% packet loss rate means every twentieth action you take never reaches the server.

    2. The 4-Stage Network Stabilization Protocol

    Fixing erratic lag spikes requires a systematic, troubleshooting-first approach. Never jump straight to buying new hardware until you have exhausted software and diagnostic optimizations.

    Stage 1: Eliminating Wireless Interference (The Wi-Fi Trap)

    • The Problem: Wi-Fi is inherently susceptible to environmental interference. Microwaves, Bluetooth devices, thick walls, and neighboring router channels cause micro-drops in signal strength, manifesting as sudden ping spikes.
    • The Fix: Connect your gaming rig directly to your router using a Cat6 or Cat7 shielded Ethernet cable. A hardwired connection instantly eliminates 90% of random jitter fluctuations.

    Stage 2: Background Bandwidth Hogs and Cloud Syncs

    • The Problem: Windows updates, cloud backups (OneDrive, Google Drive, iCloud), streaming services, and background downloads launch silently, saturating your upload and download pipelines.
    • The Fix: Disable automatic background downloads during competitive play. Check your Task Manager before queuing to ensure no hidden applications are utilizing network bandwidth.

    Stage 3: ISP Throttling and Bufferbloat Mitigation

    • The Problem: When multiple devices on your home network pull data simultaneously, your router’s data queues become overwhelmed, creating bufferbloat (massive latency inflation).
    • The Fix: Log into your router dashboard and enable Quality of Service (QoS) or Smart Queue Management (SQM) to prioritize your gaming device above all other household traffic.

    Stage 4: DNS and Server Routing Optimization

    • The Problem: Default Internet Service Provider (ISP) Domain Name System (DNS) servers often route your data through congested, inefficient pathways before reaching game server hubs.
    • The Fix: Switch your network adapter settings to high-performance, low-latency public DNS servers like Cloudflare (1.1.1.1) or Google (8.8.8.8).

    3. Comprehensive Matrix: Network Symptoms vs. Root Causes

    Symptom / BehaviorLikely Root CauseRecommended Immediate Solution
    Consistent High Ping (100ms+)Connected to a distant geographic server region.Change matchmaking settings to local data centers; use wired connection.
    Wild Jitter FluctuationsWi-Fi packet interference or background downloads.Switch to an Ethernet cable; pause all cloud syncing apps.
    Rubber-Banding & TeleportingPacket loss or sudden bufferbloat saturation.Enable router QoS settings; restart modem and router hardware.
    Lag Spikes Every Few MinutesISP background maintenance or thermal throttling on router.Power-cycle your networking hardware; check for firmware updates.

    4. Advanced Network Commands for Troubleshooting

    When diagnosing connection instabilities on PC, utilize Windows command-line tools to isolate where the packet breakdown occurs:

    • The Ping Stability Test: Open Command Prompt and type ping 8.8.8.8 -t. Let it run for 5 minutes while you play. Look at the latency output. If times are stable (e.g., 22ms, 23ms, 22ms), your connection is clean. If you see erratic jumps (22ms, 450ms, 19ms), your local network or ISP line has severe jitter.
    • Trace Route Analysis: Type tracert 1.1.1.1 to track every individual “hop” your data takes from your home router through your ISP’s nodes to the destination server. This identifies precisely which network hop introduces lag.

    10 Frequently Asked Questions (FAQ)

    1. Why does my ping spike only during specific times of the day?

    This is typically caused by neighborhood peak hour congestion. In residential areas, when everyone comes home from work and streams 4K video or downloads files (usually between 7 PM and 11 PM), local ISP node bandwidth becomes heavily saturated, causing latency spikes.

    2. Does upgrading to a “gaming router” actually reduce ping?

    A high-end gaming router with advanced QoS, SQM, and hardware acceleration will not magically make your base ping lower than the speed of light allows, but it will eliminate internal home network jitter and bufferbloat caused by other family members using the internet.

    3. Is a wired Ethernet connection always better than Wi-Fi for gaming?

    Without exception, yes. Even the most expensive Wi-Fi 6E or Wi-Fi 7 routers experience micro-packet loss and environmental interference. Ethernet provides a dedicated, uninterrupted copper or fiber pathway for your data packets.

    4. What is “bufferbloat” and how do I know if I have it?

    Bufferbloat happens when data queues up in excessively large buffers inside your modem or router. You can test for it using online diagnostic tools like the Bufferbloat Test on Waveform. If your latency shoots up by 200ms+ during active downloads, you suffer from bufferbloat.

    5. Can changing my DNS server lower my in-game ping?

    DNS servers translate web addresses into IP addresses. While changing your DNS to Cloudflare or Google won’t directly speed up live game server data packets, it can significantly speed up initial matchmaking server lookups and menu loading times.

    6. What should I do if my ISP refuses to fix my high jitter rates?

    Document your ping tests with screenshots and logs over several days. Call your ISP tech support, request a line inspection for packet loss, and ask if your node requires a port reset or signal amplification. If they fail to fix it, consider switching to a dedicated fiber provider.

    7. Do background VPNs or anti-virus firewalls cause ping spikes?

    Running a consumer VPN adds an extra routing layer, increasing your baseline ping and introducing potential jitter. Furthermore, aggressive third-party antivirus real-time network scanning can inspect incoming game packets, causing micro-stutters.

    8. How often should I restart my internet modem and router?

    Power-cycling (unplugging for 30 seconds and plugging back in) your modem and router once a month clears out cached RAM leaks, refreshes local IP allocations, and stabilizes internal routing tables.

    9. Why do I get good ping in some games but terrible ping in others?

    Different games host their servers in different geographic data centers. If a game has servers located across the country or overseas, your physical distance to that server dictates a naturally higher baseline ping.

    10. Where can I find more networking guides and hardware optimization tips?

    Bookmark The Gamer Buzz and check back regularly for our comprehensive database of professional esports guides, router setups, and competitive optimization tips!

    Conclusion

    Dealing with ping spikes and jitter fluctuations during crucial moments in competitive matches requires moving away from guesswork and adopting a systematic diagnostic approach. By switching to a hardwired Ethernet connection, eliminating background bandwidth hogs, configuring router Quality of Service settings, and monitoring your network health, you permanently banish erratic lag spikes. Protect your competitive rank, secure your connections, and dominate your lobbies with absolute stability!

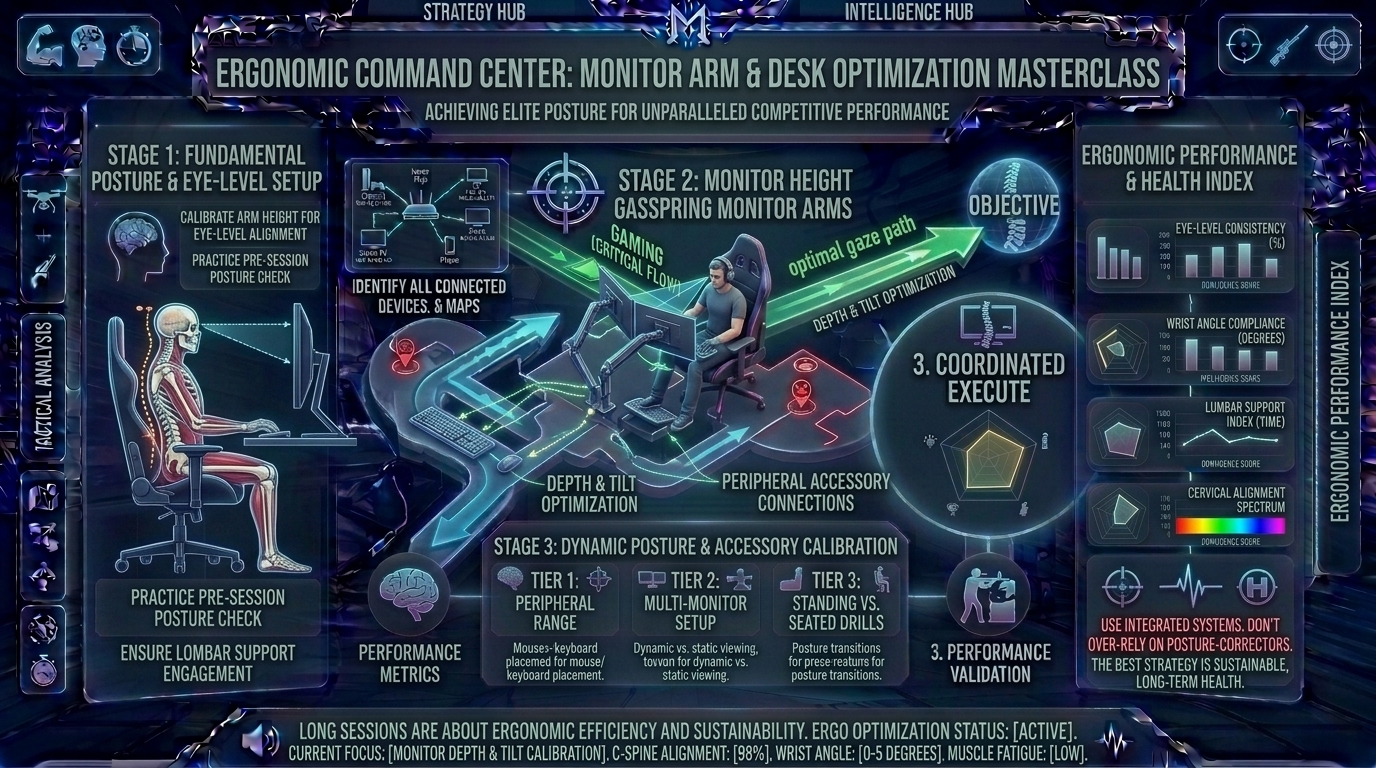
  • What are the best monitor arm and desk ergonomics setups to maintain proper posture during long competitive sessions

    What are the best monitor arm and desk ergonomics setups to maintain proper posture during long competitive sessions

    Welcome to The Gamer Buzz, your premier competitive performance and ergonomic health authority. Whether you are fine-tuning high-performance battle stations from tech hubs in San Francisco, New York, and Seattle, or optimizing long-hour gaming spaces across Texas, California, and Washington, one physical truth remains absolute: your competitive longevity depends entirely on your physical health.

    When you are deeply engrossed in a multi-hour ranked session, climbing ladders in tactical first-person shooters or competing in intense battle royale endgames, posture is the first thing that deteriorates. You unconsciously slouch forward, crane your neck downward toward a low screen, hunch your shoulders toward your ears, and clamp your wrists onto a sharp desk edge.

    Before long, you feel the burn: a dull ache creeping up your cervical spine, tight forearm tendons, lower back stiffness, and eye strain that ruins your visual focus.

    In competitive gaming, physical discomfort is a performance killer. Poor posture restricts breathing, slows reaction times, and invites chronic repetitive strain injuries. In this exhaustive, master-level guide, we break down the biomechanics of desk ergonomics, the vital role of articulating monitor arms, and the step-by-step setup framework required to train hard and play pain-free.

    1. The Biomechanics of Gaming Posture: Why Standard Desks Fail

    To build an ergonomic setup, you must first understand how gravity and structural alignment affect your body during long sessions.

    The Head-Forward Posture Trap

    • The Physics: Your head weighs roughly 10 to 12 pounds when held neutrally over your spine. For every inch you lean your chin forward toward your monitor, the effective load experienced by your neck muscles and cervical vertebrae doubles.
    • The Result: Hunching forward forces your trapezius and neck muscles into a constant state of isometric tension. This restricts blood flow to your brain, causes tension headaches, and destroys your visual reaction time during high-stress clutches.

    2. The Golden Rules of Desk and Chair Alignment

    Before adjusting your monitors, your seating foundation must be structurally sound. Follow this top-down ergonomic checklist:

    [Phase 1: Chair & Feet Base] ➔ [Phase 2: Elbow & Armrest Angle] ➔ [Phase 3: Monitor Height & Eye Level] ➔ [Phase 4: Peripheral Floating Zone]
    

    1. Chair Height and Feet Position

    • Adjust your chair so your feet rest flat and firmly on the floor, with your knees bent at a comfortable 90-to-100-degree angle. If your feet dangle, your thighs experience pressure points that restrict lower body circulation. Use an ergonomic footrest if your desk height forces your chair too high.

    2. Armrest and Elbow Ergonomics

    • Set your desk and chair armrests so that your elbows form a relaxed 90-degree angle when your hands rest naturally on your keyboard and mouse.
    • Your shoulders must remain completely relaxed and dropped—never shrugged upward toward your ears.

    3. The Monitor Arm Advantage: Why Fixed Stands Are Outdated

    The single most impactful hardware upgrade you can make for your posture is replacing stock monitor stands with a fully articulated gas-spring monitor arm.

    Why Fixed Stands Restrict Ergonomics

    Stock monitor stands typically offer zero height adjustment or force you to stack books underneath your display to get it level with your eyes. This leaves your screen locked in a rigid, non-ergonomic position.

    The Benefits of Articulating Monitor Arms:

    • Infinite Spatial Freedom: Gas-spring arms allow you to push your monitor backward, pull it closer, tilt it upward, or rotate it vertically with a single finger touch.
    • Desk Real Estate Recovery: By clamping directly to the back of your desk, monitor arms completely remove the large plastic or metal tripod base from your playing surface, giving your mouse hand acres of unobstructed horizontal swipe room.

    4. Comprehensive Matrix: Ergonomic Metrics for Competitive Setups

    Ergonomic ComponentOptimal Measurement / PositionBiological / Competitive Benefit
    Monitor Eye LevelTop 1/3 of screen aligned with eye heightKeeps cervical spine in a neutral, strain-free vertical position.
    Viewing Distance20 to 28 inches (Arm’s length away)Reduces eye accommodation strain and broadens peripheral vision.
    Keyboard & Mouse AngleFlat or slight negative tilt; wrists straightPrevents carpal tunnel compression and tendonitis.
    Monitor Tilt Angle10 to 20 degrees upward tiltEliminates overhead glare and matches natural downward gaze.

    5. Combatting Eye Strain and Lighting Fatigue

    Long competitive sessions under harsh room lighting or glaring screens cause digital eye strain (asthenopia), leading to dry eyes, blurred focus, and mental fatigue.

    • The 20-20-20 Rule: Every 20 minutes of intense gaming, look away from your screen at an object positioned at least 20 feet away for 20 seconds. This relaxes the ciliary muscles inside your eyes.
    • Monitor Backlighting (Bias Lighting): Place a soft, dim LED bias light strip behind your monitor against the wall. This reduces the harsh contrast between a blindingly bright display and a dark room, drastically easing eye fatigue during late-night gaming sessions.

    10 Frequently Asked Questions (FAQ)

    1. How high should the top of my gaming monitor be relative to my eyes?

    The top edge of your monitor screen should sit at or slightly below your eye level, forcing your eyes to look slightly downward (about 10 to 15 degrees) when focusing on the center of the crosshair.

    2. Are gaming “bucket seat” racing chairs good for posture?

    Most aesthetic racing-style gaming chairs are inspired by sports car bucket seats, which are designed to keep drivers locked in place during lateral G-forces—not for sitting upright at a computer desk for 6 hours. Ergonomic mesh office chairs with lumbar support and adjustable armrests are vastly superior for long-term spinal health.

    3. What is the best monitor arm weight capacity to look for?

    Always check your monitor’s exact weight without its stand. Choose a gas-spring monitor arm with a weight rating that comfortably exceeds your monitor’s weight to prevent sagging or drooping over time.

    4. How do I stop myself from slouching forward during tense gaming moments?

    Consciously check your posture between rounds. Additionally, setting up your monitor at the correct arm’s-length distance prevents you from having to lean your neck forward to spot micro-details on screen.

    5. Should I tilt my monitor upward or keep it completely vertical?

    A slight upward tilt of 10 to 20 degrees is ideal. This aligns the display plane perpendicular to your natural line of sight, reducing screen glare and neck strain.

    6. Can poor posture actually lower my in-game reaction time?

    Yes. Slouching compresses your diaphragm and restricts optimal oxygen intake. Reduced oxygen flow to the brain impairs cognitive processing speeds and fine motor coordination, directly tanking your competitive aim.

    7. Is a standing desk worth it for competitive gamers?

    Standing desks are fantastic for alternating between sitting and standing during casual tasks or long queue waits, but most competitive players prefer sitting for active gameplay to maintain absolute, micro-stable lower-body grounding and muscle control.

    8. How do I prevent wrist pain caused by hard desk edges?

    Never rest your bare wrists directly on a sharp desk edge. Use a soft, full-length desk mat (mousepad) or a rounded desk edge cushion to distribute arm pressure evenly across your forearms.

    9. Does monitor refresh rate affect eye strain?

    Low-refresh-rate monitors (60Hz) with high flicker rates or poor backlight dimming can cause subtle eye fatigue. Upgrading to a high-refresh monitor (144Hz to 240Hz+) offers smoother motion clarity, making it significantly easier on the eyes.

    10. Where can I find more ergonomic hardware guides and health optimization tips?

    Bookmark The Gamer Buzz and check back regularly for our comprehensive database of professional esports health guides, workspace setups, and competitive optimization tips!

    Conclusion

    Optimizing your monitor arm and desk ergonomics is the ultimate investment in your gaming career and physical well-being. By aligning your display at eye level, enforcing a neutral spine posture, setting up your desk at a 90-degree arm angle, and investing in articulating monitor arms, you banish physical fatigue and protect your body from repetitive strain injuries. Clean up your battle station layout, fix your posture, and play at your absolute peak comfortably for years to come!

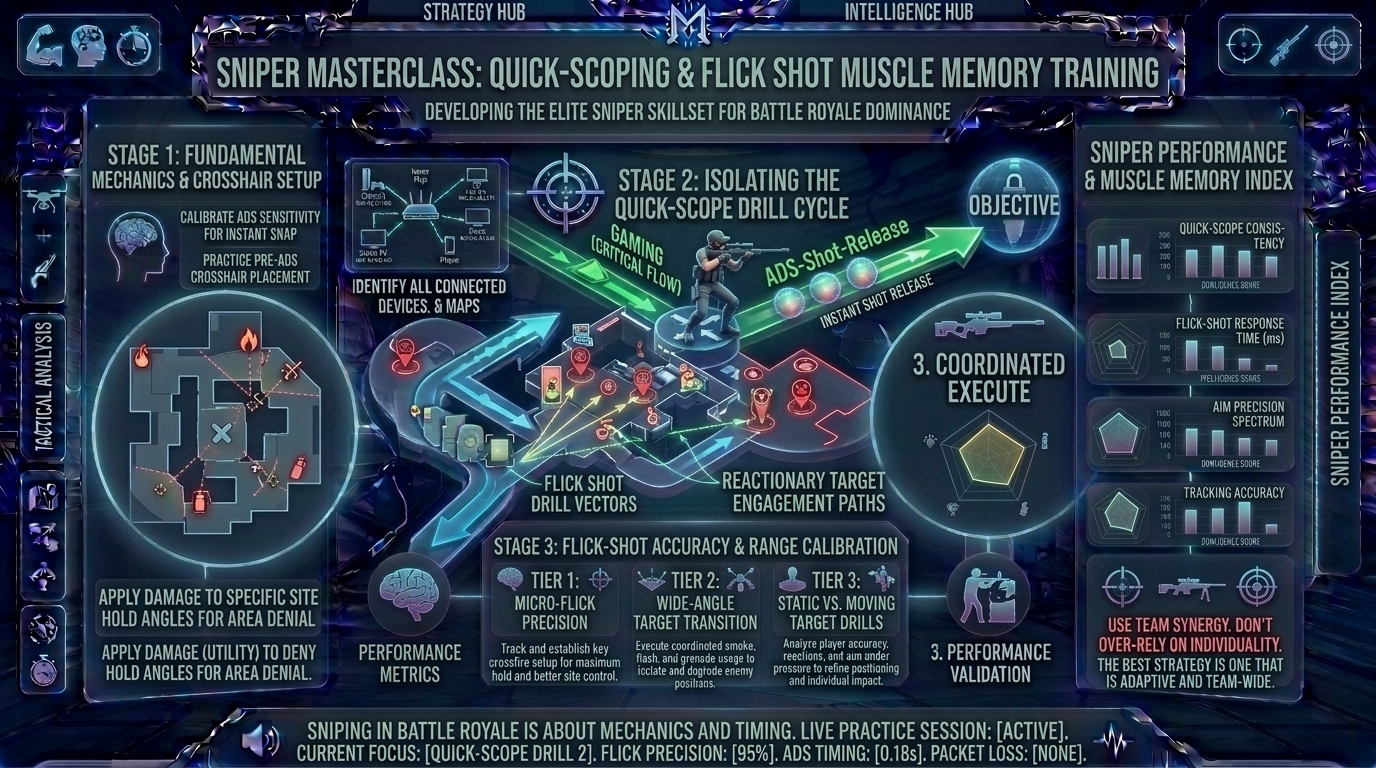
  • How to practice quick scoping and flick shot muscle memory in sniper rifle heavy competitive battle royale titles

    How to practice quick scoping and flick shot muscle memory in sniper rifle heavy competitive battle royale titles

    Welcome to The Gamer Buzz, your premier competitive performance and tactical marksmanship authority. Whether you are dialing in high-sensitivity sniper flicks from high-rise setups in San Francisco, New York, and Seattle, or grinding through high-stakes cross-map engagements across Texas, California, and Washington, one weapon class rules the meta with absolute lethality: the high-tier sniper rifle.

    In heavy competitive battle royale titles (such as Apex Legends, Call of Duty: Warzone, PUBG, and various tactical battle royale variants), securing a clean, one-shot knockdown or heavy armor break at 200 meters changes the entire momentum of a match. However, battle royales are chaotic, fast-paced, and wildly unpredictable. Enemies are rarely standing still waiting for you to line up a lazy crosshair; they are sliding, jumping, ziplining, and weaving behind erratic cover.

    To dominate with sniper rifles, you cannot rely purely on slow, deliberate aiming. You must master quick scoping and flick-shot muscle memory. In this exhaustive, master-level guide, we break down eye-hand coordination neurology, flick mechanics, specialized sensitivity configuration, and step-by-step training drills to turn you into an elite sniper.

    1. The Anatomy of a Snipe: Quick Scoping vs. Tracking

    Before building muscle memory, you must understand the two fundamental aiming archetypes required for sniper-heavy battle royales.

    [Target Acquisition] ➔ [Pre-Aim Center Screen] ➔ [Simultaneous Scope-In & Flick] ➔ [Micro-Correction & Shot Execution]
    

    1. Quick Scoping Mechanics

    • Quick scoping is the art of bringing your sniper rifle up to your shoulder, firing the exact millisecond the crosshair narrows or the scope animation transitions into view, and dropping back out of scope to maintain peripheral vision.
    • The Illusion of Speed: Elite snipers don’t look fast because their hands are shaking with panic; they look fast because their crosshair placement is already 90% accurate before they even touch the scope button.

    2. Flick-Shot Muscle Memory

    • A flick shot is a lightning-fast, ballistic hand movement that snaps your crosshair from an idle resting position directly onto a sudden, unexpected target, followed by an immediate click.
    • This relies entirely on procedural muscle memory: your brain calculating distance and training your forearm and wrist muscles to travel a precise angular distance without conscious thought.

    2. The 4-Stage Sniper Training Protocol

    Building lightning-fast sniper muscle memory cannot be achieved purely by playing live matches, where you only get a few sniper shots per hour. You need isolated, high-repetition training.

    Stage 1: Centered Pre-Aim Discipline

    • The Rule of Center: Never run around with your camera staring at the floor or sky. Keep your crosshair locked constantly at head/chest height on common corner angles and ridgelines.
    • Benefit: When an enemy appears, the physical distance your mouse or thumbstick needs to travel to reach their hitbox is cut down to a bare minimum, making your quick scope virtually instantaneous.

    Stage 2: The Two-Step Flick Rhythm (Snap & Stop)

    When practicing flicks in aim trainers (like Aimlabs or KovaaK’s) or in-game training ranges, avoid the common trap of sweeping your mouse in a wide, uncontrolled arc.

    • Snap: Initiate a high-speed acceleration toward the target.
    • Stop: Immediately brake your momentum using your stopping technique (or mouse deceleration). Never overshoot past the target and try to correct backward—that introduces double-correction delays. Smooth, single-motion snaps build clean muscle memory.

    Stage 3: Scope Timing Synchronization

    The biggest mistake aspiring snipers make is clicking before the scope is fully active (resulting in an inaccurate un-scoped hip-fire) or waiting too long after scoping (making you an easy target).

    • The Rhythm: Practice the physical cadence: Spot target ➔ Pre-aim crosshair ➔ Right-click (Scope) and Left-click (Fire) in rapid, synchronized succession. In many games, you must wait for the exact frame the crosshair center dot locks into place to avoid bullet deviation spread.

    Stage 4: Managing Sniper Scope Sensitivity Multipliers

    Battle royale titles feature multiple magnification scopes (2x, 4x, 8x, 12x). If your high-magnification scope sensitivity is identical to your hip-fire sensitivity, your muscle memory will break down.

    • The Fix: Fine-tune your relative sniper scope sensitivity settings. Your zoomed-in sensitivity should feel heavy and controlled, allowing you to micro-adjust over long distances without throwing your crosshair flying past distant moving targets.

    3. Comprehensive Matrix: Sniper Practice Drills vs. Skill Outcomes

    Training DrillEnvironment / ToolCore Skill Developed
    Static Gridshot / ReflexAim Trainers / Warm-up rangeRaw hand-eye coordination and initial snap speed.
    Moving Target TrackingCustom BR training mapsPredicting target velocity and lead distance over range.
    Peek-and-Shoot DrillsCover-heavy angles in deathmatchQuick-scoping timing while exposing minimal hitbox area.
    Flick Recovery DrillsSolo practice lobbiesSnapping back to cover immediately after firing a shot.

    4. Advanced Battle Royale Sniper Tactics: Positioning and Movement

    In a battle royale, hitting the shot is only half the battle; surviving the aftermath determines your win rate.

    • Never Peek Twice From the Same Angle: The moment you fire a sniper shot, a loud bullet crack echoes across the terrain, broadcasting your exact position. If you miss or only crack armor, do not scope in again from that same rock or window. Rotate to an alternate off-angle before taking your next shot.
    • The Crouch-Peel Escape: Always keep cover within arm’s reach. The second you fire your bolt-action or semi-auto sniper, immediately duck behind hard cover to chamber your next round safely out of enemy line of sight.

    10 Frequently Asked Questions (FAQ)

    1. Should I use a high or low mouse sensitivity for sniping in battle royales?

    Most elite snipers use a medium-to-low overall sensitivity paired with a slightly elevated DPI or a dedicated sniper scope multiplier. This gives you wide freedom of movement for general looking, but provides micro-precision control when zoomed in at long range.

    2. How do I lead moving targets across long distances in a battle royale?

    You must factor in bullet travel time (projectile velocity) and bullet drop. Practice on custom servers to learn your weapon’s specific projectile speed so you can instinctively aim ahead of sprinting or sliding enemies.

    3. What is “centering” and why is it more important than raw flick speed?

    Centering is keeping your crosshair naturally pointed where an enemy is most likely to appear before you scope in. Good centering means your flick only needs to travel 2 inches instead of 10 inches, making you exponentially faster.

    4. Can hardware upgrade paths (like high refresh rate monitors) help me snipe better?

    Abso-lutely. Sniping relies on spotting microscopic pixel movements across vast distances. Moving from a 60Hz monitor to a 240Hz monitor cuts down display latency and motion blur, making distant moving targets vastly easier to track and snap onto.

    5. How long should I practice in aim trainers before my sniper aim improves?

    Dedicated 10-to-15-minute daily sessions focusing on dynamic clicking and micro-adjustments yield noticeable improvements in muscle memory consistency within 2 to 3 weeks.

    6. Is it better to hold breath or snap quickly in high-stress fights?

    In chaotic close-to-medium range quick-scope engagements, you do not have time to hold your breath; you must rely purely on raw crosshair snap and click timing. Save breath-holding for stationary, ultra-long-range overwatch shots.

    7. Why do my sniper shots sometimes miss even when my crosshair was on the target?

    This is usually caused by bullet spread penalties, firing before the scope animation has completely finished settling, or failing to account for bullet drop and enemy movement vector lead time.

    8. Should I use controller aim assist or mouse and keyboard for sniping?

    Both have distinct advantages. Mouse and keyboard offer unmatched flick precision and range freedom, while modern controller thumbsticks benefit from rotational aim assist tracking in close-quarters skirmishes. Choose what fits your hardware setup.

    9. What should I do if I keep missing my initial sniper shots out of panic?

    Slow down your rhythm. Deliberately force yourself to take an extra 0.2 seconds to ensure your crosshair is anchored correctly before clicking. Speed comes naturally as your muscle memory builds confidence.

    10. Where can I find more marksmanship guides and battle royale tips?

    Bookmark The Gamer Buzz and check back regularly for our comprehensive database of professional esports guides, hardware setups, and competitive training tips!

    Conclusion

    Mastering quick scoping and flick-shot muscle memory in sniper-heavy competitive battle royale titles requires a blend of disciplined pre-aiming, synchronized scope-and-fire timing, and structured daily training. By eliminating wasted hand movements, refining your scope sensitivities, and prioritizing smart positioning after every shot, you transform yourself into a feared long-range predator. Lock in your crosshair rhythm, trust your muscle memory, and dominate every horizon in your next battle royale lobby!

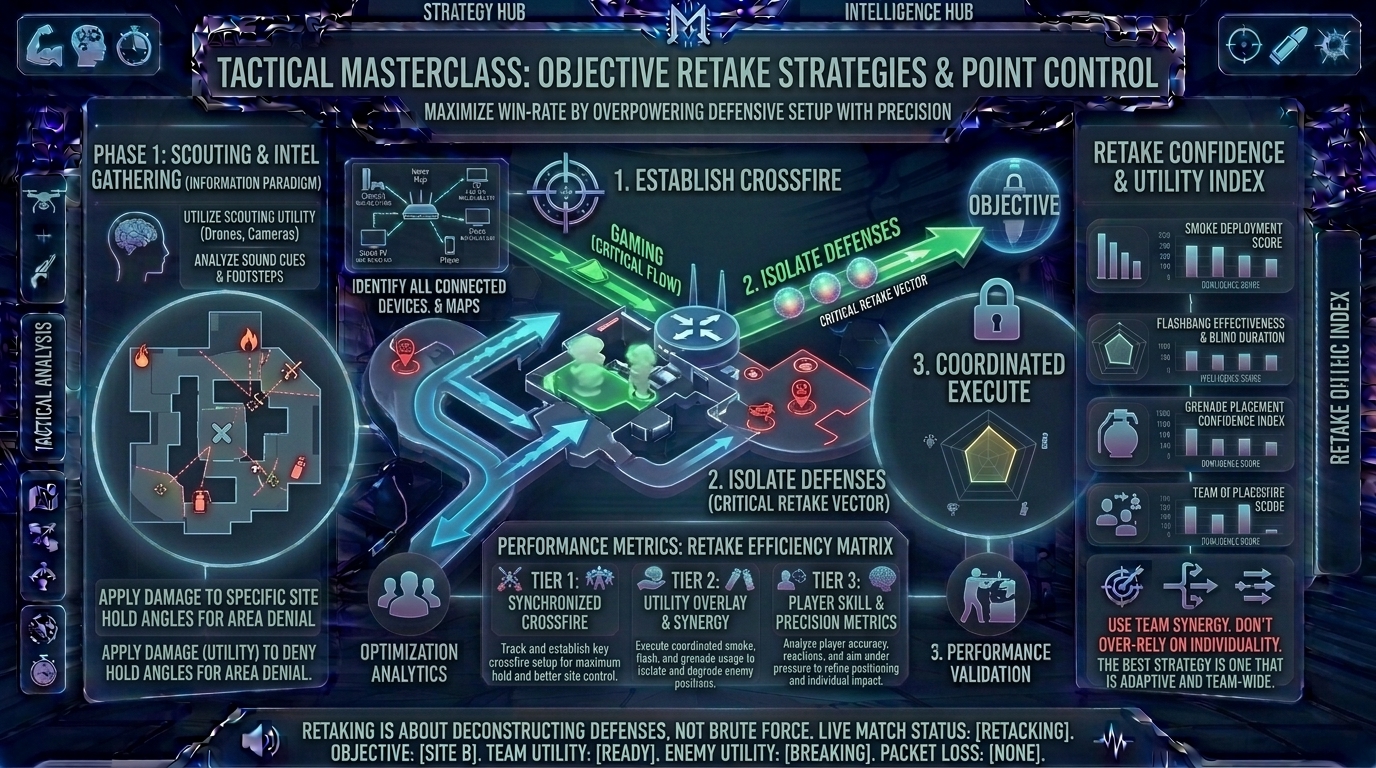
  • What are the best strategies for retaking bomb sites and objective points against a well defended enemy setup

    What are the best strategies for retaking bomb sites and objective points against a well defended enemy setup

    What Are the Best Strategies for Retaking Bomb Sites and Objective Points Against a Well-Defended Enemy Setup?

    Welcome to The Gamer Buzz, your definitive competitive tactical authority. Whether you are coordinating site collapses from high-end setups in San Francisco, New York, and Seattle, or grinding through high-stress competitive ranked lobbies across Texas, California, and Washington, one moment defines tactical masterclasses: the site retake.

    Your team loses control of a bomb site, the spike or objective is planted, and text flashes across the screen. Panic usually sets in. Players sprint blindly through choke points, dry-peek complex crossfires, and get picked off one by one by an enemy team comfortably dug into post-plant positions.

    Winning a retake against a well-defended enemy setup requires treating the situation as a space and information puzzle, not an aim duel. In this exhaustive, master-level guide, we break down resource mathematics, utility layering, multi-pronged synchronization, and psychological traps to successfully retake any objective point.

    1. The Retake Reality: Space, Information, and Structure

    Before casting a single utility grenade or stepping into a crossfire, you must understand the geometry of a post-plant scenario.

    The Attacker’s Advantage vs. Defender’s Mandate

    • The Attacker’s Setup: Once the objective is locked down, attackers build overlapping crossfires, hide behind dense cover, and line up utility to delay or outright block your access to the bomb. They want you to rush in blindly out of time desperation.
    • The Defender’s Mandate: As the retaking team, your goal is to dismantle their crossfires systematically. You achieve this not by rushing harder, but by coordinating your approach so that the enemy is forced to react to multiple threats simultaneously.

    2. The 4-Stage Retake Execution Framework

    Successfully collapsing on a defended site requires a strict, sequential process. Never skip a step.

    [Stage 1: Inventory & Resource Audit] ➔ [Stage 2: Multi-Lane Regrouping] ➔ [Stage 3: Layered Utility Dumping] ➔ [Stage 4: The Synchronized Push & Defuse]
    

    Stage 1: Inventory and Resource Audit (The 3-Second Pause)

    The moment the site falls, take a deep breath and assess what you actually have left.

    • Count Living Players & Utility: Do you have a 3v3 retake with three smokes and two flashes, or a 2v3 with zero utility? If you have numbers and utility, slow down. You have time to orchestrate a structured push. If you are low on numbers and time, you must collapse immediately before attackers fully settle into post-plant angles.

    Stage 2: Regrouping and Multi-Lane Approach

    • Never Enter Alone: Running through a choke point one by one guarantees a series of easy 1v1 duels for the defenders.
    • Pincer Movements: Coordinate with your surviving teammates to approach the objective from two separate entry lanes simultaneously (e.g., one group pushes through Main while the other swings through Connector or Heaven). Hitting from dual angles breaks the enemy’s ability to hold a single unified crossfire.

    Stage 3: Layered Utility Dumping

    Most retakes fail because players “panic-dump” all their grenades in the first two seconds, leaving nothing to protect the defuser later.

    • Layer 1 (The Isolation Smoke): Use smokes to cut off primary sniper sightlines or long-range crossfires, isolating the defenders into smaller, disconnected pockets.
    • Layer 2 (The Clearing Tool): Throw Molotovs or explosive utility into common “ninja” hiding spots or default holding boxes to flush enemies out of safety.
    • Layer 3 (The Defuse Buffer): Save at least one smoke or flashbang specifically for the moment your teammate touches the bomb to begin the defuse.

    Stage 4: Forcing the Reaction (The Fake Tap)

    Once you have cleared the immediate perimeter of the site, do not immediately commit to a full 5-second defuse channel.

    • The Power of the Tap: Tap the objective for half a second to generate the audio cue, then immediately back off into a pre-aimed position.
    • Baiting the Panic: Hearing that interaction sound forces hidden attackers to break cover and peek blindly to stop you. Let them peek into your crosshairs rather than you hunting them down across open space.

    3. Comprehensive Matrix: Retake Scenarios & Tactical Solutions

    Retake ScenarioCore ChallengeOptimal Tactical Counter-Strategy
    1v3 Heavy Crossfire HoldAttackers watching all site entries from safe distance.Smoke off primary vision lanes; isolate one angle; double-peek together.
    Post-Plant with Zero UtilityNo smokes or flashes remaining to cover defusal.Rely entirely on coordinated sound-masking, fake taps, and tight trade positioning.
    Late Clock Panic (Under 20s)Insufficient time to execute a slow, multi-lane setup.Immediate hard push with a flashbang wave; skip complex map movement.
    Enemies Hiding in Off-AnglesUnconventional spots making standard clears fail.Use Molotovs/clearing utility aggressively before stepping onto site.

    4. Advanced Psychological Tricks for Retaking Sites

    • The Staggered Peek: When entering a site with a teammate, do not shoulder-to-shoulder peek the same angle. Stagger your entry by half a second—the first player draws the enemy’s crosshair and focus, while the second player instantly secures the trade kill before the defender can reset.
    • Sound Masking: Use gunfire, utility bounces, or coordinated movement jumps to mask your footsteps as you close the distance on an objective point, catching entrenched defenders off guard.

    10 Frequently Asked Questions (FAQ)

    1. Should I always save my weapons if we lose a bomb site?

    Not always. If the match score is close, it’s match point, or you still have a healthy numbers advantage (like a 3v3 or 4v4 retake), you should attempt the retake. Save weapons only when you are heavily outnumbered (e.g., 1v3 or 2v4) and lack the utility to win cleanly.

    2. How do I stop panicking when the bomb is ticking down?

    Focus entirely on the immediate micro-task (clearing the closest corner, throwing your smoke) rather than staring at the countdown timer. Breaking the retake down into step-by-step actions keeps adrenaline under control.

    3. What is a “fake tap” and why is it so important?

    A fake tap is tapping the bomb defuse interface for a fraction of a second to create the distinct audio sound. This psychological trick forces hidden attackers to break cover and peek out of their hiding spots, turning them from passive defenders into moving targets.

    4. Is it better to push through smokes during a retake?

    Generally, no. Pushing blindly through an enemy smoke puts you at a massive visual disadvantage. Instead, use your own utility to deny their angles or wait out their smoke duration if the clock permits.

    5. How important is communication during a site retake?

    Absolute communication is critical. Players must call out exact utility usage (“Smoking Heaven now”), coordinate simultaneous entry timing (“Entering in 3, 2, 1”), and share enemy sound locations without cluttering audio channels.

    6. What should I do if my teammates refuse to coordinate a retake plan?

    If your teammates rush in randomly, your best option is to act as their shadow. Position yourself closely behind the most aggressive player so you can immediately trade out the opponent who kills them.

    7. How do I clear close corners effectively during a site entry?

    Always keep your crosshair locked at head height and slice the pie around obstacles. Clear the closest, most immediate danger angle before looking toward distant post-plant sniper nests.

    8. Can ultimates or special abilities turn an impossible retake around?

    Yes. Area-of-effect denial abilities, scouting drones, or heavy flash utility can instantly break a defensive post-plant setup, transforming an unwinnable 2v3 into an open site.

    9. Why do defenders often lose retakes even with a man advantage?

    Because they rush in uncoordinated, taking isolated 1v1 gunfights that allow the attacking team to pick them off one by one. Structure and trading mechanics always beat raw numbers in post-plant scenarios.

    10. Where can I find more advanced tactical team strategies and map guides?

    Bookmark The Gamer Buzz and check back regularly for our comprehensive database of professional esports guides, map-control breakdowns, and competitive rank-up tips!

    Conclusion

    Retaking bomb sites and objective points against a well-defended enemy setup is the ultimate test of tactical discipline, resource management, and team synchronization. By abandoning rushed individual hero plays, auditing your remaining utility, executing multi-lane pincer movements, and leveraging psychological fake defuse taps, you turn overwhelming post-plant disadvantages into brilliant team victories. Structure your approach, layer your utility, and reclaim every objective!

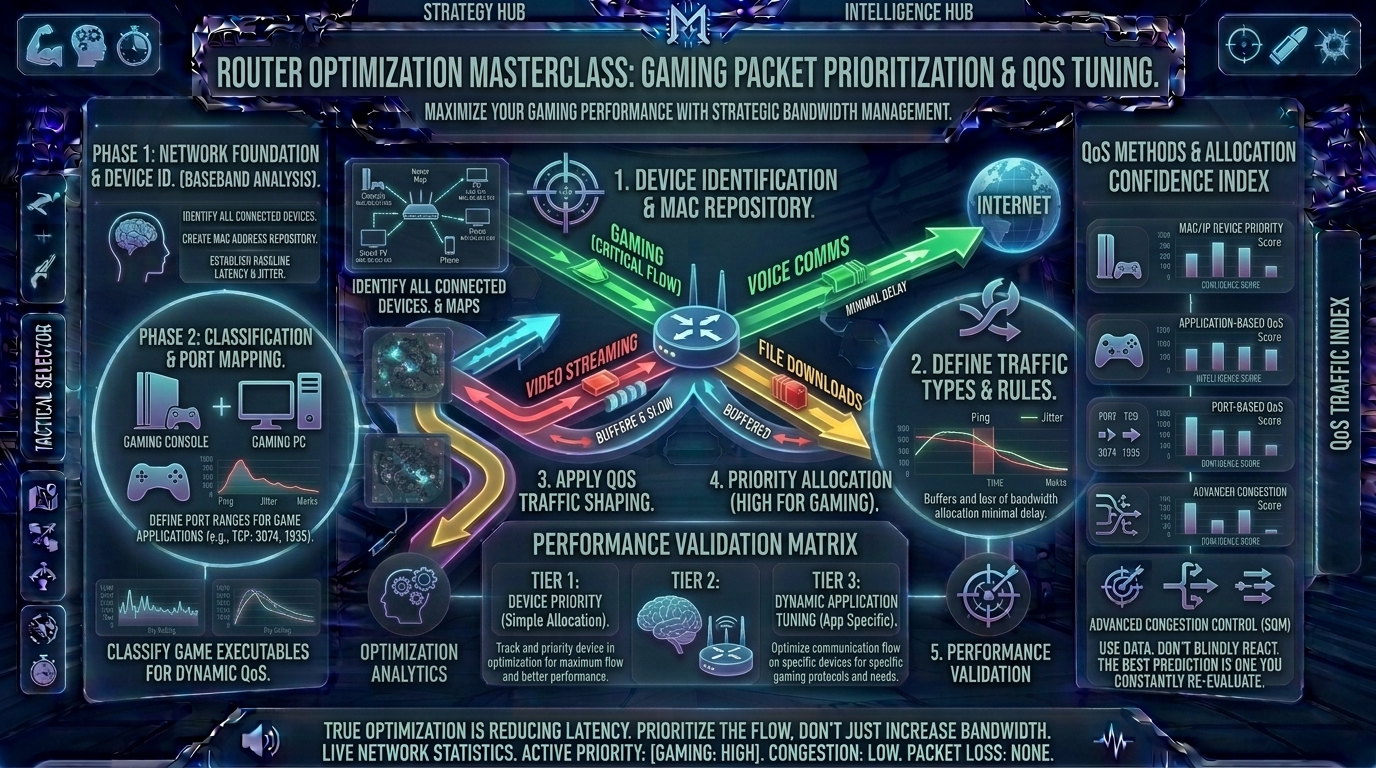
  • How to optimize your internet router quality of service settings to prioritize gaming packets over other home devices

    How to optimize your internet router quality of service settings to prioritize gaming packets over other home devices

    Welcome to The Gamer Buzz, your definitive competitive performance and networking authority. Whether you are running high-stakes ranked matches from advanced fiber-optic connections in San Francisco, New York, and Seattle, or battling high ping spikes across residential setups in Texas, California, and Washington, one invisible enemy ruins more matches than bad aim: network congestion.

    Picture this scenario: You are sitting in a 1v2 clutch situation in a high-tier competitive match. Suddenly, your ping skyrockets from 20ms to 350ms, your character rubber-bands backward, and you die helplessly while your screen freezes. You check the house network, only to discover someone started downloading a 100GB game update or streaming 4K video on another device.

    In competitive multiplayer gaming (Counter-Strike 2, Valorant, Apex Legends, Call of Duty), raw download speed matters far less than packet consistency and low latency. This is where Quality of Service (QoS) comes in. By properly configuring your router’s QoS engine, you can teach your home network to treat your gaming traffic like an emergency ambulance, pushing all other household downloads to the back of the line. In this exhaustive, master-level guide, we break down network packets, bufferbloat mitigation, router settings, and step-by-step optimization procedures to lock in rock-solid connection stability.

    1. Understanding the Culprit: Bufferbloat and Network Congestion

    To fix your gaming network, you must first understand why your ping spikes the moment someone else uses the internet in your house.

    The Highway Analogy

    Think of your home internet connection as a multi-lane highway leading to game servers:

    • Your Gaming Packets: These are tiny, high-priority motorcycles. They don’t need a lot of physical space, but they must travel continuously without interruption. If they get delayed by even 50 milliseconds, your game desynchronizes.
    • Household Downloads/Streams: These are massive freight trucks carrying movie data or file downloads. They require heavy bandwidth.
    • The Traffic Jam: When your router lacks proper management, a massive freight truck (a background download) hogs the entire highway. When your gaming motorcycle arrives, it gets stuck waiting behind the truck. This queuing delay is called bufferbloat, and it is the primary cause of sudden in-game lag spikes.

    2. What Is Quality of Service (QoS) and How Does It Work?

    Quality of Service is a feature built into modern routers that allows you to prioritize specific types of network traffic over others.

    [Incoming Internet Traffic] ➔ [Router QoS Engine / Packet Inspection] ➔ [Instant Gaming Priority Lane] ➔ [Background Downloads / Streaming Lane]
    

    The Two Core Functions of Gaming QoS

    1. Bandwidth Allocation: Ensuring your game always has a reserved slice of your total upload and download speed, no matter how busy the house gets.
    2. Packet Prioritization (DSCP/Queue Management): Instructing the router to inspect outgoing and incoming data packets and place real-time gaming UDP/TCP packets at the front of the transmission queue.

    3. Step-by-Step Guide to Configuring Router QoS Settings

    Every router brand (ASUS, Netgear, TP-Link, or custom firmware like DD-WRT/OpenWrt) has a slightly different dashboard layout, but the core configuration steps remain identical. Follow this framework to set up your optimization profile:

    Step 1: Log Into Your Router Admin Dashboard

    • Open a web browser on a PC connected to your network.
    • Type your router’s default gateway IP address (commonly 192.168.1.1 or 192.168.0.1) into the URL bar.
    • Log in using your admin username and password (found printed on a sticker underneath your physical router).

    Step 2: Run a Baseline Speed Test (Crucial for Bandwidth Shaping)

    • Go to a site like Speedtest.net and run a test while no one else is using the internet.
    • Note down your maximum Download Speed and Upload Speed in Megabits per second (Mbps).
    • The Golden Rule: When configuring QoS bandwidth limits, set your router’s QoS bandwidth ceiling to 85% to 90% of your actual tested speed (e.g., if your fiber is 500 Mbps download, set your QoS limit to 450 Mbps). This prevents your internet service provider (ISP) line from hitting raw saturation bottlenecks.

    Step 3: Locate and Enable the QoS Engine

    • Navigate to your router settings menu. Look for tabs labeled QoS, Bandwidth Control, Traffic Manager, or Game Acceleration.
    • Enable the master toggle switch for QoS.

    Step 4: Choose Your Prioritization Method

    Modern routers generally offer three distinct methods to prioritize gaming. Choose the one that matches your router’s capabilities:

    • Method A: Device-Based Priority (The Easiest Method)
      • Find your gaming PC or console’s physical MAC address or IP address in the connected devices list.
      • Assign that specific device as “Highest Priority” or “Gaming Device” profile. The router will automatically prioritize all network traffic moving to and from that machine.
    • Method B: Application / Port-Based Priority
      • Some routers feature pre-built application presets (e.g., Steam, Xbox Live, PlayStation Network, specific game titles). Check these boxes to ensure traffic running on those specific network ports is prioritized.
    • Method C: Smart Queue Management (SQM / Cake / FQ-CoDel)
      • If your router runs advanced firmware (like ASUS Adaptive QoS or OpenWrt), enable SQM algorithms like Cake or FQ-CoDel. These advanced algorithms dynamically eliminate bufferbloat without requiring manual port configuration.

    4. Comprehensive Matrix: Router QoS Features and Their Benefits

    QoS Feature / SettingRecommended Setting for GamingPurpose / Network Benefit
    QoS Master SwitchEnabledActivates packet inspection and traffic shaping engines.
    Bandwidth AllocationSet to 85% – 90% of max speedPrevents ISP line saturation and eliminates bufferbloat.
    Device PriorityAssign to Gaming PC / ConsoleForces router to process your gaming packets first.
    WMM (Wi-Fi Multimedia)EnabledPrioritizes wireless data packets for gaming on Wi-Fi (if wired is impossible).
    UPnP / Port ForwardingConfigured for specific gamesEnsures clean, direct data handshakes with game servers.

    5. Wired vs. Wireless: The Hardware Foundation of Network Quality

    Even the most advanced QoS settings cannot fully overcome the physical limitations of a congested, interference-heavy Wi-Fi network.

    • The Ethernet Imperative: Whenever possible, connect your gaming PC or console directly to your router using a Cat6 or Cat7 Ethernet cable. Ethernet eliminates wireless packet loss, microwave/Bluetooth interference, and micro-jitter caused by walls and distance.
    • If You Must Use Wi-Fi: Ensure your router has WMM (Wi-Fi Multimedia) enabled in the wireless settings. WMM is the wireless equivalent of QoS, ensuring your gaming data packets get priority access over the airwaves.

    10 Frequently Asked Questions (FAQ)

    1. Will enabling QoS slow down my overall internet download speeds?

    Slightly, by design. Because QoS requires your router to reserve a small percentage of bandwidth headroom (usually 10%) to prevent traffic jams, your maximum raw download speed for massive file downloads may drop slightly. However, your latency stability during gaming will improve dramatically.

    2. Should I prioritize my gaming PC by its IP address or MAC address?

    Using its MAC address is safer because it is a permanent hardware identifier, ensuring your prioritization settings don’t break if your router changes your PC’s dynamic local IP address. Alternatively, assign a Static IP to your gaming PC.

    3. What is “bufferbloat” and how does QoS fix it?

    Bufferbloat happens when data packets queue up in massive buffers inside your modem or router when your connection is fully saturated. QoS fixes this by actively dropping or reprioritizing packets so queues never form, keeping ping times ultra-low.

    4. Are gaming routers with built-in QoS worth buying?

    If your current ISP-provided router is basic and lacks advanced traffic shaping controls, purchasing a dedicated gaming router (or installing custom open-source firmware like OpenWrt) provides a massive upgrade in connection stability.

    5. Can QoS fix high ping caused by being too far from game servers?

    No. QoS can only manage traffic inside your home network and up to your ISP’s local gateway. If you live in Texas and connect to a server in Europe, physics dictates your baseline ping will be high due to distance; QoS cannot bend the speed of light.

    6. What is the difference between bandwidth and latency?

    Bandwidth is the width of your pipe (how much data can pass per second, measured in Mbps). Latency (ping) is the speed at which that data travels back and forth (measured in milliseconds). Gamers need low latency far more than massive bandwidth.

    7. Does QoS help if I live alone and no one else uses my internet?

    If you are the sole user of your internet connection and no background apps are running on your PC, QoS offers minimal benefit because your network highway is already completely empty. QoS shines in multi-device, multi-user households.

    8. How do I know if my router supports Smart Queue Management (SQM)?

    Check your router’s advanced WAN or QoS settings menu. Look for terms like FQ-CoDel, Cake, or Bufferbloat Mitigation. If your stock ISP router lacks these, flashing third-party firmware or upgrading to an ASUS/Netgear router unlocks them.

    9. Should I turn on “Game Acceleration” or “QoS” if I have multi-gigabit fiber internet?

    If you have a massive 1-Gigabit or 2-Gigabit fiber connection and live with only one or two other people, your bandwidth is so large that household devices rarely saturate it. However, enabling QoS still helps if someone starts a massive 4K stream or cloud backup while you are in a match.

    10. Where can I find more networking and hardware optimization guides?

    Bookmark The Gamer Buzz and check back regularly for our comprehensive database of professional esports guides, router setups, and competitive optimization tips!

    Conclusion

    Optimizing your internet router’s Quality of Service (QoS) settings is one of the most effective ways to protect your competitive matches from household network chaos. By identifying your baseline bandwidth speeds, allocating priority to your gaming hardware, eliminating bufferbloat, and prioritizing wired Ethernet connections, you permanently banish lag spikes from your gaming setup. Configure your router today, take control of your packets, and enjoy an unshakeable connection in every ranked lobby!

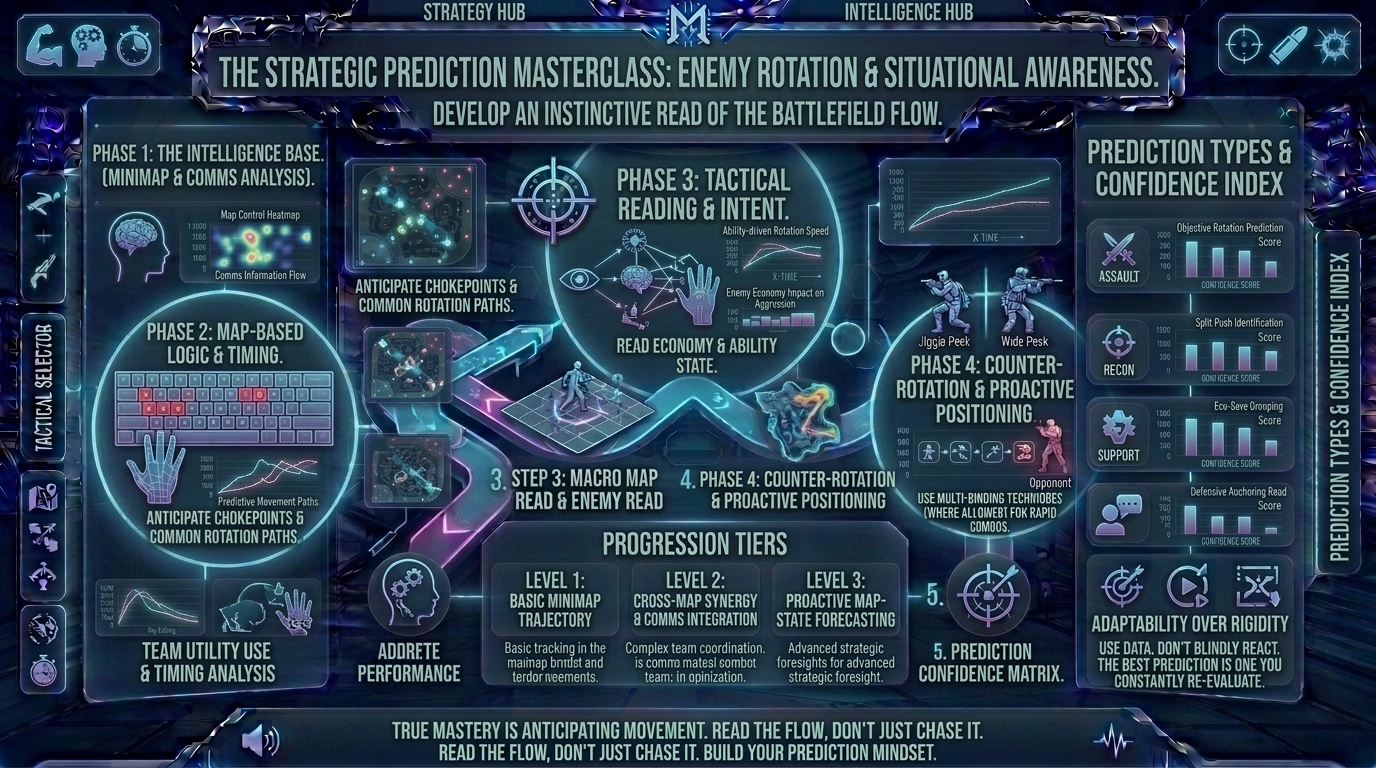
  • What are the best game sense and situational awareness tips to predict enemy rotation movements across the map

    What are the best game sense and situational awareness tips to predict enemy rotation movements across the map

    What Are the Best Game Sense and Situational Awareness Tips to Predict Enemy Rotation Movements Across the Map

    Welcome to The Gamer Buzz, your premier competitive strategy and tactical intelligence hub. Whether you are calling out strategic rotations for your squad in high-stakes lobbies across San Francisco, New York, and Seattle, or grinding through competitive ranked ladders in Texas, California, and Washington, one reality separates immortal-tier players from the rest: the ability to see the future.

    When you watch a professional esports player, it often looks like they possess psychic powers. They seem to effortlessly pre-aim a corner right as an enemy runs into it, or rotate to an empty bomb site seconds before a full-scale offensive push lands. They aren’t psychic. They have mastered game sense and situational awareness.

    Predicting enemy rotation movements is the ultimate competitive skill. It turns chaotic, reactive gameplay into proactive domination. In this exhaustive, master-level guide, we break down map timers, audio cues, elimination tracking, and psychological trigger points to help you read enemy rotations like an open book.

    1. The Foundation of Game Sense: Information Processing vs. Tunnel Vision

    To predict where your opponents are going, you must first understand how they gather information and make decisions.

    [Information Gathering (Sound/Visual)] ➔ [Clock & Timer Calculation] ➔ [Elimination Math] ➔ [Anticipatory Rotation]
    

    The Tunnel Vision Trap

    • The Average Player: Focuses exclusively on the 2-inch crosshair box in the center of their screen. They react only when an enemy appears directly in their line of sight. By the time they react, they are already caught off-guard by a flanking rotation.
    • The Elite Player: Maintains a continuous mental map of the entire battlefield. They process mini-map blips, subtle audio footprints, and utility timing simultaneously while keeping their crosshair disciplined.
    • The Rule of Active Awareness: Game sense is not an innate talent; it is the habit of constantly asking three questions: Where was the enemy last seen? How much time is left on the clock? What options do they have left?

    2. The 4 Pillars of Predicting Enemy Rotations

    To consistently forecast enemy movements across any tactical multiplayer map (Counter-Strike 2, Valorant, Rainbow Six Siege, etc.), anchor your decisions to these four concrete pillars:

    Pillar 1: Map Timers and Movement Distance Mathematics

    Every map has fixed physical dimensions. It takes a specific, measurable number of seconds for an unencumbered player to run from one end of the map to another.

    • The Rotation Clock: Memorize baseline transit times. If an enemy is spotted defaulting on Site A at 1:30 on the game clock, and your team secures an early entry kill on Site B at 1:15, calculate how long it takes for the remaining A-site defenders to sprint or rotate through connectors to assist.
    • The Blind Window: Once you know the travel time, you can identify exact “blind windows” where rotating enemies are caught out in the open with their knives out, completely vulnerable to an ambush.

    Pillar 2: Reading the Mini-Map and Elimination Feed

    Your UI is your primary radar system. Most players glance at the kill feed only to see who died, but elite players read the sequence of eliminations.

    • The Absence of Evidence is Evidence: If three rounds in a row the enemy team heavily contests mid-map control, and suddenly a round begins where mid is completely silent and devoid of utility, do not assume they are playing passive. They have likely stacked a bomb site or executed a silent rotation to the opposite side of the map. Use early map information to call an immediate counter-rotation.

    Pillar 3: Audio Forensics (Beyond Footsteps)

    Sound travels through walls, ceilings, and corridors, carrying rich operational data long before an enemy model ever comes into view.

    • Utility Cues: Listen for specific ability deployments, decoy grenades, fake flashes, or weapon switches. Attackers often throw smoke screens or execute noisy distractions on one side of the map specifically to mask the heavy rotation of their primary playmakers crawling toward the opposite site.
    • The Echo Principle: Learn the unique surface acoustic signatures of every map (metal grates, wood planks, concrete tile). Knowing where a footstep echoes allows you to instantly map an enemy’s exact corridor path.

    Pillar 4: Economic and Round-State Psychology

    An enemy team’s financial state dictates their strategic behavior.

    • Eco-Round Rushes: If the enemy team is on an economic eco-round with limited funds, they cannot afford a slow, methodical default setup because they will lose a long-range gunfight. Expect a fast, coordinated 5-man rush down a single choke point. Knowing this allows you to pre-rotate your team and stack heavy utility before the round even starts.

    3. Comprehensive Matrix: Game State Cues vs. Predicted Enemy Actions

    Game State TriggerObservable Cue / SymptomPredicted Enemy Rotation / Move
    Early Pick on Site AFirst blood secured on A defender within 15 seconds.Attackers will pivot heavily toward Site B or turtle into a slow map default.
    Heavy Utility Dump on MidMultiple smokes and flashes dropped simultaneously mid.Fake execution or setup for a rapid split-push through connectors.
    Total Silence on MapZero sound or utility for 30+ seconds mid-round.Silent defensive stacking or repositioning for a late-round flank.
    Enemy Eco RoundLow-tier weapons purchased; no utility displayed early.Aggressive, fast-paced rushing or coordinate shotgun/SMG stacking in tight corners.

    4. Advanced Tactical Practice: How to Build Game Sense

    Game sense cannot be taught purely through theory; it must be forged through deliberate self-reflection and match review.

    • The Death Autopsy: Every time you die in a ranked match, do not immediately blame your teammate or your aim. Ask yourself: “What map information was available to me 10 seconds before I died? Did my mini-map show an open lane that I ignored?” Pinpoint the exact information cue you missed.
    • Demo Reviewing (The God’s Eye View): Once a week, watch one of your competitive match replays from the enemy team’s perspective. Seeing how easily they read your team’s predictable habits, slow rotations, and common holding angles will permanently alter how you approach positioning in future matches.

    10 Frequently Asked Questions (FAQ)

    1. What is the difference between aim skill and game sense?

    Aim skill dictates how quickly and accurately you can click on an enemy’s head when you see them. Game sense dictates where your crosshair is already pointing before the enemy even rounds the corner. Game sense wins rounds when aim is failing.

    2. How can I improve my mini-map awareness without losing gunfights?

    Build a rhythm of glancing at your mini-map for a split second every time you reload or finish clearing a corner. Never look at the map while actively holding an open angle where an enemy might peek.

    3. Why do I always seem to guess the wrong bomb site when rotating?

    You are likely reacting too late—moving only after you physically see the bomb or enemy players. True game sense requires you to rotate based on early indicator clues (utility dumps, missing defenders, and sound cues) before the enemy commits.

    4. How do map layouts affect rotation speed timings?

    Some maps feature open, direct layouts with fast connectors (allowing 5-second rotations), while others feature labyrinthine corridors that require 15 to 20 seconds to cross. Memorizing these layout choke points is essential for timing your counter-rotations.

    5. Can I predict enemy rotations better if my team has no communication?

    Yes. Even if your teammates refuse to speak in voice chat, their bodies, deaths, and radar pings on the map act as telemetry data. Watch where your solo queue teammates die to deduce where the enemy concentration is shifting.

    6. What should I do if the enemy team constantly fakes their rotations?

    Against teams that love fake executions, hold your ground with discipline. Do not send all your defenders packing the moment you hear noise on the opposite site. Leave a reliable anchor behind with escape utility while the rest of the team edges closer to support without fully abandoning their post.

    7. How does the game clock influence enemy decision-making?

    As the round timer dips below 30 seconds, attacking teams experience acute urgency. They are forced to make high-risk plays, push through smokes, or commit to plant sites. Use this panic window to set up crossfires where desperate enemies run right into your pre-aimed crosshairs.

    8. Does playing different roles (support vs. entry fragger) improve game sense?

    Abso-lutely. Playing an entry fragger teaches you how defenders hold angles and rotate under pressure, while playing a supportive controller teaches you map-wide timing and resource management. Experiencing both roles rounds out your overall tactical awareness.

    9. How do I stop second-guessing my rotations during a live match?

    Trust your initial read based on concrete evidence (like sound or radar data). Second-guessing usually leads to getting caught moving out in the open halfway across the map. Commit to your read, position yourself safely, and gather updated info.

    10. Where can I find more tactical strategy guides and map breakdowns?

    Bookmark The Gamer Buzz and check back regularly for our comprehensive database of professional esports guides, map-control strategies, and advanced competitive rank-up tips!

    Conclusion

    Mastering game sense and situational awareness transforms you from a reactive target into an active chess master on the competitive battlefield. By tracking map timers, reading elimination feeds, listening to audio forensics, and analyzing round-state psychology, you can accurately predict enemy rotation movements before they even happen. Sharpen your tactical radar, trust your data reads, and outsmart your opponents in every single ranked lobby!

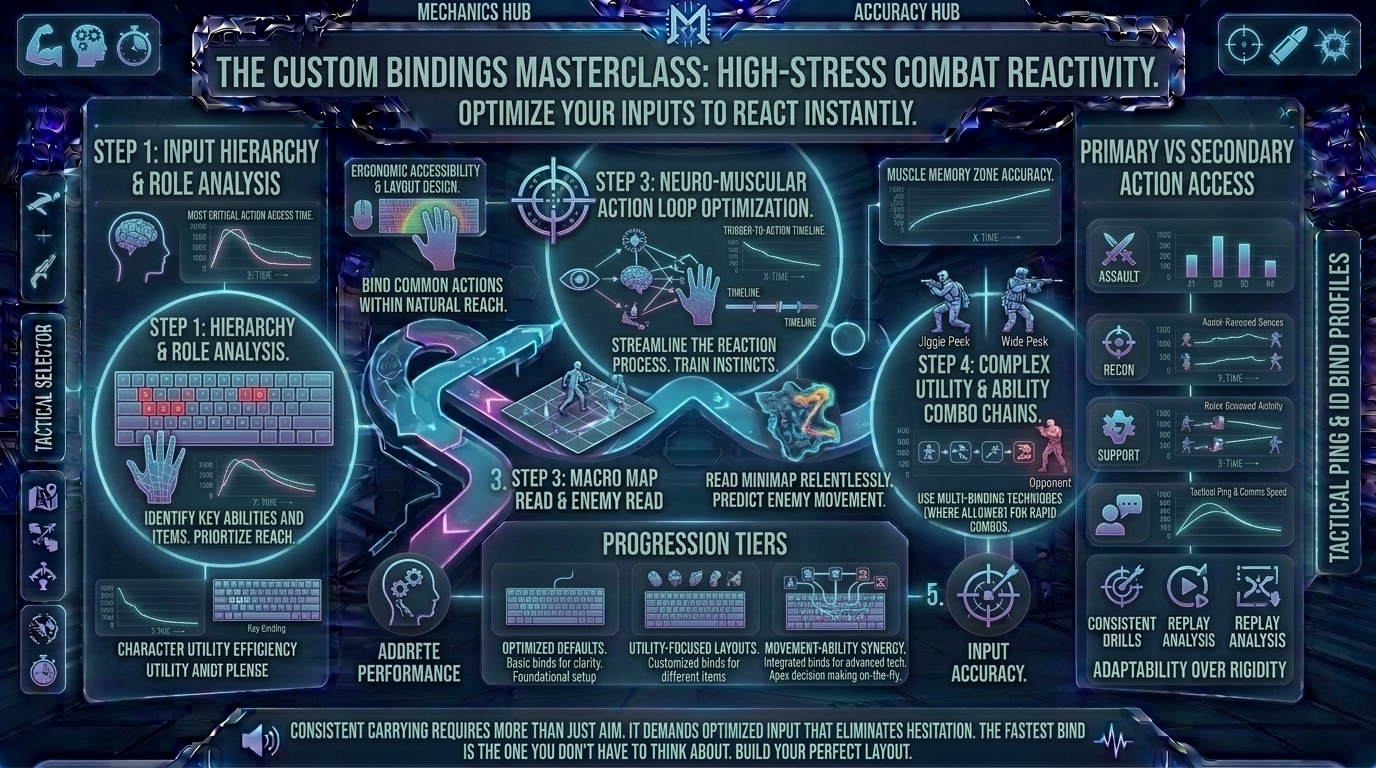
  • How to set up custom binding layouts for equipment and abilities to react instantly in high stress combat moments

    How to set up custom binding layouts for equipment and abilities to react instantly in high stress combat moments

    Welcome to The Gamer Buzz, your premier competitive performance and hardware configuration authority. Whether you are optimizing control schemes from high-end tactical rigs in San Francisco, New York, and Seattle, or engineering precision layouts across Texas, California, and Washington, one truth remains absolute: your default game controls are holding you back.

    In high-stress competitive multiplayer titles (such as Counter-Strike 2, Valorant, Apex Legends, Overwatch 2, and Call of Duty), split-second reactions win or lose gunfights. When an enemy rounds a corner unexpectedly, you cannot afford to stretch your left hand awkwardly across your keyboard to hit a distant key, nor can you rely on scrolling your mouse wheel to cycle through a utility belt. Every fraction of a millisecond spent shifting your hand posture is latency between your brain and your on-screen action.

    Mastering keybind ergonomics means transforming your keyboard and mouse into an extension of your nervous system. In this exhaustive, master-level guide, we break down hand biomechanics, cognitive load distribution, advanced peripheral macros, and the exact custom binding framework required to react instantly under pressure.

    1. The Biomechanics of the Left Hand: Why Default Layouts Fail

    Most competitive games inherit their default keybindings from older legacy titles, prioritizing alphabetical simplicity (like 1, 2, 3, 4 for weapons) over functional ergonomic efficiency.

    The Problem with the Default WASD Layout

    • Finger Overload: On a standard QWERTY layout, your left ring finger handles A (strafe left) and frequently has to reach upward for Q (ability/utility) or Tab (scoreboard). Your index finger is tasked with D (strafe right), F (interact/use), R (reload), 4, 5, and multiple ability keys.
    • The Conflict: If your index finger is actively holding down D while moving right, forcing it to reach over and press 4 or F creates a physical movement constraint. You either stop moving cleanly or fumble your ability deployment during a gunfight.

    The Ergonomic Principle of 1-to-1 Input Isolation

    To achieve instant reactions under high stress, no single finger should ever handle more than its fair share of high-priority combat inputs. Every crucial action—weapons switching, communication pings, ability casting, and melee attacks—should sit within an immediate, strain-free radius of your resting hand position.

    2. The 4-Tier Custom Binding Blueprint

    Restructuring your control layout requires a logical hierarchy. Group your actions into four distinct operational tiers based on frequency and urgency.

    [Tier 1: Core Movement & Fire (WASD + Mouse)] ➔ [Tier 2: Immediate Combat Actions (Reload, Jump, Crouch)] ➔ [Tier 3: Active Abilities & Equipment (Mouse Buttons)] ➔ [Tier 4: Macro Utility & Communication (Infrequent Keys)]
    

    Tier 1: Core Movement and Firing (Untouchable)

    • WASD: Keep your movement keys anchored on W, A, S, D. Moving these breaks decades of gaming muscle memory and yields zero performance benefit.
    • Mouse 1 & Mouse 2: Left-click for firing, right-click for scoping/alternate fire.

    Tier 2: Instant Combat Actions (Thumb and Pinky Mastery)

    • Crouch (Ctrl vs. Shift vs. Mouse): Avoid stretching your pinky to hit Ctrl if it cramps your hand. Many elite players map Crouch to a dedicated side mouse button or Left Shift (flipping walk/crouch depending on the game genre).
    • Jump (Spacebar vs. Scroll Wheel): For games featuring bunny-hopping or momentum preservation (like Apex Legends or Counter-Strike), bind secondary jump to Scroll Wheel Down. This allows you to spam jump inputs with 100% reliability during chaotic movement duels.

    Tier 3: Abilities and Equipment (Offloading to the Mouse)

    This is where standard setups fail and custom binds create an unfair advantage. Your right hand (mouse hand) is massively underutilized for active combat actions.

    • Mouse Side Buttons (Thumb 4 & 5): Map your most critical, time-sensitive abilities—such as your tactical dash, flashbang deployment, melee attack, or push-to-talk communication—directly to your mouse thumb buttons. Your thumb can execute these actions instantly without ever disrupting your movement keys.
    • Quick-Cast vs. Normal Cast: Always configure your abilities to Quick-Cast (Smart Cast). This casts the ability the exact millisecond you press the key, bypassing the secondary confirmation click that wastes precious milliseconds.

    Tier 4: Peripheral Comfort Keys (Q, E, F, R)

    • Interaction (F): Keep your general interaction key on F or E so your index finger can access it effortlessly.
    • Reload (R): Keep R for reloading, but ensure it never conflicts with mid-combat strafing.

    3. Comprehensive Matrix: Default vs. Pro Custom Binds

    Action CategoryDefault Layout InefficienciesOptimized Pro Custom BindingCompetitive Benefit
    Primary Abilities / UtilityScattered across 3, 4, 5, Z, X, CShift, Mouse 4, Mouse 5, EEliminates awkward finger stretching; zero movement disruption.
    Push-to-Talk (Mic)CapsLock or V (disrupts thumb/pinky)Mouse 5 or Mouse Wheel ClickKeeps voice comms completely isolated from hand movement.
    Melee Weapon / Quick SwitchPressing 3 or Q (fingers leave WASD)Mouse 4 or Extra Mouse PaddleInstant emergency knife pull or weapon swap without stopping.
    Inspect / EmotesTaking up valuable nearby combat keysUnbound or moved to far-right keys (H, J)Prevents accidental misclicks during high-stress gunfights.

    4. Advanced Peripheral Setup: Leveraging Mouse and Keyboard Macros

    Modern gaming peripherals offer advanced software suites (like Logitech G HUB, Razer Synapse, or Wootility) that let you elevate your binding layout further:

    • Rapid Trigger / Magnetic Actuation: If you use a modern magnetic switch keyboard, configure your actuation point down to 0.1mm to 0.4mm for movement keys. This ensures your counter-strafes register instantaneously with the slightest physical finger relaxation.
    • Avoid Illegal Macros: While custom key remapping and single-action binds are 100% legal and encouraged, avoid multi-action macros (such as automated recoil-compensation scripts or bhop macros). These violate anti-cheat policies and result in permanent account bans. Stick to clean, 1-to-1 key remapping.

    10 Frequently Asked Questions (FAQ)

    1. Will changing my keybinds temporarily ruin my performance?

    Yes, for the first 3 to 5 days. Muscle memory takes time to overwrite. You will accidentally press old keys out of habit. Stick with your new layout by practicing in casual modes or deathmatches for a week, and your muscle memory will permanently adapt.

    2. Is it better to use mouse side buttons for abilities or weapon slots?

    Mouse side buttons are ideal for high-frequency combat actions that require simultaneous movement—such as melee attacks, tactical grenades, character dashes, or push-to-talk voice comms.

    3. What is “Quick-Cast” and should I use it for all abilities?

    Quick-cast executes an ability instantly where your crosshair is pointing the moment you press the key. You should use it for almost all combat abilities, reserving normal cast only for complex targeted wall placements that require precision indicator lines.

    4. How do I stop accidentally fat-fingering adjacent keys during high-stress moments?

    Look for physical tactile markers on your keyboard. Some gamers place a tiny drop of hot glue or a raised sticker nub on keys like W or Shift to anchor their fingers naturally without looking down.

    5. Should I map my crouch key to my mouse or keyboard?

    It depends on your playstyle. Mapping crouch to a mouse side button prevents your pinky finger from cramping during long sessions, but mapping it to Ctrl or Left Shift gives you heavier physical control for deliberate peek ducking.

    6. Are foot pedals or specialized multi-button keypads worth it for FPS games?

    While fun for hobbyists, standard mechanical keyboards and mice offer the most reliable, zero-latency input pipeline. Most competitive professionals stick strictly to standard tenkeyless or 60% keyboards.

    7. How do I handle push-to-talk without ruining my movement?

    Never use a key that requires your movement hand (left hand) to hold down a button while fighting. Map your voice comms to a mouse thumb button or use open-mic with an aggressive noise gate.

    8. What is the best key to bind for inspecting weapons?

    Bind weapon inspection to an out-of-the-way key like H or L. Never put non-combat visual animations on easily accessible combat keys like Q or F.

    9. Why do some pro players use arrow keys or custom split layouts?

    A small percentage of professional players use unconventional layouts (like left-handed setups or shifted key rows) due to past injuries, hand size variations, or personal ergonomic comfort. Always prioritize what feels anatomically natural for your hands.

    10. Where can I find more hardware and peripheral optimization guides?

    Bookmark The Gamer Buzz and check back regularly for our comprehensive database of professional esports hardware reviews, keybind templates, and competitive optimization tips!

    Conclusion

    Setting up custom binding layouts for equipment and abilities is the ultimate hardware optimization that requires zero monetary investment. By offloading high-stress actions to your mouse, eliminating finger overlap on your WASD cluster, and enforcing 1-to-1 input isolation, you remove internal physical latency from your gameplay. Remap your controls, grind through the brief muscle-memory transition phase, and react instantly in every high-stress combat lobby!

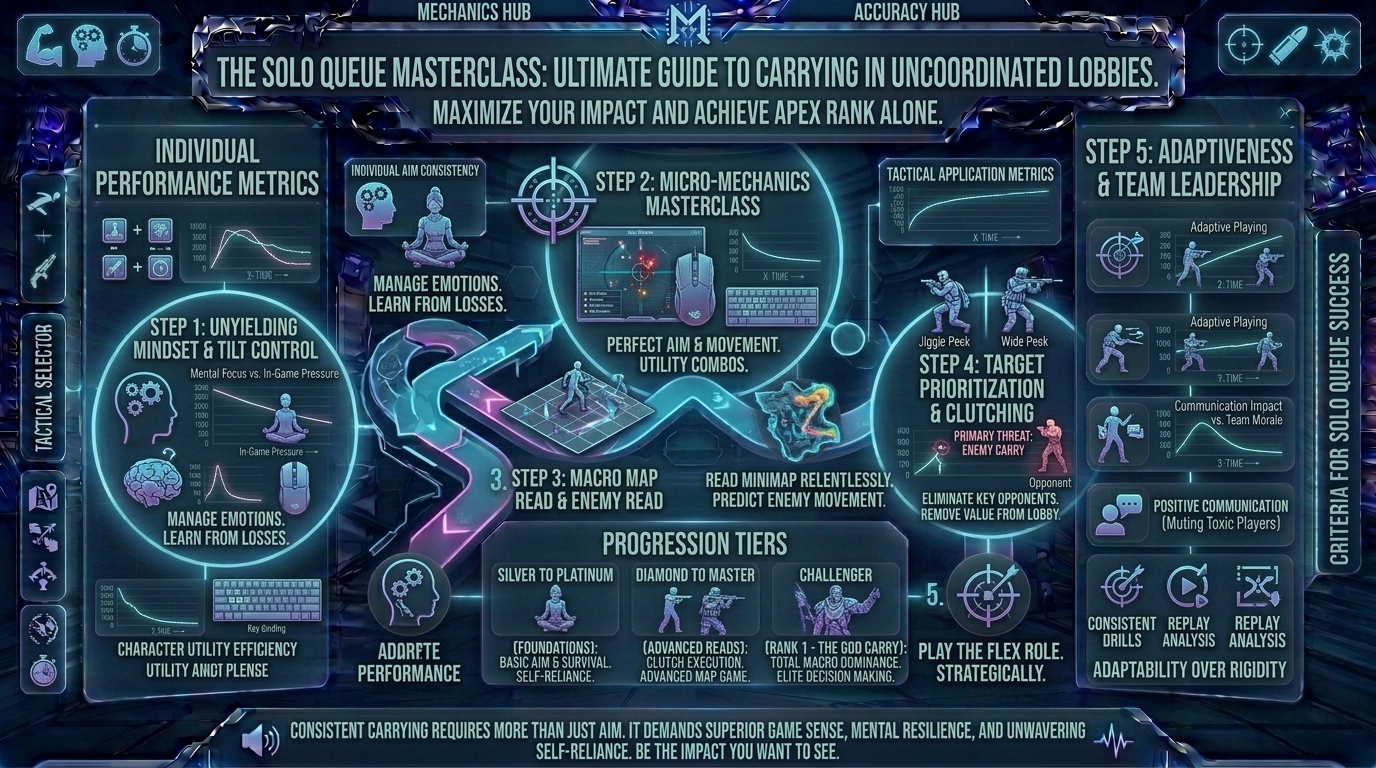
  • What are the best tips for solo queueing in ranked competitive playlists and carrying uncoordinated team lobbies

    What are the best tips for solo queueing in ranked competitive playlists and carrying uncoordinated team lobbies

    Welcome to The Gamer Buzz, your definitive competitive performance and strategy authority. Whether you are grinding ranked matches from high-end setups in San Francisco, New York, and Seattle, or navigating chaotic team lobbies across Texas, California, and Washington, one universal gaming truth binds us all: solo queueing in competitive playlists is the ultimate psychological trial.

    You queue up hoping for communicative teammates, synchronized utility usage, and tactical teamwork. Instead, you land in a lobby with silent teammates, erratic pushes, zero map control, and immediate finger-pointing when things go sideways.

    Carrying uncoordinated lobbies requires more than just good raw aim—it demands emotional discipline, leadership adaptability, and strategic self-reliance. In this exhaustive, master-level guide, we break down the core psychology, macro decision-making, and tactical carrying frameworks required to consistently win solo queue games and climb the ranked ladder.

    1. The Solo Queue Mindset: Controlling the Uncontrollable

    Before looking at mechanical carry tactics, you must master the fundamental rule of solo queueing: You cannot control your teammates; you can only control your own impact and reactions.

    The Mathematical Reality of Ranked Lobbies

    • The 40-40-20 Rule: Roughly 40% of your games are mathematically unwinnable no matter how well you play (due to griefers, uncoordinated team collapses, or smurfs on the enemy team). Another 40% are heavily favored wins where your team steamrolls naturally. The remaining 20% are the swing games—and your individual performance decides the outcome of every single one of them.
    • Abandoning Expectations: The moment you stop expecting random teammates to execute complex pro strategies, the less frustrated you will become. Play to anchor their mistakes rather than screaming at them to fix yours.

    2. The 4-Stage Solo Queue Strategy Blueprint

    Carrying uncoordinated lobbies requires a disciplined approach to every match phase, transforming chaos into structured execution.

    [Stage 1: Pre-Round Adaptation] ➔ [Stage 2: Parasitic Playmaking] ➔ [Stage 3: Information Control] ➔ [Stage 4: Mental Resilience]
    

    Stage 1: Pre-Round Adaptation and Role Flexing

    • Be the Glue: If your team lacks a smoke controller, a healer, or an anchor agent, swallow your ego and fill the gap. Playing what the team composition desperately needs skyrockets your round win probability far more than forcing a solo-carry duelist who starves for team support.
    • Identify Your Carry Target: In the first two rounds, observe your random teammates. Identify who has decent movement and game sense, and who is throwing their life away. Once you spot the most competent player on your team, hitch your wagon to them. Playing off a competent random teammate’s aggression turns isolated 1v1s into reliable 2v1 trade opportunities.

    Stage 2: “Parasitic” Playmaking (Using Your Teammates as Utility)

    When teammates refuse to communicate or coordinate, you must coordinate with them—even if they don’t realize it.

    • The Follow-the-Leader Rule: If a hyper-aggressive teammate insists on pushing a foolish angle, do not let them die alone. Position yourself slightly behind them so you can immediately trade out the enemy who kills them. A bad play executed together is often infinitely more successful than a correct play executed completely alone.
    • Baiting with Purpose: Let uncoordinated teammates take the initial contact or entry space while you hold a clean trade angle behind them.

    Stage 3: Taking Command via Pings and Calm Voice Comms

    Many uncoordinated lobbies are not toxic; they are simply leaderless. Players want to win, but nobody wants to step up and make the hard macro calls.

    • Keep Comms Short and Directive: Instead of shouting complex multi-tier strategies that randoms will ignore, use simple direct commands: “Blue, hold this door with me,” or “Let’s group up and hit B-site together.”
    • Master the Ping System: If you have no mic or teammates refuse to listen to voice chat, spam map pings aggressively. Clear visual pings cut through noise and instinctively guide random players toward objective rotations.

    3. Comprehensive Matrix: Solo Queue Scenarios and Solutions

    Lobby ProblemRoot CauseSolo Carry Solution
    No-Comms Silent TeamLack of microphone or social anxietyRely entirely on radar, audio queues, and active map pings; play defensively off their positioning.
    Constantly Aggressive TeammatesImpatience and kill-chasing habitsAnchor behind them to trade out kills; stop them from pushing alone by matching their tempo.
    Passive, Turtle-Like DefendersFear of losing ground or making mistakesTake the initiative; ping a rush path and act as the hard entry wedge to force space.
    Constant Toxic BlamingEgo protection and tilt spiralsMute them instantly; protect your own mental bandwidth; focus 100% on your game impact.

    4. Advanced Solo Carry Habits: How to Convert Leads into Wins

    • Never Tilt-Queue: If you lose two ranked matches in a row due to uncoordinated lobbies or throwers, stop playing immediately. Take a 15-minute walk, hydrate, and reset your mental state. Continuing to queue while tilted guarantees you will match with similar players or perform below your baseline.
    • Play the Anchor / Support Role When Behind: If your mechanical aim is having an off-game, transition immediately into a utility-heavy anchor or support style. Protect your team’s top fragger, drop weapons when you have extra cash, and let others carry the raw fragging load while you secure objective control.

    10 Frequently Asked Questions (FAQ)

    1. Is it better to play aggressive agents/heroes or supportive ones in solo queue?

    It depends on your rank. In lower ranks (Iron to Gold), playing high-impact playmakers lets you carry through raw mechanical outplays. In higher ranks (Platinum to Immortal), playing versatile utility or anchor roles yields higher consistency because team coordination dictates round wins.

    2. What should I do if my entire team refuses to use voice chat?

    Treat your team like advanced bots. Watch their positioning on your mini-map constantly, play off their engagements as a secondary shadow, and use map pings to direct where you want to go.

    3. How do I deal with a teammate who is deliberately throwing or griefing?

    Mute them immediately, report them after the match, and do not engage in chat arguments. Engaging with griefers fuels their behavior and drains your mental focus away from winning the round.

    4. Why do I feel like I always get the worst teammates in solo queue?

    This is a cognitive bias known as negativity bias. Statistically, the enemy team has the exact same probability of getting uncoordinated or toxic players as your team does. Over a large sample size of hundreds of matches, you are the only constant variable in your climb.

    5. Should I ever play solo queue late at night?

    Late-night queues (past 1 AM) often feature smaller player pools, leading to wider skill disparities in matchmaking lobbies, increased rates of fatigue, and higher toxicity. If you want pristine match quality, queue during peak afternoon and evening hours.

    6. How do I stop myself from getting tilted by bad teammates?

    Accept the fact that roughly 40% of games are mathematically unwinnable. When you stop tying your emotional well-being to outcomes you cannot control and focus entirely on your personal mechanical improvement, tilt fades away.

    7. Is duo-queuing better than solo-queuing for ranking up?

    Duo-queuing with a reliable teammate who communicates and synergizes with your playstyle significantly stabilizes your win rate and cuts down solo queue frustration. Just ensure your skill levels are relatively close to avoid matchmaking penalty strains.

    8. How can I carry when the enemy team is clearly a pre-made 5-stack?

    Against coordinated stacks, you must avoid taking fair, predictable 1v1 engagements. Force chaotic split pushes, hunt for isolated flanks, and abuse utility combos to disrupt their defensive setups.

    9. What is the best way to warm up before starting a solo queue grind?

    Spend 10 to 15 minutes combining a physical hand stretch routine, a quick aim-training playlist (like static clicking or tracking), and one unranked deathmatch to wake up your nervous system.

    10. Where can I find more team leadership and rank-up guides?

    Bookmark The Gamer Buzz and check back regularly for our comprehensive database of professional esports guides, mental fortitude strategies, and competitive rank-up tips!

    Conclusion

    Mastering solo queueing in competitive playlists and carrying uncoordinated team lobbies is less about possessing god-tier aim and more about developing elite emotional intelligence, tactical adaptability, and situational leadership. By abandoning expectations of random perfection, playing off your teammates’ movements, taking command with calm communication, and protecting your mental state against tilt, you take total control of your competitive destiny. Queue up with confidence, lead your team from the front, and conquer the ranked ladder!

  • How to properly practice counter strafing and movement mechanics to shoot with absolute pin point accuracy

    How to properly practice counter strafing and movement mechanics to shoot with absolute pin point accuracy

    Welcome to The Gamer Buzz, your premier competitive performance and tactical strategy authority. Whether you are fine-tuning your gunplay from high-end setups in San Francisco, New York, and Seattle, or grinding through high-stakes competitive ranked lobbies across Texas, California, and Washington, one mechanic separates casual gamers from elite elite players: clean movement mechanics.

    In tactical first-person shooters (such as Counter-Strike 2, Valorant, and various tactical variants), your weapon is fundamentally inaccurate the moment your character’s feet are sliding across the ground. If you fire while moving, your bullet spray transforms into a random geometric cone of failure.

    To hit targets with absolute pinpoint accuracy, you must master counter-strafing—the art of instantly killing your lateral momentum using opposing keyboard inputs. In this exhaustive, master-level guide, we break down the physics of movement inaccuracy, the exact finger-tapping rhythms required to counter-strafe, and step-by-step training drills to embed this mechanic permanently into your muscle memory.

    1. The Physics of Momentum: Why Moving Kills Accuracy

    In modern tactical shooters, game engines track your player velocity vector on every single tick.

    The Accuracy Cone

    • In Motion: When you hold down a movement key (A or D), your character slides smoothly across the map. During this window, your gun’s dispersion error multiplies drastically. Your first bullet can land anywhere within a large radius of your crosshair.
    • At Rest (Zero Velocity): The millisecond your character’s speed hits absolute zero, the dispersion cone collapses down to a single, microscopic point.
    • The Problem with Just Releasing Keys: If you are strafing right by holding the D key and simply let go, your character doesn’t stop instantly; you coast for a few frames due to friction deceleration. Those few frames of coasting mean you are still inaccurate when you click. That delay loses gunfights.

    2. The Anatomy of Counter-Strafing: Key by Key

    Counter-strafing bypasses natural friction deceleration by forcing an immediate counter-input. Here is how the sequence works mechanically:

    [Hold Movement Key (e.g., D)] ➔ [Release/Crosshair Target Reached] ➔ [Tap Opposite Key (e.g., A) for 1 Frame] ➔ [Fire Pinpoint Shot]
    

    The 4-Step Execution Rhythm

    1. The Peek (Hold): Press and hold D to slide out to the right from behind a protective wall. Your crosshair sweeps across the open angle.
    2. The Target Lock: As your crosshair sweeps across your enemy’s head, prepare to stop.
    3. The Counter-Tap: The exact microsecond you want to stop, tap the A key for a fraction of a second while releasing D. This counter-input cancels your momentum instantly, dropping your velocity to zero.
    4. The Shot: Fire your single-bullet tap or controlled short burst during the microscopic stability window where your speed is zero.

    Crucial Timing Note: Do not hold the opposite key down too long, or you will immediately begin sliding backward in the opposite direction, rendering your second shot just as inaccurate. It is a sharp, crisp tap, not a held press.

    3. Comprehensive Matrix: Common Movement Errors vs. Corrections

    Movement MistakeSymptom / ResultCorrective Adjustment
    Just Letting Go of KeysCoasting past your target; shots miss wide due to residual momentum.Actively tap the opposing movement key to force instant zero velocity.
    The “Jitter” Panic MashRapidly mashing A-D-A-D back and forth out of nervousness, causing permanent motion inaccuracy.Slow down your rhythm. One clean stop tap, a settled beat, then click.
    Shooting Before the StopFiring during the deceleration slide (counter-tapped too late).Delay your mouse click by roughly 50 milliseconds to match the completion of the counter-stop.
    Moving the Mouse While StoppingCrosshair drifts off target during the counter-tap.Keep your mouse hand steady; separate your movement keys from your aim corrections.

    4. The Ultimate 10-Minute Daily Counter-Strafe Practice Routine

    Muscle memory is built through isolated repetition. Implement this structured 10-minute training routine before jumping into your competitive matches:

    Step 1: The Wall Check (3 Minutes)

    • Load up a practice range or custom offline map and stand parallel to a flat wall.
    • Turn on your game’s movement error crosshair graph (if available).
    • Strafe left and right, practicing your counter-taps. Watch your crosshair lines: they should snap back together instantly when you execute the opposite tap. Fire a single bullet; if it leaves a mark directly on your crosshair dot, your timing is clean.

    Step 2: Prefire Corner Peeking (4 Minutes)

    • Go to a prefire map or custom map featuring common angle obstacles.
    • Practice moving around a corner using only a single strafe key, counter-strafing the exact moment your pre-aimed crosshair lines up with a bot or target dummy’s head. Do not touch your W or S keys.

    Step 3: Deathmatch Integration (3 Minutes)

    • Jump into an unranked deathmatch server.
    • Consciously force yourself to stop completely via counter-strafing before every single engagement. Do not allow yourself to panic-spray while moving. Focus exclusively on clean movement mechanics rather than your overall scoreboard kill count.

    10 Frequently Asked Questions (FAQ)

    1. Is counter-strafing necessary in all tactical shooters?

    Yes, games like Counter-Strike 2 and Valorant heavily penalize movement accuracy. While the deceleration window in Valorant is shorter than in CS2, mastering counter-strafing completely eliminates the micro-drift delay, ensuring your first bullet hits its target every time.

    2. Should I press both the original movement key and the opposite key at the same time?

    No. You should release your primary movement key (or let the opposite key’s snap-override handle it) while giving the opposite key a crisp, isolated tap. Holding both down simultaneously results in standing still, but doing it cleanly relies on a tap-and-release rhythm.

    3. Why do my bullets still miss even when I feel like I counter-strafed?

    You are likely shooting either a split-second too early (while still sliding) or too late (after you’ve already started drifting backward). Watch your bullet impact holes on a wall rather than your crosshair to find your true timing feedback.

    4. Can keyboard switch types (like mechanical vs. magnetic hall-effect switches) help with counter-strafing?

    Yes. Modern keyboards featuring magnetic switches with adjustable actuation points (and features like Rapid Trigger) cut out physical switch reset lag, allowing your counter-strafe inputs to register slightly faster.

    5. How do I practice counter-strafing into my weaker side?

    Most players find it easier to counter-strafe in one direction (e.g., stopping when moving right vs. moving left). Deliberately spend double your practice time drilling movement toward your weak side until your muscle memory balances out.

    6. Should I crouch during a counter-strafe?

    Crouching immediately lowers your hitbox and changes your spray patterns, but doing it on every single peek makes you predictable. Reserve crouch-peeking for specific mix-ups; rely primarily on standing counter-strafes.

    7. How long does it take to make counter-strafing feel automatic?

    With dedicated 10-minute daily practice sessions, most players build basic subconscious muscle memory within 1 to 2 weeks of consistent ranked play.

    8. Does moving my mouse while counter-strafing ruin my accuracy?

    Your mouse movement doesn’t directly affect movement inaccuracy penalties, but moving your aim wildly while trying to time a static stop introduces human error. Keep your crosshair steady on the target angle while your fingers handle the stop.

    9. What is “jiggle peeking” and how does it relate to counter-strafing?

    Jiggle peeking is rapid, repeated counter-strafing back and forth across a corner threshold (A-D-A-D) to gather enemy information or bait sniper shots without fully committing your body to a lethal duel.

    10. Where can I find more advanced movement guides and training drills?

    Bookmark The Gamer Buzz and check back regularly for our comprehensive database of professional esports guides, mechanical breakdowns, and tactical rank-up tips!

    Conclusion

    Mastering counter-strafing and fluid movement mechanics is the ultimate mechanical foundation that turns random bullet sprays into reliable, pinpoint headshots. By understanding momentum physics, training your finger-tapping rhythm in isolated practice drills, and eliminating panic-mashing during live matches, you take complete control of your gunplay. Lock in your movement rhythm, plant your feet cleanly, and dominate your next competitive lobby!