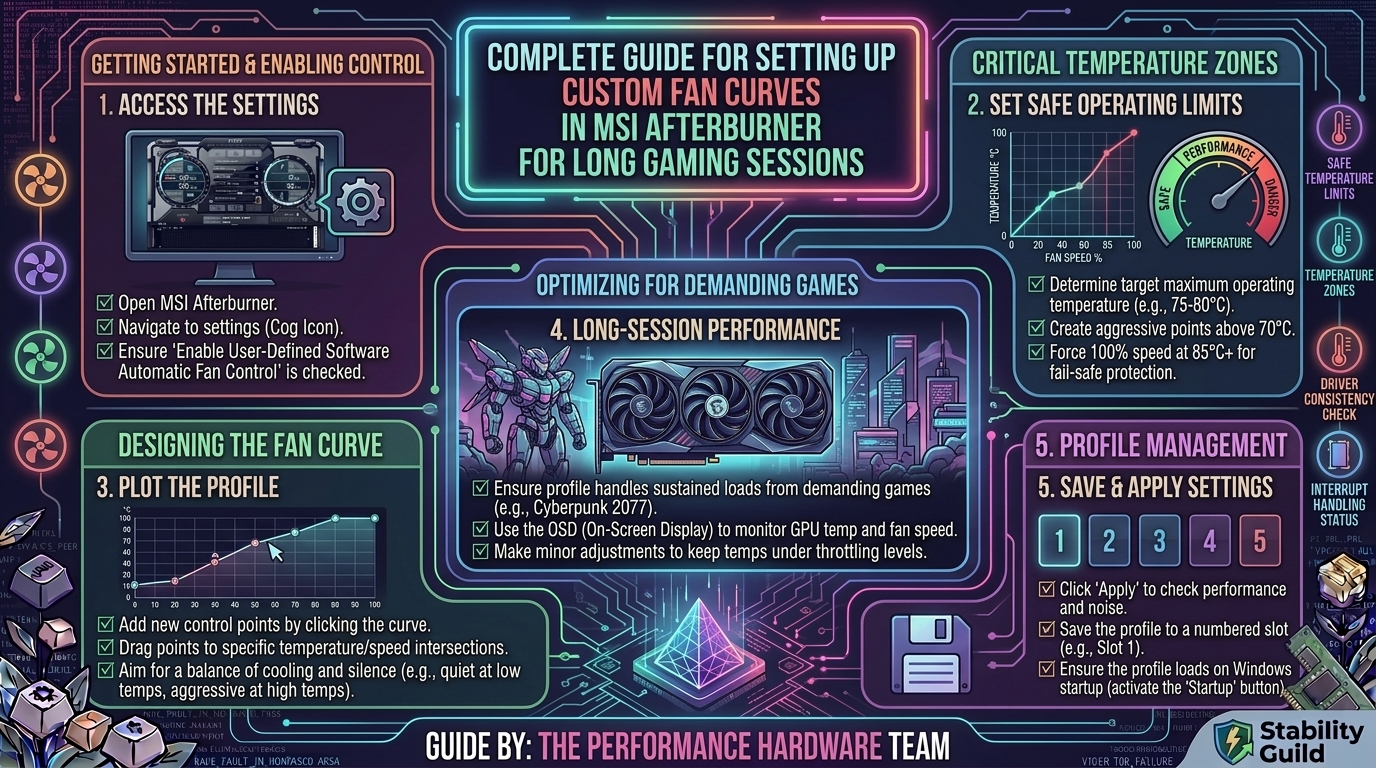
How to Set Up Custom Fan Curves in MSI Afterburner to Keep Your Graphics Card Cool During Long Gaming Sessions
Modern high-performance graphics cards generate significant heat under sustained loads. When your GPU reaches high thermal thresholds, it automatically reduces core clock speeds—a process known as thermal throttling—to protect hardware integrity. This results in sudden frame drops, micro-stuttering, and reduced hardware longevity.
While graphics cards ship with factory fan profiles, these configurations typically prioritize low noise output over cooling efficiency. Setting up a custom fan curve in MSI Afterburner allows you to balance thermal performance and acoustic output, preventing frame rate drops during extended gaming sessions.
Thermal Targets for Modern GPUs
Before creating a custom fan profile, it is essential to understand safe GPU operating temperatures:
| Temperature Range | Thermal Status | System Impact |
| Below 60°C (140°F) | Excellent | Maximum Boost Clocks maintained. |
| 60°C – 75°C (140°F – 167°F) | Optimal | Ideal thermal target for long gaming sessions. |
| 76°C – 84°C (168°F – 183°F) | Warm / Factory Target | Mild GPU boost clock reduction; increased acoustic noise. |
| 85°C+ (185°F+) | Thermal Throttling | Core clocks drop sharply; potential silent crashes to desktop. |
Step 1: Download and Configure MSI Afterburner
- Download MSI Afterburner from the official MSI website (ensure you download directly from MSI to avoid unverified third-party mirrors).
- Run the installer and include RivaTuner Statistics Server (RTSS) if you wish to monitor real-time GPU temperatures in-game via an On-Screen Display (OSD).
- Open MSI Afterburner.
- Click the Gear Icon (Settings) to access the properties menu.
[ MSI Afterburner Main Screen ] ---> Click Gear Icon (Settings) ---> Navigate to [ Fan Tab ]
Step 2: Enable User-Defined Software Fan Control
By default, graphics card fans run on the GPU vBIOS hardcoded fan profile. To take manual control:
- In the Settings window, click on the Fan tab.
- Check the box for Enable user defined software automatic fan control.
- Set the Pre-defined fan control curve setting to Custom.
- Change the Fan speed update period to 5000 ms (this prevents the fans from constantly fluctuating speed every single second, reducing acoustic ramping).
- Set the Temperature hysteresis to 3°C or 5°C. Hysteresis prevents rapid fan speed oscillations when your GPU temperature hovers right on a node boundary (e.g., jumping back and forth between 60°C and 61°C).
Step 3: Plotting the Ideal Custom Fan Curve
The fan curve graph plots GPU Temperature (°C) along the horizontal X-axis against Fan Speed (%) along the vertical Y-axis. You can click and drag individual node points or double-click on the line to add new nodes.
The Balanced Gaming Profile (Recommended)
Use the following node coordinates for an optimal balance of silent idle operation and low load temperatures:
Fan Speed (%)
100% |                                               /--- [ 80°C , 100% ]
 80% |                                       /------/
 60% |                               /------/ [ 70°C , 70% ]
 40% |                       /------/ [ 60°C , 50% ]
 20% |  [ 40°C , 0-30% ]----/
  0% +----------------------------------------------------- GPU Temp (°C)
        30°C    40°C    50°C    60°C    70°C    80°C
- Node 1 (Idle):
40°Cat0%or30%Fan Speed. (If your GPU supports Zero RPM mode, set this to 0% so fans stay off during desktop browsing). - Node 2 (Warm-Up):
50°Cat40%Fan Speed. - Node 3 (Moderate Gaming):
60°Cat50%Fan Speed. - Node 4 (Heavy Load Target):
70°Cat70%Fan Speed. - Node 5 (Safety Threshold):
80°Cat100%Fan Speed.
Step 4: Save and Apply Settings on Windows Boot
Creating the fan curve is only effective if MSI Afterburner automatically applies the profile whenever you power on your PC.
- Click Apply and OK on the Settings menu.
- On the main MSI Afterburner interface, ensure the User Define button (the small fan icon next to the fan speed slider) is highlighted/activated.
- Click the Windows Startup button (top-right or bottom-left depending on the active skin) so it illuminates blue.
- Save your configuration to a profile slot (click the Save (Floppy Disk) icon, then select a profile number like 1).
Step 5: Verify Fan Curves with Stress Testing
After saving your fan curve, verify thermal stability under heavy synthetic load:
- Launch a GPU benchmarking utility such as 3DMark Time Spy, UNIGINE Heaven, or FurMark.
- Run the stress test for 15–20 minutes to allow your GPU heat sink to reach full saturation.
- Observe peak temperatures:
- If your GPU stays under 75°C, your fan curve is successful.
- If noise levels are too loud, slightly drop the fan speed percentage at the 60°C and 70°C nodes.
- If temperatures exceed 80°C, increase fan speed percentages across high-temperature nodes and consider improving your PC case airflow.
Extra Tips to Improve GPU Thermal Performance
- Optimize PC Case Airflow: Ensure your PC intake fans pull sufficient cool air from the front/bottom, while exhaust fans push hot air out the top/rear.
- Repaste Older Graphics Cards: Thermal paste between the GPU core and heatsink degrades over 2–4 years. Re-applying high-quality thermal paste can drop temperatures by 5°C to 15°C.
- Undervolt Your GPU: Lowering core voltage slightly via MSI Afterburner’s Curve Editor (
Ctrl + F) significantly cuts power draw and heat generation without dropping boost clock speeds.
Frequently Asked Questions (FAQ)
Q1: Does running GPU fans at 100% speed shorten their lifespan?
A: Running fans at maximum speed continuously increases mechanical wear on fluid dynamic or ball bearings over time. Designing a curve that keeps fans around 60%–75% under load preserves bearing life while providing adequate cooling.
Q2: Why do my custom fan settings reset after restarting my PC?
A: Make sure the Startup button in MSI Afterburner is highlighted. Also, check Windows Task Manager to ensure MSI Afterburner is allowed to run on startup.
Q3: What is temperature hysteresis in MSI Afterburner?
A: Hysteresis adds a temperature delay buffer before fans ramp down. A 5°C hysteresis means if your GPU hits 70°C and fans ramp up, they will stay at that speed until the temperature drops back down to 65°C, preventing erratic fan noise spikes.
Q4: Can MSI Afterburner damage my graphics card?
A: Adjusting fan speeds in MSI Afterburner is completely safe. Safety limits built into the GPU hardware (vBIOS) will automatically throttle or shut down the card long before physical damage can occur from high temperatures.
Q5: Should I use Zero RPM mode on my GPU?
A: Yes, Zero RPM mode stops fan spin completely when the GPU is idle (under 50°C–55°C), reducing dust accumulation and bearing wear during basic desktop use.
Q6: What is the difference between Hotspot Temperature and GPU Temperature?
A: “GPU Temperature” measures the average thermal reading across the silicon die. “Hotspot Temperature” represents the hottest single sensor on the chip, usually running 10°C to 15°C higher than the edge temperature.
Q7: Why are my fans ignoring my custom MSI Afterburner curve?
A: Ensure the User Define icon on the main screen is active. Additionally, check that vendor software (like ASUS GPU Tweak or Gigabyte Control Center) isn’t overriding MSI Afterburner settings in the background.
Q8: Does a custom fan curve lower in-game temperatures for laptops?
A: Laptop GPUs often rely on unified cooling systems managed by manufacturer embedded controllers (EC). While MSI Afterburner can monitor laptops, manual fan curve overrides often require proprietary brand software (e.g., Lenovo Vantage, ASUS Armoury Crate).
Q9: Will lowering GPU temperatures increase frame rates?
A: Yes. Modern GPUs use algorithms (such as NVIDIA GPU Boost or AMD Precision Boost) that scale clock speeds higher when operating within cooler thermal windows.
Q10: What fan speed update period should I set?
A: Setting the fan speed update period between 3000 ms and 5000 ms is ideal. This ensures smooth fan transitions instead of jarring volume changes every fraction of a second.
Conclusion
Setting up a custom fan curve in MSI Afterburner is one of the most effective ways to stabilize graphics card thermal performance during long gaming sessions. By mapping clear temperature-to-fan-speed steps, balancing acoustic noise levels, and setting an appropriate hysteresis buffer, you can eliminate thermal throttling, maintain stable boost clocks, and protect your hardware investment over time.
Leave a Reply