Blog

  • Why does my game keep crashing to desktop without giving any error message or warning sign

    Why does my game keep crashing to desktop without giving any error message or warning sign

    Why Does My Game Keep Crashing to Desktop Without Any Error Message or Warning Sign?

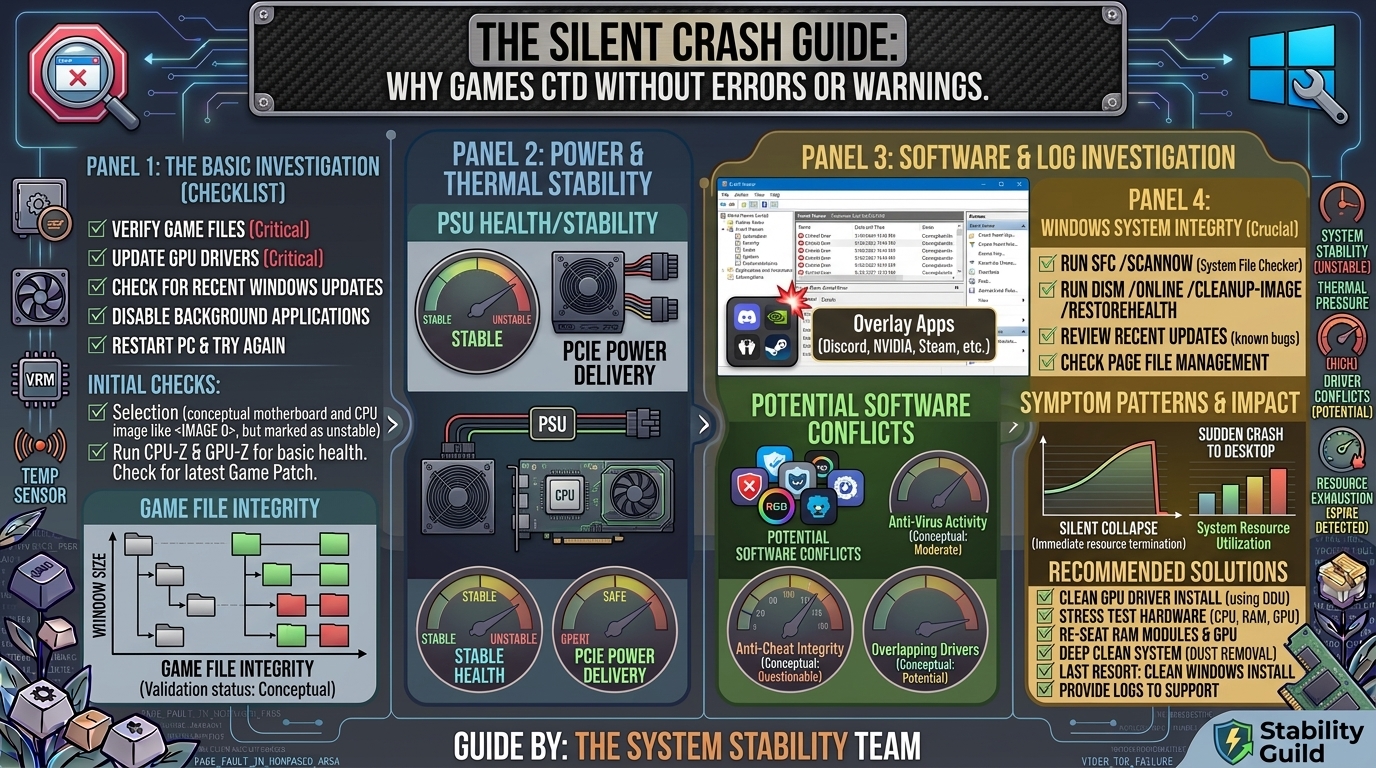
    Few things in PC gaming are as frustrating as a silent crash to desktop (CTD). One moment you are immersed in an intense match or exploring an open world, and the next, your screen instantly closes down back to your desktop without an error code, crash log, or warning dialog.

    When a game crashes without displaying an error, it usually means the operating system or hardware forced the application to shut down before the game’s internal diagnostic tool could process the failure. This comprehensive guide breaks down the core causes of silent CTDs, step-by-step diagnostic workflows, and proven solutions to get your system back to peak gaming stability.

    Quick Diagnostic Checklist: Common Causes of Silent Crashes

    Before diving into deep system modifications, review this overview of what typically triggers an abrupt exit to the desktop:

    CategoryPrimary TriggerWhy It Causes a Silent CTD
    GPU DriversCorrupted or outdated display driversDriver timeout (TDR) resets the graphics pipeline instantly.
    RAM / MemoryMemory leaks, bad sticks, or unstable XMP/EXPOWindows terminates apps immediately upon memory read/write failure.
    Background AppsOverlays (Discord, Steam, RivaTuner) & Anti-CheatSoftware conflicts force instantaneous thread termination.
    System FilesMissing DirectX runtime or Visual C++ RedistributablesMissing execution files break rendering loops without alert boxes.
    Power & TempsGPU/CPU thermal throttling or PSU power spikesHardware safety cuts process threads under extreme thermal stress.
    Pagefile SizeDisabled or under-allocated Virtual Memory (VRAM overflow)Running out of virtual memory forces Windows to kill the heaviest process.

    1. Check Event Viewer & Reliability Monitor

    Even if no popup error message appears on screen, Windows almost always records the exact moment of the crash in its underlying system logs.

    1. Press Windows Key + R, type perfmon /rel, and press Enter to launch Reliability Monitor.
    2. Look for red critical icons on the timeline corresponding to the time your game crashed.
    3. Double-click the event (e.g., “Stopped working” or “Application Error”).
    4. Check the Fault Module Name and Exception Code:
      • 0xc0000005: Memory Access Violation (indicates RAM issues, unstable XMP, or anti-cheat conflicts).
      • nvlddmkm.sys / atikmdag.sys: NVIDIA/AMD Graphics Driver Crash.
      • d3d11.dll / dxgi.dll: DirectX Pipeline Error.

    2. Perform a Clean GPU Driver Reinstall (DDU Method)

    Updating your GPU drivers through standard express installers can leave behind corrupted cache files or mismatched registry keys. A clean installation via Display Driver Uninstaller (DDU) eliminates driver residue completely.

    1. Download the latest driver for your GPU from the official NVIDIA, AMD, or Intel website.
    2. Download Display Driver Uninstaller (DDU) from a verified source.
    3. Boot your PC into Safe Mode:
      • Hold Shift while clicking Restart in the Start Menu.
      • Navigate to Troubleshoot > Advanced options > Startup Settings > Restart.
      • Press 4 or F4 to enable Safe Mode.
    4. Run DDU in Safe Mode, select your device type (GPU), and click Clean and restart.
    5. Once Windows reboots normally, disconnect your internet connection (to prevent Windows Update from installing a generic driver) and install your downloaded driver package.

    3. Test RAM Stability (Disable XMP / EXPO)

    RAM instability is one of the single most frequent causes of games closing without an error. Extreme Memory Profiles (XMP on Intel, EXPO on AMD) are technically factory overclocks. If your motherboard or memory controller struggles with those speeds, games will silently collapse.

    • Disable Overclocks: Restart your PC, enter your BIOS/UEFI (usually via DEL or F2), and turn off XMP or EXPO. Test your game at standard base frequency (e.g., 2133 MHz – 4800 MHz depending on DDR4/DDR5).
    • Run Windows Memory Diagnostic: Press Windows Key + R, type mdsched.exe, and choose Restart now and check for problems.
    • Run MemTest86: For deep testing, create a bootable USB with MemTest86 and let it run for 4 full passes to verify individual stick stability.

    4. Configure Virtual Memory (Pagefile)

    If your system runs out of physical RAM and your Virtual Memory (Pagefile) is set too low or disabled, Windows instantly kills memory-heavy applications like modern AAA games without warning to prevent a full system blue screen (BSOD).

    1. Press Windows Key + R, type sysdm.cpl, and hit Enter.
    2. Go to the Advanced tab and click Settings under Performance.
    3. Go to the Advanced tab again and click Change under Virtual memory.
    4. Uncheck Automatically manage paging file size for all drives.
    5. Select your fastest drive (NVMe/SSD) and select System managed size, or manually set:
      • Initial size: 1.5 x your RAM size (e.g., 24576 MB for 16GB RAM).
      • Maximum size: 3 x your RAM size (e.g., 49152 MB for 16GB RAM).
    6. Click Set, then OK, and restart your PC.

    5. Disable Conflicting Overlays and Background Applications

    Third-party software that attempts to inject code into your game’s visual pipeline can trigger silent crashes.

    • Disable Overlays: Turn off the overlay feature in Discord, GeForce Experience / NVIDIA App, Steam, EA App, and Ubisoft Connect.
    • Disable RivaTuner Statistics Server (RTSS) & MSI Afterburner: Turn off custom frame-rate limiters or hardware monitoring overlays temporarily.
    • Perform a Clean Boot:
      1. Press Windows Key + R, type msconfig, and open System Configuration.
      2. Go to the Services tab, check Hide all Microsoft services, and click Disable all.
      3. Open Task Manager, go to the Startup tab, and disable non-essential startup programs.
      4. Reboot and test your game.

    6. Repair System Files and Game Files

    Corrupted game assets or missing Windows dependencies will interrupt execution instantly.

    • Verify Integrity of Game Files:
      • Steam: Right-click game > Properties > Installed Files > Verify integrity of game files.
      • Epic Games: Click the three dots on the game tile > Manage > Verify.
      • Battle.net / Xbox App: Select Options / Manage > Scan and Repair.
    • Run SFC and DISM Scans:
      1. Open Command Prompt as Administrator.
      2. Type sfc /scannow and press Enter.
      3. After completion, type DISM /Online /Cleanup-Image /RestoreHealth and press Enter.
    • Reinstall Runtimes: Ensure you have the latest Microsoft Visual C++ Redistributable All-in-One package and updated DirectX End-User Runtimes installed on your system.

    Frequently Asked Questions (FAQ)

    Q1: Why does my game crash without showing any error code?

    A: Silent crashes typically occur when an unhandled system-level exception occurs. Windows or your GPU driver terminates the game process immediately due to memory access violations, driver timeouts, or hardware thermal protections before the game can generate a diagnostic popup.

    Q2: Can an unstable RAM overclock cause silent crashes?

    A: Yes. Unstable RAM timings or unstable XMP/EXPO profiles frequently cause data corruption in volatile memory. Windows detects the read/write fault and closes the process instantly to avoid corrupting your operating system.

    Q3: How do I know if my GPU is causing the crash?

    A: Check the Windows Reliability Monitor (perfmon /rel) or Event Viewer. Look for LiveKernelEvent code 141 or 119, or faulting module names referencing nvlddmkm.sys (NVIDIA) or atikmdag.sys (AMD).

    Q4: Will running out of Virtual Memory cause a crash to desktop?

    A: Absolutely. If physical RAM fills up and your pagefile is disabled or restricted, Windows will abruptly kill the application consuming the most memory without displaying a warning dialog.

    Q5: Why do games crash only after 15–30 minutes of gameplay?

    A: Delayed crashes usually indicate continuous heat buildup (thermal throttling of the CPU/GPU), progressive memory leaks within the game software, or power supply unit (PSU) instability under sustained load.

    Q6: Can anti-cheat software cause games to close randomly?

    A: Yes. Modern kernel-level anti-cheat programs (like Easy Anti-Cheat, BattlEye, or Vanguard) will close a game immediately without notification if they detect blacklisted background software, conflicting injection software, or corrupted anti-cheat service files.

    Q7: How does DirectX 12 affect silent crashes?

    A: DirectX 12 places lower-level memory management responsibilities on game developers compared to DirectX 11. If a game’s DX12 implementation encounters a pipeline stall or buffer mismatch, it often terminates directly to desktop instead of falling back smoothly.

    Q8: Can a weak Power Supply Unit (PSU) trigger desktop crashes?

    A: Yes. High-end GPUs draw sudden transient power spikes during intense rendering. If your PSU cannot supply clean power during a spike, the GPU drops power momentarily, triggering a graphics reset that drops you back to desktop.

    Q9: Does Windows Game Mode help prevent crashes?

    A: Windows Game Mode prioritizes CPU and GPU resources for active gaming threads. While it generally improves performance, disabling Windows Game Mode can sometimes resolve weird compatibility crashes caused by system thread allocation bugs.

    Q10: What should I do if every fix fails?

    A: If manual file repairs and driver reinstallations do not solve the issue, run a dedicated stress test (like 3DMark or FurMark) to isolate hardware instability. If synthetic stress tests also crash, you may be dealing with a physically degrading hardware component (such as bad VRAM, degraded CPU, or failing storage drive).

    Summary

    Diagnosing a silent crash to desktop requires systematically eliminating variables. Start by inspecting Windows Reliability Monitor to identify underlying event codes. From there, execute a clean GPU driver reinstallation using DDU, verify RAM stability by disabling XMP/EXPO, increase your virtual memory allocation, and disable invasive third-party overlays. Methodically working through these steps isolates the conflict and restores seamless stability to your gaming sessions.
  • How to enable and configure resizable bar in bios for performance boosts in modern graphics cards

    How to enable and configure resizable bar in bios for performance boosts in modern graphics cards

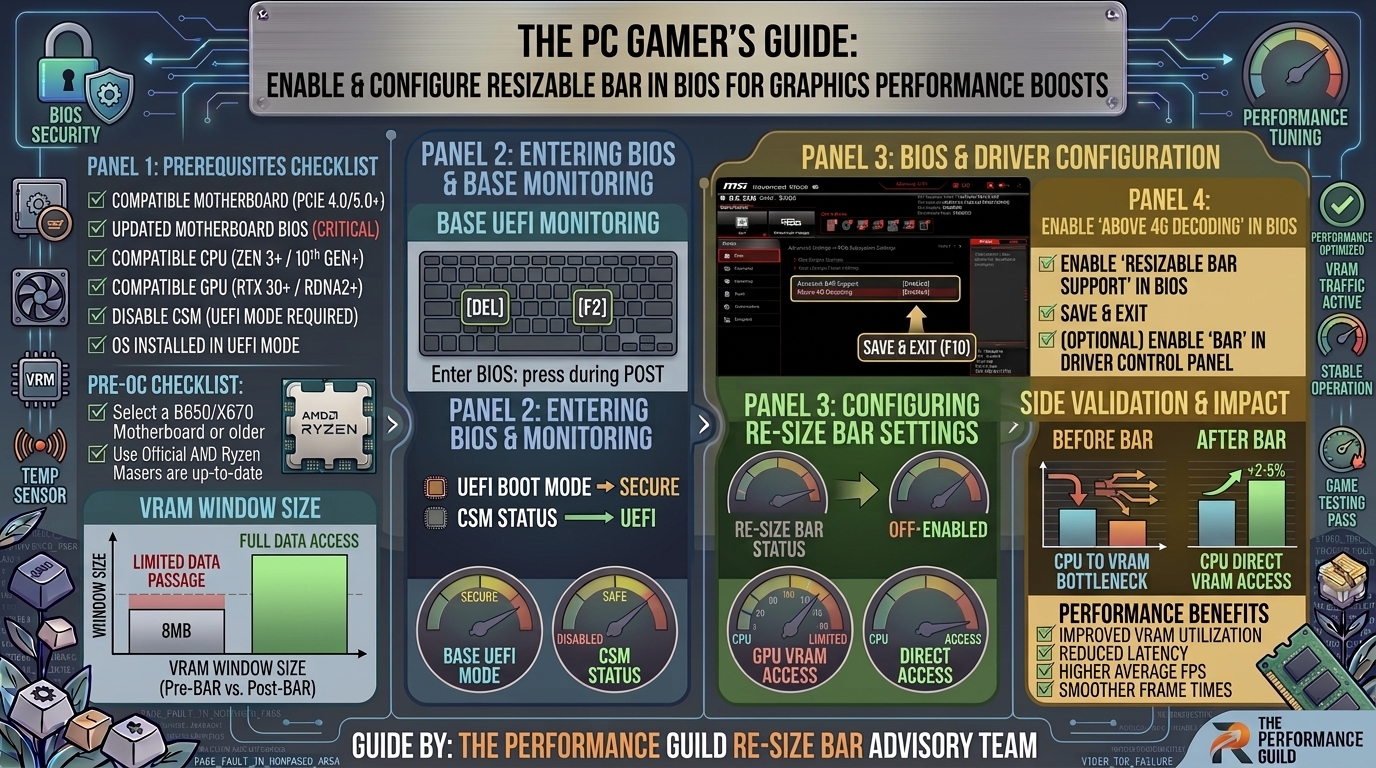
    How to Enable and Configure Resizable BAR in BIOS for Performance Boosts in Modern Graphics Cards

    Modern video games demand unprecedented data transfer rates between your System RAM, Central Processing Unit (CPU), and Graphics Processing Unit (GPU). As render resolutions scale to 4K, textures grow to massive sizes, and ray tracing pipelines saturate system buses, traditional hardware communication bottlenecks can restrict overall frame rate output.

    Enter Resizable BAR (Base Address Register)—an advanced PCI Express (PCIe) interface technology that fundamentally restructures how your processor communicates with your graphics card’s video memory (VRAM). When enabled and properly configured, Resizable BAR unlocks significant performance boosts, stabilizes 1% low frame rates, and eliminates texture streaming stutters across a vast library of modern PC titles.

    This comprehensive guide breaks down the underlying technology, system compatibility requirements, step-by-step BIOS configuration procedures across major motherboard vendors, and critical troubleshooting steps to ensure your rig achieves maximum gaming performance.

    1. What Is Resizable BAR and How Does It Work?

    To understand why Resizable BAR is a game-changer for PC gaming performance, you must first understand how traditional PCIe communication works.

    Traditional PCIe Transfer (256 MB Blocks):
    [CPU] ──(256 MB)──> [256 MB] ──(256 MB)──> [256 MB] ──> [GPU VRAM]
    (Multiple small transactions create queuing bottlenecks)
    
    Resizable BAR PCIe Transfer (Full VRAM Access):
    [CPU] ───────────────────────(Full 16 GB Access)───────────────────────> [GPU VRAM]
    (CPU directly requests and transfers assets instantly as needed)
    

    The Legacy 256 MB Bottleneck

    For decades, standard PCI Express architecture dictated that the CPU could only negotiate transfers to GPU video memory in rigid 256 Megabyte (MB) chunks. This limitation was established during the 32-bit computing era, long before modern games began requiring 8 GB, 12 GB, or 16 GB+ of VRAM to hold high-resolution assets.

    Under the traditional 256 MB limit:

    • If a game engine needed to transfer 4 GB of character models, lighting maps, and texture packs from System RAM to VRAM, the CPU had to break that payload into 16 separate transfers.
    • These transfers queued up on the PCIe bus, forcing execution threads to wait and creating momentary latency spikes—commonly experienced by players as micro-stutters or dropped frames.

    The Resizable BAR Solution

    Resizable BAR (part of the official PCIe 3.0 specifications and expanded in PCIe 4.0/5.0) removes this arbitrary block limitation. It enables the CPU to dynamically negotiate the size of the Base Address Register mapped to the GPU.

    Instead of a narrow 256 MB pipe, the CPU gains direct, simultaneous access to the entire VRAM frame buffer. The CPU can request single assets, small shaders, or multi-gigabyte texture packages in a single transaction, dramatically reducing bus overhead and pipeline stalls.

    2. Platform Branding: Resizable BAR vs. Smart Access Memory (SAM)

    Depending on your hardware ecosystem, you will see different terms used for the same underlying PCI Express feature:

    • AMD Smart Access Memory (SAM): AMD’s marketing name for Resizable BAR when combining an AMD Ryzen CPU, an AMD 500-series or 600-series motherboard, and an AMD Radeon RX 6000 or RX 7000 series GPU. AMD SAM includes additional driver-level software optimizations tailored for all-AMD hardware builds.
    • Nvidia Resizable BAR (ReBAR): Nvidia’s implementation for GeForce RTX 30-series (Ampere), RTX 40-series (Ada Lovelace), and newer graphics cards.
    • Intel Resizable BAR: Supported across Intel Arc GPUs and 10th Gen to 14th Gen Intel Core desktop processors. (Note: Intel Arc GPUs require Resizable BAR enabled for playable frame rates).

    Core Fact: Whether labeled as SAM or Resizable BAR, the feature relies on identical motherboard BIOS mechanisms: Above 4G Decoding and Re-Size BAR Support.

    3. System Hardware & Software Requirements

    Before attempting to enable Resizable BAR in your motherboard BIOS, ensure your hardware platform meets all necessary compatibility checks across the CPU, GPU, motherboard, and operating system.

    Hardware Compatibility Overview

    ComponentMinimum Compatibility RequirementRecommended / Ideal Setup
    Operating SystemWindows 10 64-bit (v2004 or newer)Windows 11 64-bit (UEFI native)
    Drive PartitioningGPT (GUID Partition Table)GPT (CSM/MBR mode is strictly unsupported)
    Graphics CardNvidia RTX 3060 or higher / AMD RX 6000 series / Intel Arc A-SeriesRTX 40-Series / RX 7000-Series / Intel Arc B-Series
    Processor (CPU)Intel 10th Gen Core (vBIOS update may be needed) / AMD Ryzen 3000 Series (excl. Ryzen 3 3200G/3400G)Intel 12th–14th Gen / AMD Ryzen 5000, 7000, or 9000 Series
    Motherboard ChipsetIntel 400-series / AMD 400-seriesIntel 600/700-series / AMD 600/800-series

    Critical Requirement: GPT Partition & UEFI Mode

    Resizable BAR cannot function in Legacy BIOS (CSM) mode or on hard drives using the old MBR (Master Boot Record) partition table.

    To verify your partition style in Windows:

    1. Right-click the Windows Start Button and select Disk Management.
    2. Right-click Disk 0 (your primary Windows boot drive) and select Properties.
    3. Click the Volumes tab.
    4. Locate Partition style: It MUST say GUID Partition Table (GPT).
    [System Check Workflow]
                 │
                 ├──> Drive Partitioning = MBR? ──> Convert to GPT via mbr2gpt tool in Windows
                 │
                 └──> Drive Partitioning = GPT? ──> Proceed directly to BIOS configuration
    

    If your drive shows Master Boot Record (MBR), you must convert it to GPT using Windows’ built-in mbr2gpt.exe command tool before disabling CSM in BIOS, or your system will fail to boot into Windows.

    4. Step-by-Step BIOS Configuration Guide

    Because every motherboard manufacturer organizes setup menus slightly differently, follow the specific guide below for your motherboard brand (ASUS, MSI, Gigabyte, or ASRock).

    Step 1: Pre-BIOS Preparation

    1. Ensure your graphics card drivers are updated to the latest available version via Nvidia GeForce Experience / App, AMD Software: Adrenalin Edition, or Intel Arc Control.
    2. Save any open work and restart your computer.
    3. During the initial boot splash screen, repeatedly press the designated key to enter BIOS/UEFI setup (typically Delete or F2).

    Step 2: Motherboard Brand Instructions

    ASUS Motherboards (ROG, TUF, Prime)

    1. Once inside the ASUS BIOS, press F7 to switch to Advanced Mode.
    2. Navigate to the Advanced tab using the top menu.
    3. Select PCI Subsystem Settings.
    4. Locate Above 4G Decoding and set it to Enabled.
    5. Once Above 4G Decoding is enabled, the Re-Size BAR Support option will become visible.
    6. Set Re-Size BAR Support to Auto (or Enabled).
    7. Navigate to the Boot tab and select CSM (Compatibility Support Module).
    8. Set Launch CSM to Disabled.
    9. Press F10 to Save Changes & Reboot.

    MSI Motherboards (MPG, MAG, PRO)

    1. Press F7 to toggle to Advanced Mode (EZ Mode does not reveal full PCIe submenus).
    2. Go to Settings ──> Advanced ──> PCIe / PCI Subsystem Settings.
    3. Change Above 4G Memory/Crypto Currency Mining to Enabled.
    4. Change Re-Size BAR Support to Auto (or Enabled).
    5. Navigate back to Settings ──> Boot.
    6. Ensure Boot mode select is set to UEFI (not Legacy/CSM).
    7. Press F10 to Save and Exit.

    Gigabyte / AORUS Motherboards

    1. Press F2 if necessary to enter Advanced Mode.
    2. Navigate to the Settings tab at the top of the screen.
    3. Select IO Ports (or PCIe Subsystem Settings on older revisions).
    4. Locate Above 4G Decoding and change to Enabled.
    5. Locate Re-Size BAR Support and change from Disabled to Auto.
    6. Switch to the Boot tab on the top menu.
    7. Locate CSM Support and set it to Disabled.
    8. Press F10 to Save Changes and Reboot.

    ASRock Motherboards

    1. Click on the Advanced tab at the top navigation bar.
    2. Select PCI Configuration.
    3. Toggle Above 4G Decoding to Enabled.
    4. Set Re-Size BAR Support to Auto.
    5. Go to the Boot tab along the top.
    6. Scroll down to CSM (Compatibility Support Module) and set it to Disabled.
    7. Press F10 to Save Changes and restart.

    5. Verifying Resizable BAR Activation in Windows

    After configuring your BIOS and booting back into Windows, verify that Resizable BAR is active using any of these three quick methods:

    [Verification Methods]
            │
            ├──> Method 1: Nvidia Control Panel (System Information ──> Resizable BAR: Yes)
            ├──> Method 2: AMD Software Adrenalin (Performance ──> Tuning ──> AMD Smart Access Memory: Enabled)
            └──> Method 3: GPU-Z Utility (Advanced Tab ──> Resizable BAR ──> All Checks Green)
    

    Method 1: Nvidia Control Panel

    1. Right-click on your desktop and select Nvidia Control Panel.
    2. Click on System Information in the bottom-left corner of the window.
    3. In the Details list under the Display tab, look for Resizable BAR.
    4. If configured correctly, it will state Yes.

    Method 2: AMD Software: Adrenalin Edition

    1. Right-click your desktop and open AMD Software.
    2. Go to the Performance tab, then select Tuning.
    3. Scroll down to the bottom right of the panel.
    4. Locate AMD Smart Access Memory. The toggle switch should show Enabled.

    Method 3: GPU-Z Utility (Universal)

    1. Download and run the free utility TechPowerUp GPU-Z.
    2. On the main Graphics Card tab, look at the bottom right corner for the Resizable BAR field (it will display Enabled or Disabled).
    3. Click on the Advanced tab along the top, select Resizable BAR from the dropdown menu, and review the detailed check log. If any requirement fails (such as CSM Enabled or No GPT Partition), GPU-Z will highlight the exact issue.

    6. Real-World Performance Impact & Game Scaling

    Resizable BAR is not a magic bullet that boosts frame rates across every application equally; its impact depends heavily on game engine design, render API (DirectX 12 vs. Vulkan vs. DirectX 11), and hardware resolution.

    Game Performance Scaling Profile

    [Performance Gains Across Titles]
    +15% to +24%  ████████████████████████  (Assassin's Creed Valhalla, Forza Horizon 5)
     +5% to +12%  ██████████████            (Cyberpunk 2077, Red Dead Redemption 2)
      0% to +3%   ████                     (Competitive eSports at 1080p, CS2, Valorant)
     -1% to -3%   █                        (Select legacy DX11 games - handled via driver profiles)
    

    Where You Will See the Biggest Gains

    • Open-World Titles: Games with seamless world streaming (like Forza Horizon 5, Cyberpunk 2077, and Horizon Zero Dawn) benefit enormously from instantly accessible VRAM blocks.
    • 1% and 0.1% Low Frame Rates: Even in games where average FPS only rises by 3% to 5%, Resizable BAR dramatically lifts 1% low frame rates. This cleans up frame-time spikes and eliminates stuttering during sharp turns, high-speed travel, or chaotic explosion sequences.
    • High Resolutions (1440p & 4K): As asset size grows at higher resolutions, rendering pipelines saturate traditional bus transfers faster. ReBAR shines brightest when pushing heavy 4K texture packages.

    Driver-Enforced Whitelisting

    Both Nvidia and AMD maintain driver-level whitelists within their display drivers. If a game experiences negative scaling (a minor performance loss) when Resizable BAR is active, the graphics driver automatically turns ReBAR off for that specific game executable while keeping it active globally for supported titles.

    7. Frequently Asked Questions (FAQ)

    1. Will enabling Resizable BAR increase my GPU temperatures or power consumption?

    No. Resizable BAR changes how data is organized and transferred across the PCI Express interface; it does not increase clock speeds, alter core voltages, or force the GPU to draw more wattage. Thermal and power signatures remain within standard operational specifications.

    2. My PC won’t boot into Windows after disabling CSM in the BIOS. What happened?

    If your computer boots directly back into the BIOS screen or displays a “No Bootable Device Found” error after disabling CSM, your Windows installation drive is partitioned using MBR (Master Boot Record) instead of GPT. Re-enable CSM in BIOS to boot back into Windows safely, run the mbr2gpt conversion tool, and then return to BIOS to turn off CSM.

    3. Does Resizable BAR work on PCIe 3.0 motherboards?

    Yes. Although Resizable BAR is highlighted alongside PCIe 4.0 and PCIe 5.0 platforms, the feature is fundamentally part of the PCI Express specification back to PCIe 3.0. Many Intel 400-series and AMD 400-series PCIe 3.0 motherboards support Resizable BAR through BIOS firmware updates provided by vendors.

    4. Can I enable Resizable BAR on an Nvidia RTX 20-Series (Turing) card?

    Officially, Nvidia restricted Resizable BAR support to RTX 30-Series (Ampere), RTX 40-Series (Ada Lovelace), and newer GPUs. RTX 20-series (RTX 2080 Ti, 2070, etc.) and GTX 10-series cards do not support official driver-level Resizable BAR integration.

    5. Why does GPU-Z show “Resizable BAR Enabled in BIOS: Yes” but “GPU Supported: No”?

    If you own an early production Nvidia RTX 30-series graphics card (such as an early RTX 3070 or 3080 purchased at launch), your card shipped with an older video BIOS (vBIOS) flashed before Resizable BAR support was finalized. You must download the official vBIOS update utility from your graphics card manufacturer (ASUS, EVGA, MSI, Gigabyte) to update your GPU firmware.

    6. Is Intel Arc GPU performance heavily dependent on Resizable BAR?

    Yes. Intel Arc graphics architecture is designed around direct high-speed memory transactions. Running an Intel Arc GPU on a system without Resizable BAR can cause severe performance drops ranging between 20% and 40% across modern games.

    7. Does Resizable BAR work with SLI or dual GPU configurations?

    Multi-GPU setups (SLI or Crossfire) are generally legacy technologies not supported by modern game engines or current driver whitelists for Resizable BAR. ReBAR optimizations target single-GPU setups running DirectX 12 or Vulkan pipelines.

    8. What is the difference between Above 4G Decoding and Resizable BAR in BIOS?

    • Above 4G Decoding is the underlying 64-bit addressing feature that allows system controllers to address memory spaces above the 4 GB boundary.
    • Resizable BAR is the specific PCIe function that uses Above 4G Decoding to resize VRAM allocation blocks. Above 4G Decoding must be enabled for Resizable BAR to appear or function.

    9. Can I force-enable Resizable BAR in games that are not whitelisted by Nvidia?

    Yes. Enthusiast tools like Nvidia Profile Inspector (NPI) allow users to manually set rBAR - Feature flags to Enabled on non-whitelisted game profiles. However, exercise caution: forcing ReBAR in unvalidated titles can occasionally cause texture flickering or minor performance degradation.

    10. Does enabling Resizable BAR affect system RAM stability or XMP/EXPO overclocks?

    No. Resizable BAR operates specifically over the PCIe bus lanes running between the CPU and the GPU interface. It does not alter DRAM frequencies, memory sub-timings, or memory controller voltages.

    Conclusion & Summary Checklist

    Enabling Resizable BAR is one of the most effective software-level performance optimizations available for modern gaming rigs. By restructuring PCIe bus communications, you give your processor direct access to your GPU’s full VRAM buffer—eliminating asset pipeline bottlenecks and elevating frame-time consistency.

    1. Confirm your Windows boot drive uses the GPT partition style.
    2. Boot into your motherboard BIOS/UEFI.
    3. Disable CSM (Compatibility Support Module) mode.
    4. Enable Above 4G Decoding and set Re-Size BAR Support to Auto/Enabled.
    5. Verify activation in Windows via Nvidia Control Panel, AMD Adrenalin, or TPU GPU-Z.

    Once configured, your system will automatically leverage expanded PCIe transfer blocks across all supported modern games for a smoother, higher-performing gameplay experience.

  • How to overclock your amd ryzen processor safely using official ryzen master software for better gaming performance

    How to overclock your amd ryzen processor safely using official ryzen master software for better gaming performance

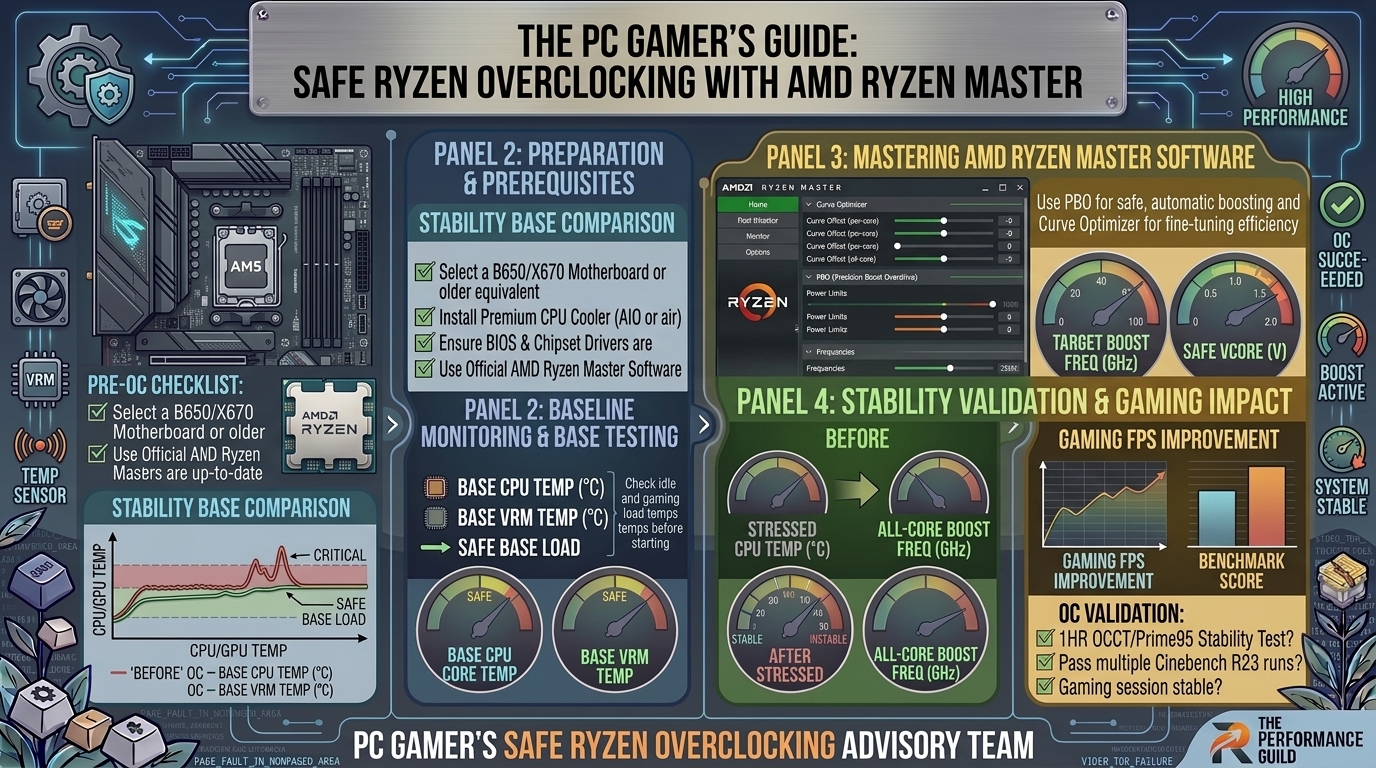
    How to Overclock Your AMD Ryzen Processor Safely Using Official Ryzen Master Software for Better Gaming Performance

    Modern competitive gaming demands every drop of performance your system can provide. Frame rates, low frame-time variance (1% lows), and crisp render latency often boil down to single-core and multi-core CPU performance.

    Historically, pushing a processor beyond its factory specifications meant navigating confusing BIOS screens, manually calculating voltage ratios, and running the risk of frying silicon. AMD changed the playing field with AMD Ryzen Master—an official, Windows-based tuning software designed to let gamers safely optimize Ryzen CPUs in real-time without diving into complex firmware.

    This complete guide breaks down how to use AMD Ryzen Master safely, maximize frame rates in heavy games, lower thermal output, and achieve rock-solid system stability.

    1. Prerequisites Before Overclocking Your Ryzen CPU

    Overclocking elevates performance by drawing more power and generating extra thermal output. Preparing your system beforehand ensures hardware safety and optimal performance gains.

    [System Check] ──> [Update BIOS & Drivers] ──> [Install Cooling & HWiNFO64] ──> [Safe Ryzen Master Tuning]
    

    Necessary Hardware Checklist

    • Cooling: Stock coolers (like the Wraith Stealth) are built for default thermal targets. A quality dual-tower air cooler or 240mm/360mm AIO liquid cooler is recommended for sustained overclocks.
    • Power Supply Unit (PSU): Ensure your PSU has at least 150W of headroom above your total system draw to handle transient voltage spikes.
    • Motherboard: AMD B-series (B450, B550, B650, B850) and X-series (X570, X670, X870) chipsets fully support CPU overclocking. A-series chipsets (A320, A520, A620) do not support CPU core tuning.

    Essential Software Tools

    1. AMD Ryzen Master: Download directly from AMD’s official support portal.
    2. HWiNFO64: For monitoring CPU Tdie temperatures, VCore voltages, and core clocks.
    3. Cinebench (R23 or 2024): Used for baseline and post-overclock CPU stress testing.
    4. 3DMark / Cyberpunk 2077 Benchmark: To measure real-world gaming FPS improvements.

    2. PBO vs. Curve Optimizer vs. Manual All-Core Overclocking

    Understanding AMD’s tuning mechanisms is critical for modern gaming workloads.

    Overclock MethodSingle-Core Speed (Gaming)Multi-Core Speed (Workloads)Thermal OutputRecommended For
    Precision Boost Overdrive (PBO)Very High (Dynamic)HighModerate – High95% of Gamers
    PBO + Curve Optimizer (Undervolting)MaximumMaximumLower / OptimizedBest Performance & Efficiency
    Manual All-Core OCLower (Loses Boost Clock)HighHighRender Rigs / Static Workloads

    Why Manual Static Overclocking Hurts Gaming Performance:

    Modern Ryzen CPUs (Zen 3, Zen 4, Zen 5) use intelligent boosting algorithms. A static manual overclock (e.g., locking all cores to 4.5GHz) prevents single cores from boosting up to 5.0GHz+ during light, high-frequency game threads. PBO + Curve Optimizer is the single best method for gaming.

    3. Step-by-Step Guide: Overclocking with AMD Ryzen Master

    Step 1: Install and Open Ryzen Master

    1. Install AMD Ryzen Master and restart your PC.
    2. Launch the application and accept the safety agreement warning.
    3. Switch to Advanced View using the toggle at the bottom left of the screen.

    Step 2: Establish Your Baseline

    1. Open Cinebench alongside HWiNFO64.
    2. Run a 10-minute multi-core test to record stock Cinebench scores, maximum CPU temperature (Tdie), and peak voltage (CPU VCore).
    3. Record these baseline numbers to verify your performance gains later.

    Step 3: Enable Precision Boost Overdrive (PBO)

    PBO relaxes the factory power limits (PPT, TDC, EDC) built into your processor:

    1. In Ryzen Master, select Profile 1 on the left menu.
    2. Under Control Mode, select Precision Boost Overdrive.
    3. Apply the settings. This allows your CPU to maintain higher boost clocks for longer durations as long as thermal room permits.
    PPT (Package Power Tracking): Max power delivered to CPU socket
    TDC (Thermal Design Current): Max current from motherboard VRMs under thermal load
    EDC (Electrical Design Current): Max peak current delivered during short bursts
    

    Step 4: Apply Curve Optimizer (The “Secret Sauce” for Gaming)

    Curve Optimizer shifts the voltage-to-frequency curve down. By feeding the CPU slightly less voltage per frequency step, it runs cooler, allowing PBO to boost to higher clock speeds without hitting thermal limits.

    Lower Voltage  ──>  Lower Temperatures  ──>  Higher Automatic PBO Boost Clocks
    
    1. Scroll down to the Curve Optimizer section inside Ryzen Master.
    2. Select All Cores mode.
    3. Set the sign to Negative.
    4. Start with a safe baseline value of -10.
    5. Click Apply & Test. Ryzen Master will reboot your PC to apply the profile.

    Step 5: Fine-Tuning Core Stability

    If -10 is stable after gaming and stress testing:

    1. Re-open Ryzen Master and increase the negative offset to -15, then -20.
    2. Most modern Ryzen silicon can handle between -15 and -25 on all cores.
    3. If your system crashes or encounters a blue screen (BSOD), your offset is too aggressive. Back off by 5 points (e.g., move from -25 back to -20).

    4. Special Optimization for Ryzen X3D Processors (3D V-Cache)

    If you own a Ryzen 7 5800X3D, 7800X3D, or 9800X3D, traditional voltage overclocking is locked in hardware to protect the sensitive 3D V-Cache stack.

    • Do NOT attempt manual static voltage changes on X3D processors.
    • DO use Curve Optimizer inside Ryzen Master: Setting a negative Curve Optimizer offset (typically -20 to -30) lowers thermals significantly on X3D chips, enabling them to sustain their peak 5.0GHz+ gaming boost clocks consistently without thermal throttling.

    5. Frequently Asked Questions (FAQ)

    1. Does overclocking with AMD Ryzen Master void my processor warranty?

    Using Ryzen Master to operate the CPU outside factory specifications technically falls under enthusiast tuning. However, because Ryzen Master relies on AMD’s built-in internal thermal and electrical safety limiters, it is vastly safer than manual BIOS voltage modifications.

    2. Is Ryzen Master tuning permanent, or do I need it running at all times?

    Changes made in Ryzen Master apply to the operating system level. If you close the app, your settings remain active until you shut down or reboot your PC. To apply changes permanently across restarts without running the app, apply the finalized values (such as Curve Optimizer offsets) directly inside your motherboard’s BIOS.

    3. What is the maximum safe CPU temperature for AMD Ryzen CPUs under load?

    For standard Ryzen 5000, 7000, and 9000 series processors, AMD specifies that operating temperatures up to 90°C–95°C under full multi-core stress are within design specifications. For optimal long-term health and maximum boost retention, target under 80°C during gaming sessions.

    4. Why did my PC crash to a Blue Screen (BSOD) after applying Curve Optimizer?

    A blue screen (such as WHEA_UNCORRECTABLE_ERROR or CLOCK_WATCHDOG_TIMEOUT) indicates that one or more CPU cores are not receiving enough voltage for their current clock frequency. Return to Ryzen Master and reduce your negative offset value (e.g., change from -25 to -15).

    5. Will overclocking my Ryzen CPU give me a massive FPS boost in all games?

    Gains depend on whether your game is CPU-bound or GPU-bound:

    • CPU-Bound Games (Valorant, CS2, Warzone, Rainbow Six Siege, Starfield): You will see noticeable frame rate increases and improved 1% low frame consistency.
    • GPU-Bound Games (Cyberpunk 2077 at 4K Ultra): FPS gains will be minimal, as your graphics card remains the primary performance limit.

    6. What is the difference between Eco Mode and PBO in Ryzen Master?

    PBO increases power limits to maximize performance. Eco Mode reduces the CPU’s target TDP (e.g., dropping a 105W CPU down to 65W target draw). Eco Mode drops temperatures by 15°C–20°C with only a tiny 2%–5% hit to gaming performance.

    7. Should I turn on Auto Overclocking mode in Ryzen Master?

    Auto Overclocking mode combines PBO with an automated boost clock override (adding +50MHz to +200MHz to peak frequency). While useful, it requires more voltage and creates extra heat. Enabling PBO + Negative Curve Optimizer generally yields better gaming thermals and higher sustained clocks.

    8. Is static all-core manual overclocking good for Ryzen CPUs?

    No. Static manual overclocking forces all CPU cores to run at a fixed frequency continuously. This degrades single-thread boost speeds essential for games, increases idle power usage, and generates unnecessary heat compared to dynamic PBO tuning.

    9. Can I overclock my RAM using AMD Ryzen Master?

    Yes. Ryzen Master allows you to adjust Memory Clock (MCLK), Fabric Clock (FCLK), and DRAM timings. However, enabling EXPO (AMD) or XMP (Intel profile) directly in your motherboard BIOS remains the safest and easiest way to ensure RAM stability.

    10. How do I completely reset Ryzen Master if my system becomes unstable?

    If your PC fails to boot into Windows after applying a profile, boot Windows into Safe Mode. Open Ryzen Master and select Reset to Default, or clear your motherboard’s CMOS battery to restore factory stock settings.

    Conclusion & Summary Checklist

    Overclocking modern AMD Ryzen processors is no longer about brute-force voltage. By utilizing Precision Boost Overdrive (PBO) alongside a Negative Curve Optimizer offset in AMD Ryzen Master, you can unlock higher sustained boost clock speeds, improve 1% low frame rates in games, and reduce your CPU’s operational temperatures.

  • What causes random blue screen of death errors only when playing heavy demanding video games on pc

    What causes random blue screen of death errors only when playing heavy demanding video games on pc

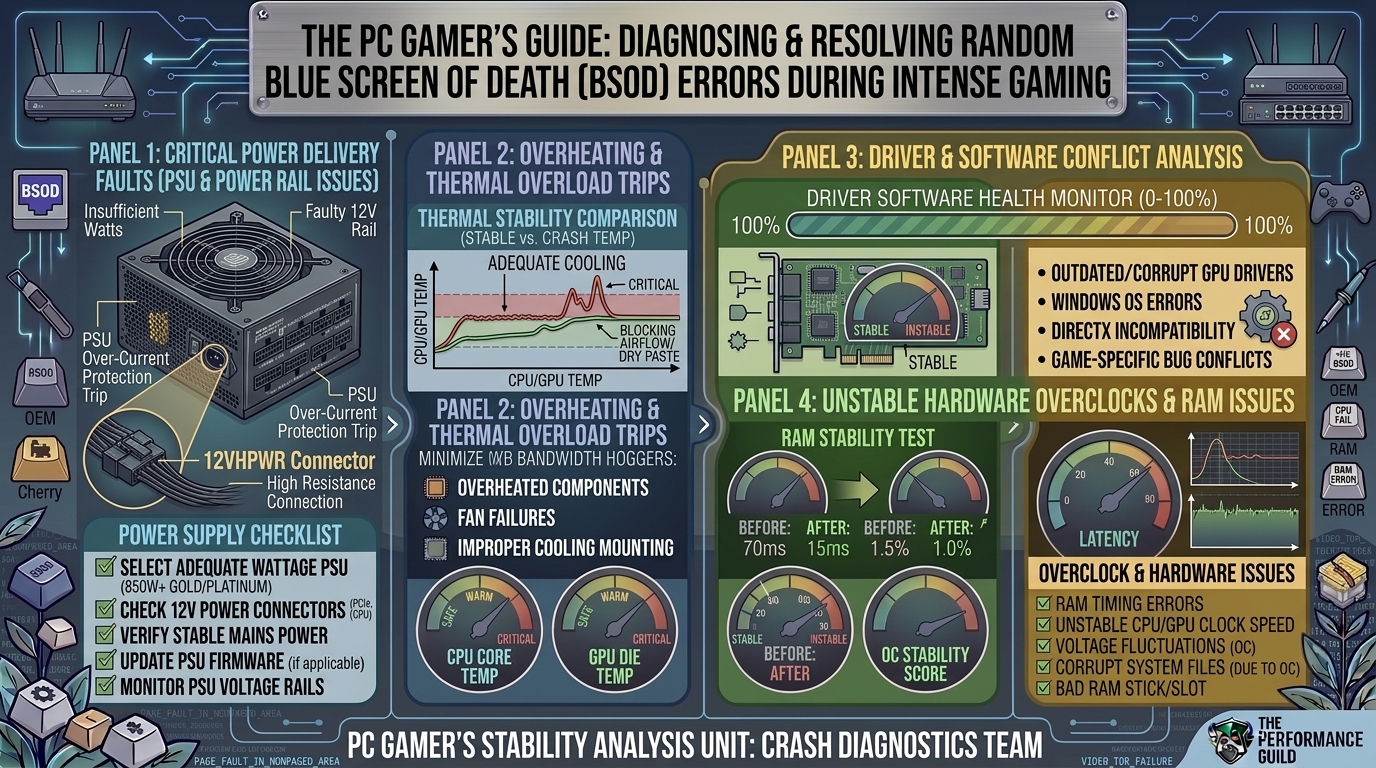
    What Causes Random Blue Screen of Death (BSOD) Errors Only When Playing Heavy Demanding Video Games on PC?

    Experiencing a Blue Screen of Death (BSOD) exclusively while playing demanding PC games is one of the most frustrating issues a gamer can face. Your system runs fine during web browsing, streaming, or office work, but within 10 to 30 minutes of launching intensive titles like Cyberpunk 2077, Call of Duty, or Unreal Engine 5 games, Windows crashes completely.

    This targeted crashing behavior points to a system component that fails under heavy stress, high power draw, elevated thermal levels, or rapid memory access. Below is a structured diagnosis guide to identify and resolve game-only BSOD crashes.

    1. Primary Causes of Load-Specific Gaming BSODs

    When modern games push hardware to its limit, they expose hidden vulnerabilities in system stability. The root causes generally fall into five core categories:

    A. Power Supply Unit (PSU) Transient Spikes & Instability

    Modern graphics cards (Nvidia RTX 40/30 series, AMD RX 7000/6000 series) experience sudden microsecond-long power spikes—known as transient spikes—where the GPU briefly draws up to 2x its rated TDP.

    • The Problem: If your PSU lacks sufficient wattage headroom, lacks multi-rail protections, or is aging, these sudden power demands drop the 12V rail voltage below threshold.
    • Resulting Errors: KERNEL_POWER (Event ID 41), SYSTEM_SERVICE_EXCEPTION, or immediate system reboots.

    B. Thermal Throttling & Hardware Overheating

    Under heavy load, CPUs and GPUs generate intense heat. While components are designed to thermal throttle to protect themselves, extreme temperature spikes can force an emergency Windows kernel shutdown.

    • Critical Thresholds: CPU temperatures exceeding 95°C or GPU Junction/Hotspot temperatures exceeding 105°C.
    • Resulting Errors: WHEA_UNCORRECTABLE_ERROR, CLOCK_WATCHDOG_TIMEOUT.

    C. Unstable RAM & XMP/EXPO Overclocks

    High-end games constantly stream vast amounts of assets in and out of System RAM.

    • The Problem: Extreme Memory Profiles (Intel XMP or AMD EXPO) are technically overclocks. A RAM module might pass simple desktop usage, but under high system temperatures and heavy memory bus saturation during gaming, bit flips occur.
    • Resulting Errors: MEMORY_MANAGEMENT, PAGE_FAULT_IN_NONPAGED_AREA, IRQL_NOT_LESS_OR_EQUAL.

    D. GPU Driver Corruption & TDR Failures

    Heavy games make intensive DirectX 12 / Vulkan calls to your display driver. If a display driver takes longer than 2 seconds to respond, Windows triggers Timeout Detection and Recovery (TDR). If the driver fails to reset, the system blue screens.

    • Resulting Errors: VIDEO_TDR_FAILURE (naming nvlddmkm.sys for Nvidia or atikmpag.sys for AMD), DRIVER_IRQL_NOT_LESS_OR_EQUAL.

    E. Storage Drive Degradation (NVMe/SSD Heat)

    Demanding games constantly stream assets from high-speed NVMe SSDs. M.2 SSDs positioned directly beneath hot graphics cards can suffer thermal throttling or memory controller failure under sustained loads.

    • Resulting Errors: CRITICAL_PROCESS_DIED, KERNEL_DATA_INPAGE_ERROR.

    2. Common BSOD Stop Codes During Gaming

    BSOD Error CodePrimary CulpritImmediate Action Required
    VIDEO_TDR_FAILUREGPU Driver / Overheated GPUClean install graphics drivers via DDU.
    WHEA_UNCORRECTABLE_ERRORCPU Voltage / Hardware InstabilityRemove CPU overclocks, check thermal paste.
    MEMORY_MANAGEMENTRAM Failure or XMP InstabilityDisable XMP/EXPO in BIOS; test RAM sticks individually.
    PAGE_FAULT_IN_NONPAGED_AREACorrupted Drivers / Bad VRAMRun sfc /scannow and test GPU memory.
    CLOCK_WATCHDOG_TIMEOUTCPU Core Hang / Unstable VoltageUpdate motherboard BIOS; check CPU temps under load.
    KERNEL_DATA_INPAGE_ERRORNVMe SSD Overheating / Drive FailureCheck drive SMART health and ensure heatsink is fitted.

    3. Step-by-Step Troubleshooting Workflow

    Follow this logical path to isolate and resolve game-only BSODs:

    [Start BSOD Diagnosis]
              │
              ├──> 1. Check Hardware Temps (HWiNFO64 under stress) ──> (>90°C?) ──> Repaste / Clean Dust
              │
              ├──> 2. Reinstall GPU Drivers (DDU in Safe Mode) ──────> Fixed? ────> Resolved
              │
              ├──> 3. Disable XMP/EXPO in BIOS ─────────────────────────> Fixed? ────> Adjust Memory Timings/Voltage
              │
              ├──> 4. Test RAM (MemTest86 / Windows Memory Diagnostic) ─> Errors? ──> Replace Bad RAM Stick
              │
              └──> 5. Stress Test PSU & GPU (OCCT Power Test) ─────────> Crash? ───> Upgrade Power Supply
    

    Step 1: Clean Install Graphics Drivers with DDU

    Corrupted GPU registry entries cause immediate crashes under DirectX 12 loads.

    1. Download Display Driver Uninstaller (DDU) and your latest GPU drivers (Nvidia/AMD/Intel).
    2. Reboot Windows into Safe Mode.
    3. Run DDU, select GPU, and click Clean and Restart.
    4. Reinstall the fresh graphics driver in normal Windows.

    Step 2: Disable XMP/EXPO & Test RAM

    1. Boot into system BIOS (press Delete or F2 on startup).
    2. Locate XMP (Intel) or EXPO / DOCP (AMD) and set it to Disabled (Default 2133MHz/4800MHz).
    3. Test your demanding game. If the crashing stops, your RAM module is unstable at its advertised overclocked profile and may require manual voltage or timing adjustments.

    Step 3: Monitor Thermals Under Load

    Download HWiNFO64 and run it in the background while playing a demanding game for 10 minutes.

    • Check CPU Package Temperature (keep under 85°C–90°C).
    • Check GPU Hotspot / Memory Junction (keep under 95°C–100°C).
    • Clean dust filters, replace thermal paste, or increase fan curves if limits are breached.

    Step 4: Run System File Repair Commands

    Game crashes often corrupt core OS dependencies.

    1. Open Command Prompt as Administrator.
    2. Type sfc /scannow and press Enter.
    3. Once complete, type DISM /Online /Cleanup-Image /RestoreHealth and press Enter.

    Step 5: Read Crash Dumps with WinDbg or BlueScreenView

    To stop guessing, read the exact memory dump Windows generates:

    1. Download BlueScreenView or Microsoft’s official WinDbg tool.
    2. Open the crash dump located at C:\Windows\Minidump.
    3. Look at the Caused By Driver column. If it points to nvlddmkm.sys (GPU), ntoskrnl.exe (Kernel/Memory), or Netadapter.sys (Network Driver), you have pinpointed the failing hardware interface.

    4. Frequently Asked Questions (FAQ)

    1. Why does my PC only blue screen during heavy games and not during standard use?

    Demanding games push system components to maximum capacity simultaneously. This triggers high power draw, maximum heat output, high memory utilization, and maximum GPU driver execution. Standard tasks (browsing, light software) do not stress hardware enough to trigger voltage drops, memory bit flips, or thermal limits.

    2. Can a bad Power Supply (PSU) cause a BSOD instead of just shutting off?

    Yes. While severe power loss causes an instant black screen, minor voltage drops on the 12V rail can cause system RAM or CPU calculations to miscalculate, leading to a kernel crash and a BSOD stop code like KERNEL_POWER or WHEA_UNCORRECTABLE_ERROR.

    3. Will updating my BIOS fix game-related blue screens?

    Updating your BIOS can resolve stability issues, especially on newer hardware platforms (AM5, Intel 13th/14th Gen). BIOS updates frequently improve memory compatibility profiles (XMP/EXPO), refine CPU power limits, and resolve PCIe lane stability issues during high GPU loads.

    4. How do I know if my GPU is physically failing or just has bad drivers?

    If clean installing drivers using DDU does not fix the issue, test the GPU in another PC or run FurMark. Physical GPU failure usually presents graphical artifacts (colored lines/dots) right before the BSOD, whereas driver issues cause clean, sudden crashes.

    5. Can anti-cheat software cause BSODs in multiplayer games?

    Yes. Kernel-level anti-cheat engines (such as Easy Anti-Cheat, BattlEye, or Vanguard) operate with driver-level permissions. Conflicts between anti-cheat drivers, Windows security features (Core Isolation/HVCI), or third-party antivirus applications can cause immediate BSODs upon game startup or server load.

    6. What is XMP/EXPO, and why does it cause gaming crashes?

    XMP (Intel) and EXPO (AMD) are pre-configured factory overclocks for your RAM. While memory manufacturers rate RAM for high speeds (e.g., DDR5 6000MHz), your specific CPU memory controller might not stably handle those speeds under high load, causing system memory corruption and crashes.

    7. How does a corrupted Windows Pagefile cause gaming BSODs?

    When games deplete physical VRAM or System RAM, Windows offloads data to the drive via pagefile.sys. If the storage drive contains bad sectors or the Pagefile is corrupted, reading from it under heavy game loads triggers PAGE_FAULT_IN_NONPAGED_AREA.

    8. Can daisy-chaining GPU power cables cause high-load BSODs?

    Yes. Using a single split PCIe power cable (“pigtail”) to supply power to high-draw GPUs can overheat the cable and limit power delivery during heavy loads. Always use separate, individual PCIe power cables running directly from the PSU to each power connector on the GPU.

    9. Why does ntoskrnl.exe appear as the cause in BlueScreenView?

    ntoskrnl.exe is the Windows OS Kernel. When BlueScreenView lists it as the culprit, it simply means another hardware component or driver forced the kernel to shut down. It is rarely an issue with Windows itself; look deeper into RAM, thermals, or drivers.

    10. Does overheating CPU thermal paste cause blue screens?

    Yes. Dried or improperly applied thermal paste prevents effective heat transfer to your CPU cooler. Under heavy gaming, CPU temperatures hit critical limits in seconds, causing thermal protection shutdowns or WHEA stop codes.

    Summary Checklist to Stop Gaming BSODs

    To resolve game-only BSOD crashes permanently:

    1. Perform a clean DDU reinstall of graphics drivers.
    2. Disable XMP/EXPO in BIOS to rule out memory instability.
    3. Monitor CPU/GPU thermals using HWiNFO64.
    4. Use independent PCIe cables from the PSU to your GPU.
    5. Run sfc /scannow and check Minidump logs to pinpoint offending hardware drivers.

    Eliminating these instability factors will restore your system’s load capacity and keep your PC stable during long, demanding gaming sessions.

  • How to fix high ping and packet loss issues in multiplayer games using wired ethernet cable connections

    How to fix high ping and packet loss issues in multiplayer games using wired ethernet cable connections

    An SEO-optimized article designed to rank on Google and provide high value to readers on thegamerbuzz.com is provided below.

    The content incorporates relevant target keywords naturally (“high ping fix ethernet”, “packet loss wired connection”, “Ethernet cable gaming low latency”, “Ethernet cat6 vs cat8 latency”), clear visual hierarchy (headings, bullet points, tables), direct answers to user search intent, and structural elements designed for search crawlers and reader engagement.

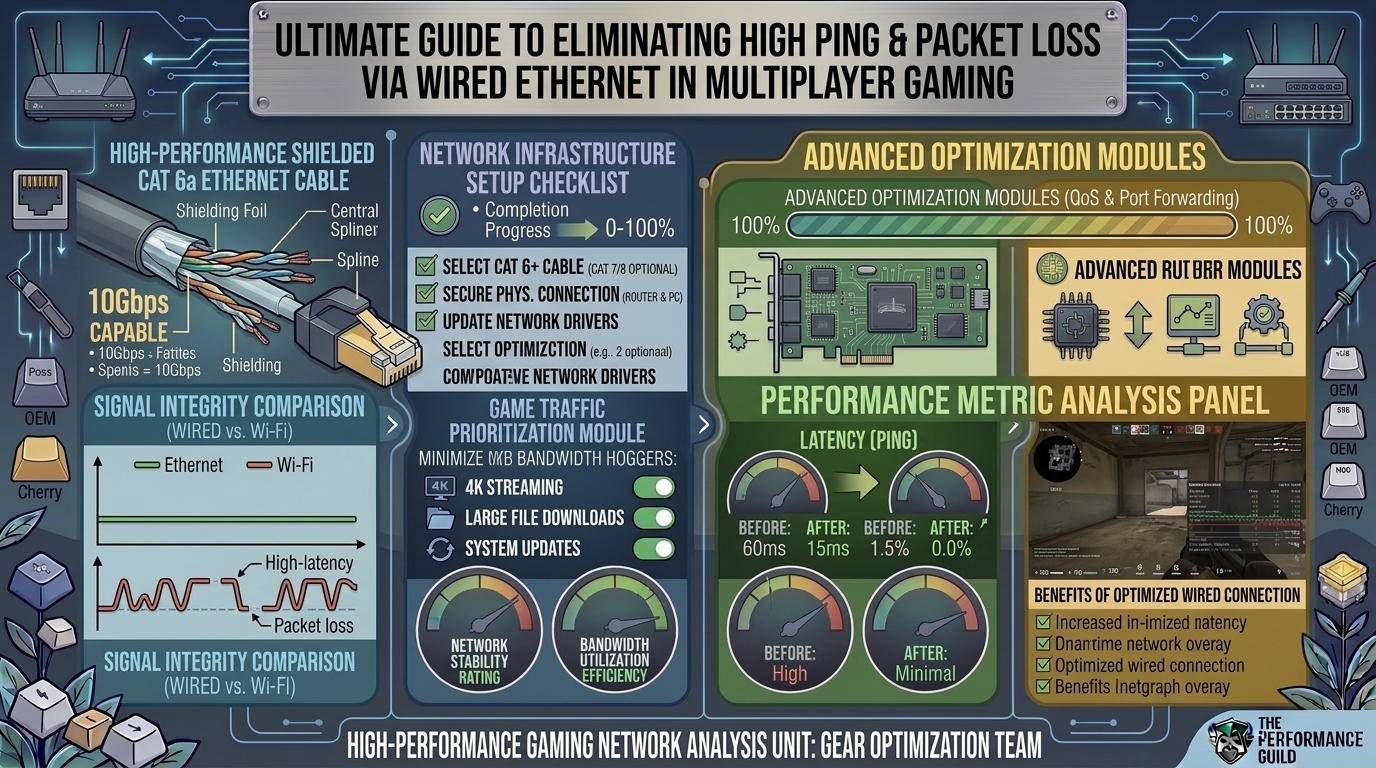
    How to Fix High Ping and Packet Loss Issues in Multiplayer Games Using Wired Ethernet Cable Connections

    High ping and packet loss ruin competitive online gaming faster than a bad teammate. You click to shoot, cast a spell, or turn a corner—only to teleport backward, miss a crucial hit, or get disconnected entirely.

    While switching from Wi-Fi to a wired Ethernet connection is the single best step toward a stable network, simply plugging in a cable does not guarantee a zero-lag experience. Physical cable defects, misconfigured network settings, background bandwidth hogs, and poor router configurations can still cause massive latency spikes and dropped packets over Ethernet.

    This comprehensive guide breaks down the root causes of high ping and packet loss on wired connections and walks you through actionable steps to achieve a ultra-fast, rock-solid gaming link.

    Understanding the Enemy: Ping vs. Packet Loss

    Before diving into solutions, it helps to understand what your network metrics actually mean:

    • Ping (Latency): Measured in milliseconds (ms), ping is the time it takes for a signal (data packet) to travel from your gaming rig to the game server and back. Lower is better. Under 30ms is optimal for competitive shooters, while anything over 100ms leads to noticeable lag.
    • Packet Loss: Measured as a percentage, packet loss occurs when data packets fail to reach their destination. A 1% to 2% loss causes micro-stutters and “rubber-banding.” A 5%+ loss makes real-time multiplayer unplayable.
    [Your Gaming Rig]  ----(Data Packet Sent)---->  [Game Server]
    [Your Gaming Rig]  <--(Packet Dropped/Lost)--  [Game Server]  ❌ Packet Loss!
    

    1. Upgrade or Inspect Your Physical Hardware

    A wired setup is only as good as the physical cable running through your home.

    Choose the Right Ethernet Cable Category

    Not all Ethernet cables perform equally. Using an outdated or damaged cable introduces electrical interference, data corruption, and high latency.

    Cable CategoryMax BandwidthMax SpeedBest For Gaming?
    Cat 5100 MHz100 MbpsNo (Outdated, high crosstalk)
    Cat 5e100 MHz1 GbpsAcceptable (Minimum standard)
    Cat 6250 MHz10 GbpsIdeal (Best price-to-performance ratio)
    Cat 6a500 MHz10 GbpsExcellent (Superior shielding)
    Cat 7 / Cat 8600–2000 MHz40 GbpsOverkill (Requires grounding, often fake online)

    Key Takeaway: For standard gaming setups under 100 feet, Cat 6 or Cat 6a cables provide optimal shielding against electromagnetic interference (EMI) without unnecessary cost.

    Inspect for Cable Damage and Bends

    Ethernet copper wires inside cables are sensitive to stress. Inspect your cable for:

    • Sharp 90-degree bends or kinks.
    • Heavy furniture resting on the wire.
    • Broken locking tabs on the RJ45 connectors (causing loose fits).
    • Running parallel to high-voltage power lines or microwave ovens (causes EMI).

    2. Optimize Network Adapter Settings (Windows & Mac)

    Default OS settings prioritize energy saving over maximum network performance. Tweak these settings to force your network interface card (NIC) to prioritize speed.

    Step-by-Step Windows NIC Configuration

    1. Press Win + X and select Device Manager.
    2. Expand Network adapters, right-click your Ethernet controller (e.g., Realtek PCIe GbE or Intel Ethernet Connection), and select Properties.
    3. Go to the Advanced tab and adjust the following properties:
      • Energy Efficient Ethernet / Green Ethernet: Set to Disabled. (Prevents the adapter from entering low-power states during gameplay).
      • Interrupt Moderation: Set to Disabled (or Low). Disabling this reduces packet buffering delay at the cost of slight CPU load.
      • Speed & Duplex: Set to 1.0 Gbps Full Duplex (or Auto Negotiation if 1 Gbps isn’t supported).
      • Receive Side Scaling (RSS): Set to Enabled.
      • Flow Control: Set to Disabled (prevents packet holds during burst traffic).

    3. Router & Network Level Solutions

    Even on a wired connection, local network congestion inside your router can cause severe ping spikes.

    Enable Quality of Service (QoS)

    QoS is a router feature that prioritizes gaming traffic over low-priority bandwidth demands (such as 4K video streams or large torrent downloads).

    1. Log into your router’s admin page (usually 192.168.1.1 or 192.168.0.1 in your browser).
    2. Locate the QoS or Traffic Prioritization settings menu.
    3. Turn on QoS and assign high priority to your PC/Console’s MAC address or specific gaming ports.

    Disable SIP ALG and Bufferbloat Features

    • Bufferbloat: Occurs when routers buffer too many packets during heavy downloads, causing latency spikes. Test your setup using online Bufferbloat tests. If your grade is lower than a B, enable Smart Queue Management (SQM) on your router if available.
    • SIP ALG: Disable this setting in your router’s firewall/security section as it can inspect and modify data packets, causing dropped connection states in online games.

    4. Software & DNS Tweaks

    Background applications on your operating system can quietly consume your upload bandwidth, resulting in immediate packet loss.

    Eliminate Background Bandwidth Hogs

    • Close Cloud Syncing Services: OneDrive, Google Drive, and Dropbox upload changes in real-time, straining your upstream pipeline.
    • Pause Automatic Updates: Steam, Epic Games Launcher, Windows Update, and Discord update clients consume background bandwidth. Turn off auto-updates during gaming sessions.
    • Check Task Manager: Press Ctrl + Shift + Esc, click the Network column header, and terminate any unexpected process consuming over 0.1 Mbps.

    Switch to Fast, Gaming-Optimized Public DNS

    While DNS doesn’t directly dictate in-game ping once connected to a match, faster DNS resolution ensures quicker server handshakes and prevents connection drops.

    • Cloudflare DNS: Primary 1.1.1.1 | Secondary 1.0.0.1
    • Google Public DNS: Primary 8.8.8.8 | Secondary 8.8.4.4

    5. Diagnostic Commands: Pinpointing the Bottleneck

    When ping spikes or packet loss occurs over Ethernet, run these built-in command-line diagnostics to identify whether the issue originates inside your home network or with your Internet Service Provider (ISP).

    The Ping Loop Test

    Open Command Prompt (cmd) and type:

    Bash

    ping -t 192.168.1.1
    

    (Replace 192.168.1.1 with your router’s gateway IP).

    • If response times vary (>1ms) or drop packets: The problem is inside your house (faulty cable, failing Ethernet port, or bad router).
    • If response times are consistently <1ms without drops: Your internal local network is healthy. The issue lies further up the chain with your ISP or the game server.

    Pathping & Tracert

    Run a trace route to the game server IP:

    Bash

    pathping 8.8.8.8
    

    This pinpoints exactly which hop along the network routing path is dropping packets or adding latency.

    Frequently Asked Questions (FAQ)

    1. Can a damaged Ethernet cable cause packet loss without completely disconnecting me?

    Yes. Micro-fractures in the internal copper wiring or damaged shielding can allow data packets to become corrupted in transit. Your system attempts to retransmit the missing data, leading to noticeable packet loss, high ping, and stuttering without completely dropping the link connection.

    2. Is Cat 6 Ethernet cable better than Cat 8 for online gaming?

    For almost all residential home setups, Cat 6 or Cat 6a is superior and more practical than Cat 8. True Cat 8 cables require specialized grounded hardware to function correctly; ungrounded Cat 8 cables can collect static electricity and create more interference than Cat 6.

    3. Why do I still get packet loss over Ethernet while my speed test looks fast?

    Speed tests measure total bandwidth (download/upload throughput), not connection stability or jitter. You can have a 1 Gbps connection speed and still experience 10% packet loss if your router is suffering from bufferbloat or if there is routing degradation along your ISP’s network nodes.

    4. Should I connect my Ethernet cable directly into my modem or router?

    Connecting directly to a modem (or ONT unit) bypasses local router traffic entirely, which can lower latency. However, doing so removes your router’s firewall protections, exposing your system directly to the public internet. It is safest to connect to a quality router with QoS enabled.

    5. Can powerline Ethernet adapters cause high ping and packet loss?

    Yes. Powerline adapters use your home’s existing electrical wiring to transmit data. High-power appliances (refrigerators, AC units, chargers) create severe electrical noise on those circuits, frequently leading to ping spikes and high packet loss compared to a direct Ethernet cable.

    6. Does disabling Interrupt Moderation reduce ping?

    Disabling Interrupt Moderation forces your Network Interface Card (NIC) to process incoming packets immediately rather than batching them together. This slightly reduces system-level latency, though it causes a minor increase in CPU usage.

    7. What is a “good” ping for online multiplayer games?

    • Under 20ms: Exceptional (LAN-like responsiveness).
    • 20ms – 50ms: Excellent for competitive shooters (Valorant, CS:GO, Apex Legends).
    • 50ms – 80ms: Playable, but slight delay may be felt against low-ping opponents.
    • 100ms+: Noticeable lag and disadvantage.

    8. How long can an Ethernet cable run before latency increases?

    Standard twisted-pair Ethernet cables (Cat 5e/Cat 6) maintain peak signal speed and zero latency degradation up to 100 meters (328 feet). Beyond 100 meters, signal degradation occurs unless paired with a network switch or repeater.

    9. Will a VPN fix packet loss on an Ethernet connection?

    A VPN can only fix packet loss if your ISP is using poor or congested routing nodes to reach the game server. By rerouting your traffic through the VPN’s backbone servers, packet stability may improve. However, if the issue stems from local hardware or server issues, a VPN will usually add latency.

    10. Can a failing router Ethernet port cause packet loss?

    Yes. Physical RJ45 ports on older or overheating routers can degrade over time. Try switching your Ethernet cable into a different LAN port on your router (e.g., move from LAN Port 1 to LAN Port 2) to test if the original port is failing.

    Summary Checklist for Zero-Lag Ethernet Gaming

    To ensure your wired connection delivers low latency and zero packet loss:

    1. Use a shielded Cat 6 or Cat 6a Ethernet cable.
    2. Disable network adapter power-saving settings (Green Ethernet, Energy-Efficient Ethernet).
    3. Turn off Interrupt Moderation in your NIC advanced properties.
    4. Enable QoS on your router to prioritize your gaming system’s MAC address.
    5. Run a ping -t local gateway test to verify your local network stability before blaming game servers.

    By isolating hardware issues, tuning network drivers, and configuring router prioritization, you can maximize your wired connection and eliminate high ping and packet loss once and for all.

  • Best mechanical keyboard switches for fast reaction times in tactical first person shooter multiplayer matches

    Best mechanical keyboard switches for fast reaction times in tactical first person shooter multiplayer matches

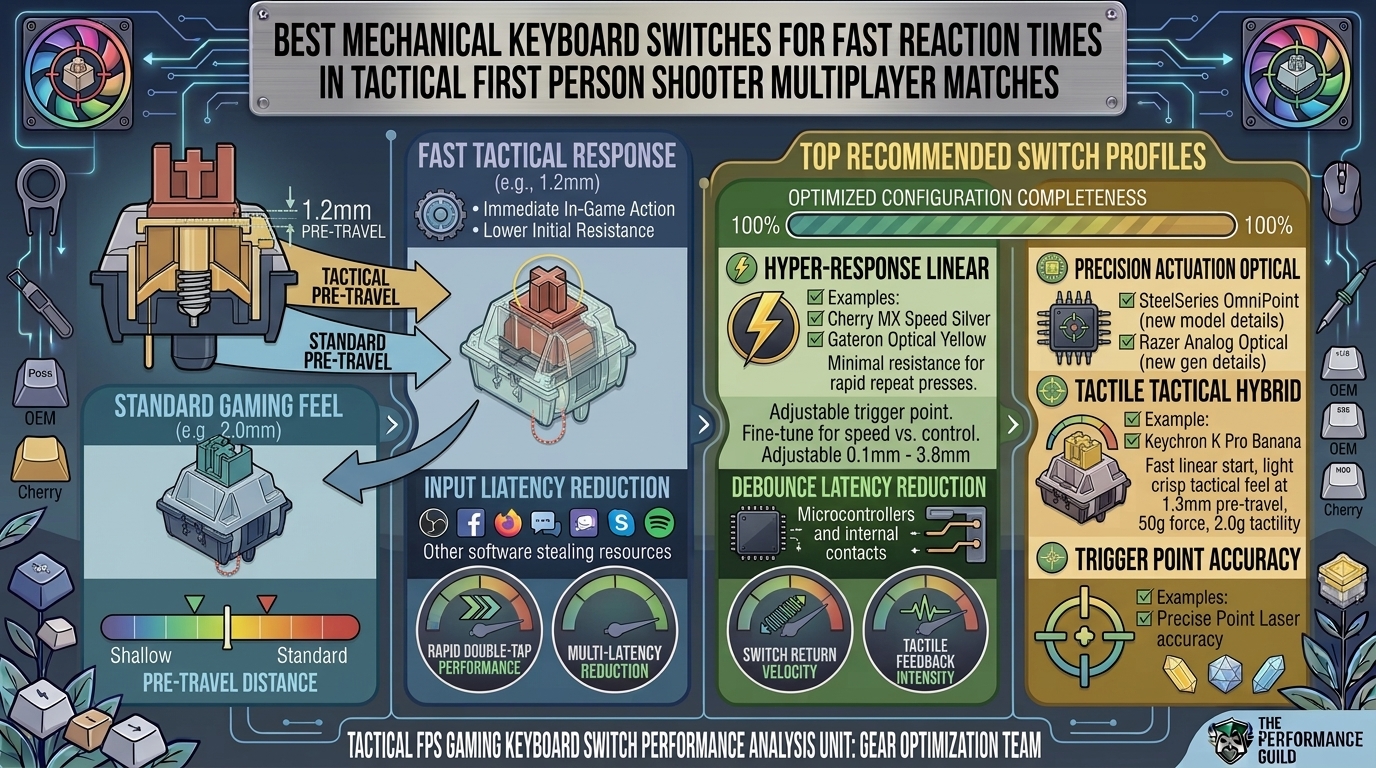
    In tactical first-person shooters like Counter-Strike 2, Valorant, Rainbow Six Siege, and Apex Legends, win-loss outcomes are decided in milliseconds. While raw aiming skill and low-latency monitors are critical, your keyboard switch determines how quickly your movement inputs—like counter-strafing, jiggle-peeking, and crouch-dodging—register in the game engine.

    Modern gaming keyboards have evolved far beyond traditional mechanical switches. Today, magnetic Hall Effect (HE) switches and light-actuated optical switches dominate the competitive landscape by eliminating the mechanical delays inherent to physical metal contact leaves.

    Top Switch Types for Competitive FPS

    • Magnetic Hall Effect (HE) Switches: The current gold standard for competitive FPS. Utilizing magnetic sensors, HE switches allow custom actuation points (from 0.1mm to 4.0mm) and Rapid Trigger technology.
    • Optical Linear Switches: Infrared light beam sensors eliminate mechanical contact bouncing, removing debounce delay entirely for near-instantaneous signal transmission.
    • Speed Mechanical Switches: Traditional metal-leaf mechanical switches modified with shortened actuation travel (1.0mm–1.2mm) and lighter spring weights (~40g–45g).

    Technical Performance Comparison

    Switch CategoryActuation MechanismActuation PointDebounce LatencyRapid Trigger Support
    Magnetic (Hall Effect)Permanent Magnet & Hall SensorDynamic (0.1mm – 4.0mm)0 msYes (Instant key reset)
    Optical LinearInfrared Light BeamFixed (1.0mm – 1.5mm)0 msLimited / Board-Specific
    Speed MechanicalPhysical Metal Contact LeafFixed (1.0mm – 1.2mm)3 ms – 5 msNo (Fixed physical reset)
    Standard MechanicalPhysical Metal Contact LeafFixed (2.0mm)5 ms – 10 msNo (Fixed physical reset)

    Best Switches for Tactical FPS Reaction Times

    1.Magnetic Hall Effect Switches (e.g., Gateron KS-20, HMX Radiant HE):Best overall for dynamic counter-strafing and instant stops.

    Hall Effect switches do not rely on physical contact. A magnet inside the stem changes the magnetic field detected by the PCB sensor.

    • Rapid Trigger Technology: Traditional switches require the stem to travel back up past a fixed reset point before re-actuating. HE switches reset the millisecond the key moves upward even 0.1mm, allowing instant direction changes in Valorant or CS2.
    • Ultra-Shallow Actuation: You can set critical movement keys (W, A, S, D) to actuate at 0.1mm to 0.2mm for immediate registration, while keeping utility keys at 2.0mm to avoid accidental fat-finger presses.

    2.Optical Speed Switches (e.g., Razer Analog Optical Gen-2, SteelSeries OptiPoint):Best for zero-latency execution without magnetic software setup.

    Optical switches use an infrared light emitter and sensor inside the switch housing. Pressing the key breaks the light beam, instantly sending the signal to the controller.

    • Zero Debounce Delay: Mechanical switches suffer from “leaf bounce,” requiring a 5ms firmware delay to avoid accidental double-clicks. Optical switches have no physical leaves, eliminating this delay completely.
    • Durability: Rated for 100+ million keystrokes because there are no metal leaves to corrode or degrade over time.

    3.Speed Mechanical Switches (e.g., Kailh Speed Silver, Akko V3 Silver Pro):Best budget option for standard MX-compatible hot-swap boards.

    If you own a standard mechanical keyboard that does not support Hall Effect or Optical PCBs, Speed Mechanical switches are the fastest plug-and-play upgrade.

    • Shortened Pre-Travel: Reduces the actuation point from standard 2.0mm down to 1.0mm–1.2mm, cutting initial key travel time in half.
    • Light Spring Weights: Typically require only 40g–45g of force, reducing finger fatigue during extended gaming sessions.

    Key Hardware Concepts That Impact FPS Input Latency

    1. Debounce Delay: Physical metal contacts vibrate when striking each other. Keyboard firmware adds a mandatory “debounce window” (3ms–10ms) to ensure one keypress doesn’t register as five. Optical and Hall Effect switches bypass this completely.
    2. Polling Rate (1000Hz vs. 8000Hz): Standard keyboards send data to the PC every 1 millisecond (1000Hz). Modern esports keyboards offer 8000Hz polling, updating the PC every 0.125ms. When paired with magnetic switches, total end-to-end latency drops below 0.5ms.
    3. Linear vs. Tactile/Clicky: Tactile bumps and clicky mechanisms add physical resistance that slows down actuation travel. Linear switches offer a smooth, unobstructed path straight down to the actuation point, making them ideal for rapid inputs.

    Frequently Asked Questions (FAQ)

    Q1: What are the best overall switches for tactical FPS games like CS2 and Valorant?

    Magnetic Hall Effect (HE) switches are currently the top pick for tactical shooters. Features like dynamic actuation (down to 0.1mm) and Rapid Trigger enable faster counter-strafing than traditional mechanical switches.

    Q2: What is “Rapid Trigger” and why does it matter in competitive games?

    Rapid Trigger allows a key to reset the exact instant it starts traveling upward, rather than requiring it to pass a fixed reset height. In games like Valorant, this lets you stop moving instantly to regain first-bullet accuracy the moment you lift your finger.

    Q3: Can I install Magnetic Hall Effect switches into any mechanical keyboard?

    No. Hall Effect switches lack physical metal pins and rely on specialized magnetic sensors on the PCB. They require a dedicated HE-compatible keyboard PCB.

    Q4: Are optical switches faster than mechanical switches?

    Yes. Optical switches use a light beam to register keypresses, eliminating physical leaf contact and the 3ms–5ms debounce delay required by standard mechanical switches.

    Q5: Why are linear switches preferred over tactile or clicky switches for gaming?

    Linear switches provide smooth, consistent resistance from top to bottom. Tactile bumps and clicky springs add physical resistance that can impede rapid double-tapping and smooth movement inputs.

    Q6: What actuation distance should I set for my movement keys?

    Most competitive players set WASD actuation between 0.1mm and 0.5mm for fast movement registration. If you notice accidental keypresses, increase the actuation distance slightly to 0.8mm–1.0mm.

    Q7: Will an 8000Hz polling rate improve my in-game reaction time?

    An 8000Hz polling rate reduces input reporting delay from 1.0ms down to 0.125ms. While the difference is micro-scale, when paired with zero-debounce magnetic switches, it produces lower input latency.

    Q8: What are Speed Silver switches?

    Speed Silver switches are traditional mechanical switches modified with a shortened pre-travel distance (usually 1.0mm–1.2mm compared to standard 2.0mm) and light spring resistance for fast actuation.

    Q9: Does switch lubrication affect reaction speed?

    Proper factory or manual lubrication reduces spring ping and stem friction, making the key feel smoother. While it doesn’t change electrical actuation speed, a smoother switch reduces physical resistance under your fingers.

    Q10: Are shallow actuation points bad for typing?

    Extremely shallow actuation points (0.1mm–0.5mm) can lead to accidental typos during everyday typing. Many Hall Effect keyboards allow you to save separate profiles: a shallow 0.2mm profile for gaming and a deeper 2.0mm profile for typing.

    Choosing the right switch for competitive FPS matches comes down to minimizing mechanical delay. Magnetic Hall Effect switches with Rapid Trigger offer a technical advantage in movement responsiveness, while Optical and Speed Mechanical options provide fast, low-latency performance across standard layouts. Match your switch selection to your keyboard PCB compatibility and fine-tune actuation points to sharpen your reaction times.

  • How to properly configure dual monitor setups for streaming pc games without losing frame rate performance

    How to properly configure dual monitor setups for streaming pc games without losing frame rate performance

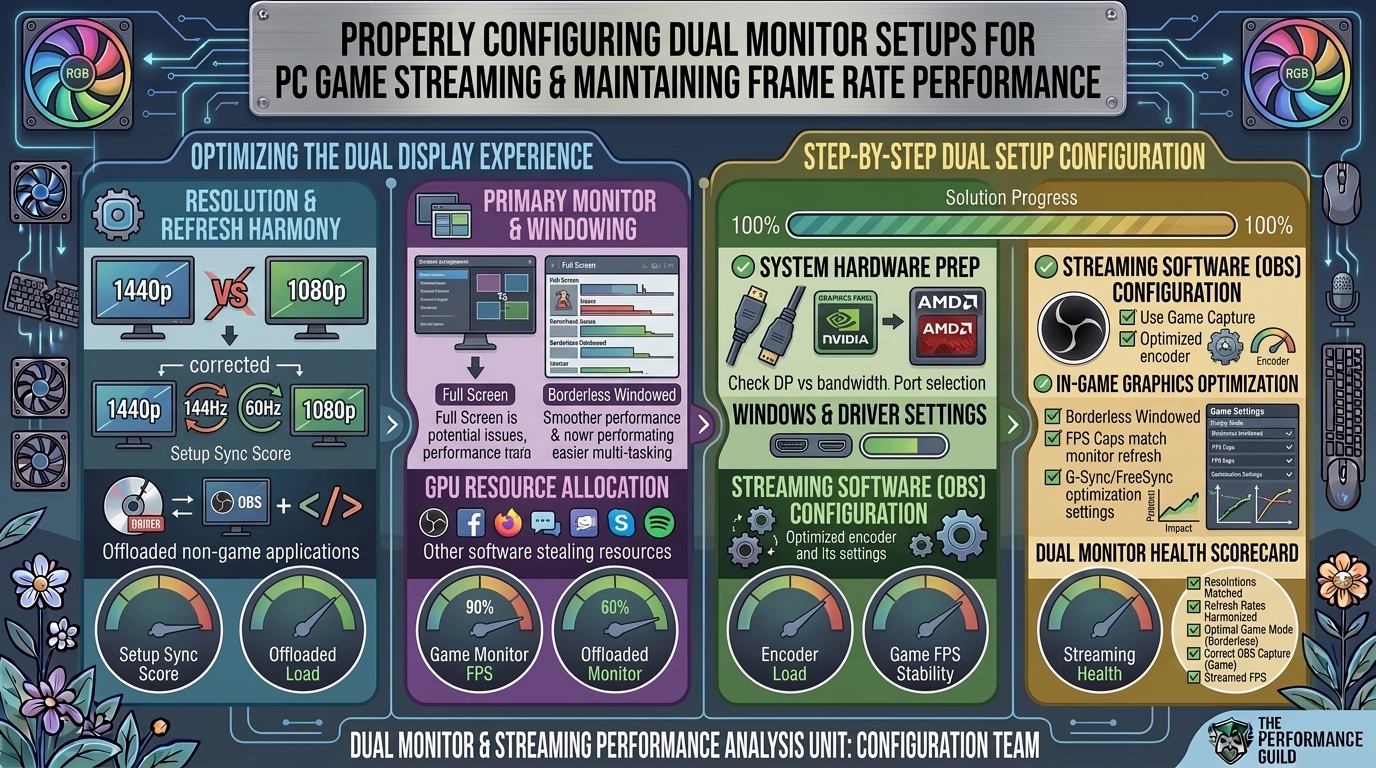
    How to Properly Configure Dual Monitor Setups for Streaming PC Games Without Losing Frame Rate Performance

    Adding a second screen to your streaming setup is one of the single biggest quality-of-life upgrades you can make as a content creator. Being able to read live chat, monitor stream health in OBS, check Discord, and adjust scenes without Alt-Tabbing out of a fast-paced multiplayer match transforms the entire broadcasting experience.

    However, many creators encounter a frustrating issue: as soon as a second display is connected and streaming software is running on it, in-game frame rates drop significantly, games stutter, or 144Hz/240Hz monitors suddenly feel like 60Hz.

    Losing performance when expanding your desktop is rarely a hardware failure. Instead, it is usually caused by resource contention, refresh rate synchronization mismatch, GPU scheduling bottlenecks, or improper display capture configurations.

    Anatomy of the Dual-Monitor Performance Drop

    Understanding what happens behind the scenes when running a two-screen setup helps isolate why frame rate drops occur.

    [ Primary Gaming Monitor ]              [ Secondary Stream Monitor ]
     (e.g., 144Hz / 240Hz)                   (e.g., 60Hz / 1080p)
              │                                       │
              │ (Full 3D Engine Render)               │ (OBS Preview + Chat Hardware Acceleration)
              ▼                                       ▼
      ═════════════════════════════════════════════════════════
                           GPU Frame Buffer
      ═════════════════════════════════════════════════════════
              │
              ▼
       Hardware Bottlenecks:
       1. Unmatched Refresh Rate Desync (DWMM / Windows Compositor)
       2. Hardware Acceleration in Background Apps (Chrome/Discord)
       3. OBS Canvas Rendering & Real-Time Preview Overhead
    

    The 4 Major Causes of In-Game Lag

    1. Windowed Optimization & VSync Synchronization: Running games in Windowed or Borderless Windowed mode forces the Desktop Window Manager (DWM) to sync frames across both displays. If your secondary monitor is running at 60Hz while your gaming monitor is at 144Hz, animated elements on the 60Hz screen (like video previews or chat widgets) can force DWM to drop the primary monitor’s perceived refresh rate down to a factor of 60Hz.
    2. GPU Resource Starvation in OBS Studio: OBS Studio relies on your GPU to render its canvas, scene transitions, and sources. If your game runs uncapped and consumes 99–100% of GPU resources, OBS suffers from rendering lag, causing stutters on stream and in-game frame pacing drops.
    3. Browser Hardware Acceleration Contention: Running Twitch Chat, Discord, or web browsers on the second screen uses GPU hardware acceleration. This steals video memory bandwidth directly from the primary 3D render pipeline.
    4. Display Capture vs. Game Capture Overhead: Using “Display Capture” (which captures the entire desktop screen) introduces considerably more latency and performance penalty than “Game Capture” or “Window Capture,” which hooks directly into the graphics API pipeline.

    Technical Comparison: Capture Modes & Configurations

    Capture / Setting MethodPerformance ImpactLatency OverheadIdeal Use Case
    Game Capture (Direct Hook)Minimal (~1–3% FPS loss)LowestExclusive Fullscreen & Borderless PC Games
    Window Capture (Graphics Track)Low (~3–5% FPS loss)LowWindowed titles, emulators, browser games
    Display Capture (Desktop Hook)High (~10–20% FPS loss)Moderate to HighFull-desktop walkthroughs, multi-app tutorials
    OBS Canvas Preview EnabledModerate (~5–10% GPU usage)N/ASetup phase; hide while playing hardware-heavy games

    Step-by-Step Configuration Guide

    Follow these steps to eliminate dual-monitor lag and preserve high in-game frame rates while broadcasting.

    1.Configure Windows Display and Refresh Rate Settings:Align refresh rate factors to avoid Windows DWM compositing lag.

    Setting up monitor refresh rates properly prevents the Windows compositor from locking your fast display to your slow display.

    1. Right-click the desktop and select Display settings.
    2. Scroll down and click Advanced display.
    3. Select your main gaming monitor and ensure its refresh rate is set to its highest native value (e.g., 144Hz, 240Hz, or 360Hz).
    4. Select your secondary monitor and set its refresh rate.
    5. Pro-Tip for Mismatched Screens (e.g., 144Hz + 60Hz): If you experience stutters, set the primary monitor’s refresh rate to an exact integer multiple of the second monitor (e.g., run the main screen at 120Hz or 240Hz if the secondary screen is 60Hz). This allows frame buffers to sync cleanly without dropping cycles.

    2.Run OBS Studio as Administrator:Prevents OBS from starving for GPU rendering cycles.

    Windows 10/11 includes a feature that prioritizes GPU allocation for applications running with administrative privileges.

    1. Right-click your OBS Studio shortcut and select Properties.
    2. Navigate to the Compatibility tab.
    3. Check the box for Run this program as an administrator.
    4. Click Apply and OK.
    5. Running OBS as administrator signals the OS scheduler to reserve dedicated GPU compute headroom for stream composition, preventing game-induced render lag.

    3.Offload Secondary Monitor to iGPU or Disable Hardware Acceleration:Frees up VRAM and core clocks on your dedicated GPU.

    Background applications running on your second monitor can draw significant GPU power.

    • Offload to Integrated Graphics (iGPU): If your CPU has an integrated GPU (Intel UHD/Iris or AMD Radeon Graphics), plug your second monitor directly into the motherboard HDMI/DisplayPort output. This delegates all secondary display processing to the CPU’s internal graphics, keeping 100% of your dedicated GPU available for gaming and encoding.
    • Disable Browser Hardware Acceleration: In Chrome, Edge, or Discord, navigate to Settings > System/Advanced and toggle off Use graphics acceleration when available. This prevents chat overlays and web pages from executing on your dedicated GPU.

    4.Optimize OBS Source Captures and Disable Preview:Use efficient DirectX/Vulkan hooks instead of desktop capturing.

    Capturing games efficiently is critical for maintaining high frame rates.

    1. In OBS, replace any Display Capture sources with Game Capture.
    2. Set Game Capture mode to Capture specific window and select your game executable.
    3. Uncheck Capture third-party overlays (such as Steam or Discord overlays) inside the source properties to minimize hook latency.
    4. If playing a modern, high-load title, right-click the OBS main viewport and uncheck Enable Preview. Hiding the real-time preview saves up to 10% of GPU compute load while keeping the stream output active.

    5.Set In-Game Frame Rate Caps and Enable NVENC/AMF Encoding:Prevents 100% GPU saturation from starving the encoder.

    If your GPU runs at absolute 100% saturation, frame pacing degrades regardless of your setup.

    1. Open your game’s graphics settings and set an In-Game FPS Limit that matches your monitor’s refresh rate (or slightly below it, e.g., 141 FPS for a 144Hz G-Sync display).
    2. In OBS, go to Settings > Output.
    3. Set Encoder to NVIDIA NVENC (H.264 / AV1), AMD AMF, or Intel QuickSync. Using dedicated hardware encoders offloads video compression from CPU/GPU compute cores to independent hardware chips.

    Frequently Asked Questions (FAQ)

    Q1: Why does my 144Hz monitor feel like 60Hz when I open Twitch Chat or a video on my second screen?

    This is caused by the Windows Desktop Window Manager (DWM) trying to synchronize two displays with non-matching refresh rates. When animated content plays on a 60Hz monitor, Windows can sync the entire desktop frame composition rate down to 60Hz. Setting your primary monitor to an integer multiple of 60Hz (like 120Hz or 240Hz), running games in Exclusive Fullscreen, or turning off hardware acceleration in secondary applications fixes this issue.

    Q2: Should I plug both monitors into my GPU, or one into the motherboard?

    If your processor has an integrated graphics chip (iGPU), plugging your secondary chat/monitoring screen into the motherboard frees up video memory and clock states on your primary discrete GPU. If your CPU lacks an iGPU (e.g., Intel “F” series or AMD non-G chips), both monitors must be plugged into your graphics card.

    Q3: Is Fullscreen or Borderless Windowed mode better for dual-monitor streaming?

    Exclusive Fullscreen yields the best performance and lowest input lag because it gives the game direct control over the display output, bypassing Windows DWM compositing. However, Borderless Windowed mode allows you to move your mouse cursor over to chat on the second screen without the game minimizing. If using Borderless Windowed mode, ensure Hardware-Accelerated GPU Scheduling (HAGS) is enabled in Windows settings.

    Q4: Why does OBS drop frames even when my game is running smoothly?

    This usually indicates Rendering Lag or Encoding Lag inside OBS rather than network issues. Rendering lag happens when the GPU is so overloaded by the game that it cannot spare resources to render the OBS canvas. Running OBS as Administrator, locking your in-game frame rate, or disabling the OBS preview window resolves rendering lag.

    Q5: Does using Display Capture instead of Game Capture hurt frame rates?

    Yes. Display Capture records the entire desktop coordinate space, forcing your system to copy raw frame buffers through Windows DWM. Game Capture hooks directly into the game’s DirectX or Vulkan render pipeline, using significantly less CPU/GPU overhead.

    Q6: Can G-Sync or FreeSync cause stuttering on dual monitors?

    Yes, variable refresh rate (VRR) technologies can get confused if a game is running in a window alongside a video stream on a secondary screen. In the NVIDIA Control Panel, under Set up G-SYNC, select Enable for full screen mode only rather than windowed and full screen mode to prevent the primary monitor from dynamically locking its refresh rate to secondary background apps.

    Q7: Will upgrading to 32GB of RAM help with dual-monitor streaming performance?

    Yes. Running a modern AAA game alongside OBS, multiple browser tabs (chat, stream alerts), Discord, and music players quickly exceeds 16GB of system RAM. Moving to 32GB of dual-channel RAM prevents Windows from paging memory to disk, eliminating micro-stutters.

    Q8: What is the best OBS output resolution for dual-monitor setups?

    For most live streaming platforms (like Twitch or YouTube), setting your Base (Canvas) Resolution to match your primary gaming monitor (e.g., 2560×1440 or 1920×1080) and setting the Output (Scaled) Resolution to 1920×1080 or 1280×720 strikes a strong balance between visual sharpness and stream encoding performance.

    Q9: Why does my game lag when I have a video playing on my second monitor?

    Video players (YouTube, Twitch, Netflix) use GPU hardware decoding. If your GPU is already at maximum capacity running a game, decoding high-definition video feeds on the second monitor starves both operations. Turn off hardware acceleration in the browser or lower the video quality on your second monitor to 720p/480p.

    Q10: Does Windows 11 handle dual monitors with mixed refresh rates better than Windows 10?

    Yes. Windows 11 features an updated display pipeline that handles independent refresh rates and per-monitor hardware acceleration far better than older builds. Upgrading to Windows 11 reduces refresh rate desync issues on mixed 144Hz + 60Hz configurations.

    Conclusion

    Configuring a dual-monitor setup for seamless PC game streaming requires balancing system resources. By running OBS Studio as Administrator, setting in-game frame rate caps, using dedicated hardware encoders like NVENC/AMF, and using direct Game Capture sources, you eliminate the resource contention that causes performance degradation. Take time to optimize your Windows display settings and background applications so you can interact with your community on screen two without sacrificing frame rate on screen one.

  • Why is my gpu usage dropping to zero percent while gaming and how to fix this stuttering issue

    Why is my gpu usage dropping to zero percent while gaming and how to fix this stuttering issue

    Why Is My GPU Usage Dropping to Zero Percent While Gaming and How to Fix This Stuttering Issue

    Nothing disrupts a gaming session faster than smooth, high-frame-rate gameplay suddenly freezing for 1 to 3 seconds while your graphics card usage plummets from 99% down to 0%. This phenomenon—frequently accompanied by severe frame drops, audio stuttering, or temporary desktop freezes—is one of the most frustrating performance issues PC gamers face.

    When your GPU usage hits 0%, it rarely means your graphics card is dying. Instead, it almost always indicates that your graphics card is stalled—it has completed its rendering work and is idling while waiting for the CPU, system RAM, storage drive, or operating system driver to deliver the next frame pipeline payload.

    Anatomy of a GPU Drop: What Causes the 0% Usage Freeze?

    Modern graphics processing units (GPUs) are designed to operate at 95% to 100% load during unconstrained 3D rendering. When GPU utilization momentarily drops to zero, the rendering pipeline has experienced a total execution bottleneck.

    [ Game Engine Frame Request ] 
              │
              ▼
    [ CPU / RAM Processing ] ──► (Stall / Asset Fetch Delay) ──► GPU Halts Processing ──► 0% Usage Spike / Stutter
              │
              ▼
    [ GPU Render Pipeline ]
    

    Primary Root Causes

    1. Storage Read Bottlenecks (Asset Streaming Stalls): When open-world titles stream assets from a traditional mechanical HDD or a failing NVMe SSD, the CPU halts rendering threads until asset data loads, leaving the GPU idle.
    2. Display Driver Timeout & Recovery (TDR Events): A subtle driver crash resets the graphics interface in the background. The GPU utilization drops to 0% while Windows re-initializes the driver.
    3. Severe CPU Thread Bottlenecks: Single-core CPU spikes or background OS tasks saturate processor threads, preventing frame instructions from reaching the GPU.
    4. VRAM Exhaustion & Pagefile Swapping: Running out of Dedicated Video Memory forces Windows to swap textures into system RAM over the PCIe bus, introducing severe frame latency stalls.
    5. Aggressive Power Throttling: Windows power management policies or GPU power states aggressively drop voltage and clocks when transient frame caps are hit.

    Troubleshooting Matrix

    SymptomsMost Likely CauseQuick Solution
    Stuttering when entering new game zonesSlow Storage / Asset StreamingMove game files from HDD to High-Speed NVMe SSD
    Screen flickers black, game freezes for 3 secTDR Driver Crash / TimeoutPerform Clean DDU Driver Reinstall
    High CPU usage (100%) during GPU dropsCPU Bottleneck / Background ProcessesDisable background tasks & unpark CPU cores
    Drops occur during intensive combat scenesPower Supply Transient / VRAM LimitLower texture settings & disable power saving modes

    Step-by-Step Fixes for GPU Usage Drops

    1.Configure Windows and Driver Power Management Settings:Stops Windows and background apps from throttling GPU power.

    Windows power-saving modes can aggressively downclock GPU voltage during low-demand scenes, causing delays when render demands abruptly spike.

    1. Open Control Panel and navigate to Hardware and Sound > Power Options.
    2. Change your power plan to High Performance or Ultimate Performance.
    3. Open NVIDIA Control Panel (or AMD Software: Adrenalin Edition).
    4. Under Manage 3D Settings > Global Settings, set Power management mode to Prefer maximum performance.
    5. Click Apply and restart your system.

    2.Perform a Clean Display Driver Reinstall via DDU:Eliminates corrupted registry entries and stale driver states.

    Stale graphics driver binaries or corrupted updates frequently trigger background driver resets (TDRs).

    1. Download Display Driver Uninstaller (DDU) and the latest display driver from NVIDIA, AMD, or Intel.
    2. Disconnect your internet connection to stop Windows from auto-installing generic drivers.
    3. Boot Windows into Safe Mode.
    4. Open DDU, select GPU, and click Clean and restart.
    5. Once Windows reboots normally, install the freshly downloaded driver package and choose Perform a Clean Installation.

    3.Optimize Game Storage and Windows Pagefile:Resolves disk queue latency and asset loading freezes.

    Installing modern AAA games on mechanical hard drives (HDDs) is a primary trigger for 0% GPU drops due to I/O bottlenecks.

    1. Move the game directory from an HDD to a fast SATA or NVMe SSD.
    2. Ensure your primary OS drive has at least 15% free space for virtual memory allocation.
    3. Open System Properties (sysdm.cpl) > Advanced > Performance Settings > Advanced > Virtual Memory.
    4. Ensure the pagefile is set to System managed size on your fastest SSD, and disable pagefile swapping on mechanical HDDs.

    4.Disable Overlays and In-Game Hooks:Prevents third-party software from hooking into DirectX execution.

    Background applications that render telemetry overlays can interfere with low-level GPU API calls.

    • NVIDIA Overlay / App: Toggle In-Game Overlay to Off in settings.
    • Discord: Go to User Settings > Game Overlay and turn it off.
    • Steam / Epic Games Launcher: Disable launch overlays in the settings menu.
    • RivaTuner / Afterburner: Close background monitoring hooks temporarily to rule out software polling issues.

    5.Enable Hardware-Accelerated GPU Scheduling (HAGS):Allows Windows 11 to handle low-level memory allocation efficiently.

    HAGS passes virtual memory management directly to dedicated GPU scheduling logic.

    1. Press Win + I to open Settings, then go to System > Display > Graphics.
    2. Click Change default graphics settings.
    3. Toggle Hardware-accelerated GPU scheduling to On.
    4. Reboot your PC to apply changes.

    Frequently Asked Questions (FAQ)

    Q1: Why does my GPU usage drop to 0% specifically during open-world gaming?

    Open-world titles continuously stream textures, meshes, and audio assets from your storage drive into RAM and VRAM as you travel across the map. If your storage drive cannot keep up with the read requests, the CPU thread halts to wait for data, leaving the GPU with 0% work to perform until assets finish loading.

    Q2: Could a bad Power Supply Unit (PSU) cause GPU usage drops?

    Yes. If your PSU experiences voltage supply drops on the 12V rail during transient power spikes, the GPU may automatically downclock its core frequencies to protect its VRMs from tripping power limits, resulting in brief utilization drops.

    Q3: Does low GPU usage mean my graphics card is dying?

    Generally no. A failing GPU typically presents hardware artifacts, full system crashes, Blue Screens (BSODs), or total signal loss. Temporary 0% drops are almost always caused by software bottlenecks, storage delays, or driver-level timeout recoveries.

    Q4: How does a CPU bottleneck cause 0% GPU usage?

    The CPU prepares draw calls and instructs the GPU on what to render next. If a single CPU core spikes to 100% capacity due to game physics, AI calculations, or background tasks, it cannot dispatch instructions to the GPU quickly enough, leaving the GPU idle at 0% load.

    Q5: Can V-Sync or frame rate limiters cause GPU usage drops?

    Yes. Enabling V-Sync or capping frame rates instructs the GPU to stop rendering once it reaches your monitor’s refresh rate. During simple in-game scenes, GPU usage may plummet because the card completes the required frame limit effortlessly and waits for the next monitor refresh cycle.

    Q6: What is a TDR error and how do I check if it’s happening?

    TDR stands for Timeout Detection and Recovery. Windows monitors your GPU and resets the display driver if it doesn’t respond within 2 seconds. To check if TDRs are causing your drops, open View Reliability History from the Windows Start menu and check for “LiveKernelEvent 141” or display driver crash records.

    Q7: Will upgrading my system RAM fix GPU usage stuttering?

    If your system is running out of physical RAM (e.g., 8GB or 16GB under heavy modern gaming loads), Windows forces memory allocation onto the system drive pagefile. Upgrading to 32GB of dual-channel RAM eliminates pagefile swapping stutter.

    Q8: Why does my GPU usage drop to 0% when alt-tabbing?

    Windows automatically deprioritizes background applications to save system resources. When you tab out of a game, Windows suspends or reduces render calls to the background window, dropping GPU usage until you refocus on the game executable.

    Q9: Can corrupted DirectX shader caches cause usage drops?

    Yes. Corrupted pre-compiled shaders cause processing stalls while the game engine re-compiles pipeline state objects on the fly. Clearing your DirectX shader cache via Windows Disk Cleanup forces the system to build fresh, error-free shader files.

    Q10: Should I disable XMP / EXPO RAM profiles to test stability?

    Yes. Unstable memory overclocks (even factory XMP/EXPO profiles) can cause subtle micro-stalls and memory controller errors that interrupt render pipelines without crashing Windows directly.

    Conclusion

    Fixing 0% GPU usage drops requires isolating where the rendering pipeline is being held up. By switching to High Performance power plans, performing a clean DDU driver wipe, moving game installations to high-speed SSDs, and clearing out background overlays, you remove the primary software and hardware bottlenecks that interrupt GPU frame generation. Systematically working through these steps ensures stable frame pacing and fluid, stutter-free gameplay.

  • Complete guide on how to clean and apply new thermal paste to your cpu to lower temperatures

    Complete guide on how to clean and apply new thermal paste to your cpu to lower temperatures

    Complete Guide on How to Clean and Apply New Thermal Paste to Your CPU to Lower Temperatures

    Maintaining optimal processor temperatures is essential for squeezing every drop of performance out of your gaming rig, maintaining boost clocks, and extending hardware lifespan. Over time, original factory thermal interface material (TIM) degrades, dries out, and loses its heat-transfer efficiency. Reapplying high-quality thermal paste is one of the most effective, low-cost maintenance steps you can perform on your PC.

    Understanding Thermal Paste and Heat Transfer

    A CPU surface and the copper base of a cooler look perfectly flat to the naked eye, but at a microscopic level, both metals are covered in tiny pits, grooves, and imperfections. Air is an extremely poor thermal conductor. When a cooler is clamped directly onto a CPU without an interface, trapped microscopic air pockets act as heat insulators, forcing CPU core temperatures to spike immediately under load.

    Thermal paste (also called thermal interface material, thermal compound, or CPU grease) is designed to fill those microscopic air gaps with a highly thermally conductive medium.

    [ CPU Cooler Base Plate ]
    =========================
      ~ ~ Thermal Paste ~ ~   <-- Fills microscopic air pockets
    =========================
    [ CPU Integrated Heat Spreader (IHS) ]
    

    Types of Thermal Interface Materials

    Material TypeElectrical ConductivityThermal PerformanceRisk LevelIdeal Use Case
    Non-Conductive Carbon/SiliconeNon-conductiveHighLowEveryday gaming, general maintenance
    Metal-Oxide (Ceramic)Non-conductiveModerateLowBudget builds, standard desktop CPUs
    Liquid Metal (Gallium Alloy)Electrically ConductiveExtremeHighDelidded CPUs, custom loop liquid cooling
    Phase-Change Materials (PCM)Non-conductiveHighLowHigh-pressure air coolers, laptops

    Signs Your CPU Needs Fresh Thermal Paste

    Knowing when to service your cooling system prevents thermal throttling and structural wear on your motherboard from prolonged high heat.

    • Sustained High Idle Temps: CPU idle temperatures remain above 45°C–50°C despite no background applications running.
    • Immediate Thermal Throttling: CPU cores hit 95°C–100°C within seconds of initiating a heavy workload or launching a modern AAA title.
    • Loud, Maxed-Out Fans: CPU cooler or AIO pump fans ramp up to 100% speed during basic tasks like web browsing.
    • Age of Current Paste: The system has been running on the same thermal paste for 2 to 3 years or longer.
    • Cooler Displacement: The CPU cooler was bumped, unseated, or rotated during a transport or component upgrade.

    Required Tools and Preparation Checklist

    Before opening your PC case, assemble these essential tools on a clean, anti-static work area:

    • High-Purity Isopropyl Alcohol (99% recommended, 90% minimum): Avoid lower concentrations or standard rubbing alcohol, as they contain water and additives that leave conductive residues or corrode pins.
    • Microfiber Cloths or Coffee Filters: Coffee filters are ideal because they are cheap, soft, and guaranteed to be lint-free. Avoid standard paper towels or tissues, which leave microscopic paper fibers on the heat spreader.
    • Plastic Spudger or Thermal Paste Spatula: Useful for spreading thermal paste evenly without scratching the heat spreader. Never use metal blades or screwdrivers.
    • New Thermal Paste Compound: High-performance, non-conductive options like Noctua NT-H1/NT-H2, ARCTIC MX-4/MX-6, or Thermal Grizzly Kryonaut.
    • Screwdriver Set: Properly fitting Phillips (#1 and #2) screwdrivers for CPU cooler mounting brackets.
    • Anti-Static Protection: An anti-static wrist strap, or habitually touch the painted metal surface of an grounded PC chassis before handling internal parts.

    Step-by-Step Guide: Cleaning and Reapplying Thermal Paste

    1.System Power-Down and Thermal Pre-Conditioning:Warm up old thermal paste to make cooler removal effortless.

    1. Turn on your PC and run a light workload or benchmark for 3–5 minutes to warm up the CPU. This softens dried thermal paste that can act like glue.
    2. Shut down the system completely.
    3. Flip the Power Supply Unit (PSU) toggle switch to Off (O) and unplug the AC power cable from the wall.
    4. Hold down the PC power button for 5 seconds to discharge leftover capacitor energy.
    5. Disconnect fan and RGB headers connected from the CPU cooler to the motherboard.

    2.Safe CPU Cooler Removal:Avoid pulling AMD PGA CPUs out of the socket.

    1. Unfasten the mounting screws or retention clips in a diagonal X-pattern, loosening each screw two turns at a time to keep pressure even across the CPU socket.
    2. Crucial Step for AMD AM4 (PGA) CPUs: Gently twist the cooler back and forth horizontally before lifting. Never pull straight up, as hardened paste can rip the CPU out of the locked socket and bend the pins.
    3. Carefully lift the CPU cooler off the processor and place it base-side up on your workbench.

    3.Cleaning Old Compound from CPU and Cooler:Achieve a mirror-finish surface free of microscopic debris.

    1. Fold a lint-free coffee filter or microfiber cloth and moisten it with 99% isopropyl alcohol.
    2. Gently wipe the CPU Integrated Heat Spreader (IHS) in firm, circular motions from the outer edges inward to prevent paste from smearing onto motherboard components.
    3. Repeat with a clean section of cloth soaked in alcohol until no discoloration shows on the wipe.
    4. Repeat the same cleaning process on the contact plate of your CPU cooler or AIO cold plate.
    5. Allow both metal surfaces to air-dry for 2 to 3 minutes.

    4.Applying Fresh Thermal Paste:Select the best application pattern for your CPU layout.

    Select the application method suited to your CPU architecture (detailed in the next section) and apply the correct amount of non-conductive compound directly to the center of the CPU IHS.

    5.Remounting the Cooler and Restoring Even Pressure:Secure the thermal interface without creating trapped air pockets.

    1. Align the CPU cooler cold plate directly over the CPU and lower it straight down without tilting or sliding it around.
    2. Engage all mounting screws by hand for a turn or two to ensure threads catch evenly.
    3. Using your screwdriver, tighten the screws in an X-pattern (top-left, bottom-right, top-right, bottom-left), giving each screw two full turns at a time until you meet natural mechanical resistance.
    4. Do not overtighten; stop when the screws reach their built-in stopping points.
    5. Reconnect the CPU fan/pump cables to their proper motherboard headers (CPU_FAN, AIO_PUMP).

    Modern CPU Paste Application Patterns Explained

    Selecting the right application pattern depends on the size and internal chiplet layout of your CPU.

    1. The Pea/Dot Method (Standard Desktop CPUs)

    Place a single dot of thermal paste, roughly the size of a standard grain of rice or pea (4–5mm in diameter), directly in the absolute center of the CPU heat spreader.

    • Best For: Intel LGA 115x, 1200, AMD AM3/AM4 standard builds.
    • How it works: Clamping pressure naturally forces the paste outward in a smooth circle, leaving zero air pockets.

    2. The Five-Dot / Cross Pattern (Large Heat Spreaders)

    Place a small main dot in the center and four smaller pinhead-sized dots near each corner (about 5mm inside the edges), or draw a thin “X” across the IHS.

    • Best For: Intel LGA 1700 (elongated shape) and AMD AM5 processors.
    • Why it works: Rectangular CPUs and multi-chiplet layouts have hotspots spread out across a larger area. The five-dot method ensures full corner-to-corner coverage under mounting pressure.

    3. The Manual Spread Method (Direct Die & Laptops)

    Using a clean plastic spatula or spreader, spread a thin, uniform layer of thermal paste across the entire metal surface before mounting the cooler.

    • Best For: Bare-die laptop CPUs, delidded desktop processors, liquid metal applications, and high-viscosity pastes.
    • Why it works: Bare silicon dies have no integrated heat spreader to distribute mounting pressure evenly, making manual coverage essential before mounting.

    Verifying Temps Post-Application

    Once your PC is reassembled and booted into Windows, verify that your new thermal application is performing as expected.

    1. Idle Temperature Check: Launch a monitoring utility like HWiNFO64, Core Temp, or NZXT CAM. Allow the system to idle for 5 minutes. Healthy idle temperatures generally range between 30°C and 40°C (depending on ambient room temperature and cooler type).
    2. Stress Test Verification: Run a CPU workload like Cinebench R23, Prime95, or a demanding modern game for 10–15 minutes.
    3. Analyze Load Temps:
      • Air Coolers / Standard AIOs: Target temperatures under load should sit between 65°C and 85°C.
      • Modern High-Boost Chips (e.g., Ryzen 7000/9000, Intel 13th/14th Gen): These processors are designed to boost until hitting their thermal targets (up to 89°C–95°C). Verify that your CPU is achieving higher clock speeds and benchmark scores than before, which confirms effective heat dissipation.

    Frequently Asked Questions (FAQ)

    Q1: How often should I replace my CPU thermal paste?

    For high-performance gaming desktops and workstations, reapplying thermal paste every 2 to 3 years maintains peak efficiency. High-quality pastes like Noctua NT-H2 or ARCTIC MX-6 can last up to 5 years, but heavy daily use or high thermal cycles will dry out compound faster.

    Q2: What happens if I use too much or too little thermal paste?

    Using too little paste leaves dry gaps between the CPU and cooler, causing immediate core hotspots and thermal throttling. Using slightly too much non-conductive paste is usually harmless—excess paste simply squeezes out the sides onto the mounting substrate. However, a massive overflow can make a mess and insulate nearby electrical components.

    Q3: Can I use 70% Rubbing Alcohol to clean off old paste?

    It is not recommended. 70% isopropyl alcohol contains 30% water and impurities that take longer to evaporate, risking liquid pooling around CPU socket pins. Always use 90% or higher (preferably 99%) purity isopropyl alcohol.

    Q4: Do I need to clean and reapply paste if I just installed the cooler brand new?

    If your new cooler comes with factory pre-applied thermal paste on the cold plate, you do not need to apply additional paste. However, if you remove or reposition the cooler at any point during installation, you must clean off the pre-applied paste and apply fresh compound to prevent trapped air bubbles.

    Q5: Is liquid metal better than standard thermal paste?

    Liquid metal offers superior thermal conductivity compared to standard paste, lowering temperatures by an additional 5°C to 15°C. However, liquid metal is electrically conductive and will short-circuit your components if it leaks onto the motherboard. It also reacts chemically with copper and dissolves aluminum coolers. It should only be used by experienced builders on delidded CPUs or specialized nickel-plated cold plates.

    Q6: Why did my CPU temperatures go UP after applying new thermal paste?

    Higher temperatures after reapplication usually stem from three common issues:

    1. Uneven mounting screw pressure causing the cooler base to tilt away from the CPU.
    2. Forgetting to peel off the clear plastic protective film from the bottom of a new cooler cold plate.
    3. Trapped air pockets caused by lifting and dropping the cooler repeatedly during installation.

    Q7: Can I use alternative household materials like grease, petroleum jelly, or toothpaste as thermal paste?

    Never. Household items contain water, organic matter, and volatile oils that boil off or break down within minutes under CPU heat. They can corrode metal surfaces, conduct electricity, or cause permanent CPU hardware failure.

    Q8: What is the difference between thermal paste and thermal pads?

    Thermal paste is a viscous fluid designed to fill microscopic gaps between smooth, high-pressure metal surfaces like CPUs and CPU coolers. Thermal pads are soft, thick, pre-formed sheets used to bridge larger, uneven gaps (1mm to 3mm) over GPU VRAM, power MOSFETs, and M.2 NVMe SSDs. They are not interchangeable on standard desktop CPUs.

    Q9: Do I need to remove the CPU from the motherboard socket when cleaning off old thermal paste?

    No. It is safer to leave the CPU locked in its motherboard socket while cleaning the Integrated Heat Spreader (IHS). Leaving the CPU socket locked protects delicate socket pins (on LGA motherboards) and CPU pins (on PGA processors) from accidental damage or liquid spills.

    Q10: Should I spread the thermal paste manually or let the cooler press it down naturally?

    For standard desktop CPUs with an Integrated Heat Spreader (IHS), letting the cooler’s mounting pressure flatten a central dot or five-dot pattern naturally produces a bubble-free layer. Manual spreading is generally reserved for direct-die applications (laptops/delidded chips) or very high-viscosity compounds.

    Conclusion

    Cleaning and reapplying CPU thermal paste is one of the most effective ways to lower your PC’s operating temperatures, prevent thermal throttling, and keep fan noise down. By choosing a quality non-conductive compound, thoroughly cleaning the contact surfaces with 99% isopropyl alcohol, and securing your CPU cooler with even diagonal torque, you guarantee maximum heat transfer between your processor and cooling system. Make thermal paste maintenance a part of your regular system care routine every couple of years to keep your PC running fast and quiet.

  • How to troubleshoot directx 12 crash error messages when launching new AAA pc game releases

    How to troubleshoot directx 12 crash error messages when launching new AAA pc game releases

    • DXGI_ERROR_DEVICE_HUNG: The graphics card took too long to execute a command, causing the driver to reset the hardware pipeline. Frequently triggered by unstable factory overclocks or high GPU memory junction temperatures.
    • DXGI_ERROR_DEVICE_REMOVED: The operating system lost connection to the graphics card. Usually points to aggressive power-saving states, physical PCIe slot power drops, or a total GPU driver crash.
    • D3D12_ERROR_DRIVER_FAILURE: A fundamental failure inside the display driver when attempting to allocate virtual memory or execute pipeline state objects (PSOs).
    • DirectX 12 is Not Supported on Your System: Occurs when game files fail to detect Feature Level 12_0+ support, often caused by out-of-date Windows builds or corrupt runtime libraries.

    1.Run a Clean Driver Installation via DDU:Eliminates corrupted registry entries and stale driver caches.

    Standard driver updates often leave behind legacy settings that conflict with new DX12 game patches.

    1. Download Display Driver Uninstaller (DDU) and the latest standalone driver package from NVIDIA, AMD, or Intel.
    2. Disconnect your internet connection to stop Windows Update from automatically pulling an old generic driver.
    3. Boot Windows into Safe Mode.
    4. Run DDU, select GPU as the device type, and click Clean and Restart.
    5. Once back in normal Windows, run the official driver installer and check Perform a Clean Installation. Reconnect to the internet afterward.

    2.Purge Corrupted DirectX Shader Caches:Forces the game engine to recompile clean pipeline state objects.

    Stale or corrupted pre-compiled shaders are a primary trigger for startup crashes in modern engines like Unreal Engine 5.

    1. Open Windows Settings (Win + I) and go to System > Storage.
    2. Click on Temporary Files and check the box for DirectX Shader Cache.
    3. Click Remove files and reboot your system.
    4. If using an NVIDIA GPU, open the NVIDIA Control Panel, navigate to Manage 3D Settings, set Shader Cache Size to 10GB or Unlimited, and apply changes.

    3.Disable Overlays and In-Game Hooking Apps:Prevents third-party software from injecting unstable DirectX layers.

    DirectX 12 gives games low-level access to the GPU, making background rendering hooks highly unstable.

    • NVIDIA GeForce Experience / App: Turn off In-Game Overlay in settings.
    • Discord: Go to User Settings > Game Overlay and toggle it off.
    • RivaTuner Statistics Server (RTSS) / MSI Afterburner: Close the software entirely or set Application Detection Level to None.
    • Steam / Epic Games Launcher: Disable the platform overlay in the launcher properties.

    4.Revert Memory and GPU Overclocks to Stock:DX12 exposes subtle system instability that synthetic benchmarks miss.

    DirectX 12 exercises GPU memory and system RAM harder than older APIs. An overclock that passes 24 hours of synthetic stress tests can still crash in a DX12 title within minutes.

    1. Open MSI Afterburner and click the Reset button to restore core and memory clocks to factory defaults.
    2. Reboot into your system BIOS/UEFI.
    3. Temporarily disable XMP / EXPO profiles for your RAM to verify if system memory instability is driving the TDR (Timeout Detection and Recovery) reset.

    5.Force an Alternative Graphics API via Launch Commands:Bypasses broken DX12 pipelines until a game patch arrives.

    If launch crashes persist on a newly released title, force the game engine to fall back to an alternative rendering API.

    • Steam: Right-click the game in your library > Properties > General > Launch Options.
    • Enter -dx11, -d3d11, or -vulkan in the command box and launch the game.

    Hardware-Accelerated GPU Scheduling (HAGS) & Windows Settings

    Windows 10 and 11 feature Hardware-Accelerated GPU Scheduling (HAGS), designed to pass memory management off to the GPU. While it improves frame pacing in some titles, it frequently causes DXGI_ERROR_DEVICE_HUNG errors on fresh AAA releases.

    • How to Toggle HAGS: Go to Settings > System > Display > Graphics. Under Default settings, click Change default graphics settings. Toggle Hardware-accelerated GPU scheduling to Off and restart your PC.
    • Fullscreen Optimizations: Right-click the game’s main executable (.exe), select Properties > Compatibility, check Disable fullscreen optimizations, and click Apply.

    Frequently Asked Questions (FAQ)

    Q1: Why do new AAA games crash on DirectX 12 but run fine on DirectX 11?

    DX11 uses high-level abstraction layers managed by the GPU driver to handle memory and CPU threading. DX12 passes memory management directly to the game developer. If a game’s engine has poorly optimized memory pipelines or unhandled race conditions, DX12 crashes directly to the desktop where DX11 would have absorbed the fault.

    Q2: Will reinstalling DirectX fix my DX12 crash issues?

    DirectX 12 is integrated directly into Windows 10 and Windows 11 as a core OS component and cannot be uninstalled independently. Installing the DirectX End-User Runtime Web Installer only installs legacy DX9, DX10, and DX11 libraries. To fix DX12 runtime errors, you must run Windows Update or perform an in-place OS repair.

    Q3: What does a TDR error mean in Windows Event Viewer?

    Timeout Detection and Recovery (TDR) is a Windows safety feature. If your GPU does not respond to the OS for 2 seconds, Windows assumes the card is locked up and resets the display driver to prevent a system-wide Blue Screen (BSOD).

    Q4: How do I know if my GPU actually supports DirectX 12 Ultimate?

    Press Win + R, type dxdiag, and hit Enter. Navigate to the Display tab. Look at the Feature Levels list under the Drivers section. If it includes 12_2, your card supports DirectX 12 Ultimate (Ray Tracing, Mesh Shaders, Variable Rate Shading).

    Q5: Why does my game crash specifically during shader compilation on startup?

    Shader compilation taxes all CPU cores and system RAM simultaneously. Instability during shader compilation is frequently linked to unstable CPU power limits (such as high-tier Intel 13th/14th Gen processors needing updated motherboard microcode BIOS patches) or system memory errors.

    Q6: Can low VRAM cause a DXGI_ERROR_DEVICE_REMOVED crash?

    Yes. When a game runs out of Dedicated Video Memory (VRAM), DX12 attempts to swap assets into System RAM via the PCIe bus. If this swapping process causes a memory access violation or stalls the rendering pipeline too long, the operating system drops the device connection.

    Q7: Is it safe to delete the DirectX Shader Cache folder manually?

    Yes. The shader cache contains pre-compiled binaries created for faster loading. Deleting the cache is safe; the game will simply rebuild clean shader files the next time you launch it.

    Q8: Why does disabling my secondary monitor prevent DX12 crashes?

    Multi-monitor setups running at mixed refresh rates (e.g., 144Hz paired with 60Hz) or running background hardware-accelerated browsers can desync the GPU’s clock states, triggering a driver timeout in low-level DX12 titles.

    Q9: How do I verify if corrupted system files are breaking DirectX 12?

    Open Command Prompt as Administrator, type sfc /scannow, and press Enter. Once complete, run DISM /Online /Cleanup-Image /RestoreHealth to repair underlying Windows system files that govern Direct3D dependencies.

    Q10: Should I use Studio Drivers instead of Game Ready Drivers for AAA gaming?

    If a newly released Game Ready Driver causes persistent DX12 device-hung crashes, switching to the latest NVIDIA Studio Driver or AMD Minimal Setup Driver can offer a more stable code base while game studio patches are developed.

    Fixing DirectX 12 launch crashes on new AAA PC games usually comes down to stripping away software conflicts. By systematically conducting a clean DDU driver wipe, clearing stale shader caches, disabling third-party overlays, and disabling aggressive hardware overclocks, you strip away the background noise that destabilizes modern API pipelines. Keep your GPU drivers stable, keep your Windows build updated, and give newly launched titles a few post-launch hotfixes to settle into peak performance.