Blog

  • What is the difference between g sync and freesync monitors and which one should you buy for your graphics card

    What is the difference between g sync and freesync monitors and which one should you buy for your graphics card

    What is the Difference Between G-Sync and FreeSync Monitors and Which One Should You Buy for Your Graphics Card?

    When building or upgrading a PC gaming setup, matching your graphics card (GPU) with the right monitor is one of the most critical decisions you will make. You can purchase a high-end graphics card capable of pushing over 140 frames per second, but if your display cannot dynamically synchronize with that output, your gameplay will suffer from jarring visual artifacts like screen tearing, micro-stuttering, and increased input lag.

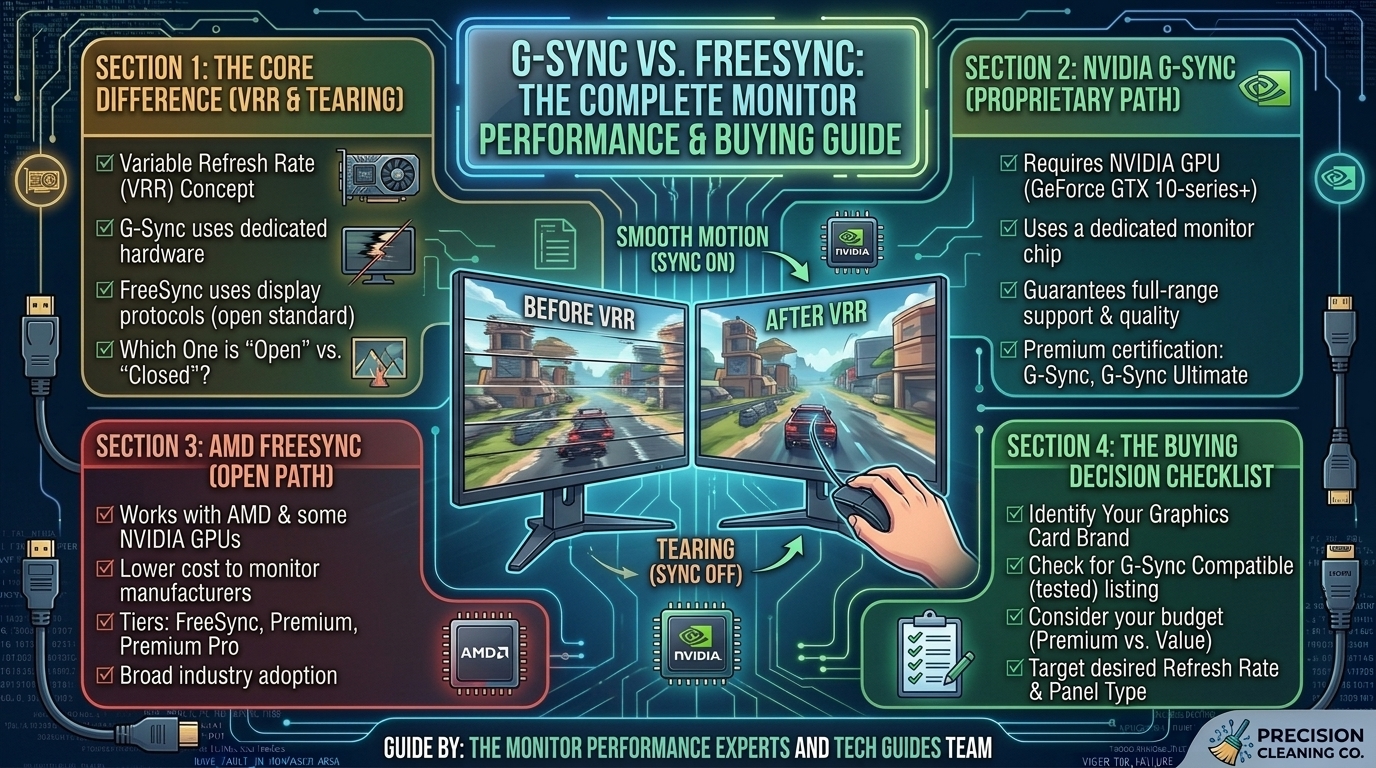
    To solve these visual discrepancies, monitor manufacturers and GPU makers rely on Variable Refresh Rate (VRR) technologies. The two dominant VRR standards on the market today are NVIDIA G-Sync and AMD FreeSync.

    While both technologies aim to eliminate screen tearing by synchronizing your monitor’s refresh rate (measured in Hz) to your GPU’s real-time frame rate (measured in FPS), they function differently under the hood, vary in pricing, and offer distinct tiers of performance.

    This comprehensive guide breaks down the core architecture of G-Sync and FreeSync, compares their performance tiers, analyzes GPU compatibility, and helps you determine exactly which monitor you should buy for your graphics card.

    Variable Refresh Rate (VRR) Overview: G-Sync vs. FreeSync

    Before examining individual features, review this side-by-side comparison of how both VRR technologies stack up against each other across essential performance metrics:

    Feature / MetricNVIDIA G-Sync (Native / Ultimate)NVIDIA G-Sync CompatibleAMD FreeSync (Base / Premium / Pro)
    Primary TechnologyHardware-based (Proprietary NVIDIA FPGA chip built into monitor)Software/Standard-based (VESA Adaptive-Sync standard)Software/Standard-based (VESA Adaptive-Sync standard)
    Supported GPUsNVIDIA GeForce GPUsNVIDIA GeForce & AMD Radeon GPUsAMD Radeon & NVIDIA GeForce GPUs
    Connection TypesDisplayPort (HDMI 2.1 supported on select newer modules)DisplayPort 1.4+ (and HDMI 2.1 on select displays)DisplayPort & HDMI (HDMI 2.0 / 2.1 supported)
    Variable OverdriveHardware-tuned, dynamic real-time overdriveVaries by monitor manufacturer qualityVaries by monitor manufacturer quality
    Low Framerate Compensation (LFC)Built-in native support across full Hz spectrumSupported on validated displays with wide VRR rangesSupported on FreeSync Premium and FreeSync Premium Pro
    Price PremiumHigher cost due to physical NVIDIA hardware moduleBudget to Mid-Range friendlyBudget to High-End friendly
    HDR ValidationStandardized via G-Sync Ultimate certificationVaries based on monitor panel specsStandardized via FreeSync Premium Pro certification

    1. The Core Problem: Why Do You Need VRR in Fast Gaming?

    To understand why G-Sync and FreeSync exist, you must first understand what happens when a monitor and a graphics card are out of sync.

    Traditional monitors refresh their image at a fixed rate—typically 60 Hz, 144 Hz, or 240 Hz. This means a 144 Hz display updates its picture exactly 144 times every second, regardless of what your computer is doing. However, a graphics card does not produce frames at a constant rate. In complex gaming scenes (such as explosions, dense foliage, or intensive multiplayer gunfights), your GPU frame output fluctuates constantly—jumping from 120 FPS down to 85 FPS and back up to 140 FPS.

    Fixed Refresh Rate (144Hz Monitor) :  [ Frame Update ] ------> [ Frame Update ] ------> [ Frame Update ]
    Fluctuating GPU Output (FPS)       :  [ Rendered FPS ] ---> [ Drop ] -------> [ Spike ] ---> [ Drop ]
                                                      ||
                                             RESULT: SCREEN TEARING / STUTTER
    

    This mismatch leads to two major visual issues:

    1. Screen Tearing

    Screen tearing occurs when your graphics card sends a new frame to the display while the monitor is mid-way through drawing the previous frame. The monitor renders the top portion of the old frame alongside the bottom portion of the new frame, causing a visible horizontal “split” across your screen.

    2. Stutter and Input Lag (The V-Sync Dilemma)

    Historically, gamers enabled V-Sync (Vertical Synchronization) in game menus to fix screen tearing. V-Sync forces the GPU to wait for the monitor to complete its refresh cycle before sending a new frame. However, if your GPU drops even a single frame below the monitor’s target refresh rate, V-Sync holds the old frame on screen for an extra cycle. This creates noticeable micro-stuttering and introduces severe input lag, making your mouse controls feel sluggish.

    The Solution: Variable Refresh Rate (VRR)

    Variable Refresh Rate technology flips traditional rendering logic on its head: instead of forcing your GPU to match your monitor’s timing, the monitor dynamically adjusts its refresh rate in real-time to match the GPU’s instantaneous FPS output. If your card outputs 87 FPS, the display runs at 87 Hz. If your performance drops to 52 FPS, the display slows down to 52 Hz instantly.

    2. Deep Dive: NVIDIA G-Sync Architecture & Tiers

    NVIDIA introduced G-Sync to solve VRR challenges using dedicated hardware. Over time, NVIDIA expanded the G-Sync brand into three distinct tiers to accommodate different price points and panel technologies.

                                 +-------------------------------+
                                 |    NVIDIA G-SYNC ECOSYSTEM    |
                                 +-------------------------------+
                                                 |
           +-------------------------------------+-------------------------------------+
           |                                     |                                     |
    [ G-Sync Compatible ]                [ Native G-Sync ]                   [ G-Sync Ultimate ]
    - Software / Adaptive-Sync           - Physical NVIDIA Hardware Chip     - Physical Module + HDR Peak Brightness
    - No extra hardware cost             - Full Variable Overdrive           - Advanced Color Calibration & Low Latency
    

    Tier 1: G-Sync Compatible

    • How it works: G-Sync Compatible monitors do not contain an NVIDIA hardware chip inside the display. Instead, they are standard VESA Adaptive-Sync / FreeSync displays that NVIDIA has tested and validated in its labs.
    • Key Features: Ensures no flickering, blanking, or visual artifacts when running G-Sync on NVIDIA GeForce graphics cards over DisplayPort or HDMI 2.1.
    • Best for: Gamers looking for an affordable, high-performance display without paying a hardware premium.

    Tier 2: Native G-Sync

    • How it works: These displays feature a physical, proprietary NVIDIA hardware module (FPGA board) built directly into the monitor casing, replacing standard scalar chips.
    • Key Features: Features Hardware Variable Overdrive. As your FPS fluctuates wildly from 144 FPS down to 50 FPS, the NVIDIA module dynamically tunes the voltage pushed to the monitor’s liquid crystals. This prevents ghosting (slow pixel response) or inverse ghosting (bright halos) across the entire refresh rate spectrum.
    • Best for: Competitive players who experience wide frame rate shifts and require zero pixel motion blur at all speeds.

    Tier 3: G-Sync Ultimate

    • How it works: Combines the physical NVIDIA hardware module with top-tier HDR (High Dynamic Range) display specifications.
    • Key Features: Validated for ultra-low latency, multi-zone local dimming (mini-LED or OLED), extreme color accuracy, and high peak brightness levels (1000+ nits).
    • Best for: Enthusiast gamers playing cinematic AAA titles who want peak HDR visuals alongside perfect hardware VRR execution.

    3. Deep Dive: AMD FreeSync Architecture & Tiers

    Introduced by AMD as an open-source alternative to NVIDIA’s hardware approach, AMD FreeSync relies on the royalty-free VESA DisplayPort Adaptive-Sync standard built into standard display scaler chips. FreeSync operates across three certification tiers:

                                +-------------------------------+
                                |     AMD FREESYNC ECOSYSTEM    |
                                +-------------------------------+
                                                |
           +------------------------------------+------------------------------------+
           |                                    |                                    |
    [ Base FreeSync ]                   [ FreeSync Premium ]                [ FreeSync Premium Pro ]
    - Standard Adaptive-Sync            - 120Hz+ Refresh Rate at FHD        - Includes all Premium features
    - Eliminates tearing & stutter      - Low Framerate Compensation (LFC)  - Meticulous HDR Color & Tone Mapping
    

    Tier 1: AMD FreeSync (Base Tier)

    • How it works: Utilizes standard DisplayPort Adaptive-Sync or HDMI VRR protocols without physical hardware modules.
    • Key Features: Eliminates tearing and stuttering within a defined dynamic refresh rate window (e.g., 48 Hz to 144 Hz).
    • Limitation: If your game’s FPS drops below the minimum VRR threshold (such as 40 FPS on a 48–144 Hz screen), base FreeSync deactivates, and screen tearing or stuttering can return.

    Tier 2: AMD FreeSync Premium

    • How it works: Enforces stricter validation standards on monitor panel performance.
    • Key Features: Requires a minimum refresh rate of 120 Hz at FHD (1080p) resolution or higher. It introduces mandatory Low Framerate Compensation (LFC).
    • What is LFC? Low Framerate Compensation prevents tearing even when your FPS drops below the monitor’s minimum threshold. If your game drops to 30 FPS on a monitor with a 48 Hz minimum boundary, LFC automatically duplicates frames (rendering each frame twice to run the monitor at 60 Hz), keeping VRR smooth and active.

    Tier 3: AMD FreeSync Premium Pro (formerly FreeSync 2 HDR)

    • How it works: Combines low-latency VRR execution with strict HDR visual quality standards.
    • Key Features: Includes LFC and high refresh rates while adding direct tone-mapping communication between the game engine, AMD Radeon drivers, and the display. This bypasses standard Windows HDR latency, delivering vibrant colors and high dynamic contrast without adding input lag.

    4. GPU Compatibility: Which Technology Works with Your Card?

    One of the most common questions gamers ask is whether an NVIDIA GPU will work on a FreeSync monitor, or vice versa. The industry has become significantly more cross-compatible over recent years.

    NVIDIA GeForce GPU  ---> [ Native G-Sync Monitor ]     = Full Hardware VRR
    NVIDIA GeForce GPU  ---> [ FreeSync / Adaptive-Sync ]  = G-Sync Compatible (over DP / HDMI 2.1)
    AMD Radeon GPU     ---> [ FreeSync Monitor ]           = Full Native FreeSync / LFC
    AMD Radeon GPU     ---> [ Native G-Sync Monitor ]     = Limited (Works only if monitor has newer module)
    

    If You Own an NVIDIA GeForce Graphics Card (GTX 10-Series, RTX 20/30/40 Series or Newer):

    1. Native G-Sync & G-Sync Ultimate Monitors: Works flawlessly out of the box via DisplayPort.
    2. FreeSync / Adaptive-Sync Monitors: Works via G-Sync Compatible mode! You can enable G-Sync inside the NVIDIA Control Panel for almost any modern DisplayPort FreeSync monitor.

    If You Own an AMD Radeon Graphics Card (RX 5000, 6000, 7000 Series or Newer):

    1. FreeSync, FreeSync Premium, & Premium Pro Monitors: Works flawlessly out of the box via DisplayPort or HDMI.
    2. Native G-Sync Monitors: Older Native G-Sync monitors with early hardware modules only worked with NVIDIA GPUs. However, modern Native G-Sync displays (equipped with updated scalar firmware) support standard VESA Adaptive-Sync over DisplayPort, allowing AMD cards to utilize basic VRR functionality.

    Step-by-Step Setup Guide: Enabling VRR on Your PC

    Simply plugging in a high-refresh-rate VRR monitor does not automatically guarantee that G-Sync or FreeSync is active. Follow these steps to ensure your system is properly configured:

    How to Enable G-Sync on an NVIDIA GPU

    1. Connect your monitor using a certified DisplayPort cable (or HDMI 2.1 for supported GPUs/monitors).
    2. Right-click your desktop and open NVIDIA Control Panel.
    3. Under the left menu, expand Display and select Set up G-SYNC.
    4. Check the box for Enable G-SYNC, G-SYNC Compatible.
    5. Select whether to enable it for Fullscreen mode or Windowed and fullscreen mode.
    6. Select your monitor model from the icon list, check Enable settings for the selected display model, and click Apply.
    [ NVIDIA Control Panel ] ---> [ Display > Set up G-SYNC ] ---> Check "Enable G-SYNC" ---> Apply
    

    How to Enable FreeSync on an AMD GPU

    1. Connect your monitor using a high-speed DisplayPort or HDMI cable.
    2. Open your monitor’s physical On-Screen Display (OSD) menu using the buttons on the panel and ensure FreeSync / Adaptive-Sync is set to ON.
    3. Right-click your desktop and launch AMD Software: Adrenalin Edition.
    4. Click the Settings (Gear Icon) in the top right corner and select the Display tab.
    5. Locate AMD FreeSync and toggle the switch to Enabled.

    Optimal In-Game Settings for G-Sync & FreeSync

    To achieve the absolute lowest input lag while keeping tearing completely eliminated, use this industry-standard VRR control configuration across your games:

    1. Turn VRR ON in your GPU Driver Control Panel (G-Sync or FreeSync).
    2. Turn In-Game V-Sync OFF inside individual game graphics menus (this prevents in-game V-Sync from adding processing buffer delay).
    3. Turn GPU Control Panel V-Sync ON (e.g., in NVIDIA Control Panel or AMD Software). Why? This acts as a frame framer-cap safety guardrail to keep your frame output from ever exceeding your maximum monitor refresh rate boundary.
    4. Set a Frame Rate Limit (NVIDIA Reflex / AMD Anti-Lag): Use built-in game frame limiters or GPU control panel caps to set your maximum FPS 3 to 4 frames BELOW your monitor’s native refresh rate.
      • On a 144 Hz screen: Cap FPS at 140 FPS.
      • On a 240 Hz screen: Cap FPS at 236 FPS.

    Why Cap FPS 3-4 Frames Below Maximum Hz?

    If your GPU frame rate reaches or exceeds your monitor’s maximum refresh cap (e.g., hitting 145 FPS on a 144 Hz display), VRR turns off automatically, and standard V-Sync takes over—introducing sudden input lag spikes. Capping your FPS slightly below your native Hz keeps VRR active 100% of the time.

    Frequently Asked Questions (FAQ)

    Q1: What is the main difference between G-Sync and FreeSync?

    A: Native G-Sync uses a physical proprietary hardware processor installed inside the monitor to handle variable refresh rates and dynamic pixel overdrive. FreeSync relies on open-source VESA DisplayPort Adaptive-Sync protocols built into standard monitor scalars, making FreeSync monitors generally more affordable.

    Q2: Will an NVIDIA graphics card work on an AMD FreeSync monitor?

    A: Yes. Modern NVIDIA GeForce graphics cards (GTX 10-series and newer) support Adaptive-Sync. You can enable G-Sync Compatible mode in the NVIDIA Control Panel over DisplayPort or HDMI 2.1 to enjoy smooth variable refresh rate gaming on a FreeSync display.

    Q3: Is Native G-Sync still worth the extra cost over FreeSync?

    A: Native G-Sync is worth the extra investment primarily for competitive gamers who demand Hardware Variable Overdrive. This feature dynamically tunes pixel response times across the entire refresh rate range, eliminating motion ghosting when your frame rates drop significantly.

    Q4: Can I use G-Sync or FreeSync over an HDMI cable?

    A: FreeSync works across both DisplayPort and standard HDMI cables. G-Sync historically required DisplayPort; however, newer G-Sync Compatible displays and HDMI 2.1 connections allow G-Sync to operate over HDMI on modern GPUs (such as RTX 20/30/40 series and newer).

    Q5: What is Low Framerate Compensation (LFC)?

    A: LFC is a feature included in FreeSync Premium, FreeSync Premium Pro, and G-Sync displays. When your game’s FPS drops below the monitor’s supported minimum refresh threshold (e.g., dropping to 35 FPS on a 48–144 Hz screen), LFC automatically doubles or triples frame renders to keep the monitor within its active VRR window, preventing sudden stutters.

    Q6: Does enabling FreeSync or G-Sync add input lag?

    A: No. VRR technologies add virtually zero input lag compared to running unconstrained frames, and they provide significantly lower input lag than traditional software V-Sync. When properly set up with a frame rate cap 3–4 FPS below your max Hz, VRR delivers the lowest latency experience alongside tearing-free visual clarity.

    Q7: Why is my G-Sync Compatible monitor flickering in game menus?

    A: Brightness flickering on unvalidated FreeSync/Adaptive-Sync displays usually occurs when frame rates fluctuate rapidly around the minimum VRR boundary (such as loading screens dropping to 15–30 FPS). Using a validated G-Sync Compatible or FreeSync Premium display prevents this issue.

    Q8: What is the difference between FreeSync Premium and FreeSync Premium Pro?

    A: FreeSync Premium adds mandatory 120Hz+ refresh rate support and Low Framerate Compensation (LFC). FreeSync Premium Pro includes all Premium features while adding strict high-dynamic-range (HDR) certification and low-latency HDR tone mapping.

    Q9: Does G-Sync or FreeSync work on modern gaming consoles like PS5 and Xbox Series X?

    A: Xbox Series X supports both AMD FreeSync and standard HDMI 2.1 VRR. PlayStation 5 supports standard HDMI 2.1 VRR. If you plan to connect your console to a gaming monitor, ensure the display supports HDMI 2.1 VRR or AMD FreeSync over HDMI.

    Q10: Should I turn off G-Sync or FreeSync for fast-paced competitive shooters like VALORANT or CS2?

    A: If your PC consistently outputs frame rates far higher than your monitor’s maximum refresh rate (e.g., 400 FPS on a 240 Hz panel), pure competitive esports players sometimes disable VRR completely to minimize every fraction of a millisecond of input processing. However, for 99% of gamers, keeping VRR active with a sub-Hz frame cap provides superior motion clarity and tracking consistency.

    Decision Framework: Which Monitor Should You Buy?

    To select the ideal display technology for your system, match your setup to these recommendations:

    • Buy an AMD FreeSync / FreeSync Premium Monitor If: You are on a budget, own an AMD Radeon GPU (or an NVIDIA GPU), and want excellent tearing-free performance across 1080p or 1440p high-refresh displays without paying a hardware markup.
    • Buy a G-Sync Compatible Monitor If: You own an NVIDIA GeForce GPU and want verified, flicker-free Adaptive-Sync performance at a competitive price point over DisplayPort or HDMI 2.1.
    • Buy a Native G-Sync / G-Sync Ultimate Monitor If: You own a high-end NVIDIA GeForce GPU, play demanding AAA titles with varying frame rates, want perfect variable hardware overdrive to eliminate motion ghosting, and demand peak HDR performance.

    By matching your graphics card to the right VRR standard and configuring your driver settings properly, you eliminate screen tearing, smooth out frame drops, and unlock the true visual potential of your gaming rig.
  • How to properly clean dust out of your pc gaming rig without damaging delicate internal computer components

    How to properly clean dust out of your pc gaming rig without damaging delicate internal computer components

    How to Properly Clean Dust Out of Your PC Gaming Rig Without Damaging Delicate Internal Computer Components

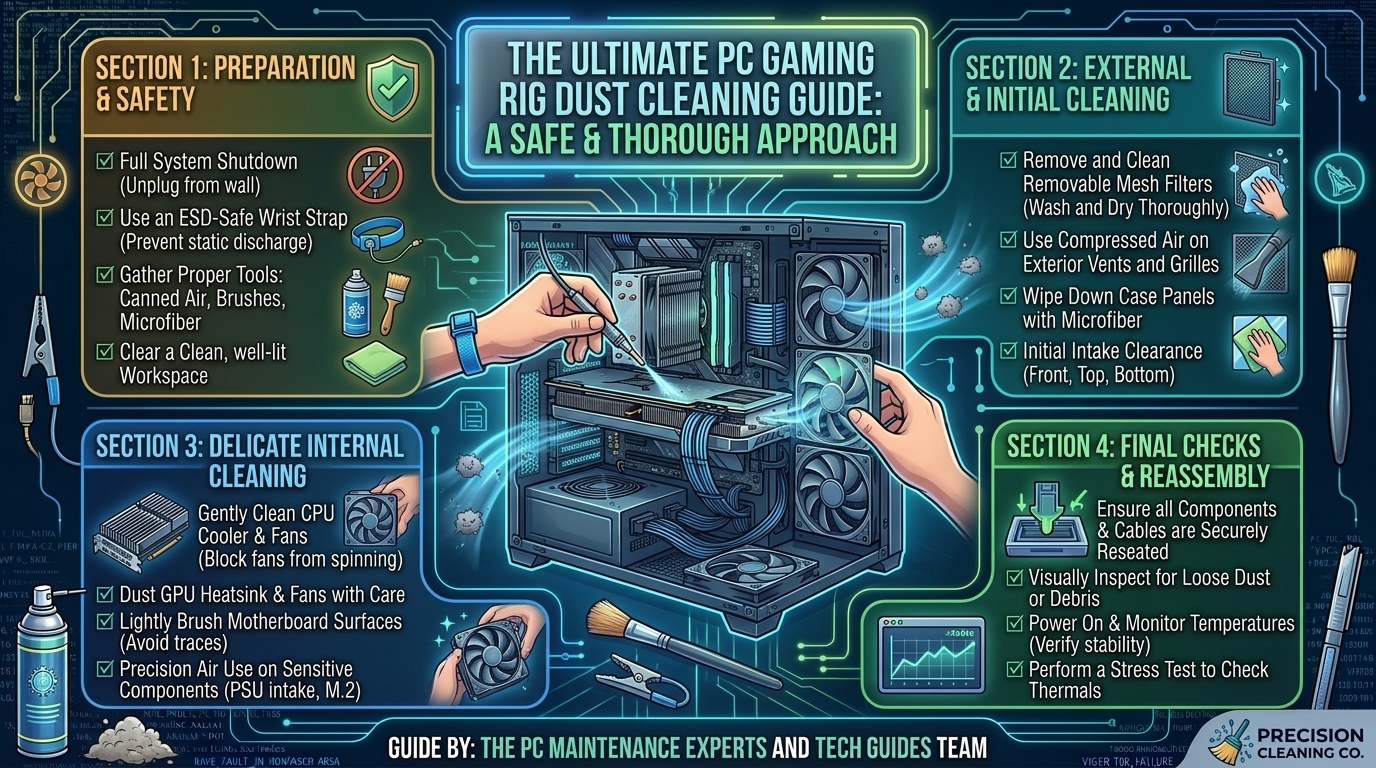
    Accumulated dust is one of the leading silent killers of gaming PC performance and hardware longevity. Over months of high-FPS gaming, your case fans pull in ambient household dust, pet dander, micro-particles, and debris. This dust settles directly onto heatsinks, graphics card backplates, radiator fins, and motherboard components.

    When dust blankets critical components, it forms an insulating thermal barrier. Your CPU and GPU can no longer dissipate heat effectively, forcing fan speeds to skyrocket, core clocks to throttle, and system noise to increase. Left unchecked, excessive heat density and static-charged dust build-up can shorten component lifespans or cause hardware failure.

    This comprehensive guide covers everything you need to safely clean your gaming PC: essential safety protocols, required tools, step-by-step disassembly workflows, deep-cleaning techniques, and preventative airflow strategies.

    Cleaning Frequency & Risk Assessment Matrix

    Before opening your PC case, review this maintenance timeline and component vulnerability guide to understand where extra care is required:

    ComponentRisk LevelRecommended IntervalKey Hazard / Primary Precaution
    Case Dust FiltersLowEvery 2–4 WeeksRestricts airflow. Wash with water (must be 100% dry before reinstallation).
    Case Fans & BladesMediumEvery 1–3 MonthsSpin hazard. Over-spinning fans with compressed air can wreck bearings or generate back-EMF voltage.
    GPU Heatsink & FansHighEvery 3–6 MonthsDelicate surface components (SMDs) and sensitive fan bearings. Never blast air up close.
    CPU Cooler / AIO RadiatorMediumEvery 3–6 MonthsDust clogs tight aluminum fins. Block fan blades while blowing out radiator channels.
    Motherboard & RAMHighEvery 6 MonthsESD Hazard. Avoid touching circuit traces or CPU socket pins with vacuum nozzles or brushes.
    Power Supply Unit (PSU)CRITICALEvery 6–12 MonthsInternal High Voltage. Clean externally using air ONLY; NEVER open the PSU casing.

    1. Essential Tools & Safety Gear (What to Use vs. What to Avoid)

    Using the wrong cleaning equipment is the leading cause of accidental component damage during maintenance.

    Approved Cleaning Tools:

    • Compressed Air Cans (Dedicated Electronics Duster): Great for short, controlled bursts of air.
    • Electric ESD-Safe Air Duster / Blower: An eco-friendly alternative to canned air that delivers steady air pressure without chemical propellants or moisture risk.
    • 99% Isopropyl Alcohol (IPA): High-purity alcohol evaporates instantly and leaves zero conductive residue. Perfect for cleaning thermal paste, fan blades, and PCB surfaces. (Avoid 70% IPA, as its water content can cause short circuits).
    • Microfiber Cloths (Lint-Free): Traps dust without scratching acrylic or tempered glass panels.
    • Anti-Static (ESD) Soft-Bristle Brushes: Ideal for gently dislodging stubborn dust stuck between heatsink fins or capacitors.
    • Wooden Toothpicks or Cable Ties: Used to hold fan blades motionless while blowing out dust.

    BANNED Equipment (NEVER Use These):

    • Standard Household Vacuum Cleaner Nozzles: Plastic vacuum nozzles build up massive static electricity charges. Touching a motherboard or GPU with a household vacuum nozzle can kill components via Electrostatic Discharge (ESD).
    • Standard Feather Dusters or Paint Brushes: Generates static friction and leaves conductive synthetic fibers behind.
    • Water, Glass Cleaners, or Household Detergents: Using water or glass cleaners on bare circuit boards causes corrosion, shorts, and permanent failure.
    • Air Compressors with Air Tanks: Standard workshop compressors collect moisture inside their tanks. Blasting your PC with a workshop compressor can spray liquid water and oil droplets directly onto your motherboard.
    [ SAFE TOOLS ]                               [ UNSAFE TOOLS ]
    - Electric ESD Duster / Canned Air           - Household Vacuum Cleaners
    - 99% Isopropyl Alcohol (IPA)                - Water / Windex / Household Cleaners
    - Anti-Static Soft Brushes                   - Workshop Compressors (Moisture Risk)
    - Microfiber Cloths                          - Feather Dusters / Synthetic Brushes
    

    2. Critical Pre-Cleaning Safety Protocols

    Before touching a single screw on your system, follow this mandatory safety routine to protect both yourself and your hardware:

    1. Power Down Complete: Shut down Windows completely (Start > Power > Shut down).
    2. Flip the PSU Toggle Switch: Switch the toggle on the back of your Power Supply Unit to the “0” (OFF) position.
    3. Unplug the AC Power Cable: Disconnect the main power cord from the wall outlet or surge protector.
    4. Discharge Residual Capacitance: Press and hold the PC’s physical Power Button on the front case for 10–15 seconds. You may see case LEDs flash briefly; this drains remaining power stored in the motherboard and PSU capacitors.
    5. Disconnect Peripheral Cables: Unplug all DisplayPort/HDMI cables, USB peripherals, network cables, and audio jacks.
    6. Establish ESD Grounding: Move your PC to a hard flat surface (wooden table or anti-static mat). Avoid working on carpets, rugs, or wearing wool socks, as these build up static charges rapidly. Touch a grounded metal object (like a bare metal table leg or unpainted PC chassis area) before touching internal components.

    3. Step-by-Step PC Deep Cleaning Workflow

    Follow this logical sequence to clean your system from the outside in without spreading dust back into cleaned areas.

    [ 1. Outer Filters & Panels ] ---> [ 2. Internal Disassembly ] ---> [ 3. Case & Radiator Blowout ]
                                                                                 |
    [ 6. Reassembly & Inspection ] <--- [ 5. CPU/GPU Thermal Maintenance ] <--- [ 4. Deep Component Cleaning ]
    

    Step 3.1: External Dust Filters and Glass Panels

    • Remove the top, front, and bottom power supply dust filters.
    • Blow off heavy dust outdoors using canned air or an electric duster. If filters are heavily caked, rinse them under lukewarm water. Crucial: Let filters air-dry completely for 12–24 hours before reinstalling.
    • Clean tempered glass side panels using a microfiber cloth lightly dampened with glass cleaner (apply cleaner to the cloth, never directly onto the PC).

    Step 3.2: Dismantling Key Components for Access

    Working inside a cramped chassis makes thorough cleaning difficult. Removing key components improves access and prevents dust from settling into slots:

    1. Carefully remove the primary Graphics Card (GPU) by unscrewing the PCIe bracket screws, releasing the PCIe slot retention latch, and disconnecting PCIe power cables.
    2. Remove RAM modules by pressing down the slot retention clips.
    3. Keep the CPU and CPU cooler mounted unless you plan to replace thermal paste.

    Step 3.3: Cleaning Radiators, Heatsinks, and Fans

    The golden rule of cleaning fans: Always immobilize the blades.

    Why You Must Hold Fan Blades Still:

    When high-pressure air spins a cooling fan past its design RPM, two things happen:

    1. It can over-torque and ruin the sleeve or fluid dynamic bearings.
    2. Electric motors act as generators in reverse. Spinning a fan blade manually sends an electrical current (Back-EMF) back through the fan header directly into your motherboard, which can fry delicate fan controller ICs.
    • Insert a wooden toothpick or hold fan blades stationary with your finger.
    • Hold canned air upright (never tilt or turn cans upside down, or liquid freezing propellant will spray out).
    • Use short, controlled bursts of air to blast dust through heatsink fins, AIO liquid cooling radiators, and fan housing frames.
    • Wipe fan blade edges clean using a microfiber cloth lightly dampened with 99% Isopropyl Alcohol to remove caked-on dust grime.
    Correct Method:  [ Toothpick / Finger Holding Blades Still ] + [ Short Air Bursts 4-6 Inches Away ]
    Incorrect Method: [ Blasting Air Directly at Free-Spinning Fans ] -> Risk of Bearing & Electrical Damage
    

    Step 3.4: Cleaning Motherboard, RAM, and Expansion Slots

    • Use an electric duster or canned air held 6–8 inches away to blow dust off the motherboard surface, working from top to bottom.
    • Use a soft anti-static brush to loosen dust trapped around capacitors, M.2 heatsink channels, and power delivery (VRM) heatsinks.
    • Spray short bursts of air into PCIe slots and RAM DIMM slots to clear out settled debris. Clean RAM gold contacts using a lint-free microfiber cloth dipped in 99% IPA.

    Step 3.5: Power Supply Unit (PSU) Maintenance

    • SAFETY WARNING: Never disassemble the metal casing of your Power Supply Unit. Internal high-voltage capacitors can hold lethal charges for days, even when completely unplugged.
    • Insert a non-conductive object (like a wooden chopstick or plastic zip tie) through the PSU fan grill to hold the internal fan blade still.
    • Use short bursts of compressed air from the outside to blow dust out through the honeycomb ventilation holes.

    4. GPU Thermal Maintenance (Advanced Deep Clean)

    If your graphics card is more than 2–3 years old and running hot despite clean heatsink fins, the internal thermal paste may have dried out and cracked.

    1. Remove the GPU backplate screws carefully in a diagonal star pattern.
    2. Gently separate the PCB from the heatsink assembly (take care not to tear delicate fan/RGB header cables).
    3. Clean old, hardened thermal paste off the GPU die using a lint-free microfiber cloth and 99% Isopropyl Alcohol.
    4. Apply a fresh dot or X-pattern of high-viscosity thermal paste (like Arctic MX-6, Thermal Grizzly Kryonaut, or Noctua NT-H2) to the GPU core die.
    5. Realign thermal pads over VRAM chips and MOSFETs (replace damaged or torn pads with matching thickness pads).
    6. Reassemble the GPU heatsink and tighten screws evenly in a cross pattern.

    5. Preventative Airflow Maintenance (Positive Static Pressure)

    To keep your system cleaner for longer, configure your case fan setup for Positive Static Pressure:

    POSITIVE PRESSURE SETUP (Recommended):
    [ Front/Bottom Intake Fans (Filtered) ] >>> Air In > Air Out >>> [ Top/Rear Exhaust Fans ]
    (More filtered intake volume than exhaust volume prevents dust from leaking through unsealed cracks)
    
    • Positive Pressure (Intake > Exhaust): You have more fans pulling air into the case through dust filters than fans pushing air out. Air naturally escapes out through unfiltered mesh cracks and PCIe slots, preventing ambient room dust from getting pulled in.
    • Negative Pressure (Exhaust > Intake): More fans pushing air out than pulling in. This creates a vacuum inside the chassis that pulls unfiltered, dusty air in through every unsealed panel seam and rear port.
    • Elevate Your PC: Keep your PC chassis off carpeted floors using a PC stand, desk mount, or hard wooden surface. Carpet placement causes bottom PSU intake fans to pull in heavy carpet fibers and floor dust.

    Cleaning Checklist Summary

    +---------------------------------------------------------------------------------+
    |                       PC GAMING RIG CLEANING CHECKLIST                          |
    +---------------------------------------------------------------------------------+
    | [ ] System powered off, PSU switch toggled OFF, power cord unplugged            |
    | [ ] Front power button held for 15s to discharge residual electrical power      |
    | [ ] Grounded self against ESD; working on hard wooden surface (no carpet)       |
    | [ ] Air filters removed and cleaned (fully dried before reinstallation)         |
    | [ ] Fan blades immobilized (holding still) during compressed air blowout        |
    | [ ] Motherboard, PCIe slots, and VRM heatsinks cleared of dust buildup          |
    | [ ] Canned air held upright (no liquid freezing propellant sprayed)             |
    | [ ] PSU cleaned EXTERNALLY only (never opening the PSU casing)                  |
    | [ ] GPU and RAM re-seated firmly; all PCIe power latches secured                |
    +---------------------------------------------------------------------------------+
    

    Frequently Asked Questions (FAQ)

    Q1: How often should I clean dust out of my gaming PC?

    A: A basic cleaning (dust filters and quick air blowout) should be done every 1–3 months. A comprehensive deep cleaning (removing the GPU, clearing fan blades, and wiping down surfaces) is recommended every 6–12 months depending on household dust levels and pet ownership.

    Q2: Can using compressed air damage my computer parts?

    A: Yes, if used improperly. Holding cans upside down sprays liquid freezing propellant that can thermally shock glass or components. Additionally, allowing compressed air to over-spin fan blades can damage bearings or send back-voltage into motherboard fan headers. Always hold cans upright and hold fan blades motionless.

    Q3: Is it safe to use a hairdryer to blow dust out of a PC?

    A: No. Hairdryers generate hot air that can warp thin plastic fan blades, melt thermal pads, or degrade components. They also build up static electricity along the plastic nozzle, posing an ESD hazard.

    Q4: What should I do if liquid propellant sprays out of my compressed air can onto a component?

    A: Do not panic or power on the PC. The liquid propellant (usually difluoroethane) evaporates quickly, but it freezes the surface instantly. Allow the component to return to room temperature completely and wait at least 30–60 minutes for all moisture to evaporate before applying power.

    Q5: Will opening my PC case to clean it void my warranty?

    A: No. Pre-built system vendors and custom PC builders expect users to perform regular maintenance. However, damaging components physically (like snapping a PCIe latch or opening a PSU casing) will void component warranties.

    Q6: Can I use 70% Rubbing Alcohol instead of 99% Isopropyl Alcohol?

    A: It is strongly discouraged. 70% alcohol contains 30% water, which takes significantly longer to evaporate and can pool underneath surface-mount components, leading to corrosion or short circuits. Always use 99% pure Isopropyl Alcohol for electronics.

    Q7: Why are my CPU and GPU temperatures still high after cleaning all the dust out?

    A: If air passages are clean but thermal performance remains poor, your thermal paste between the processor and heatsink has likely dried out and lost thermal conductivity. Replacing dried thermal paste with a fresh application usually resolves persistent high temperatures.

    Q8: How do I remove stubborn, sticky dust from fan blades?

    A: Dust mixed with oil or humidity creates a sticky film that air alone cannot remove. Dip a cotton swab or microfiber cloth in 99% Isopropyl Alcohol and gently wipe each fan blade clean individually.

    Q9: Is a leaf blower or air compressor safe if I stand far away?

    A: No. Standard air compressors can output oil and condensed water vapor stored in their tanks. Leaf blowers lack ESD grounding and produce excessive static. Stick to dedicated, ESD-safe electric duster blowers designed specifically for electronics.

    Q10: Should I replace dust filters if they are damaged or torn?

    A: Yes. Damaged or warped dust filters allow fine dust directly into your intake fans. Inexpensive magnetic aftermarket dust filters can be purchased online to replace missing or damaged stock filters.

    Conclusion

    Properly cleaning dust out of your PC gaming rig is one of the easiest ways to preserve hardware stability, maintain low thermal output, and protect expensive components from premature failure. By using ESD-safe tools, immobilizing fan blades during blowout routines, avoiding dangerous cleaning methods like household vacuums, and maintaining a positive-pressure airflow environment, your gaming rig will stay cool, quiet, and perform at its best for years to come.

  • How to fix game stuttering caused by background application overlays like discord and nvidia experience

    How to fix game stuttering caused by background application overlays like discord and nvidia experience

    How to Fix Game Stuttering Caused by Background Application Overlays Like Discord and NVIDIA App

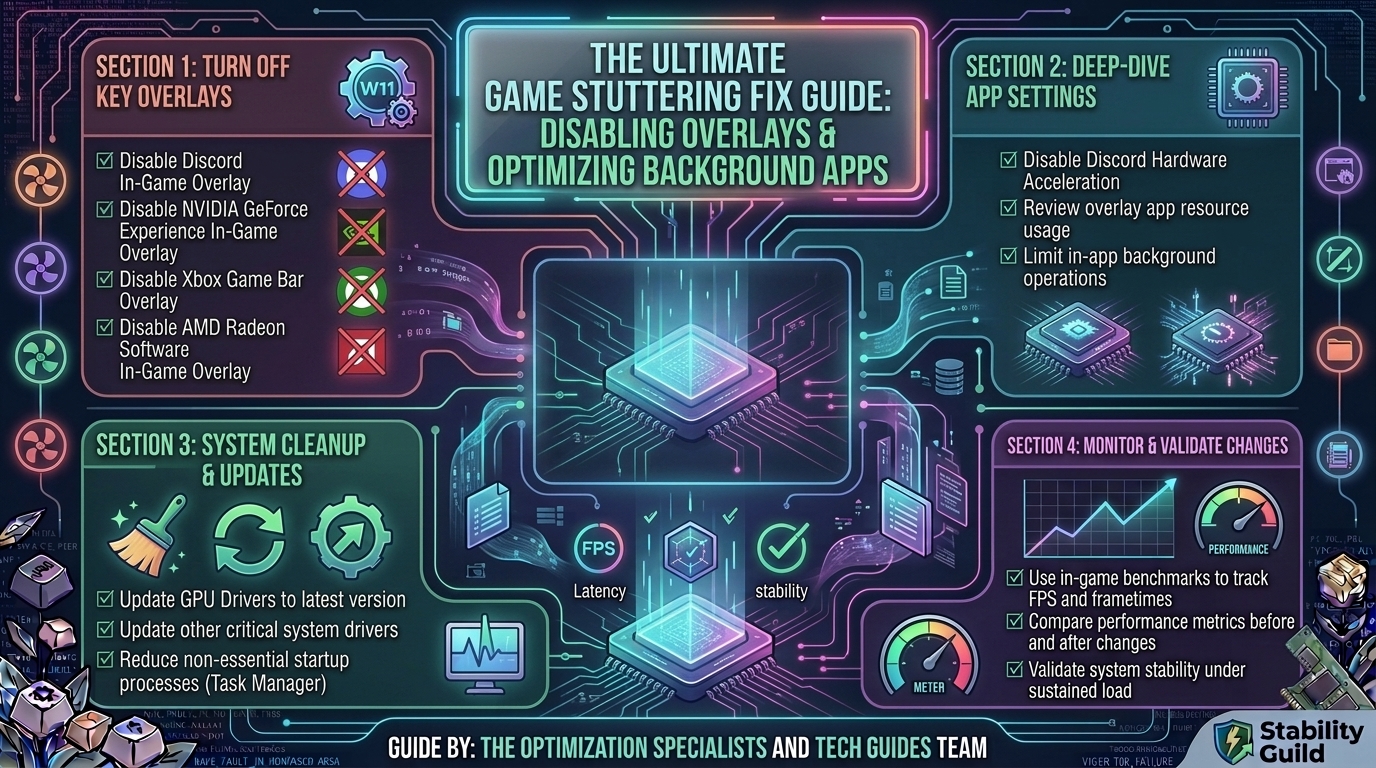
    Few issues ruin a smooth gaming session faster than sudden, jarring micro-stuttering. You might be pulling off high frame rates according to your counter, yet the game feels hitchy, choppy, and unresponsive.

    In modern PC gaming, third-party software overlays are one of the most frequent culprits behind frame-pacing drops. Features built into applications like Discord, NVIDIA App (GeForce Experience), Steam, Spotify, and RTSS hook directly into your game’s rendering pipeline (DirectX or Vulkan). When these overlays request screen redraws, encode background video, or capture hardware telemetry, they interrupt your GPU’s frame generation cycle.

    This guide breaks down why software overlays cause frame-pacing stutters, step-by-step instructions to isolate conflicting applications, and hardware-level tweaks to keep your games running smoothly.

    Overlay Impact Overview: Hardware vs. Software Overhead

    Background ApplicationFeatures Causing StutterCore Mechanism of Failure
    DiscordIn-Game Overlay, Hardware AccelerationInjects dynamic UI render loops into the game’s DirectX pipeline.
    NVIDIA App / GeForce ExperienceInstant Replay, ShadowPlay, In-Game OverlayConstant background video buffer encoding strains GPU memory bandwidth.
    RivaTuner (RTSS) / MSI AfterburnerOn-Screen Display (OSD), High Polling RatesFrequent CPU polling interrupts real-time game thread scheduling.
    Steam / EA / Epic OverlaysNotifications, Browser InjectionBackground web-view process spikes CPU usage during popups.
    Windows Game BarBackground Recording, CapturesActive screen-capture pipeline causes 1% low FPS frame drops.

    1. Disable Discord Hardware Acceleration and In-Game Overlay

    Discord is one of the most resource-intensive background apps for PC gamers. Its overlay places dynamic text, voice avatars, and pop-up notifications on top of active 3D applications.

    Turn Off the Discord Overlay:

    1. Open Discord and click the Gear Icon (User Settings) in the bottom-left corner.
    2. Scroll down the left sidebar to Activity Settings and click Game Overlay.
    3. Toggle Enable in-game overlay to OFF.
    [ Discord User Settings ] ---> [ Game Overlay ] ---> Toggle "Enable in-game overlay" to OFF
    

    Disable Hardware Acceleration in Discord:

    By default, Discord uses your graphics card to render its Electron interface. This competes directly with your active game for GPU resources.

    1. In Discord Settings, navigate to Advanced under App Settings.
    2. Toggle Hardware Acceleration to OFF.
    3. Click Okay to restart Discord.

    2. Configure NVIDIA App & GeForce Experience ShadowPlay

    The NVIDIA overlay allows quick access to filters, performance metrics, and Instant Replay. However, continuously recording gameplay to VRAM while streaming overlay layers can introduce micro-stutters, particularly in VRAM-heavy AAA titles.

    Turn Off the In-Game Overlay:

    1. Open the NVIDIA App or GeForce Experience.
    2. Click the Settings (Gear Icon).
    3. Under the General tab, find In-Game Overlay (or ShadowPlay) and toggle it OFF.

    If You Need Instant Replay (ShadowPlay):

    If you rely on NVIDIA Instant Replay to capture clips, tune these settings to prevent stuttering:

    • Lower Bitrate: Drop the recording bitrate from 50 Mbps down to 25–30 Mbps.
    • Change Save Drive: Store temporary recording cache files on a separate physical SSD, away from your primary OS and game installation drive.

    3. Adjust RivaTuner Statistics Server (RTSS) Injection Modes

    RivaTuner Statistics Server (RTSS) is an excellent tool for frame-rate capping, but aggressive hooked injection can clash with game engine render loops.

    1. Open RTSS from your system tray.
    2. Select your game’s executable profile (or Global).
    3. Set Application detection level to Low or Medium instead of High.
    4. Set Injection delay to 15000 ms (15 seconds). This allows the game engine to complete initializing its render pipeline before RTSS hooks into it.
    5. If stuttering persists, turn Enable 60 FPS / OSD Limit off and rely on built-in game frame limiters instead.

    4. Turn Off Steam, Epic, and EA App Overlays

    Even built-in game launcher overlays can cause background processing stalls when friends join games or achievements unlock.

    Disable Steam Overlay:

    1. Open Steam and navigate to Steam > Settings > In-Game.
    2. Toggle Enable the Steam Overlay while in-game to OFF.
    3. Alternatively, right-click a specific stuttering game in your Library > Properties > General > toggle off Steam Overlay.

    Disable EA App & Epic Games Overlays:

    • EA App: Click top menu > Settings > Application > Application Settings > Toggle off In-game overlay.
    • Epic Games Launcher: Click account icon > Settings > Scroll to the target game > Uncheck launcher overlay options.

    5. Enable Hardware-Accelerated GPU Scheduling (HAGS)

    Windows 11 and Windows 10 feature Hardware-Accelerated GPU Scheduling (HAGS), which hands off memory management from the CPU directly to the GPU’s dedicated scheduling processor. This reduces latency when multiple applications (like overlays and games) compete for VRAM.

    1. Press Windows Key + I to open Settings.
    2. Go to System > Display > Graphics.
    3. Click Change default graphics settings.
    4. Toggle Hardware-accelerated GPU scheduling to ON.
    5. Restart your PC.
    [ Windows Settings ] ---> [ System > Display > Graphics ] ---> Turn HAGS to ON
    

    6. Set Process Priorities & Disable Fullscreen Optimizations

    When Windows treats your background app and your game with similar process priority, frame pacing degrades quickly.

    Enforce High Game Priority:

    1. Launch your game, then press Ctrl + Shift + Esc to open Task Manager.
    2. Go to the Details tab, find your game’s .exe file.
    3. Right-click the process > Set priority > High. (Avoid setting to “Realtime”, which can freeze input threads).

    Disable Fullscreen Optimizations:

    1. Right-click the game executable file (.exe), select Properties.
    2. Go to the Compatibility tab.
    3. Check the box for Disable fullscreen optimizations.
    4. Click Apply and OK.

    Overlay Troubleshooting Workflow Summary

    +---------------------------------------------------------------------------------+
    |                        OVERLAY STUTTER FIX CHECKLIST                            |
    +---------------------------------------------------------------------------------+
    | [ ] Disabled Discord In-Game Overlay & turned OFF Hardware Acceleration        |
    | [ ] Disabled NVIDIA App / GeForce Experience In-Game Overlay                    |
    | [ ] Disabled Steam, EA App, and Epic Games Store Overlays                       |
    | [ ] Added 15,000ms Injection Delay to RTSS / RivaTuner                          |
    | [ ] Enabled Hardware-Accelerated GPU Scheduling (HAGS) in Windows               |
    | [ ] Checked "Disable fullscreen optimizations" on game executable               |
    +---------------------------------------------------------------------------------+
    

    Frequently Asked Questions (FAQ)

    Q1: Why do frame rates show high FPS even when the game feels choppy?

    A: Average FPS counters measure total frames delivered per second, but they don’t account for frame time consistency. Overlays cause irregular delays between individual frames (e.g., 5ms, then 40ms, then 5ms), creating visible micro-stutter despite a high average FPS readout.

    Q2: Does Discord’s screen-sharing feature cause micro-stuttering?

    A: Yes. Streaming your game through Discord activates real-time video encoding. If your GPU handles both high-resolution game rendering and Discord stream encoding simultaneously, frame pacing drops significantly.

    Q3: Is it better to use in-game frame limiters or RTSS?

    A: Native in-game frame limiters introduce the lowest possible input lag and avoid third-party hooking issues. However, RTSS offers flatter frame-time delivery. If RTSS causes stutter in a specific game, switch to the in-game limiter.

    Q4: Will turning off Hardware Acceleration in Discord reduce GPU temp?

    A: Yes. Disabling Hardware Acceleration forces Discord to render its UI using CPU cycles instead of drawing VRAM and GPU clock speed away from your active game.

    Q5: Why does my game stutter only when notifications pop up?

    A: Notifications from Discord, Steam, or Windows force the OS Desktop Window Manager (DWM) to interrupt the full-screen rendering pipeline to draw transparency layers, leading to temporary stuttering.

    Q6: Does Windows Game Bar overlay impact non-Microsoft games?

    A: Yes. If Xbox Game Bar background recording is active, it continuously captures video frames for all running games, which consumes GPU memory bandwidth regardless of whether the game was downloaded from Steam or Xbox App.

    Q7: Can running games in Borderless Windowed mode prevent overlay stutter?

    A: Borderless Windowed mode makes overlays render more reliably, but it forces the game through the Windows Desktop Window Manager (DWM), which can add input latency. Exclusive Fullscreen often yields lower input lag.

    Q8: Why does overlay stuttering happen more frequently on multi-monitor setups?

    A: If your primary monitor runs at 144 Hz and your secondary monitor (with Discord/browser active) runs at 60 Hz, Windows DWM can desynchronize refresh rates, triggering stutter whenever media updates on the second screen.

    Q9: Does disabling overlays affect game mods or reshade filters?

    A: Disabling standard launchers (Steam, Discord, NVIDIA) will not affect game mods. However, programs like ReShade function as custom overlays; if conflicting with RTSS or NVIDIA filters, they can also induce micro-stutter.

    Q10: What is the single most effective setting to fix background app stutter?

    A: Disabling the Discord In-Game Overlay along with turning off NVIDIA’s In-Game Overlay solves roughly 80% of background application stutter issues for PC gamers.

    Conclusion

    Software overlays offer convenient social features and clip recording, but they remain a primary cause of micro-stuttering and inconsistent frame times. By turning off non-essential overlays in Discord, Steam, and the NVIDIA App, enforcing Hardware-Accelerated GPU Scheduling, and managing process priorities, you eliminate rendering bottlenecks and restore steady, fluid performance to your PC gaming experience.

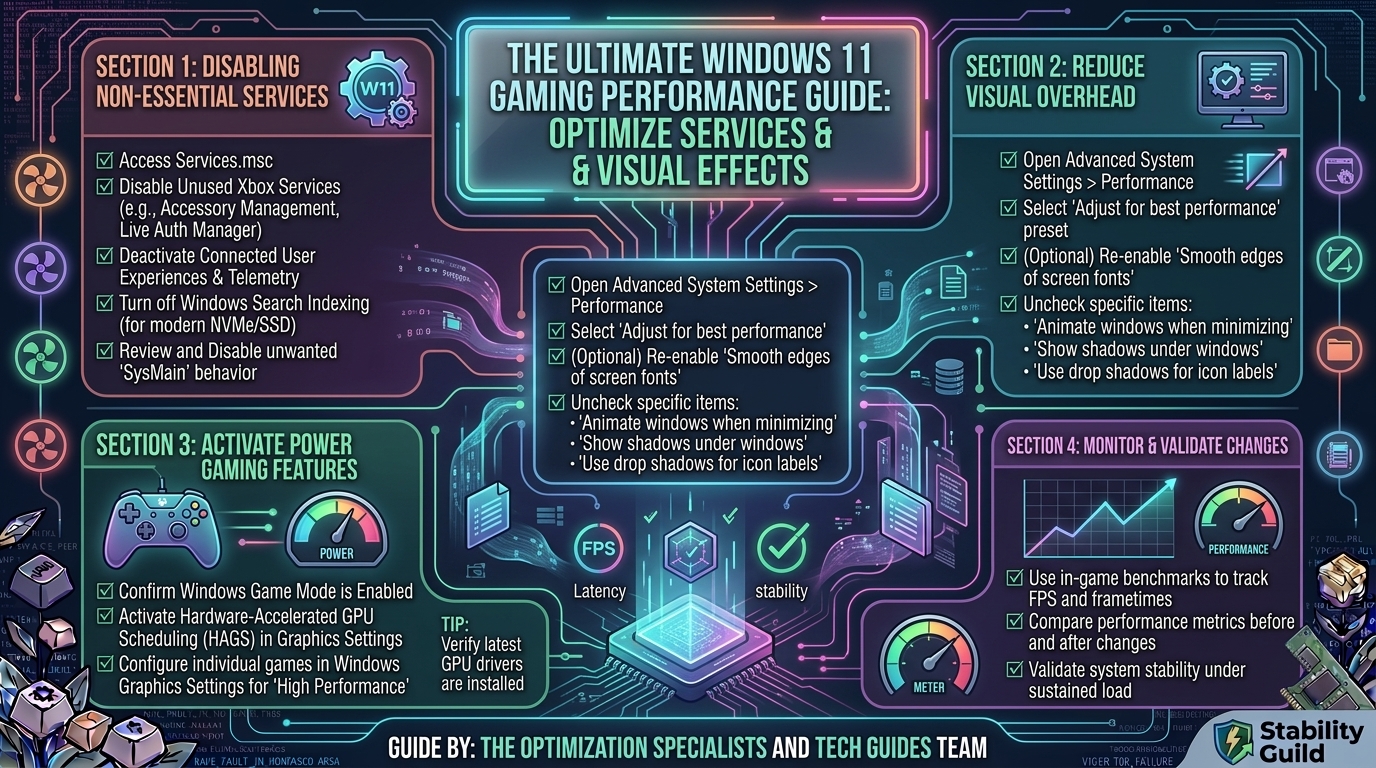
  • What are the best windows 11 background services and visual effects to disable for better gaming performance

    What are the best windows 11 background services and visual effects to disable for better gaming performance

    What Are the Best Windows 11 Background Services and Visual Effects to Disable for Better Gaming Performance

    Modern PC gaming requires every ounce of system performance your hardware can deliver. While Windows 11 brings advanced features like DirectStorage and Auto HDR to the table, its default installation ships with dozens of background services, telemetry trackers, animations, and visual enhancements running out of the box.

    These unneeded background processes constantly consume valuable CPU cycles, hog RAM, trigger background disk reads, and introduce input latency. For competitive gamers looking to maximize frame rates, smooth out 1% low frame drops, and eliminate micro-stuttering, trimming OS bloat is essential.

    This guide breaks down exactly which Windows 11 services and visual effects you can safely disable, how to streamline your operating system for raw gaming efficiency, and how to verify your performance gains step by step.

    Quick Diagnostic Matrix: Performance vs. Visual Trade-Offs

    Optimization CategoryResource ReclaimedExpected Performance ImpactSafe for Daily Use?
    Disabling Telemetry & Diagnostic TrackingCPU Cycles & Network BandwidthReduces background micro-stutters and latency spikes.100% Safe
    Trimming Unnecessary System ServicesRAM (up to 1.5 GB) & Background ThreadsKeeps CPU clear for high-frame-rate rendering.100% Safe (if following guidelines)
    Disabling Visual Effects & TransparencyGPU VRAM & Desktop Window Manager (DWM) OverheadDrops input latency and frees up GPU memory bandwidth.100% Safe
    Turning Off Xbox Game Bar & DVRCPU/GPU Video Encoding OverheadPrevents sudden 1% low FPS drops during heavy combat.100% Safe
    Disabling Core Isolation / VBSHardware Virtualization Overhead+5% to +15% FPS boost in CPU-bound games.Moderate (Reduces hyper-strict isolation security)

    1. Safely Disable High-Overhead Windows 11 Background Services

    Windows 11 runs over a hundred background services by default. Many of these are legacy features or enterprise management tasks completely irrelevant to a personal gaming rig.

    How to Access Services Manager

    1. Press Windows Key + R to open the Run dialog.
    2. Type services.msc and hit Enter.
    3. To change any service: Right-click the service name, select Properties, set the Startup type to Disabled or Manual, click Stop if running, then click Apply.
    [ Run Dialog (services.msc) ] ---> [ Right-Click Service ] ---> [ Properties ] ---> [ Startup Type: Disabled ]
    

    The Ultimate Safe Services Disabling List

    Here is the exact breakdown of non-essential services you can disable for gaming efficiency:

    Service NameDisplay NameRecommended SettingWhy You Should Disable / Set to Manual
    DiagTrackConnected User Experiences and TelemetryDisabledSends diagnostic data to Microsoft; causes periodic background CPU/disk spikes.
    sysmainSysMain (formerly Superfetch)Disabled (if on SSD/NVMe)Caches apps into RAM for HDDs. On fast NVMe SSDs, it causes unneeded RAM usage and disk writes.
    dmwappushserviceDevice Management Wireless Application ProtocolDisabledUsed for telemetry and enterprise data routing. Irrelevant for gaming PCs.
    RemoteRegistryRemote RegistryDisabledAllows remote users to modify Windows Registry. Massive security risk and resource hog.
    FaxFax ServiceDisabledOutdated legacy service. Completely useless on modern gaming hardware.
    PrintNotify / SpoolerPrint SpoolerDisabled(Only if you do not own a printer) Prevents background printer polling threads.
    MapsBrokerDownloaded Maps ManagerDisabledManages offline maps in Windows. Games use their own asset management system.
    RetailDemoRetail Demo ServiceDisabledUsed by store display PCs. Serves zero purpose on home computers.
    WSearchWindows SearchManualIndexing disk files in the background can cause stutters during open-world asset streaming.
    XblAuthManagerXbox Live Auth ManagerManual(Disable if you don’t play Game Pass titles) Required only for logging into Xbox services.

    2. Streamline Windows 11 Visual Effects for Maximum GPU Efficiency

    The Desktop Window Manager (DWM) uses GPU acceleration to render translucent windows, drop shadows, smooth animations, and window transitions. Turning off these eye-candy features frees up VRAM and eliminates display pipeline delays.

    Optimizing Visual Effects via System Properties

    1. Press Windows Key + R, type sysdm.cpl, and hit Enter.
    2. Go to the Advanced tab.
    3. Under the Performance section, click Settings…
    4. In the Visual Effects tab, select Adjust for best performance.
    [ Visual Effects Settings ]
     ( ) Let Windows choose what's best
     ( ) Adjust for best appearance
     (X) Adjust for best performance  <--- SELECT THIS
     ( ) Custom
    
    1. For a clean desktop look while preserving performance, re-check only these two options:
      • Smooth edges of screen fonts (Prevents text from looking jagged).
      • Show thumbnails instead of icons (Preserves media preview icons in File Explorer).
    2. Click Apply and OK.

    Disable Transparency & Window Animations

    1. Open Windows Settings (Windows Key + I).
    2. Navigate to Accessibility > Visual effects.
    3. Turn Transparency effects to OFF.
    4. Turn Animation effects to OFF.

    3. Disable Virtualization-Based Security (VBS) & Core Isolation

    Introduced to bolster enterprise defense, Virtualization-Based Security (VBS) and Memory Integrity (HVCI) create an isolated virtual layer in RAM. Independent benchmarks show that HVCI can reduce gaming performance by up to 15% on modern processors due to strict security validation overhead.

    How to Turn Off Memory Integrity for Gaming Performance:

    1. Open the Start menu, search for Core Isolation, and launch it.
    2. Toggle Memory Integrity to OFF.
    3. Reboot your PC.
    [ Windows Security ] ---> [ Device Security ] ---> [ Core Isolation Details ] ---> [ Memory Integrity: OFF ]
    

    4. Turn Off Game Bar Recording and Unnecessary Overlays

    Windows 11 includes built-in background recording features designed to capture gameplay clips automatically. If active, these features place continuous encoding strain on your graphics card and CPU.

    1. Open Settings (Windows Key + I).
    2. Go to Gaming > Captures.
    3. Set Record what happened to OFF.
    4. Go to Gaming > Xbox Game Bar and toggle Open Xbox Game Bar using this button on a controller to OFF.

    5. Disable Startup Apps and Telemetry Background Tasks

    Background apps that launch automatically when Windows boots consume memory bandwidth and CPU execution cycles while running quietly in your system tray.

    Clean Up Startup Tasks:

    1. Press Ctrl + Shift + Esc to launch Task Manager.
    2. Click the Startup apps icon on the left navigation panel.
    3. Review the list of applications. Right-click non-essential launchers (e.g., Spotify, Discord, Microsoft Teams, OneDrive) and select Disable.

    Disable Scheduled Telemetry Tasks:

    1. Press Windows Key + R, type taskschd.msc, and hit Enter to open Task Scheduler.
    2. Navigate to: Task Scheduler Library > Microsoft > Windows > Application Experience.
    3. Right-click Microsoft Compatibility Appraiser and select Disable.
    4. Navigate to Customer Experience Improvement Program and disable all listed tasks.

    Step-by-Step Optimization Summary Checklist

    +---------------------------------------------------------------------------------+
    |                       GAMING PERFORMANCE OPTIMIZATION CHECKLIST                 |
    +---------------------------------------------------------------------------------+
    | [ ] Set Non-Essential Windows Services to Disabled (DiagTrack, SysMain, etc.) |
    | [ ] Adjusted Performance Options to "Adjust for Best Performance"               |
    | [ ] Disabled Transparency Effects & Window Animations                           |
    | [ ] Turned OFF Memory Integrity / Core Isolation in Windows Security            |
    | [ ] Disabled Background Game Recording & Xbox Game Bar Overlays                 |
    | [ ] Cleaned up non-essential Startup Apps in Task Manager                       |
    | [ ] Disabled Background Telemetry Tasks in Task Scheduler                       |
    +---------------------------------------------------------------------------------+
    

    Frequently Asked Questions (FAQ)

    Q1: Will disabling Windows background services cause my PC to crash?

    A: As long as you follow the verified services list provided above, your operating system will remain completely stable. Essential core services responsible for system boot, network connectivity, and GPU execution are left intact.

    Q2: Does disabling SysMain (Superfetch) hurt SSD performance?

    A: No. SysMain was engineered primarily to pre-load frequently used applications into RAM for slow mechanical hard drives (HDDs). Modern NVMe SSDs read data fast enough that SysMain only adds unnecessary disk writes and RAM usage.

    Q3: How much performance gain can I expect from these Windows 11 tweaks?

    A: Depending on your hardware bottlenecks, disabling bloatware, VBS, and visual effects typically improves overall FPS by 5% to 15%, while dramatically improving 1% low frame rates, eliminating micro-stutters.

    Q4: Is it safe to disable Virtualization-Based Security (VBS) on a home gaming PC?

    A: Yes. For a home gaming system protected by standard antivirus software and safe browsing habits, turning off VBS is safe and recommended by major hardware manufacturers for performance gains.

    Q5: Should I turn off Windows Update service to stop background downloads?

    A: It is better to set Windows Update active hours rather than disabling the service entirely. Keeping Windows updated ensures your system receives critical security patches and DirectStorage performance updates.

    Q6: What is the difference between disabling services and choosing “Disable” in Task Manager?

    A: Task Manager’s “Startup apps” tab stops user-level applications (like Discord or Spotify) from booting with Windows. The Services Manager (services.msc) controls low-level kernel and background operating system processes.

    Q7: Will disabling visual effects make text look bad on my monitor?

    A: If you follow our recommended checklist and keep Smooth edges of screen fonts enabled, text readability will remain sharp while all unnecessary window animations and shadows are removed.

    Q8: Why does Xbox Game Bar cause FPS drops in modern games?

    A: Xbox Game Bar runs a background overlay and encoding pipeline that hooks into your game’s graphics rendering thread. This can introduce input lag and frame pacing stutters on single-screen setups.

    Q9: Does Windows Game Mode actually help after turning off background services?

    A: Yes. Windows 11 Game Mode prioritizes CPU and GPU resources for the active game window while suppressing background Windows Update notifications. Keep Game Mode ON in your Settings menu.

    Q10: Can I reverse these changes if I want to revert back to default Windows 11 visuals?

    A: Absolutely. Every step outlined in this guide is fully reversible. You can re-enable services in services.msc, turn transparency back on under Accessibility settings, or click Let Windows choose what’s best in Performance Options.

    Conclusion

    Windows 11 is a powerful operating system for gaming, but its factory configuration contains excessive bloatware designed for general office users and enterprise network tracking. By disabling diagnostic telemetry services, trimming background processes, turning off Core Isolation, and stripping away visual effects, you free up vital system resources. The end result is lower input latency, smoother 1% frame rate lows, and a stable, high-performance gaming environment.

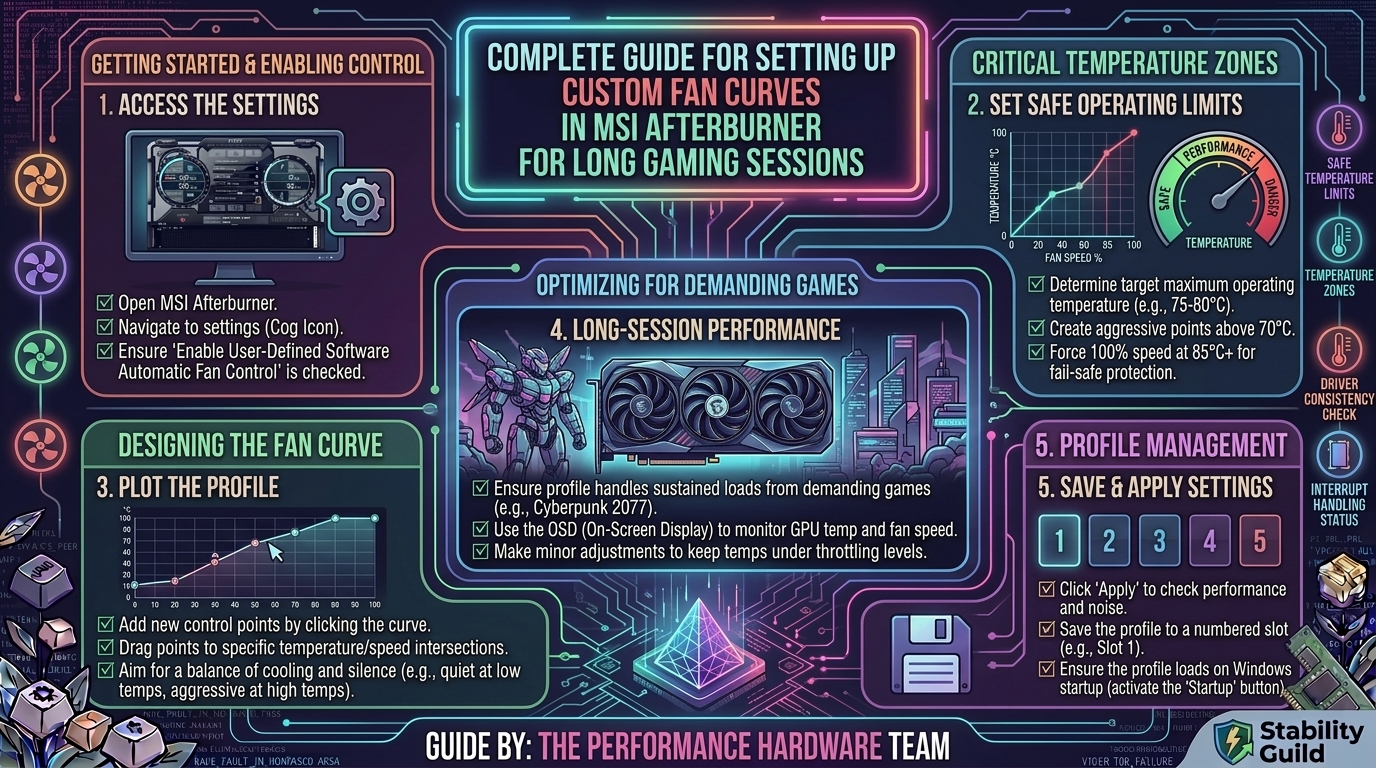
  • How to set up custom fan curves in msi afterburner to keep your graphics card cool during long gaming sessions

    How to set up custom fan curves in msi afterburner to keep your graphics card cool during long gaming sessions

    How to Set Up Custom Fan Curves in MSI Afterburner to Keep Your Graphics Card Cool During Long Gaming Sessions

    Modern high-performance graphics cards generate significant heat under sustained loads. When your GPU reaches high thermal thresholds, it automatically reduces core clock speeds—a process known as thermal throttling—to protect hardware integrity. This results in sudden frame drops, micro-stuttering, and reduced hardware longevity.

    While graphics cards ship with factory fan profiles, these configurations typically prioritize low noise output over cooling efficiency. Setting up a custom fan curve in MSI Afterburner allows you to balance thermal performance and acoustic output, preventing frame rate drops during extended gaming sessions.

    Thermal Targets for Modern GPUs

    Before creating a custom fan profile, it is essential to understand safe GPU operating temperatures:

    Temperature RangeThermal StatusSystem Impact
    Below 60°C (140°F)ExcellentMaximum Boost Clocks maintained.
    60°C – 75°C (140°F – 167°F)OptimalIdeal thermal target for long gaming sessions.
    76°C – 84°C (168°F – 183°F)Warm / Factory TargetMild GPU boost clock reduction; increased acoustic noise.
    85°C+ (185°F+)Thermal ThrottlingCore clocks drop sharply; potential silent crashes to desktop.

    Step 1: Download and Configure MSI Afterburner

    1. Download MSI Afterburner from the official MSI website (ensure you download directly from MSI to avoid unverified third-party mirrors).
    2. Run the installer and include RivaTuner Statistics Server (RTSS) if you wish to monitor real-time GPU temperatures in-game via an On-Screen Display (OSD).
    3. Open MSI Afterburner.
    4. Click the Gear Icon (Settings) to access the properties menu.
    [ MSI Afterburner Main Screen ] ---> Click Gear Icon (Settings) ---> Navigate to [ Fan Tab ]
    

    Step 2: Enable User-Defined Software Fan Control

    By default, graphics card fans run on the GPU vBIOS hardcoded fan profile. To take manual control:

    1. In the Settings window, click on the Fan tab.
    2. Check the box for Enable user defined software automatic fan control.
    3. Set the Pre-defined fan control curve setting to Custom.
    4. Change the Fan speed update period to 5000 ms (this prevents the fans from constantly fluctuating speed every single second, reducing acoustic ramping).
    5. Set the Temperature hysteresis to 3°C or 5°C. Hysteresis prevents rapid fan speed oscillations when your GPU temperature hovers right on a node boundary (e.g., jumping back and forth between 60°C and 61°C).

    Step 3: Plotting the Ideal Custom Fan Curve

    The fan curve graph plots GPU Temperature (°C) along the horizontal X-axis against Fan Speed (%) along the vertical Y-axis. You can click and drag individual node points or double-click on the line to add new nodes.

    The Balanced Gaming Profile (Recommended)

    Use the following node coordinates for an optimal balance of silent idle operation and low load temperatures:

    Fan Speed (%)
    100% |                                               /--- [ 80°C , 100% ]
     80% |                                       /------/
     60% |                               /------/ [ 70°C , 70% ]
     40% |                       /------/ [ 60°C , 50% ]
     20% |  [ 40°C , 0-30% ]----/
      0% +----------------------------------------------------- GPU Temp (°C)
            30°C    40°C    50°C    60°C    70°C    80°C
    
    • Node 1 (Idle): 40°C at 0% or 30% Fan Speed. (If your GPU supports Zero RPM mode, set this to 0% so fans stay off during desktop browsing).
    • Node 2 (Warm-Up): 50°C at 40% Fan Speed.
    • Node 3 (Moderate Gaming): 60°C at 50% Fan Speed.
    • Node 4 (Heavy Load Target): 70°C at 70% Fan Speed.
    • Node 5 (Safety Threshold): 80°C at 100% Fan Speed.

    Step 4: Save and Apply Settings on Windows Boot

    Creating the fan curve is only effective if MSI Afterburner automatically applies the profile whenever you power on your PC.

    1. Click Apply and OK on the Settings menu.
    2. On the main MSI Afterburner interface, ensure the User Define button (the small fan icon next to the fan speed slider) is highlighted/activated.
    3. Click the Windows Startup button (top-right or bottom-left depending on the active skin) so it illuminates blue.
    4. Save your configuration to a profile slot (click the Save (Floppy Disk) icon, then select a profile number like 1).

    Step 5: Verify Fan Curves with Stress Testing

    After saving your fan curve, verify thermal stability under heavy synthetic load:

    1. Launch a GPU benchmarking utility such as 3DMark Time Spy, UNIGINE Heaven, or FurMark.
    2. Run the stress test for 15–20 minutes to allow your GPU heat sink to reach full saturation.
    3. Observe peak temperatures:
      • If your GPU stays under 75°C, your fan curve is successful.
      • If noise levels are too loud, slightly drop the fan speed percentage at the 60°C and 70°C nodes.
      • If temperatures exceed 80°C, increase fan speed percentages across high-temperature nodes and consider improving your PC case airflow.

    Extra Tips to Improve GPU Thermal Performance

    • Optimize PC Case Airflow: Ensure your PC intake fans pull sufficient cool air from the front/bottom, while exhaust fans push hot air out the top/rear.
    • Repaste Older Graphics Cards: Thermal paste between the GPU core and heatsink degrades over 2–4 years. Re-applying high-quality thermal paste can drop temperatures by 5°C to 15°C.
    • Undervolt Your GPU: Lowering core voltage slightly via MSI Afterburner’s Curve Editor (Ctrl + F) significantly cuts power draw and heat generation without dropping boost clock speeds.

    Frequently Asked Questions (FAQ)

    Q1: Does running GPU fans at 100% speed shorten their lifespan?

    A: Running fans at maximum speed continuously increases mechanical wear on fluid dynamic or ball bearings over time. Designing a curve that keeps fans around 60%–75% under load preserves bearing life while providing adequate cooling.

    Q2: Why do my custom fan settings reset after restarting my PC?

    A: Make sure the Startup button in MSI Afterburner is highlighted. Also, check Windows Task Manager to ensure MSI Afterburner is allowed to run on startup.

    Q3: What is temperature hysteresis in MSI Afterburner?

    A: Hysteresis adds a temperature delay buffer before fans ramp down. A 5°C hysteresis means if your GPU hits 70°C and fans ramp up, they will stay at that speed until the temperature drops back down to 65°C, preventing erratic fan noise spikes.

    Q4: Can MSI Afterburner damage my graphics card?

    A: Adjusting fan speeds in MSI Afterburner is completely safe. Safety limits built into the GPU hardware (vBIOS) will automatically throttle or shut down the card long before physical damage can occur from high temperatures.

    Q5: Should I use Zero RPM mode on my GPU?

    A: Yes, Zero RPM mode stops fan spin completely when the GPU is idle (under 50°C–55°C), reducing dust accumulation and bearing wear during basic desktop use.

    Q6: What is the difference between Hotspot Temperature and GPU Temperature?

    A: “GPU Temperature” measures the average thermal reading across the silicon die. “Hotspot Temperature” represents the hottest single sensor on the chip, usually running 10°C to 15°C higher than the edge temperature.

    Q7: Why are my fans ignoring my custom MSI Afterburner curve?

    A: Ensure the User Define icon on the main screen is active. Additionally, check that vendor software (like ASUS GPU Tweak or Gigabyte Control Center) isn’t overriding MSI Afterburner settings in the background.

    Q8: Does a custom fan curve lower in-game temperatures for laptops?

    A: Laptop GPUs often rely on unified cooling systems managed by manufacturer embedded controllers (EC). While MSI Afterburner can monitor laptops, manual fan curve overrides often require proprietary brand software (e.g., Lenovo Vantage, ASUS Armoury Crate).

    Q9: Will lowering GPU temperatures increase frame rates?

    A: Yes. Modern GPUs use algorithms (such as NVIDIA GPU Boost or AMD Precision Boost) that scale clock speeds higher when operating within cooler thermal windows.

    Q10: What fan speed update period should I set?

    A: Setting the fan speed update period between 3000 ms and 5000 ms is ideal. This ensures smooth fan transitions instead of jarring volume changes every fraction of a second.

    Conclusion

    Setting up a custom fan curve in MSI Afterburner is one of the most effective ways to stabilize graphics card thermal performance during long gaming sessions. By mapping clear temperature-to-fan-speed steps, balancing acoustic noise levels, and setting an appropriate hysteresis buffer, you can eliminate thermal throttling, maintain stable boost clocks, and protect your hardware investment over time.

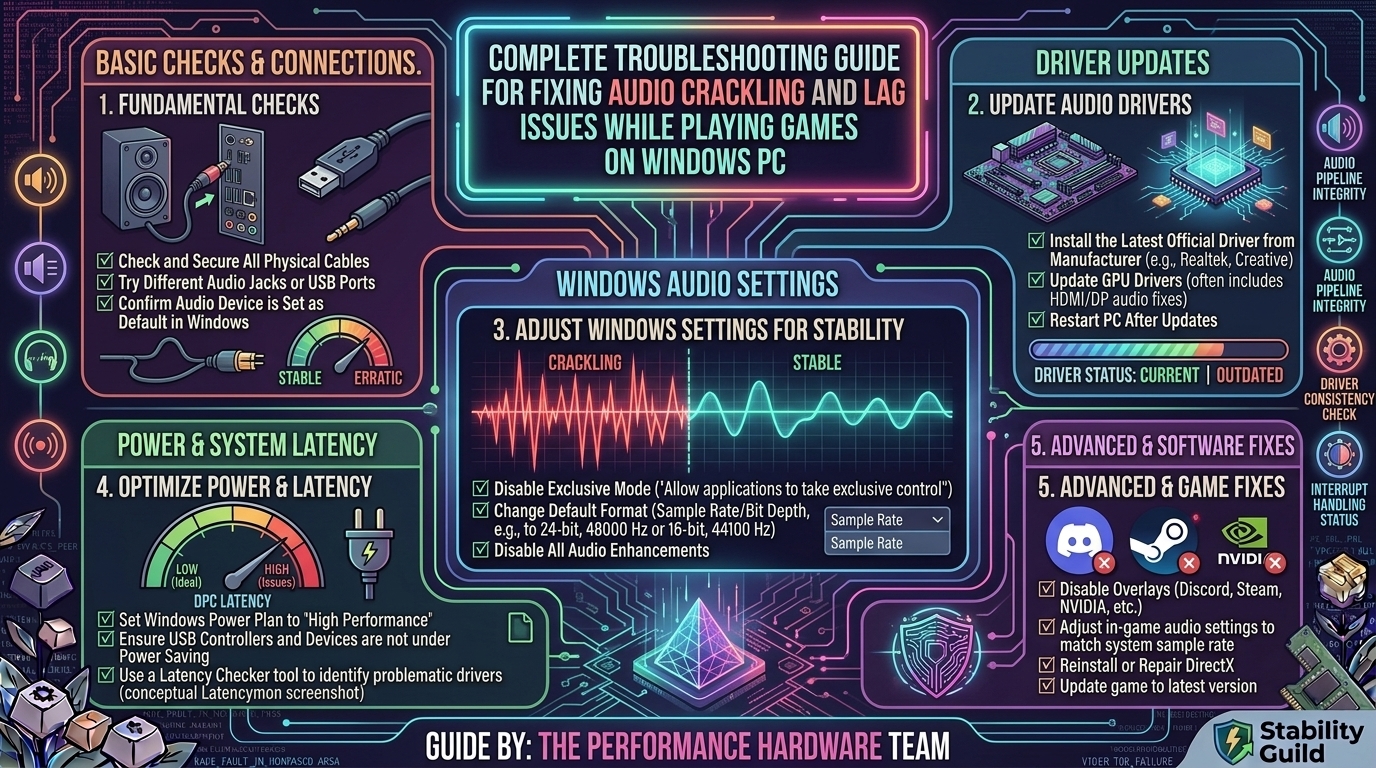
  • Complete troubleshooting guide for fixing audio crackling and lag issues while playing games on windows pc

    Complete troubleshooting guide for fixing audio crackling and lag issues while playing games on windows pc

    Complete Troubleshooting Guide for Fixing Audio Crackling and Lag Issues While Playing Games on Windows PC

    Audio issues during gaming—such as crackling, popping, buzzing, or delayed sound synced to frame hitches—can completely destroy your immersion and ruin competitive play. These artifacts occur when your PC experiences a breakdown in real-time data streaming between the hardware, audio stack, operating system, and game engine.

    Whether your audio stutters under heavy GPU load or introduces noticeable delay during fast-paced matches, this guide covers every major root cause, diagnostic workflow, and technical fix for Windows 11 and Windows 10.

    Quick Fix Matrix: Identifying the Cause

    Visual/Audio SymptomMost Likely CausePrimary Fix
    Robotic crackling under high GPU/CPU usageHigh DPC Latency / Driver ConflictsDisable High Precision Event Timer (HPET) & update drivers.
    Pop/Click sound when opening games or switching audioPower Management / USB Sleep StateSet Power Plan to High Performance; disable USB Selective Suspend.
    Sound lags several milliseconds behind videoHigh Buffer Latency or Spatial Audio ProcessingDisable Windows Spatial Sound; lower sample rate to 16-bit / 24-bit 48000 Hz.
    Audio stutters simultaneously with visual frame dropsMemory Leak / CPU Throttling / Pagefile ExhaustionRepair Windows System Files (SFC/DISM) & adjust Virtual Memory.
    Buzzing/Static through analog (3.5mm) headphonesGround Loop / Electrical EMI NoiseSwitch to an external USB DAC or isolate front-panel cables.

    Step 1: Adjust Default Audio Format and Sample Rates

    High sample rates (such as 32-bit, 192000 Hz) require significant real-time processing. Many modern game engines are natively mixed for 16-bit or 24-bit at 48000 Hz (DVD/Studio Quality). Forcing higher rates creates buffer underruns, causing static popping.

    1. Press Windows Key + R, type mmsys.cpl, and hit Enter to open the classic Sound Control Panel.
    2. Under the Playback tab, right-click your default device (Headphones or Speakers) and select Properties.
    3. Go to the Advanced tab.
    4. Set the Default Format drop-down menu to 24-bit, 48000 Hz (Studio Quality) or 16-bit, 48000 Hz.
    5. Click Apply, then OK.
    [ Sound Control Panel ] ---> [ Playback Properties ] ---> [ Advanced Tab ] ---> Select 24-bit, 48000 Hz
    

    Step 2: Disable Audio Enhancements and Spatial Sound

    Signal Processing Objects (APOs) introduced by Windows, Realtek, or third-party suites (NahiMic, Waves MaxxAudio, Dolby Access) frequently inject processing delay and output latency into real-time gaming streams.

    1. Open mmsys.cpl and access your default Playback Device Properties.
    2. Go to the Enhancements tab (or Signal Enhancements on newer Windows 11 updates).
    3. Check Disable all enhancements (or turn off Enable audio enhancements).
    4. Move to the Spatial sound tab.
    5. Set the Spatial sound format to Off.
    6. Test your game to verify if processing latency drops.

    Step 3: Fix DPC Latency (Deferred Procedure Calls)

    DPC Latency is the single largest culprit behind mysterious audio stuttering and game freezing. When a buggy device driver (often Wi-Fi, Ethernet, or GPU drivers) monopolizes your CPU core, Windows is forced to delay real-time audio buffer execution, resulting in visible lag and audio popping.

    How to Diagnose DPC Latency with LatencyMon:

    1. Download and install LatencyMon (from Resplendence Software).
    2. Close background apps, launch LatencyMon, and click the green Start Monitor button.
    3. Launch your game and play until audio crackling or stutter occurs.
    4. Alt-Tab back to LatencyMon and check the Drivers tab.
    5. Sort by Highest execution time (ms):
      • nvlddmkm.sys: NVIDIA Display Driver (Fix: Perform a clean installation of GPU drivers using DDU).
      • dxgkrnl.sys: DirectX Graphics Kernel (Fix: Disable HPET and update chipset drivers).
      • ndis.sys / wlanext.sys: Network Card Driver (Fix: Disable Wi-Fi/Ethernet power-saving features or update network drivers).

    Step 4: Configure Power Options & Disable USB Selective Suspend

    Aggressive power-saving states put hardware controllers (including USB DACs and PCIe sound cards) into low-power modes during minor execution pauses. Re-awakening these components causes instantaneous popping noises.

    1. Press Windows Key + R, type powercfg.cpl, and hit Enter.
    2. Select the High Performance or Ultimate Performance plan.
    3. Click Change plan settings next to your active plan, then click Change advanced power settings.
    4. Expand USB settings > USB selective suspend setting, and change it to Disabled.
    5. Expand Processor power management > Minimum processor state, and set it to 100%.
    6. Click Apply and OK.

    Step 5: Resolve HDMI / DisplayPort Audio Driver Conflicts

    If you connect your PC to a monitor or TV using DisplayPort or HDMI, graphics drivers (NVIDIA High Definition Audio / AMD HD Audio) install audio drivers alongside your display software. These often clash with onboard Realtek or USB DAC drivers.

    1. Press Windows Key + X and select Device Manager.
    2. Expand Sound, video and game controllers.
    3. If you use a USB headset or onboard motherboard audio, right-click NVIDIA High Definition Audio or AMD HD Audio Device and select Disable device.
    4. Right-click your active primary audio device, select Update driver, choose Search automatically, or reinstall clean factory drivers from your motherboard vendor.

    Step 6: Fix Exclusive Mode & Fast Startup Settings

    1. Disable Exclusive Mode Control:
      • Open mmsys.cpl > Playback Device Properties > Advanced tab.
      • Uncheck Allow applications to take exclusive control of this device. (This prevents games from forcing non-native audio buffer rates).
    2. Disable Windows Fast Startup:
      • Windows Fast Startup saves kernel states to disk instead of performing a fresh boot, accumulating corrupted driver cache over time.
      • Open powercfg.cpl > Click Choose what the power buttons do.
      • Click Change settings that are currently unavailable.
      • Uncheck Turn on fast startup (recommended) and restart your PC.

    Step 7: System File Repair and Hardware EMI Noise Isolation

    If sound cracking persists across all apps, system corruption or electromagnetic interference (EMI) may be the culprit.

    • Run System Repairs: Open Command Prompt as Administrator. Run sfc /scannow, followed by DISM /Online /Cleanup-Image /RestoreHealth.
    • Isolate Hardware Interference:
      • Plug your headphones into the rear motherboard I/O panel instead of front-panel case ports (front-panel wiring runs alongside noisy GPU/PSU power lines).
      • If using an external USB DAC, connect it to a direct USB 2.0 port or direct motherboard USB 3.0 port instead of an unpowered USB hub.

    Frequently Asked Questions (FAQ)

    Q1: Why does my game audio crackle only when my FPS drops?

    A: Frame rate drops mean your CPU or GPU is heavily saturated. When system threads hit 100% load, the Windows audio engine suffers from buffer underruns, dropping frames of sound and causing crackling artifacts.

    Q2: Will switching from 3.5mm analog to a USB headset fix static crackling?

    A: Yes, if the issue is caused by electrical EMI noise inside your PC case. USB headsets use their own built-in digital-to-analog converter (DAC), bypassing noisy internal motherboard audio circuitry.

    Q3: Can outdated graphics card drivers cause audio lag?

    A: Yes. GPU drivers manage DisplayPort/HDMI audio pipelines. Outdated or corrupted GPU drivers introduce major DPC latency spikes that interrupt real-time audio playback.

    Q4: What is the ideal sample rate setting for PC gaming?

    A: 24-bit, 48000 Hz (Studio Quality). This matches the native sound engine mix of almost all modern PC games, eliminating unnecessary upsampling or downsampling overhead.

    Q5: Why does my Bluetooth headset audio lag severely while gaming?

    A: Standard Bluetooth connections use lossy codecs (SBC) that introduce 100–200ms of input delay. Additionally, activating in-game voice chat forces Bluetooth into low-quality hands-free call mode. Use a dedicated 2.4GHz wireless gaming headset instead.

    Q6: Can an unstable RAM overclock cause audio stuttering?

    A: Absolutely. Unstable RAM timings or unstable XMP/EXPO profiles cause micro-data corruption in volatile memory. This interrupts real-time sound buffering long before causing a full blue screen.

    Q7: How does LatencyMon help fix audio crackling?

    A: LatencyMon measures system kernel driver responsiveness. It identifies the exact .sys driver file responsible for holding up CPU execution, allowing you to isolate and update the conflicting device driver.

    Q8: Why does disabling Windows Audio Enhancements solve popping?

    A: Audio enhancements add extra software filters over real-time sound streams. If a game engine pushes audio faster than the enhancement filter can process it, buffer desynchronization occurs, triggering clicks and pops.

    Q9: Does Windows Game Mode affect audio stability?

    A: Generally, Windows Game Mode helps by prioritizing CPU resources for your active game thread. However, if your audio software runs as a secondary app (like VoiceMod or Discord), ensure it isn’t being choked of system priority.

    Q10: What should I do if my audio stutters only during online multiplayer matches?

    A: Network drivers (especially Wi-Fi adapter drivers) often cause major DPC latency spikes during packet bursts. Switch to a wired Ethernet connection or update your Wi-Fi card drivers directly from Intel/Realtek.

    Conclusion

    Resolving audio crackling and input lag on a Windows PC requires systematically diagnosing both hardware and software bottlenecks. Start by matching your audio format to 24-bit/48000 Hz, disabling unnecessary spatial processing, and enforcing high-performance power profiles. If latency persists, use diagnostic tools like LatencyMon to target buggy drivers, isolate external hardware connections, and ensure your system executes real-time sound seamlessly alongside high-frame-rate gameplay.

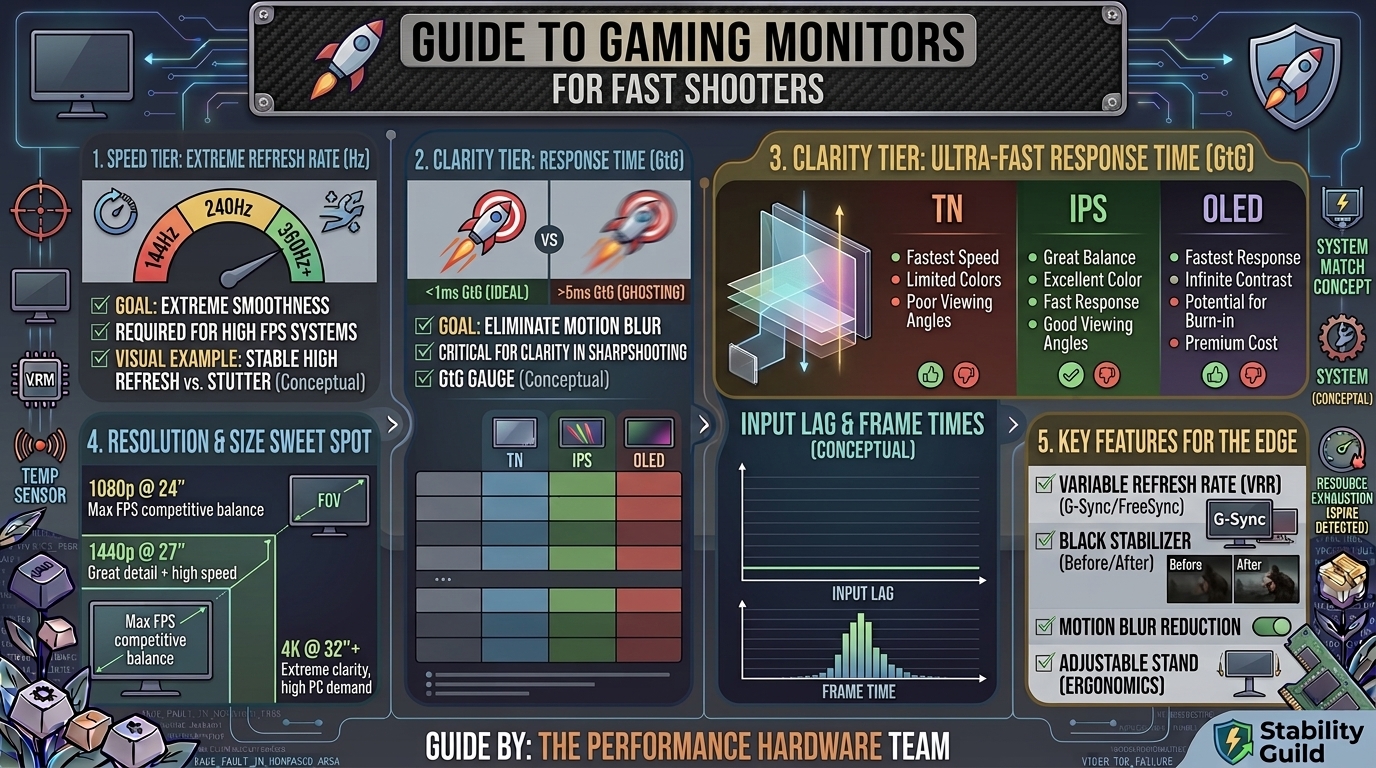
  • How to choose the best gaming monitor with high refresh rate and low response time for fast shooters

    How to choose the best gaming monitor with high refresh rate and low response time for fast shooters

    How to Choose the Best Gaming Monitor with High Refresh Rate and Low Response Time for Fast Shooters

    In fast-paced competitive shooters like VALORANT, Counter-Strike 2, Apex Legends, Call of Duty: Warzone, and Overwatch 2, split-second visual clarity can mean the difference between winning a gunfight and heading back to the lobby. While your CPU and graphics card generate high frame rates, your monitor is the final lens through which all that performance is delivered.

    If your display suffers from motion blur, screen tearing, high input latency, or slow pixel transitions, you lose critical spatial awareness. Selecting a monitor optimized for low response times and high refresh rates ensures near-instant motion tracking and crisp visual clarity under rapid mouse movements.

    This comprehensive guide breaks down every core technology, technical specification, hardware dependency, and setup step you need to select the ultimate high-refresh-rate gaming monitor for competitive fast shooters.

    Core Specifications for Fast Shooters: Quick Reference

    FeatureRecommended BaselineCompetitive Esports IdealWhy It Matters for Shooters
    Refresh Rate144 Hz – 180 Hz240 Hz – 480 Hz+Reduces display motion blur, lowers frame delay, and delivers fluid motion.
    Response Time (GtG)1ms GtG (LCD)0.03ms (OLED) / Sub-1ms (Fast IPS)Minimizes pixel transition trails (ghosting and smearing).
    Input LagUnder 5 msUnder 2 msMinimizes the delay between mouse click/movement and screen rendering.
    Panel TypeFast IPSQD-OLED / WOLED or Fast TNDetermines motion clarity, color fidelity, contrast, and response speeds.
    Screen Size24 inches (1080p)27 inches (1440p)Fits inside your peripheral vision so you don’t turn your head to spot targets.
    Resolution1080p (FHD)1440p (QHD)Maximize frame rates (1080p) vs. target clarity at range (1440p).
    Motion Blur ReductionDyAc+ / ELMB / ULMB 2Black Frame Insertion (BFI) / Pulsed BacklightStrobes backlight to eliminate sample-and-hold motion blur.

    1. Understanding Refresh Rate (Hz) and Frame Dynamics

    The refresh rate (measured in Hertz, Hz) specifies how many times per second the display draws a completely new image. Standard office displays refresh at 60 Hz (60 frames per second), whereas high-performance gaming monitors run at 144 Hz, 240 Hz, 360 Hz, or even 480 Hz.

    Frame Time Delay Comparison

    Frame time measures the exact duration a single image remains static on screen before updating:

    • 60 Hz: 16.67 milliseconds per frame
    • 144 Hz: 6.94 milliseconds per frame
    • 240 Hz: 4.16 milliseconds per frame
    • 360 Hz: 2.77 milliseconds per frame
    • 480 Hz: 2.08 milliseconds per frame

    Higher refresh rates drastically reduce human visual latency and display stutter. When sweeping a crosshair quickly across a scene, a 240 Hz or 480 Hz display renders multiple intermediate frames that a 60 Hz monitor skips completely. This allows your eyes to track enemy character models smoothly without visual breaks.

    60 Hz  : [ Frame 1 ] -----------------------> [ Frame 2 ] (16.6ms gap - choppy tracking)
    240 Hz : [ F1 ][ F2 ][ F3 ][ F4 ] ------------> [ F5 ][ F6 ] (4.1ms gap - fluid motion)
    

    2. Response Time vs. Input Lag: Why Modern Specs Are Misleading

    Many buyers confuse Response Time with Input Lag, but they govern two completely separate aspects of monitor performance:

    Pixel Response Time (GtG / MPRT)

    • What it is: The speed at which an individual liquid crystal or OLED diode transitions from one color state to another. Most commonly measured as Gray-to-Gray (GtG) or Moving Picture Response Time (MPRT).
    • Why it matters: Slow response times cause ghosting (dark trails following moving objects) and corona artifacts (inverse ghosting from excessive overdrive).

    Marketing Trap Warning: Manufacturers frequently advertise “1ms GtG” on LCD panels that only achieve that speed using extreme overdrive profiles. Extreme overdrive causes severe inverse ghosting (bright trails behind moving characters). Look for independent third-party reviews that measure real-world, artifact-free pixel transitions.

    Input Lag (Processing Delay)

    • What it is: The time interval between a frame leaving your GPU, being processed by the monitor’s internal scaler board, and physically lighting up the display pixels.
    • Why it matters: High input lag introduces delayed control feedback. If your monitor adds 15 ms of input processing, your mouse inputs will feel heavy and sluggish, ruining precise flick shots. Look for total input lag under 3–5 ms.

    3. Panel Technologies Compared: OLED vs. IPS vs. TN vs. VA

    The underlying panel architecture dictates the native response times, contrast, viewing angles, and overall clarity of your monitor.

          Fastest Response Time               Best Color & Angles
    [ OLED (0.03ms) ] ---> [ TN (1ms) ] ---> [ IPS (1ms) ] ---> [ VA (2-5ms) ]
                                                                Deepest Contrast
    
    Panel TechNative Response TimeMotion ClarityColor AccuracyContrast RatioIdeal User Profile
    OLED (QD-OLED / WOLED)0.03ms (Instant)Elite (Zero Ghosting)ExceptionalInfinite (Pure Black)Competitive players wanting peak clarity & visual quality.
    Fast IPS1ms GtGExcellentHigh (Vibrant)Moderate (~1000:1)Great balanced choice for esports and general gaming.
    TN (Twisted Nematic)0.5ms – 1ms GtGVery HighPoor (Washed Out)Low (~700:1 – 1000:1)Pure esports purists prioritizing raw speed over visuals.
    VA (Vertical Alignment)2ms – 5ms GtGPoor (Dark Smearing)DecentHigh (3000:1+)Single-player RPG gamers; Avoid for fast shooters.

    1. OLED (QD-OLED / WOLED)

    OLED pixels generate their own light independently, allowing them to switch states in 0.03 milliseconds—roughly 30 to 100 times faster than standard LCD panels. This instantaneous pixel response completely eliminates motion blur and ghosting without needing artificial overdrive voltage. Coupled with 240 Hz to 480 Hz refresh rates, OLED is the top-tier standard for competitive clarity.

    2. Fast IPS

    Modern Fast IPS (In-Plane Switching) displays have bridged the speed gap with older TN panels while preserving rich color accuracy and wide viewing angles. They deliver reliable 1ms response times across varied refresh rates, making them an incredible sweet spot for gamers who play fast shooters alongside cinematic games.

    3. TN (Twisted Nematic)

    TN panels were historically the undisputed speed champions of esports due to quick pixel transition capabilities. However, modern Fast IPS and OLED technology have largely surpassed TN. TN panels suffer from narrow viewing angles and washed-out colors, making them less practical for general use.

    4. VA (Vertical Alignment)

    While VA displays offer deep blacks and high contrast ratios, their dark-state pixel transitions are notoriously slow. This causes noticeable black smearing across high-contrast environments (e.g., an enemy moving quickly past a dark corridor). As a result, standard VA panels are generally not recommended for fast competitive shooters.

    4. Resolution vs. Screen Size: Finding the Esports Sweet Spot

    Selecting the right screen size and resolution combination is crucial to maintain both high target visibility and rapid physical reaction times.

    +-------------------------------------------------------------+
    |                                                             |
    |   [ 24" 1080p ] -> Ideal for pure high-FPS tactical shooters  |
    |                                                             |
    |   [ 27" 1440p ] -> The modern sweet spot (speed + sharpness) |
    |                                                             |
    |   [ 32"+ 4K   ] -> Immersive, but too wide for peripherals   |
    |                                                             |
    +-------------------------------------------------------------+
    
    • 24-Inch / 1080p (Full HD): The classic esports standard. A 24-inch screen fits completely within your primary field of view without forcing peripheral neck or eye movements. The lower pixel count of 1080p also allows your GPU to consistently maintain ultra-high frame rates (300+ FPS).
    • 27-Inch / 1440p (Quad HD): The current mainstream sweet spot for competitive gamers. 1440p resolution provides roughly 77% more screen space and sharper pixel density than 1080p, allowing you to spot far-off enemies and pixel peeks clearly.
    • 32-Inch+ / 4K (Ultra HD): Generally too large for fast competitive FPS games. The wide physical surface makes tracking edge UI elements (minimaps, kill feeds) difficult, while 4K places extreme performance demands on your graphics card, lowering overall frame output.

    5. Motion Blur Reduction Technologies (Backlighting Strobing)

    Motion blur on standard LCD displays is caused by a phenomenon called Sample-and-Hold—your eyes naturally follow an object in motion across the screen, but the panel holds the frame static for the entire duration of the refresh cycle.

    To eliminate this, high-end esports monitors utilize Motion Blur Reduction (MBR) technologies, such as:

    • DyAc / DyAc+ / DyAc 2 (BenQ ZOWIE)
    • ELMB / ELMB-SYNC (ASUS)
    • ULMB 2 (NVIDIA)

    How Motion Blur Reduction Works

    MBR turns the monitor’s backlight off between pixel refresh cycles (black frame insertion). By flashing the backlight synchronously with your frame output, your eyes only view fully-transitioned frames, completely eliminating visual persistence blur during fast turns.

    Trade-Off Note: Enabling MBR usually reduces overall maximum screen brightness and disables Variable Refresh Rate (VRR) on older monitors (though newer implementations like ASUS ELMB-SYNC support simultaneous VRR and strobing).

    6. Variable Refresh Rate (G-Sync & FreeSync) and Input Lag Optimization

    Variable Refresh Rate (VRR) dynamically matches your monitor’s refresh rate to the instantaneous frame-per-second (FPS) output of your GPU.

    • NVIDIA G-Sync & AMD FreeSync: Eliminates screen tearing (which occurs when the GPU pushes partial frames during a refresh scan) and prevents frame stuttering when FPS drops below native refresh caps.
    • Competitive FPS Setup Recommendation:
      1. Enable G-Sync / FreeSync in your driver control panel.
      2. Turn NVIDIA Reflex or AMD Anti-Lag ON inside game settings to automatically cap your FPS just below your maximum refresh rate (e.g., 237 FPS on a 240 Hz panel).
      3. This eliminates tearing while completely avoiding traditional V-Sync input lag penalties.

    7. Port Selection & System Cable Setup Guide

    Buying a high-refresh-rate monitor won’t help if your display cable lacks the bandwidth to transmit high refresh rates at your target resolution.

    DisplayPort 1.4 / 2.1  --->  [ Recommended for High Refresh Rates (144Hz - 480Hz) ]
    HDMI 2.1               --->  [ Required for High Refresh Rates on Consoles / PC ]
    HDMI 2.0 / Legacy      --->  [ Often locked to 60Hz - 144Hz maximum ]
    
    1. DisplayPort 1.4 / 2.1: The preferred standard connection for PC gaming. DP 1.4 supports 1440p up to 240 Hz natively (and higher via Display Stream Compression – DSC). DP 2.1 offers massive bandwidth for uncompressed 4K ultra-high-refresh displays.
    2. HDMI 2.1: Necessary if you plan to connect modern consoles (PS5 / Xbox Series X) for 4K 120 Hz gaming, or if your PC setup requires high bandwidth over HDMI.
    3. Avoid Legacy Cables: Older HDMI 1.4 or standard HDMI 2.0 cables often cap high-refresh monitors to 60 Hz or 120 Hz at native resolutions. Always use the high-speed certified DisplayPort cable included in your monitor box.

    Step-by-Step Optimization Workflow for Competitive Play

    1. Verify Windows Refresh Rate Settings:
      • Right-click desktop > Display settings > Advanced display.
      • Ensure Choose a refresh rate is manually set to your monitor’s highest available Hz setting (e.g., 240 Hz or 360 Hz). (Windows often defaults new monitors to 60 Hz).
    2. Set Monitor Overdrive (GtG):
      • Open your monitor’s physical On-Screen Display (OSD) menu.
      • Navigate to Response Time or Overdrive.
      • Set it to Fast or Medium. Avoid the “Ultra-Fast” or maximum setting if you notice bright halos (inverse ghosting) behind moving characters.
    3. Calibrate Color and Clarity Profiles:
      • Set color profile to sRGB or custom user mode.
      • Increase digital vibrance slightly in your graphics control panel if you need visual help spotting enemy models against dark backgrounds.
    4. Enable Low Latency Modes:
      • In your GPU driver settings, enable NVIDIA Reflex or AMD Radeon Anti-Lag.
      • Turn off unnecessary post-processing effects in-game (Motion Blur, Depth of Field, Chromatic Aberration).

    Frequently Asked Questions (FAQ)

    Q1: Is a higher refresh rate monitor worth it if my PC only gets 120–140 FPS in games?

    A: Yes. Even if your GPU doesn’t continuously saturate a 240 Hz monitor, the higher refresh rate capability lowers base frame processing delays and input latency. However, pairing a high refresh rate with matched frame output yields the smoothest experience.

    Q2: What is the difference between 1ms GtG and 1ms MPRT?

    A: GtG (Gray-to-Gray) measures how quickly pixels change color. MPRT (Moving Picture Response Time) measures how long a pixel remains visible on screen during motion. MPRT ratings usually rely on backlight strobing (motion blur reduction) to reduce perceived blur rather than pure pixel speed.

    Q3: Does OLED burn-in affect competitive gaming monitors?

    A: Modern OLED gaming monitors feature aggressive protection measures like pixel shifting, automatic static bright logo dimming, and background pixel refreshes. While burn-in remains a theoretical risk with static HUD elements, modern burn-in warranties and care settings make it far less of an issue for daily gaming.

    Q4: Should I buy a curved monitor for competitive shooters?

    A: Generally, flat monitors are preferred for fast competitive first-person shooters. Curved screens can slightly distort straight geometry sightlines and crosshair tracking, though subtle curves (1500R–1800R) on 27-inch screens are acceptable if you prefer them.

    Q5: Why does my monitor look blurry when I turn quickly in-game?

    A: Blurring during motion is usually caused by slow pixel response times (ghosting), sample-and-hold motion persistence, or incorrect OSD overdrive settings. Check your monitor’s OSD menu to ensure overdrive is enabled, or activate backlight strobing (MBR/DyAc) if available.

    Q6: Is 1080p still good for competitive shooting games?

    A: Yes, 1080p on a 24-inch panel remains a popular standard for budget-conscious esports players and professionals. It allows graphics cards to push consistent 360 Hz to 480 Hz frame rates without dropping frames during chaotic fights.

    Q7: Should I turn on Motion Blur in my shooter’s graphics settings?

    A: No. In-game Motion Blur adds artificial camera smear designed for cinematic immersion. In competitive shooters, always turn off in-game motion blur, depth of field, and bloom to keep target silhouettes sharp.

    Q8: What is G-Sync Compatible vs Native G-Sync?

    A: Native G-Sync monitors feature a physical NVIDIA hardware module built directly into the display board for VRR support. G-Sync Compatible monitors are standard VESA Adaptive-Sync / FreeSync displays that have been validated by NVIDIA to work smoothly over DisplayPort without flickering.

    Q9: Does screen size affect human reaction time in fast shooters?

    A: Yes. Larger screens (32 inches and up) require your eyes to physically move across a wide surface to check your minimap or health bars. A 24-inch or 27-inch display keeps the whole screen inside your central vision, enabling faster reflex tracking.

    Q10: Can I use an HDMI cable for 240 Hz gaming?

    A: Only if both your monitor and GPU feature HDMI 2.0 (for 1080p 240Hz) or HDMI 2.1 (for 1440p 240Hz+). For PC gaming setups, using a quality DisplayPort cable is always the most reliable way to guarantee native high refresh rate support without bandwidth limits.

    Conclusion

    Selecting the best gaming monitor for fast shooters comes down to prioritizing raw visual speed over high resolution. For competitive tactical FPS players, target a 24-inch 1080p or 27-inch 1440p screen paired with a 240 Hz to 480 Hz refresh rate, sub-1ms response times, and an OLED or Fast IPS panel. By tuning your Windows refresh settings, dialing in pixel overdrive, and using DisplayPort connections, you ensure your display delivers maximum clarity and peak performance when every millisecond counts.

  • Why does my game keep crashing to desktop without giving any error message or warning sign

    Why does my game keep crashing to desktop without giving any error message or warning sign

    Why Does My Game Keep Crashing to Desktop Without Any Error Message or Warning Sign?

    Few things in PC gaming are as frustrating as a silent crash to desktop (CTD). One moment you are immersed in an intense match or exploring an open world, and the next, your screen instantly closes down back to your desktop without an error code, crash log, or warning dialog.

    When a game crashes without displaying an error, it usually means the operating system or hardware forced the application to shut down before the game’s internal diagnostic tool could process the failure. This comprehensive guide breaks down the core causes of silent CTDs, step-by-step diagnostic workflows, and proven solutions to get your system back to peak gaming stability.

    Quick Diagnostic Checklist: Common Causes of Silent Crashes

    Before diving into deep system modifications, review this overview of what typically triggers an abrupt exit to the desktop:

    CategoryPrimary TriggerWhy It Causes a Silent CTD
    GPU DriversCorrupted or outdated display driversDriver timeout (TDR) resets the graphics pipeline instantly.
    RAM / MemoryMemory leaks, bad sticks, or unstable XMP/EXPOWindows terminates apps immediately upon memory read/write failure.
    Background AppsOverlays (Discord, Steam, RivaTuner) & Anti-CheatSoftware conflicts force instantaneous thread termination.
    System FilesMissing DirectX runtime or Visual C++ RedistributablesMissing execution files break rendering loops without alert boxes.
    Power & TempsGPU/CPU thermal throttling or PSU power spikesHardware safety cuts process threads under extreme thermal stress.
    Pagefile SizeDisabled or under-allocated Virtual Memory (VRAM overflow)Running out of virtual memory forces Windows to kill the heaviest process.

    1. Check Event Viewer & Reliability Monitor

    Even if no popup error message appears on screen, Windows almost always records the exact moment of the crash in its underlying system logs.

    1. Press Windows Key + R, type perfmon /rel, and press Enter to launch Reliability Monitor.
    2. Look for red critical icons on the timeline corresponding to the time your game crashed.
    3. Double-click the event (e.g., “Stopped working” or “Application Error”).
    4. Check the Fault Module Name and Exception Code:
      • 0xc0000005: Memory Access Violation (indicates RAM issues, unstable XMP, or anti-cheat conflicts).
      • nvlddmkm.sys / atikmdag.sys: NVIDIA/AMD Graphics Driver Crash.
      • d3d11.dll / dxgi.dll: DirectX Pipeline Error.

    2. Perform a Clean GPU Driver Reinstall (DDU Method)

    Updating your GPU drivers through standard express installers can leave behind corrupted cache files or mismatched registry keys. A clean installation via Display Driver Uninstaller (DDU) eliminates driver residue completely.

    1. Download the latest driver for your GPU from the official NVIDIA, AMD, or Intel website.
    2. Download Display Driver Uninstaller (DDU) from a verified source.
    3. Boot your PC into Safe Mode:
      • Hold Shift while clicking Restart in the Start Menu.
      • Navigate to Troubleshoot > Advanced options > Startup Settings > Restart.
      • Press 4 or F4 to enable Safe Mode.
    4. Run DDU in Safe Mode, select your device type (GPU), and click Clean and restart.
    5. Once Windows reboots normally, disconnect your internet connection (to prevent Windows Update from installing a generic driver) and install your downloaded driver package.

    3. Test RAM Stability (Disable XMP / EXPO)

    RAM instability is one of the single most frequent causes of games closing without an error. Extreme Memory Profiles (XMP on Intel, EXPO on AMD) are technically factory overclocks. If your motherboard or memory controller struggles with those speeds, games will silently collapse.

    • Disable Overclocks: Restart your PC, enter your BIOS/UEFI (usually via DEL or F2), and turn off XMP or EXPO. Test your game at standard base frequency (e.g., 2133 MHz – 4800 MHz depending on DDR4/DDR5).
    • Run Windows Memory Diagnostic: Press Windows Key + R, type mdsched.exe, and choose Restart now and check for problems.
    • Run MemTest86: For deep testing, create a bootable USB with MemTest86 and let it run for 4 full passes to verify individual stick stability.

    4. Configure Virtual Memory (Pagefile)

    If your system runs out of physical RAM and your Virtual Memory (Pagefile) is set too low or disabled, Windows instantly kills memory-heavy applications like modern AAA games without warning to prevent a full system blue screen (BSOD).

    1. Press Windows Key + R, type sysdm.cpl, and hit Enter.
    2. Go to the Advanced tab and click Settings under Performance.
    3. Go to the Advanced tab again and click Change under Virtual memory.
    4. Uncheck Automatically manage paging file size for all drives.
    5. Select your fastest drive (NVMe/SSD) and select System managed size, or manually set:
      • Initial size: 1.5 x your RAM size (e.g., 24576 MB for 16GB RAM).
      • Maximum size: 3 x your RAM size (e.g., 49152 MB for 16GB RAM).
    6. Click Set, then OK, and restart your PC.

    5. Disable Conflicting Overlays and Background Applications

    Third-party software that attempts to inject code into your game’s visual pipeline can trigger silent crashes.

    • Disable Overlays: Turn off the overlay feature in Discord, GeForce Experience / NVIDIA App, Steam, EA App, and Ubisoft Connect.
    • Disable RivaTuner Statistics Server (RTSS) & MSI Afterburner: Turn off custom frame-rate limiters or hardware monitoring overlays temporarily.
    • Perform a Clean Boot:
      1. Press Windows Key + R, type msconfig, and open System Configuration.
      2. Go to the Services tab, check Hide all Microsoft services, and click Disable all.
      3. Open Task Manager, go to the Startup tab, and disable non-essential startup programs.
      4. Reboot and test your game.

    6. Repair System Files and Game Files

    Corrupted game assets or missing Windows dependencies will interrupt execution instantly.

    • Verify Integrity of Game Files:
      • Steam: Right-click game > Properties > Installed Files > Verify integrity of game files.
      • Epic Games: Click the three dots on the game tile > Manage > Verify.
      • Battle.net / Xbox App: Select Options / Manage > Scan and Repair.
    • Run SFC and DISM Scans:
      1. Open Command Prompt as Administrator.
      2. Type sfc /scannow and press Enter.
      3. After completion, type DISM /Online /Cleanup-Image /RestoreHealth and press Enter.
    • Reinstall Runtimes: Ensure you have the latest Microsoft Visual C++ Redistributable All-in-One package and updated DirectX End-User Runtimes installed on your system.

    Frequently Asked Questions (FAQ)

    Q1: Why does my game crash without showing any error code?

    A: Silent crashes typically occur when an unhandled system-level exception occurs. Windows or your GPU driver terminates the game process immediately due to memory access violations, driver timeouts, or hardware thermal protections before the game can generate a diagnostic popup.

    Q2: Can an unstable RAM overclock cause silent crashes?

    A: Yes. Unstable RAM timings or unstable XMP/EXPO profiles frequently cause data corruption in volatile memory. Windows detects the read/write fault and closes the process instantly to avoid corrupting your operating system.

    Q3: How do I know if my GPU is causing the crash?

    A: Check the Windows Reliability Monitor (perfmon /rel) or Event Viewer. Look for LiveKernelEvent code 141 or 119, or faulting module names referencing nvlddmkm.sys (NVIDIA) or atikmdag.sys (AMD).

    Q4: Will running out of Virtual Memory cause a crash to desktop?

    A: Absolutely. If physical RAM fills up and your pagefile is disabled or restricted, Windows will abruptly kill the application consuming the most memory without displaying a warning dialog.

    Q5: Why do games crash only after 15–30 minutes of gameplay?

    A: Delayed crashes usually indicate continuous heat buildup (thermal throttling of the CPU/GPU), progressive memory leaks within the game software, or power supply unit (PSU) instability under sustained load.

    Q6: Can anti-cheat software cause games to close randomly?

    A: Yes. Modern kernel-level anti-cheat programs (like Easy Anti-Cheat, BattlEye, or Vanguard) will close a game immediately without notification if they detect blacklisted background software, conflicting injection software, or corrupted anti-cheat service files.

    Q7: How does DirectX 12 affect silent crashes?

    A: DirectX 12 places lower-level memory management responsibilities on game developers compared to DirectX 11. If a game’s DX12 implementation encounters a pipeline stall or buffer mismatch, it often terminates directly to desktop instead of falling back smoothly.

    Q8: Can a weak Power Supply Unit (PSU) trigger desktop crashes?

    A: Yes. High-end GPUs draw sudden transient power spikes during intense rendering. If your PSU cannot supply clean power during a spike, the GPU drops power momentarily, triggering a graphics reset that drops you back to desktop.

    Q9: Does Windows Game Mode help prevent crashes?

    A: Windows Game Mode prioritizes CPU and GPU resources for active gaming threads. While it generally improves performance, disabling Windows Game Mode can sometimes resolve weird compatibility crashes caused by system thread allocation bugs.

    Q10: What should I do if every fix fails?

    A: If manual file repairs and driver reinstallations do not solve the issue, run a dedicated stress test (like 3DMark or FurMark) to isolate hardware instability. If synthetic stress tests also crash, you may be dealing with a physically degrading hardware component (such as bad VRAM, degraded CPU, or failing storage drive).

    Summary

    Diagnosing a silent crash to desktop requires systematically eliminating variables. Start by inspecting Windows Reliability Monitor to identify underlying event codes. From there, execute a clean GPU driver reinstallation using DDU, verify RAM stability by disabling XMP/EXPO, increase your virtual memory allocation, and disable invasive third-party overlays. Methodically working through these steps isolates the conflict and restores seamless stability to your gaming sessions.

  • How to enable and configure resizable bar in bios for performance boosts in modern graphics cards

    How to enable and configure resizable bar in bios for performance boosts in modern graphics cards

    How to Enable and Configure Resizable BAR in BIOS for Performance Boosts in Modern Graphics Cards

    Modern video games demand unprecedented data transfer rates between your System RAM, Central Processing Unit (CPU), and Graphics Processing Unit (GPU). As render resolutions scale to 4K, textures grow to massive sizes, and ray tracing pipelines saturate system buses, traditional hardware communication bottlenecks can restrict overall frame rate output.

    Enter Resizable BAR (Base Address Register)—an advanced PCI Express (PCIe) interface technology that fundamentally restructures how your processor communicates with your graphics card’s video memory (VRAM). When enabled and properly configured, Resizable BAR unlocks significant performance boosts, stabilizes 1% low frame rates, and eliminates texture streaming stutters across a vast library of modern PC titles.

    This comprehensive guide breaks down the underlying technology, system compatibility requirements, step-by-step BIOS configuration procedures across major motherboard vendors, and critical troubleshooting steps to ensure your rig achieves maximum gaming performance.

    1. What Is Resizable BAR and How Does It Work?

    To understand why Resizable BAR is a game-changer for PC gaming performance, you must first understand how traditional PCIe communication works.

    Traditional PCIe Transfer (256 MB Blocks):
    [CPU] ──(256 MB)──> [256 MB] ──(256 MB)──> [256 MB] ──> [GPU VRAM]
    (Multiple small transactions create queuing bottlenecks)
    
    Resizable BAR PCIe Transfer (Full VRAM Access):
    [CPU] ───────────────────────(Full 16 GB Access)───────────────────────> [GPU VRAM]
    (CPU directly requests and transfers assets instantly as needed)
    

    The Legacy 256 MB Bottleneck

    For decades, standard PCI Express architecture dictated that the CPU could only negotiate transfers to GPU video memory in rigid 256 Megabyte (MB) chunks. This limitation was established during the 32-bit computing era, long before modern games began requiring 8 GB, 12 GB, or 16 GB+ of VRAM to hold high-resolution assets.

    Under the traditional 256 MB limit:

    • If a game engine needed to transfer 4 GB of character models, lighting maps, and texture packs from System RAM to VRAM, the CPU had to break that payload into 16 separate transfers.
    • These transfers queued up on the PCIe bus, forcing execution threads to wait and creating momentary latency spikes—commonly experienced by players as micro-stutters or dropped frames.

    The Resizable BAR Solution

    Resizable BAR (part of the official PCIe 3.0 specifications and expanded in PCIe 4.0/5.0) removes this arbitrary block limitation. It enables the CPU to dynamically negotiate the size of the Base Address Register mapped to the GPU.

    Instead of a narrow 256 MB pipe, the CPU gains direct, simultaneous access to the entire VRAM frame buffer. The CPU can request single assets, small shaders, or multi-gigabyte texture packages in a single transaction, dramatically reducing bus overhead and pipeline stalls.

    2. Platform Branding: Resizable BAR vs. Smart Access Memory (SAM)

    Depending on your hardware ecosystem, you will see different terms used for the same underlying PCI Express feature:

    • AMD Smart Access Memory (SAM): AMD’s marketing name for Resizable BAR when combining an AMD Ryzen CPU, an AMD 500-series or 600-series motherboard, and an AMD Radeon RX 6000 or RX 7000 series GPU. AMD SAM includes additional driver-level software optimizations tailored for all-AMD hardware builds.
    • Nvidia Resizable BAR (ReBAR): Nvidia’s implementation for GeForce RTX 30-series (Ampere), RTX 40-series (Ada Lovelace), and newer graphics cards.
    • Intel Resizable BAR: Supported across Intel Arc GPUs and 10th Gen to 14th Gen Intel Core desktop processors. (Note: Intel Arc GPUs require Resizable BAR enabled for playable frame rates).

    Core Fact: Whether labeled as SAM or Resizable BAR, the feature relies on identical motherboard BIOS mechanisms: Above 4G Decoding and Re-Size BAR Support.

    3. System Hardware & Software Requirements

    Before attempting to enable Resizable BAR in your motherboard BIOS, ensure your hardware platform meets all necessary compatibility checks across the CPU, GPU, motherboard, and operating system.

    Hardware Compatibility Overview

    ComponentMinimum Compatibility RequirementRecommended / Ideal Setup
    Operating SystemWindows 10 64-bit (v2004 or newer)Windows 11 64-bit (UEFI native)
    Drive PartitioningGPT (GUID Partition Table)GPT (CSM/MBR mode is strictly unsupported)
    Graphics CardNvidia RTX 3060 or higher / AMD RX 6000 series / Intel Arc A-SeriesRTX 40-Series / RX 7000-Series / Intel Arc B-Series
    Processor (CPU)Intel 10th Gen Core (vBIOS update may be needed) / AMD Ryzen 3000 Series (excl. Ryzen 3 3200G/3400G)Intel 12th–14th Gen / AMD Ryzen 5000, 7000, or 9000 Series
    Motherboard ChipsetIntel 400-series / AMD 400-seriesIntel 600/700-series / AMD 600/800-series

    Critical Requirement: GPT Partition & UEFI Mode

    Resizable BAR cannot function in Legacy BIOS (CSM) mode or on hard drives using the old MBR (Master Boot Record) partition table.

    To verify your partition style in Windows:

    1. Right-click the Windows Start Button and select Disk Management.
    2. Right-click Disk 0 (your primary Windows boot drive) and select Properties.
    3. Click the Volumes tab.
    4. Locate Partition style: It MUST say GUID Partition Table (GPT).
    [System Check Workflow]
                 │
                 ├──> Drive Partitioning = MBR? ──> Convert to GPT via mbr2gpt tool in Windows
                 │
                 └──> Drive Partitioning = GPT? ──> Proceed directly to BIOS configuration
    

    If your drive shows Master Boot Record (MBR), you must convert it to GPT using Windows’ built-in mbr2gpt.exe command tool before disabling CSM in BIOS, or your system will fail to boot into Windows.

    4. Step-by-Step BIOS Configuration Guide

    Because every motherboard manufacturer organizes setup menus slightly differently, follow the specific guide below for your motherboard brand (ASUS, MSI, Gigabyte, or ASRock).

    Step 1: Pre-BIOS Preparation

    1. Ensure your graphics card drivers are updated to the latest available version via Nvidia GeForce Experience / App, AMD Software: Adrenalin Edition, or Intel Arc Control.
    2. Save any open work and restart your computer.
    3. During the initial boot splash screen, repeatedly press the designated key to enter BIOS/UEFI setup (typically Delete or F2).

    Step 2: Motherboard Brand Instructions

    ASUS Motherboards (ROG, TUF, Prime)

    1. Once inside the ASUS BIOS, press F7 to switch to Advanced Mode.
    2. Navigate to the Advanced tab using the top menu.
    3. Select PCI Subsystem Settings.
    4. Locate Above 4G Decoding and set it to Enabled.
    5. Once Above 4G Decoding is enabled, the Re-Size BAR Support option will become visible.
    6. Set Re-Size BAR Support to Auto (or Enabled).
    7. Navigate to the Boot tab and select CSM (Compatibility Support Module).
    8. Set Launch CSM to Disabled.
    9. Press F10 to Save Changes & Reboot.

    MSI Motherboards (MPG, MAG, PRO)

    1. Press F7 to toggle to Advanced Mode (EZ Mode does not reveal full PCIe submenus).
    2. Go to Settings ──> Advanced ──> PCIe / PCI Subsystem Settings.
    3. Change Above 4G Memory/Crypto Currency Mining to Enabled.
    4. Change Re-Size BAR Support to Auto (or Enabled).
    5. Navigate back to Settings ──> Boot.
    6. Ensure Boot mode select is set to UEFI (not Legacy/CSM).
    7. Press F10 to Save and Exit.

    Gigabyte / AORUS Motherboards

    1. Press F2 if necessary to enter Advanced Mode.
    2. Navigate to the Settings tab at the top of the screen.
    3. Select IO Ports (or PCIe Subsystem Settings on older revisions).
    4. Locate Above 4G Decoding and change to Enabled.
    5. Locate Re-Size BAR Support and change from Disabled to Auto.
    6. Switch to the Boot tab on the top menu.
    7. Locate CSM Support and set it to Disabled.
    8. Press F10 to Save Changes and Reboot.

    ASRock Motherboards

    1. Click on the Advanced tab at the top navigation bar.
    2. Select PCI Configuration.
    3. Toggle Above 4G Decoding to Enabled.
    4. Set Re-Size BAR Support to Auto.
    5. Go to the Boot tab along the top.
    6. Scroll down to CSM (Compatibility Support Module) and set it to Disabled.
    7. Press F10 to Save Changes and restart.

    5. Verifying Resizable BAR Activation in Windows

    After configuring your BIOS and booting back into Windows, verify that Resizable BAR is active using any of these three quick methods:

    [Verification Methods]
            │
            ├──> Method 1: Nvidia Control Panel (System Information ──> Resizable BAR: Yes)
            ├──> Method 2: AMD Software Adrenalin (Performance ──> Tuning ──> AMD Smart Access Memory: Enabled)
            └──> Method 3: GPU-Z Utility (Advanced Tab ──> Resizable BAR ──> All Checks Green)
    

    Method 1: Nvidia Control Panel

    1. Right-click on your desktop and select Nvidia Control Panel.
    2. Click on System Information in the bottom-left corner of the window.
    3. In the Details list under the Display tab, look for Resizable BAR.
    4. If configured correctly, it will state Yes.

    Method 2: AMD Software: Adrenalin Edition

    1. Right-click your desktop and open AMD Software.
    2. Go to the Performance tab, then select Tuning.
    3. Scroll down to the bottom right of the panel.
    4. Locate AMD Smart Access Memory. The toggle switch should show Enabled.

    Method 3: GPU-Z Utility (Universal)

    1. Download and run the free utility TechPowerUp GPU-Z.
    2. On the main Graphics Card tab, look at the bottom right corner for the Resizable BAR field (it will display Enabled or Disabled).
    3. Click on the Advanced tab along the top, select Resizable BAR from the dropdown menu, and review the detailed check log. If any requirement fails (such as CSM Enabled or No GPT Partition), GPU-Z will highlight the exact issue.

    6. Real-World Performance Impact & Game Scaling

    Resizable BAR is not a magic bullet that boosts frame rates across every application equally; its impact depends heavily on game engine design, render API (DirectX 12 vs. Vulkan vs. DirectX 11), and hardware resolution.

    Game Performance Scaling Profile

    [Performance Gains Across Titles]
    +15% to +24%  ████████████████████████  (Assassin's Creed Valhalla, Forza Horizon 5)
     +5% to +12%  ██████████████            (Cyberpunk 2077, Red Dead Redemption 2)
      0% to +3%   ████                     (Competitive eSports at 1080p, CS2, Valorant)
     -1% to -3%   █                        (Select legacy DX11 games - handled via driver profiles)
    

    Where You Will See the Biggest Gains

    • Open-World Titles: Games with seamless world streaming (like Forza Horizon 5, Cyberpunk 2077, and Horizon Zero Dawn) benefit enormously from instantly accessible VRAM blocks.
    • 1% and 0.1% Low Frame Rates: Even in games where average FPS only rises by 3% to 5%, Resizable BAR dramatically lifts 1% low frame rates. This cleans up frame-time spikes and eliminates stuttering during sharp turns, high-speed travel, or chaotic explosion sequences.
    • High Resolutions (1440p & 4K): As asset size grows at higher resolutions, rendering pipelines saturate traditional bus transfers faster. ReBAR shines brightest when pushing heavy 4K texture packages.

    Driver-Enforced Whitelisting

    Both Nvidia and AMD maintain driver-level whitelists within their display drivers. If a game experiences negative scaling (a minor performance loss) when Resizable BAR is active, the graphics driver automatically turns ReBAR off for that specific game executable while keeping it active globally for supported titles.

    7. Frequently Asked Questions (FAQ)

    1. Will enabling Resizable BAR increase my GPU temperatures or power consumption?

    No. Resizable BAR changes how data is organized and transferred across the PCI Express interface; it does not increase clock speeds, alter core voltages, or force the GPU to draw more wattage. Thermal and power signatures remain within standard operational specifications.

    2. My PC won’t boot into Windows after disabling CSM in the BIOS. What happened?

    If your computer boots directly back into the BIOS screen or displays a “No Bootable Device Found” error after disabling CSM, your Windows installation drive is partitioned using MBR (Master Boot Record) instead of GPT. Re-enable CSM in BIOS to boot back into Windows safely, run the mbr2gpt conversion tool, and then return to BIOS to turn off CSM.

    3. Does Resizable BAR work on PCIe 3.0 motherboards?

    Yes. Although Resizable BAR is highlighted alongside PCIe 4.0 and PCIe 5.0 platforms, the feature is fundamentally part of the PCI Express specification back to PCIe 3.0. Many Intel 400-series and AMD 400-series PCIe 3.0 motherboards support Resizable BAR through BIOS firmware updates provided by vendors.

    4. Can I enable Resizable BAR on an Nvidia RTX 20-Series (Turing) card?

    Officially, Nvidia restricted Resizable BAR support to RTX 30-Series (Ampere), RTX 40-Series (Ada Lovelace), and newer GPUs. RTX 20-series (RTX 2080 Ti, 2070, etc.) and GTX 10-series cards do not support official driver-level Resizable BAR integration.

    5. Why does GPU-Z show “Resizable BAR Enabled in BIOS: Yes” but “GPU Supported: No”?

    If you own an early production Nvidia RTX 30-series graphics card (such as an early RTX 3070 or 3080 purchased at launch), your card shipped with an older video BIOS (vBIOS) flashed before Resizable BAR support was finalized. You must download the official vBIOS update utility from your graphics card manufacturer (ASUS, EVGA, MSI, Gigabyte) to update your GPU firmware.

    6. Is Intel Arc GPU performance heavily dependent on Resizable BAR?

    Yes. Intel Arc graphics architecture is designed around direct high-speed memory transactions. Running an Intel Arc GPU on a system without Resizable BAR can cause severe performance drops ranging between 20% and 40% across modern games.

    7. Does Resizable BAR work with SLI or dual GPU configurations?

    Multi-GPU setups (SLI or Crossfire) are generally legacy technologies not supported by modern game engines or current driver whitelists for Resizable BAR. ReBAR optimizations target single-GPU setups running DirectX 12 or Vulkan pipelines.

    8. What is the difference between Above 4G Decoding and Resizable BAR in BIOS?

    • Above 4G Decoding is the underlying 64-bit addressing feature that allows system controllers to address memory spaces above the 4 GB boundary.
    • Resizable BAR is the specific PCIe function that uses Above 4G Decoding to resize VRAM allocation blocks. Above 4G Decoding must be enabled for Resizable BAR to appear or function.

    9. Can I force-enable Resizable BAR in games that are not whitelisted by Nvidia?

    Yes. Enthusiast tools like Nvidia Profile Inspector (NPI) allow users to manually set rBAR - Feature flags to Enabled on non-whitelisted game profiles. However, exercise caution: forcing ReBAR in unvalidated titles can occasionally cause texture flickering or minor performance degradation.

    10. Does enabling Resizable BAR affect system RAM stability or XMP/EXPO overclocks?

    No. Resizable BAR operates specifically over the PCIe bus lanes running between the CPU and the GPU interface. It does not alter DRAM frequencies, memory sub-timings, or memory controller voltages.

    Conclusion & Summary Checklist

    Enabling Resizable BAR is one of the most effective software-level performance optimizations available for modern gaming rigs. By restructuring PCIe bus communications, you give your processor direct access to your GPU’s full VRAM buffer—eliminating asset pipeline bottlenecks and elevating frame-time consistency.

    1. Confirm your Windows boot drive uses the GPT partition style.
    2. Boot into your motherboard BIOS/UEFI.
    3. Disable CSM (Compatibility Support Module) mode.
    4. Enable Above 4G Decoding and set Re-Size BAR Support to Auto/Enabled.
    5. Verify activation in Windows via Nvidia Control Panel, AMD Adrenalin, or TPU GPU-Z.

    Once configured, your system will automatically leverage expanded PCIe transfer blocks across all supported modern games for a smoother, higher-performing gameplay experience.

  • How to overclock your amd ryzen processor safely using official ryzen master software for better gaming performance

    How to overclock your amd ryzen processor safely using official ryzen master software for better gaming performance

    How to Overclock Your AMD Ryzen Processor Safely Using Official Ryzen Master Software for Better Gaming Performance

    Modern competitive gaming demands every drop of performance your system can provide. Frame rates, low frame-time variance (1% lows), and crisp render latency often boil down to single-core and multi-core CPU performance.

    Historically, pushing a processor beyond its factory specifications meant navigating confusing BIOS screens, manually calculating voltage ratios, and running the risk of frying silicon. AMD changed the playing field with AMD Ryzen Master—an official, Windows-based tuning software designed to let gamers safely optimize Ryzen CPUs in real-time without diving into complex firmware.

    This complete guide breaks down how to use AMD Ryzen Master safely, maximize frame rates in heavy games, lower thermal output, and achieve rock-solid system stability.

    1. Prerequisites Before Overclocking Your Ryzen CPU

    Overclocking elevates performance by drawing more power and generating extra thermal output. Preparing your system beforehand ensures hardware safety and optimal performance gains.

    [System Check] ──> [Update BIOS & Drivers] ──> [Install Cooling & HWiNFO64] ──> [Safe Ryzen Master Tuning]
    

    Necessary Hardware Checklist

    • Cooling: Stock coolers (like the Wraith Stealth) are built for default thermal targets. A quality dual-tower air cooler or 240mm/360mm AIO liquid cooler is recommended for sustained overclocks.
    • Power Supply Unit (PSU): Ensure your PSU has at least 150W of headroom above your total system draw to handle transient voltage spikes.
    • Motherboard: AMD B-series (B450, B550, B650, B850) and X-series (X570, X670, X870) chipsets fully support CPU overclocking. A-series chipsets (A320, A520, A620) do not support CPU core tuning.

    Essential Software Tools

    1. AMD Ryzen Master: Download directly from AMD’s official support portal.
    2. HWiNFO64: For monitoring CPU Tdie temperatures, VCore voltages, and core clocks.
    3. Cinebench (R23 or 2024): Used for baseline and post-overclock CPU stress testing.
    4. 3DMark / Cyberpunk 2077 Benchmark: To measure real-world gaming FPS improvements.

    2. PBO vs. Curve Optimizer vs. Manual All-Core Overclocking

    Understanding AMD’s tuning mechanisms is critical for modern gaming workloads.

    Overclock MethodSingle-Core Speed (Gaming)Multi-Core Speed (Workloads)Thermal OutputRecommended For
    Precision Boost Overdrive (PBO)Very High (Dynamic)HighModerate – High95% of Gamers
    PBO + Curve Optimizer (Undervolting)MaximumMaximumLower / OptimizedBest Performance & Efficiency
    Manual All-Core OCLower (Loses Boost Clock)HighHighRender Rigs / Static Workloads

    Why Manual Static Overclocking Hurts Gaming Performance:

    Modern Ryzen CPUs (Zen 3, Zen 4, Zen 5) use intelligent boosting algorithms. A static manual overclock (e.g., locking all cores to 4.5GHz) prevents single cores from boosting up to 5.0GHz+ during light, high-frequency game threads. PBO + Curve Optimizer is the single best method for gaming.

    3. Step-by-Step Guide: Overclocking with AMD Ryzen Master

    Step 1: Install and Open Ryzen Master

    1. Install AMD Ryzen Master and restart your PC.
    2. Launch the application and accept the safety agreement warning.
    3. Switch to Advanced View using the toggle at the bottom left of the screen.

    Step 2: Establish Your Baseline

    1. Open Cinebench alongside HWiNFO64.
    2. Run a 10-minute multi-core test to record stock Cinebench scores, maximum CPU temperature (Tdie), and peak voltage (CPU VCore).
    3. Record these baseline numbers to verify your performance gains later.

    Step 3: Enable Precision Boost Overdrive (PBO)

    PBO relaxes the factory power limits (PPT, TDC, EDC) built into your processor:

    1. In Ryzen Master, select Profile 1 on the left menu.
    2. Under Control Mode, select Precision Boost Overdrive.
    3. Apply the settings. This allows your CPU to maintain higher boost clocks for longer durations as long as thermal room permits.
    PPT (Package Power Tracking): Max power delivered to CPU socket
    TDC (Thermal Design Current): Max current from motherboard VRMs under thermal load
    EDC (Electrical Design Current): Max peak current delivered during short bursts
    

    Step 4: Apply Curve Optimizer (The “Secret Sauce” for Gaming)

    Curve Optimizer shifts the voltage-to-frequency curve down. By feeding the CPU slightly less voltage per frequency step, it runs cooler, allowing PBO to boost to higher clock speeds without hitting thermal limits.

    Lower Voltage  ──>  Lower Temperatures  ──>  Higher Automatic PBO Boost Clocks
    
    1. Scroll down to the Curve Optimizer section inside Ryzen Master.
    2. Select All Cores mode.
    3. Set the sign to Negative.
    4. Start with a safe baseline value of -10.
    5. Click Apply & Test. Ryzen Master will reboot your PC to apply the profile.

    Step 5: Fine-Tuning Core Stability

    If -10 is stable after gaming and stress testing:

    1. Re-open Ryzen Master and increase the negative offset to -15, then -20.
    2. Most modern Ryzen silicon can handle between -15 and -25 on all cores.
    3. If your system crashes or encounters a blue screen (BSOD), your offset is too aggressive. Back off by 5 points (e.g., move from -25 back to -20).

    4. Special Optimization for Ryzen X3D Processors (3D V-Cache)

    If you own a Ryzen 7 5800X3D, 7800X3D, or 9800X3D, traditional voltage overclocking is locked in hardware to protect the sensitive 3D V-Cache stack.

    • Do NOT attempt manual static voltage changes on X3D processors.
    • DO use Curve Optimizer inside Ryzen Master: Setting a negative Curve Optimizer offset (typically -20 to -30) lowers thermals significantly on X3D chips, enabling them to sustain their peak 5.0GHz+ gaming boost clocks consistently without thermal throttling.

    5. Frequently Asked Questions (FAQ)

    1. Does overclocking with AMD Ryzen Master void my processor warranty?

    Using Ryzen Master to operate the CPU outside factory specifications technically falls under enthusiast tuning. However, because Ryzen Master relies on AMD’s built-in internal thermal and electrical safety limiters, it is vastly safer than manual BIOS voltage modifications.

    2. Is Ryzen Master tuning permanent, or do I need it running at all times?

    Changes made in Ryzen Master apply to the operating system level. If you close the app, your settings remain active until you shut down or reboot your PC. To apply changes permanently across restarts without running the app, apply the finalized values (such as Curve Optimizer offsets) directly inside your motherboard’s BIOS.

    3. What is the maximum safe CPU temperature for AMD Ryzen CPUs under load?

    For standard Ryzen 5000, 7000, and 9000 series processors, AMD specifies that operating temperatures up to 90°C–95°C under full multi-core stress are within design specifications. For optimal long-term health and maximum boost retention, target under 80°C during gaming sessions.

    4. Why did my PC crash to a Blue Screen (BSOD) after applying Curve Optimizer?

    A blue screen (such as WHEA_UNCORRECTABLE_ERROR or CLOCK_WATCHDOG_TIMEOUT) indicates that one or more CPU cores are not receiving enough voltage for their current clock frequency. Return to Ryzen Master and reduce your negative offset value (e.g., change from -25 to -15).

    5. Will overclocking my Ryzen CPU give me a massive FPS boost in all games?

    Gains depend on whether your game is CPU-bound or GPU-bound:

    • CPU-Bound Games (Valorant, CS2, Warzone, Rainbow Six Siege, Starfield): You will see noticeable frame rate increases and improved 1% low frame consistency.
    • GPU-Bound Games (Cyberpunk 2077 at 4K Ultra): FPS gains will be minimal, as your graphics card remains the primary performance limit.

    6. What is the difference between Eco Mode and PBO in Ryzen Master?

    PBO increases power limits to maximize performance. Eco Mode reduces the CPU’s target TDP (e.g., dropping a 105W CPU down to 65W target draw). Eco Mode drops temperatures by 15°C–20°C with only a tiny 2%–5% hit to gaming performance.

    7. Should I turn on Auto Overclocking mode in Ryzen Master?

    Auto Overclocking mode combines PBO with an automated boost clock override (adding +50MHz to +200MHz to peak frequency). While useful, it requires more voltage and creates extra heat. Enabling PBO + Negative Curve Optimizer generally yields better gaming thermals and higher sustained clocks.

    8. Is static all-core manual overclocking good for Ryzen CPUs?

    No. Static manual overclocking forces all CPU cores to run at a fixed frequency continuously. This degrades single-thread boost speeds essential for games, increases idle power usage, and generates unnecessary heat compared to dynamic PBO tuning.

    9. Can I overclock my RAM using AMD Ryzen Master?

    Yes. Ryzen Master allows you to adjust Memory Clock (MCLK), Fabric Clock (FCLK), and DRAM timings. However, enabling EXPO (AMD) or XMP (Intel profile) directly in your motherboard BIOS remains the safest and easiest way to ensure RAM stability.

    10. How do I completely reset Ryzen Master if my system becomes unstable?

    If your PC fails to boot into Windows after applying a profile, boot Windows into Safe Mode. Open Ryzen Master and select Reset to Default, or clear your motherboard’s CMOS battery to restore factory stock settings.

    Conclusion & Summary Checklist

    Overclocking modern AMD Ryzen processors is no longer about brute-force voltage. By utilizing Precision Boost Overdrive (PBO) alongside a Negative Curve Optimizer offset in AMD Ryzen Master, you can unlock higher sustained boost clock speeds, improve 1% low frame rates in games, and reduce your CPU’s operational temperatures.